
After the storage pool is configured for the appliance, you can begin to browse the appliance interface and configure key settings.
To configure settings for the appliance:
1. In the left-hand navigation menu, click the System Settings tab.
2. In the System Settings page, click to expand each section that you want to update.
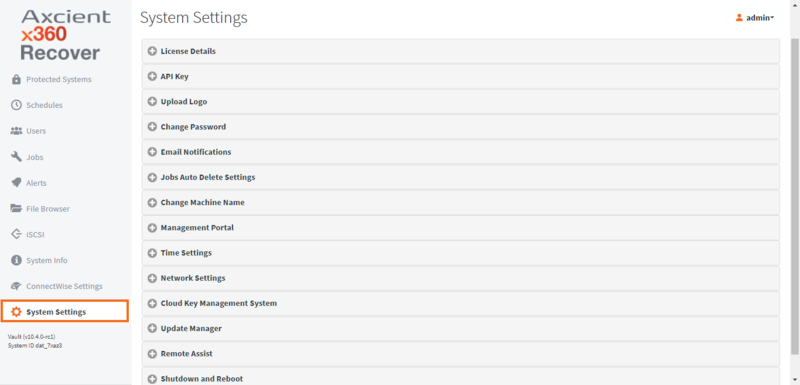
For example, click the License Details section to view the number of licenses available for use.
Note: Before you deploy the agent, we recommend reviewing the licensing information to make sure the agent will properly register with the appliance.
If no licenses display, return to the License Details page and click the Sync button to force the appliance to resync with the licensing portal.

You can assign licenses as needed to the appliance from x360Recover Manager.
- Refer to Manage licenses in x360Recover Manager for detailed instructions on assigning licenses.
3. Click the Email Notifications section to configure an email server and turn on email notifications. To configure an email server:
- Click the Enabled Email Notifications button.
- Enter information about the email server, including a From Email address, the username and password of a valid email account on the email server, and the IP address and port of the server.
- Select your connection security preference.
- Enter one or more email addresses that should receive alerts generated by the Appliance.
- Select the types of alerts that should be generated by the Appliance.
- Click the Test Mail button to test your settings and then click the Save button. To configure email delivery without a mail server account (which is not recommended) leave the Username and Password fields blank. In the Connection Security field, select None
 4. Click the Change Machine Name section to change the name of the appliance, ensuring that the appliance is easily recognized. This name will display in the Global Management Portal.
To change the machine name:
- In the Machine Name field, enter the new machine name.
- Click the Save button when you are finished.

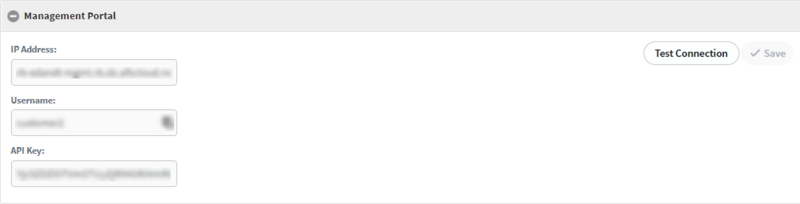
5. Click the Management Portal section to enter the IP address of your Global Management Portal.
When you connect an appliance or vault to the Global Management Portal, you will be able to monitor all protected systems from one centralized management portal.
As a first step, you may choose to create a customer-specific Username and API Key for this appliance in the Global Management Portal, or use the existing Admin user and APIKey.
To connect to the Global Management Portal:
- In the IP Address field, enter the Global Management Portal IP address or URL (without the https).
- In the Username field, enter the username from the Users tab in Global Management Portal.
- In the API Key field, enter the API key associated with the username in the Global Management portal.
- Click the Test Connection button to test your settings and then click the Save button.
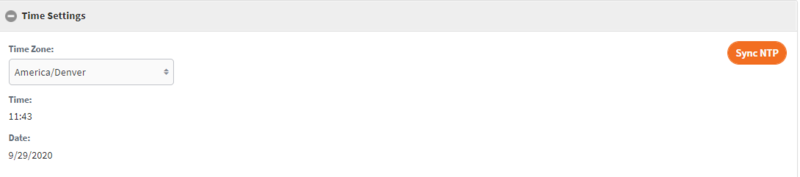
6. Click the Time Settings section to confirm that your time settings are correct. To update time settings:
- In the Time Zone drop-down menu, select the time zone of the Appliance.
- In the Time field, enter the current time.
- In the Date field, enter the current date.
- Click the Sync NTP button when you are finished
.
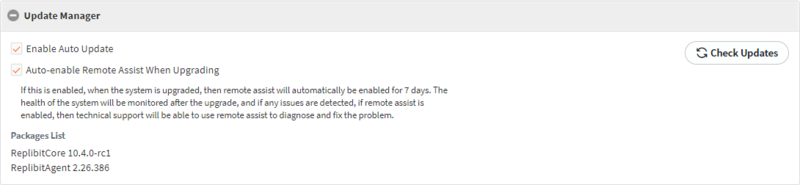
7. Click the Update Manager section to enable auto updates for the system. When enabled, x360Recover will update the appliance automatically. If you do not want x360Recover to automatically update your systems, then periodically schedule time on your calendar to manually check for updates.
To turn on Auto Updates:
- Click the Enable Auto Update checkbox to turn on the Auto Updates feature.
- Click the Auto-Enable Remote AssistWhen Upgrading checkbox to allow Axcient Support to remotely support the Appliance during updates.
- Optionally, click the Check Updates button to manually check for available updates.
SUPPORT | 720-204-4500 | 800-352-0248
- Contact Axcient Support at https://partner.axcient.com/login or call 800-352-0248
- Free certification courses are available in the Axcient x360Portal under Training
- Subscribe to the Axcient Status page for updates and scheduled maintenance
1497 | 1931