
What is Recovery Center?
Recovery Center is a stand-alone Windows application that allows you to recover data directly from the Axcient cloud, private cloud, or local Appliance. It offers recovery options ideal for Direct-to-Cloud users, with or without a local cache repository, as well as those with a local BDR appliance.
- With Recovery Center, you can directly mount a protected system’s disk volumes from any recovery point hosted on a vault.
- Recovery Center supports file and folder recovery, virtual disk exports, and Hyper-V virtualization of protected systems, with or without the use of a local cache repository.
Other advantages of Recovery Center
- Native Windows application tightly integrated with x360Recover
- Preserves native Windows file and folder permissions
- Recovers very large files and folders
- Searches within Windows for mounted iSCSI volumes
Live mode
Recovery Center supports Live mode for recovery operations. What does this mean?
1.1. Where do I download Recovery Center?
You can also download Recovery Center from inside your x360Recover dashboard, using the Downloads tab: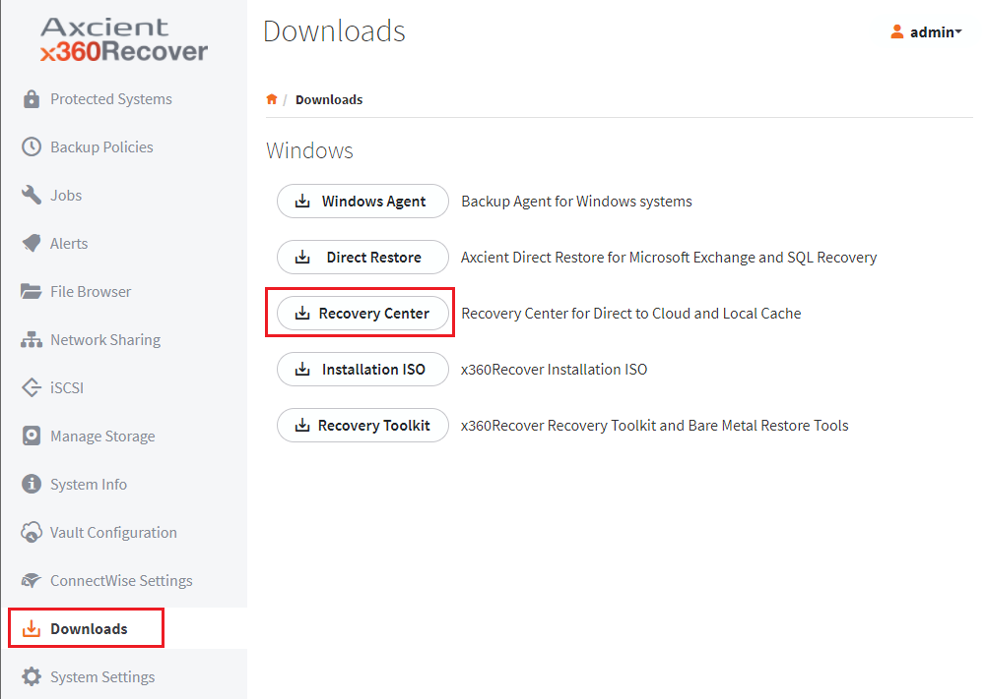
Supported operating systems and features
Any x360Recover Direct-to-Cloud (D2C) protected system (regardless of OS version) may be recovered using Recovery Center.
Supported operating systems for running Recovery Center also include:
- Server 2008 R2 or newer
- Windows 8 64-bit or newer
Note: Recovery Center installation is not supported on a Windows domain controller.
For Hyper-V virtualization, supported operating systems are:
- Server 2012 R2 or newer, with Hyper-V role enabled
- Windows 10 64-bit or newer, with Hyper-V feature enabled
Recovery Center supports file and folder recovery, virtual disk export, and manual or wizard-ized Hyper-V virtualization.
Bare metal recovery (BMR) from local cache is supported separately with the x360Recover Recovery Toolkit ISO.
Rapid data recovery for offsite protected systems
Recovery Center provides quick access to your offsite protected systems, whether they are located on an Axcient-hosted vault or a self-hosted private vault. Recovery Center is optimized to function best with D2C protected systems employing a local cache repository (which accelerates data recovery.) However, any system present on the vault may be recovered over the WAN.
Note: You may use Recovery Center to perform file and folder recovery for any protected system resident on a vault, with or without local cache, although performance without local cache will be subject to download bandwidth performance and, therefore, will potentially run much slower.
DeleteInstall Recovery Center
Recovery Center is a 64-bit Windows application which supports various forms of recovery for protected systems, natively, from within a Windows environment.
Note: A Linux-based version of Recovery Center is planned for the future.
We recommend that you install Recovery Center on one of the following:
- A 64-bit Windows system that is being protected via Direct-to-Cloud (D2C) backup
- A Hyper-V host that may be used to perform virtualization of systems being protected using Direct-to-Cloud with local cache
- A client or partner administrative workstation you wish to use for performing recovery operations
STEP 1. To install Recovery Center, download and run the latest installer package.
- Download Recovery Center here:
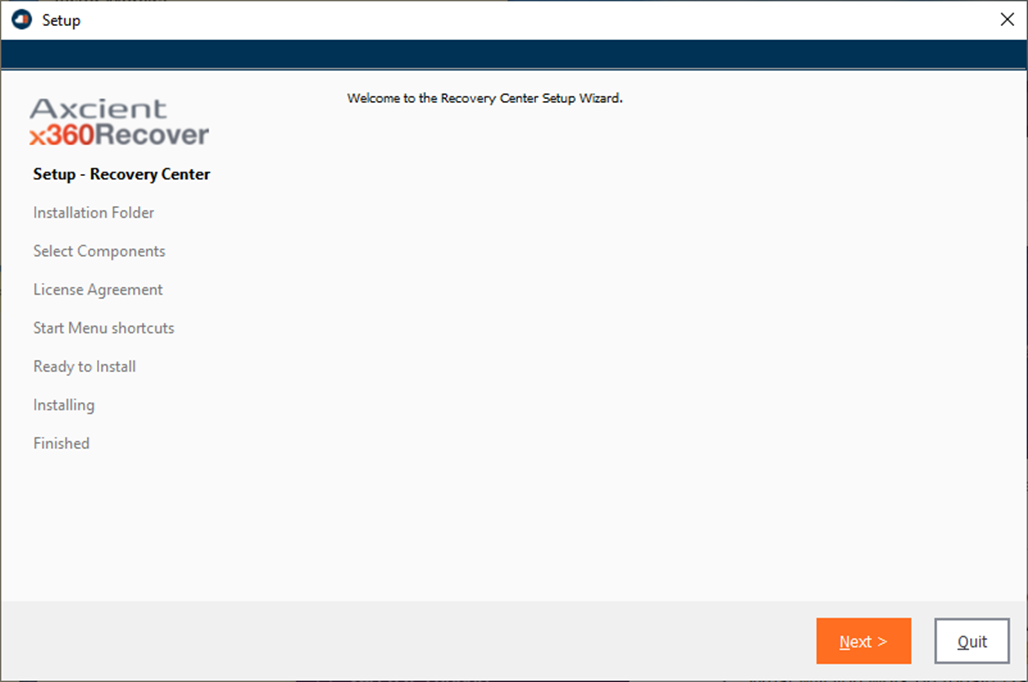
1.1. From the initial Setup page, click Next to continue:
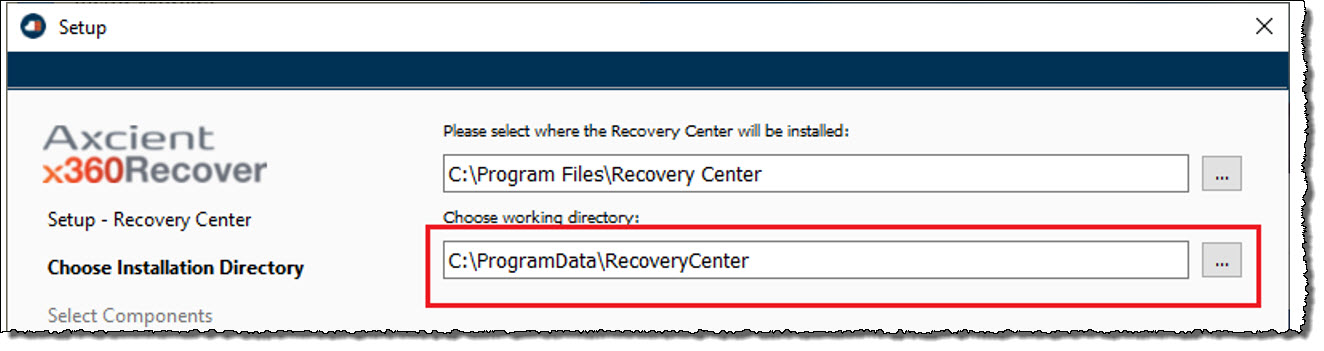
1.2. On the Choose Installation Directory screen, specify the application folder where Recovery Center will be installed.
Then select the working directory:
|
Important note: If you plan to perform virtualization of protected systems, the working directory must have a substantial amount of available free space. Any changes written to a running virtual machine created via Recovery Center will be stored into a sparse virtual disk created within the working directory. By default, the working directory is located in C:\ProgramData\RecoveryCenter but if the C: volume is limited in size, we strongly recommend that you relocate to another location. (The application installation location is not size-critical.) |
After selecting the target installation locations, click Next to continue.
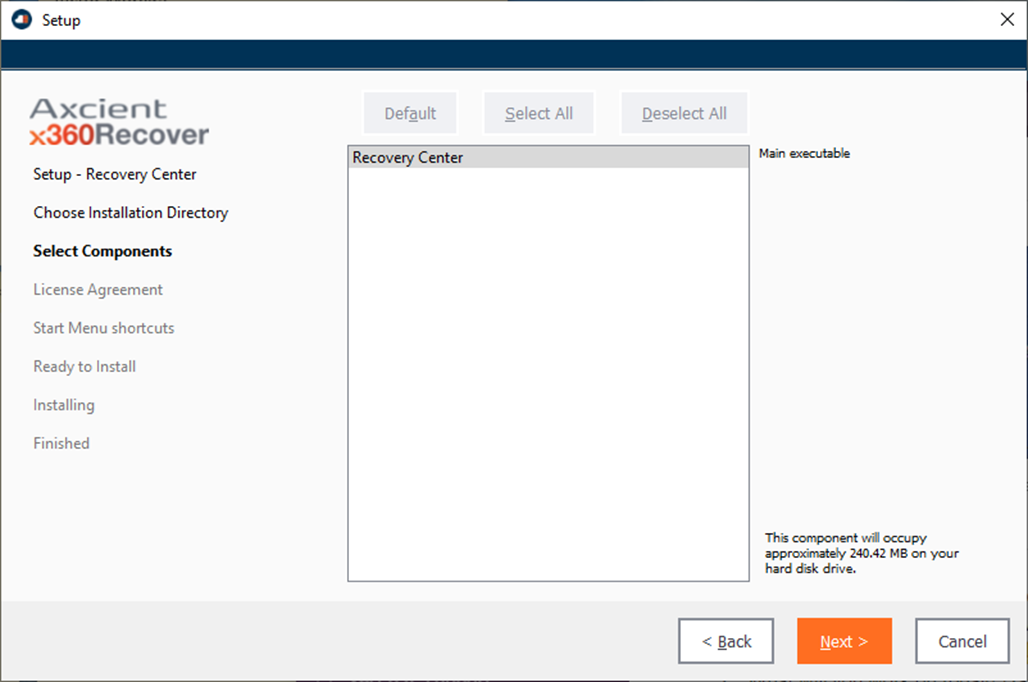
1.3. On the Select Components screen, accept the default selection and click Next to continue.
1.4. On the License Agreement screen, select I accept the license to accept the end user license agreement and click Next to continue.

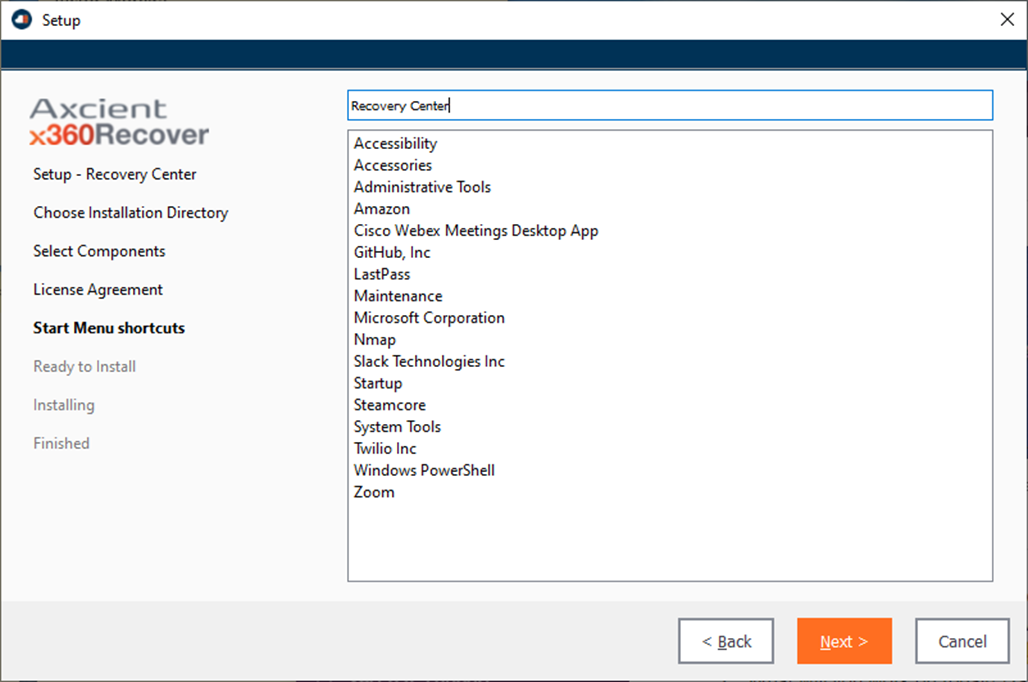
1.5. On the Start Menu Shortcuts screen, specify or select the default Start Menu application folder and click Next to continue.
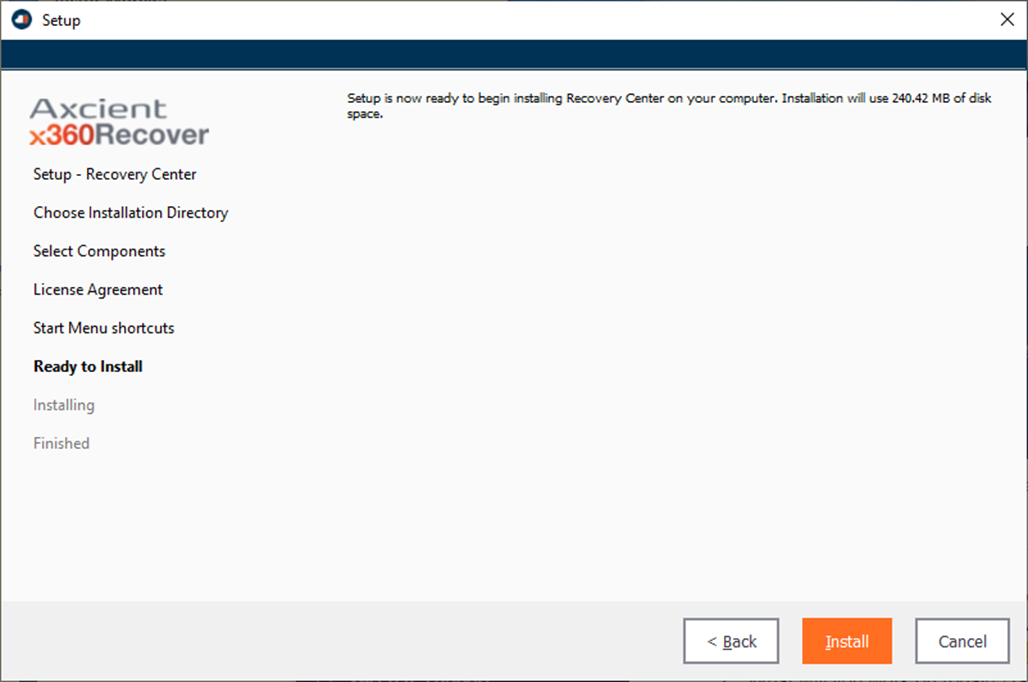
1.6. On the Ready to Install screen, click Install to proceed with installation
If prompted, select Yes to elevate permissions and install the application as ‘Administrator’.
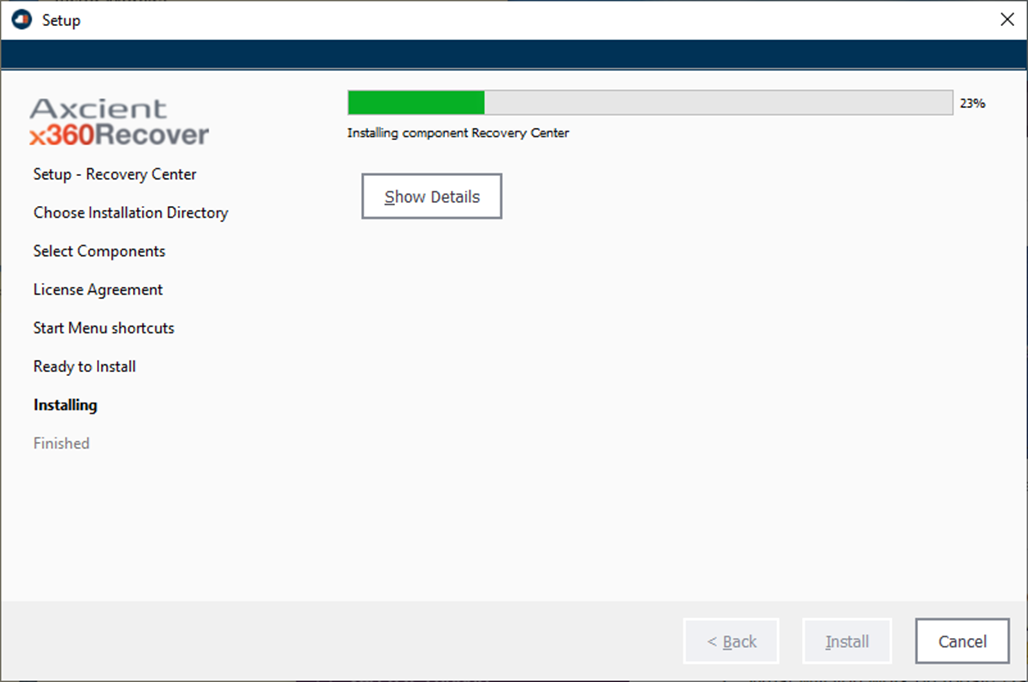
Recovery Center installation will proceed.
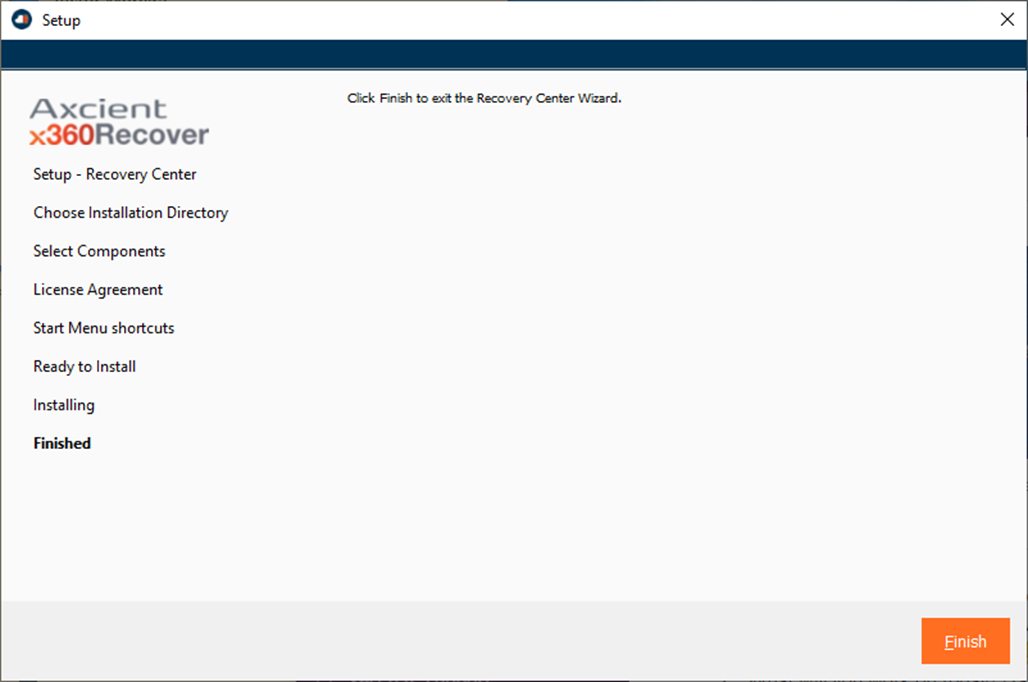
After installation has completed, click Finish.
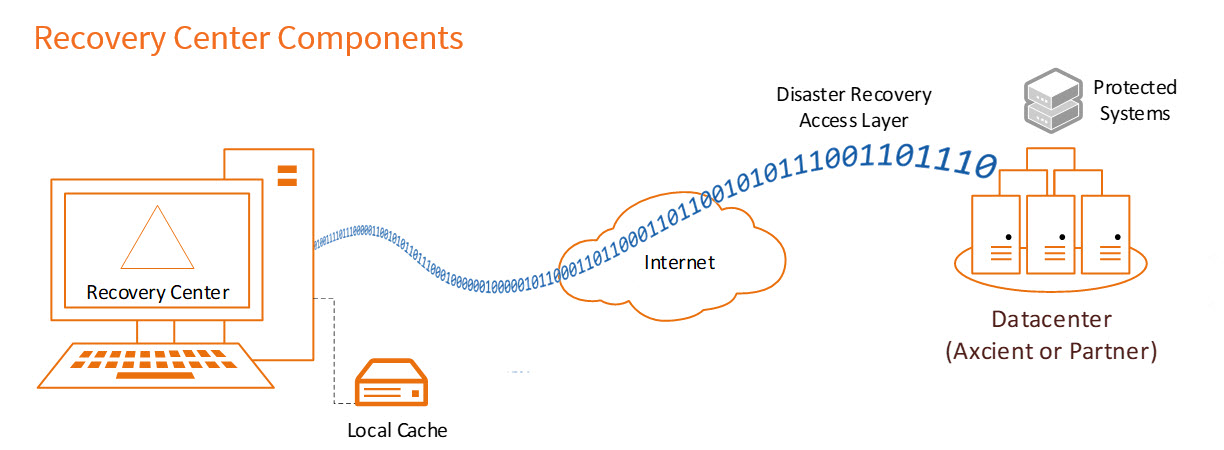
Recovery Center components
Multiple components make it possible to recover data from the Cloud with Recovery Center:
- Two background services and a frontend UI application are installed on the target system. These communicate with the vault: performing authentication, browsing protected systems and metadata, and retrieving data.
- An optional local cache repository, if available, can be used to greatly accelerate data recovery. For details on configuring your Direct-to-Cloud backup agent to generate a local cache, see this knowledgebase article.
Recovery Center component: Jobs Service
The xCloud Recovery Center Service runs in the background on the system to manage recovery jobs.
This service is responsible for creating, managing, and deleting recovery jobs constructed via the User Interface on demand, as well as providing for persistence of job states through reboots and system shutdowns.
A recovery job defines:
- type of recovery to be performed (currently limited to file and folder recovery)
- client
- protected system
- backup snapshot to recover data for
- authentication information
- how the selected protected system disk volumes will be presented to the local machine.
Recovery Center component: Virtual Disk Service
The xCloud Virtual Disk Service is the core of the recovery engine, providing the means to transform remote recovery points into locally mounted block storage devices for data retrieval.
Jobs defined in the User Interface and managed by the xCloud Recovery Center Service are executed by the xCloud Virtual Disk Service.
Cloud metadata is used to define the physical disks and volumes. Data is retrieved first from the local cache repository (if present) then over the WAN from the vault. The local machine is then presented with virtual block storage devices matching the selected protected system recovery point. The disk volumes from the selected protected system can be mounted to the local machine, either as new drive letters or as sub-folders within a selected folder.
The constructed recovery volumes are read-only in File Recovery mode, and employ a high performance copy-on-write layer in Virtual Disk and Virtualization modes to make volumes read/write.
DeleteRecovery Center component: DRAL
The Disaster Recovery Access Layer (DRAL) is a service running on the vault, providing a secure data transport layer, authentication system, and metadata retrieval service.
Recovery Center connects to DRAL in order to authenticate and browse protected systems and recovery points available on the vault. DRAL also transports any data not present within the optional local cache repository.
DRAL services are available on both Axcient-hosted vaults and self-hosted private vaults. Data for both appliance-based systems and D2C protected systems can be recovered with DRAL services
DeleteRecovery Center component: (Optional) Local cache
An optional local cache repository, if available, can be used to greatly accelerate data recovery. For details on configuring your Direct-to-Cloud backup agent to generate a local cache, see this knowledgebase article.
DeleteHow does Recovery Center work?
Metadata about the protected system is retrieved from the cloud (including available disk volumes, physical disks, and partition sizes.)
This metadata is used to build a locally attached block storage device, within which is presented the protected system disk volumes and data.
- If a local cache repository is available for the selected protected system, Recovery Center retrieves any requested data blocks locally from the cache first, greatly accelerating data access.
- If a local cache is not available (or if select blocks of data are missing or not present within the cache), the blocks are instead read over the WAN from the vault. If the job is configured to leverage a local cache, any data forced to be retrieved from the cloud will then be stored in the cache so that future requests for the retrieved block(s) will be found locally.
Please note: Although it is possible to perform general file and folder recovery for any protected system present on a vault, Recovery Center has been optimized primarily for use with a local cache repository to accelerate data access.
1.2. Launch Recovery Center
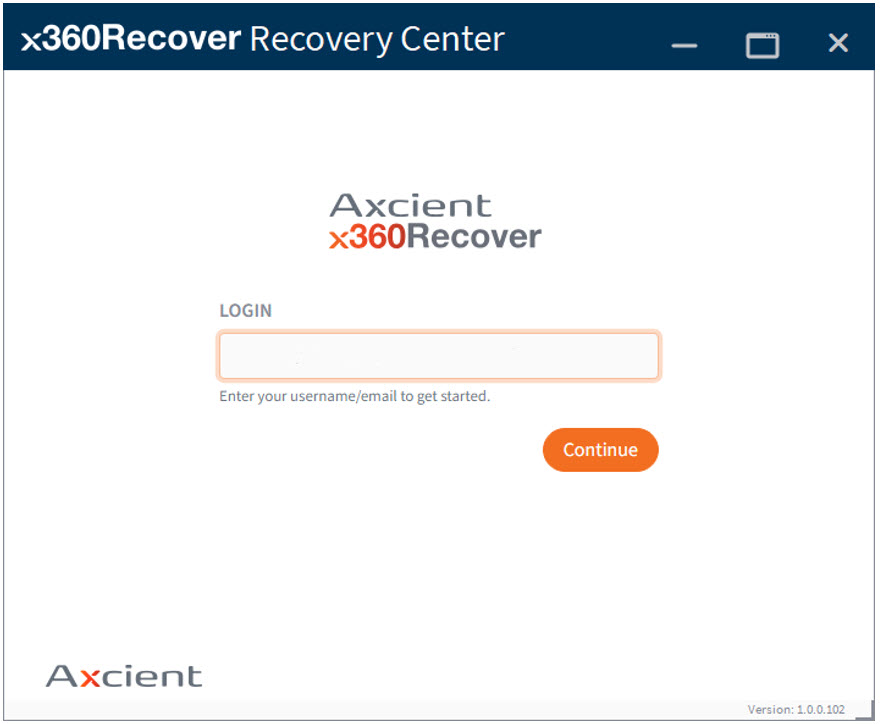
1. To launch Recovery Center, enter your Axcient x360Portal username and click Continue.
Note: Valid user accounts include x360Portal users or any Recover Manager (RMC) user account, including end client users.
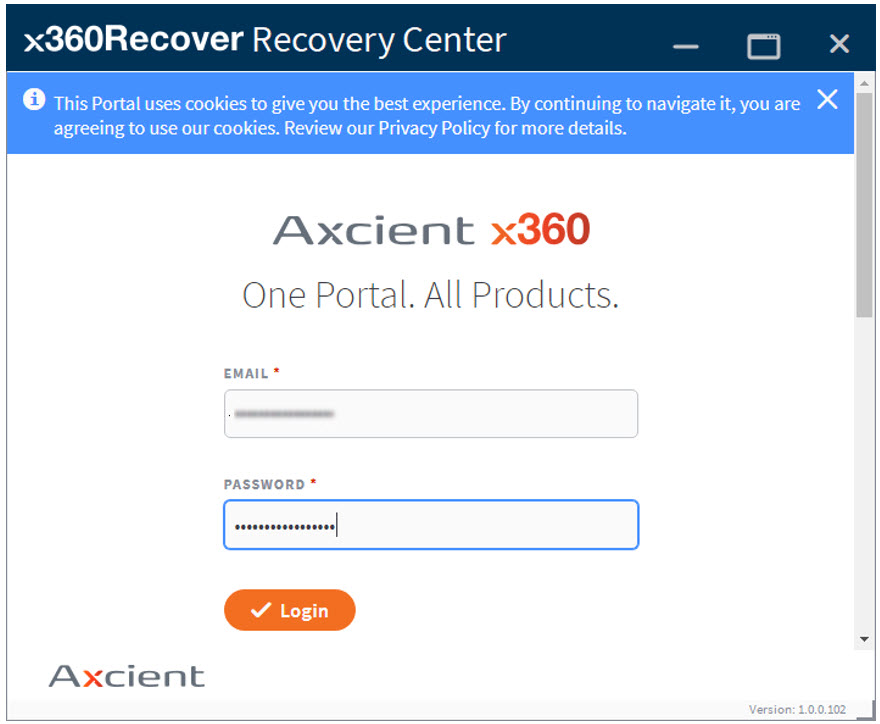
2. Enter your Password and click Login.
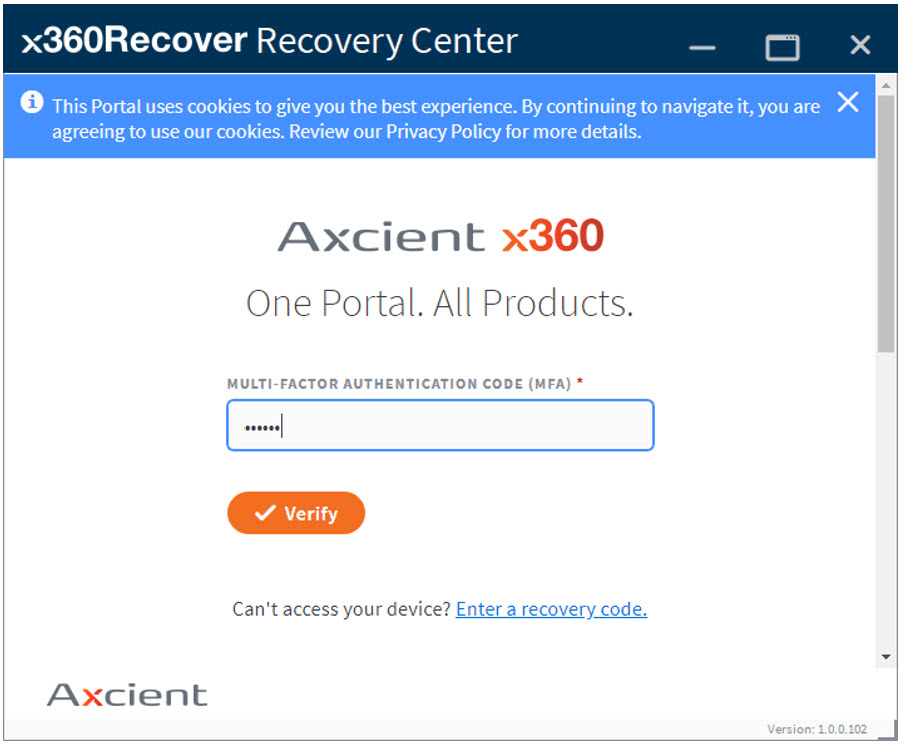
3. Enter your six-digit MFA (Multi-Factor Authentication) code (if required) and click Verify to complete the login process.
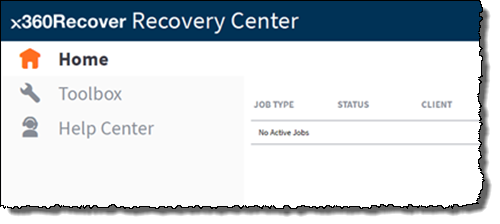
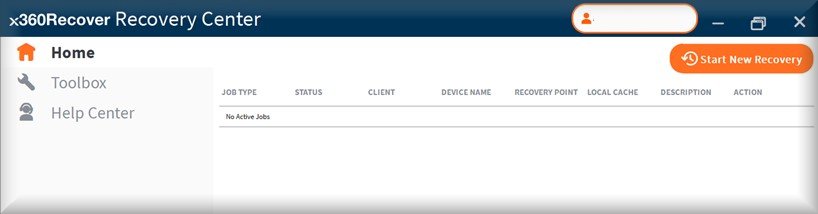
Home Page
The Home page view will load by default.
On this page, you may start new recovery jobs, monitor or manage existing jobs, or delete jobs that you are finished with.
- Recovery jobs run as a service and remain persistent in the background once created (whether the Recovery Center user interface is loaded or not.)
- Existing jobs will be restarted automatically after a system reboot.
1.3. Start a new recovery
1. To create a new recovery job, click Start New Recovery.
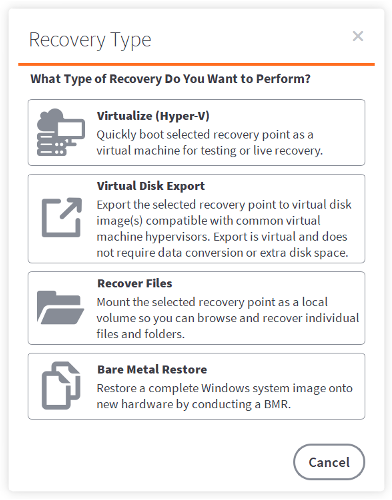
2. Next, the Recovery Type window will open.
Select the type of recovery operation you wish to perform:
- Virtualize (Hyper-V) will walk you through a wizard to export a Protected System's virtual disks and create a Hyper-V virtual machine on the locally installed Hyper-V host.
- Virtual Disk Export is available as a preview feature in this release. Selecting this option will allow you to generate a set of virtual disks in any common disk image format for use in recovery or direct virtualization of the protected system.
- Recover Files will mount all protected system volumes to this machine for use in file and folder recovery.
- Bare Metal Restore will open a browser window to download the x360 Recovery Bare Metal Restore Utility, which contains the Bare Metal Restore wizard with support for recovery from local cache.
Walk through each recovery type by expanding an accordion.
Steps across all recovery types [See steps...]
Recovery Types share many steps when you are creating a new recovery process.
1. Recovery Target
Click inside the Client field and begin typing to search for a client. You can also scroll the list. You may need to wait for the list of available clients to complete downloading.
Select the desired client in the Results field.
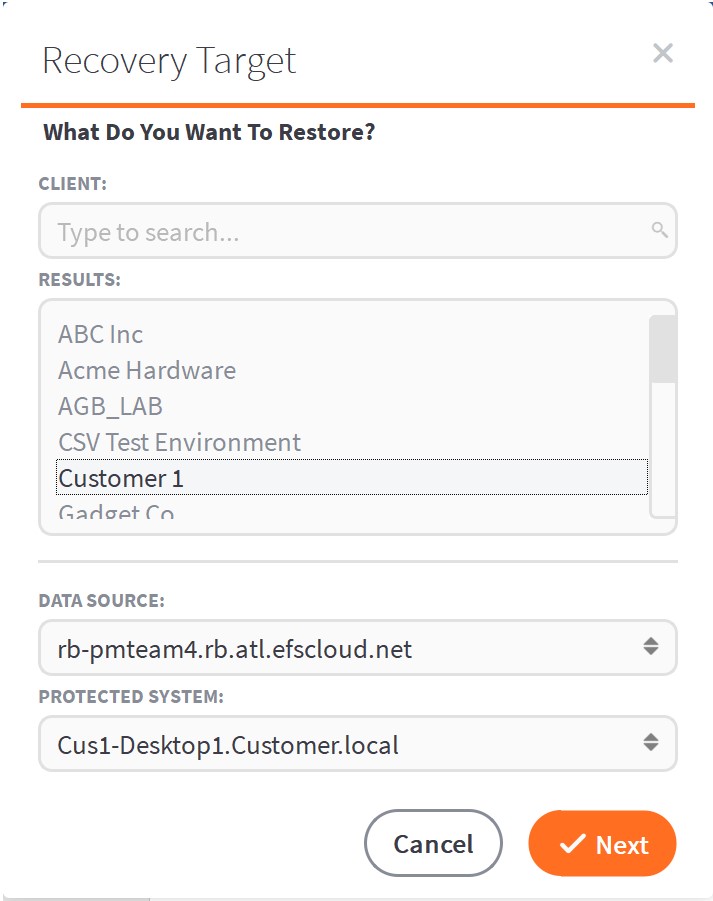
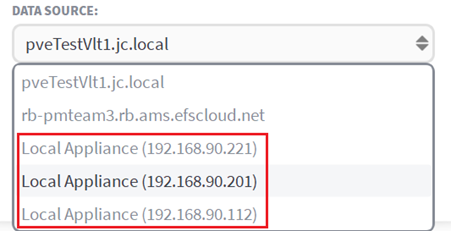
Once a Client has been selected, the Data Source field will be populated with all vaults containing protected systems for that client. Select the Data Source and Protected System you wish to recover.
Note: Beginning with x360Recover 10.18.0, you can also select a local appliance as the data source for protected system recovery.
All appliances registered to the client will be displayed in the Data Source list, but only devices accessible from the recovery system’s local LAN network will be accessible for protected system recovery operations.
Why connect to appliances?
Connecting to an appliance with Recovery Center is useful in various scenarios:
- You might wish to run a direct Hyper-V virtualization from an appliance using Recovery Center.
- You might opt to provide file and folder recovery where Active Directory security permissions are required to be maintained - without the extra complexity of using iSCSI.
2. Recovery Point
This page initially displays the most recent date for which recovery points exist. Use the calendar select to choose a date. Days with orange highlights have available recovery points.
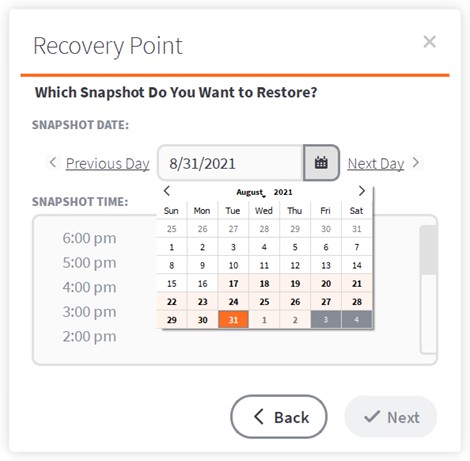
After the Snapshot Time field populates, click a Time to select it.
3. Recovery Path
You may enter an optional Recovery Description for this recovery job to help identify it on the Recovery Center Home page.

Use the radio buttons to select Restore directly from cloud or Restore using a local cache.
- From the Cloud: All data will be accessed remotely over the WAN using the Disaster Recovery Access Layer (DRAL).
-
From Local Cache: The Local Cache repository will be searched first for requested data blocks. If a block is not available, it will then be retrieved over the WAN.
- Note: Even if a substantial amount of data is not present in the Local Cache, using Local Cache is recommended to dramatically accelerate recovery. Any missing data will be downloaded directly from the Cloud.
-
Click Browse to select a Local Cache location on the protected system or attached storage device.
-
If the Local Cache is located on a network share, you must enter the path in UNC format. For example:
\\<server>\<share>\<folder
-
If the Local Cache is located on a network share, you must enter the path in UNC format. For example:
- For a Local Cache located on a network share, enter the Network Share Username and Password and click Check Credentials. Otherwise, leave these fields blank.
4. Confirmation
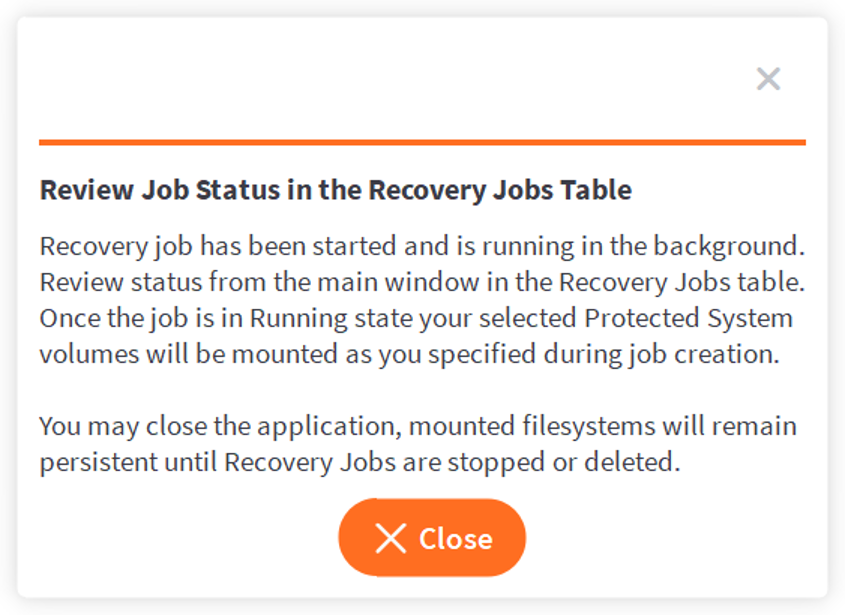
You may close this window and the recovery job will continue to run as a background service. Active jobs will be restarted automatically on a reboot of the system.
DeleteVirtualize (Hyper-V) [See steps...]
Automatically create a Virtual Machine of the Protected System within the locally installed Microsoft Hyper-V host system.
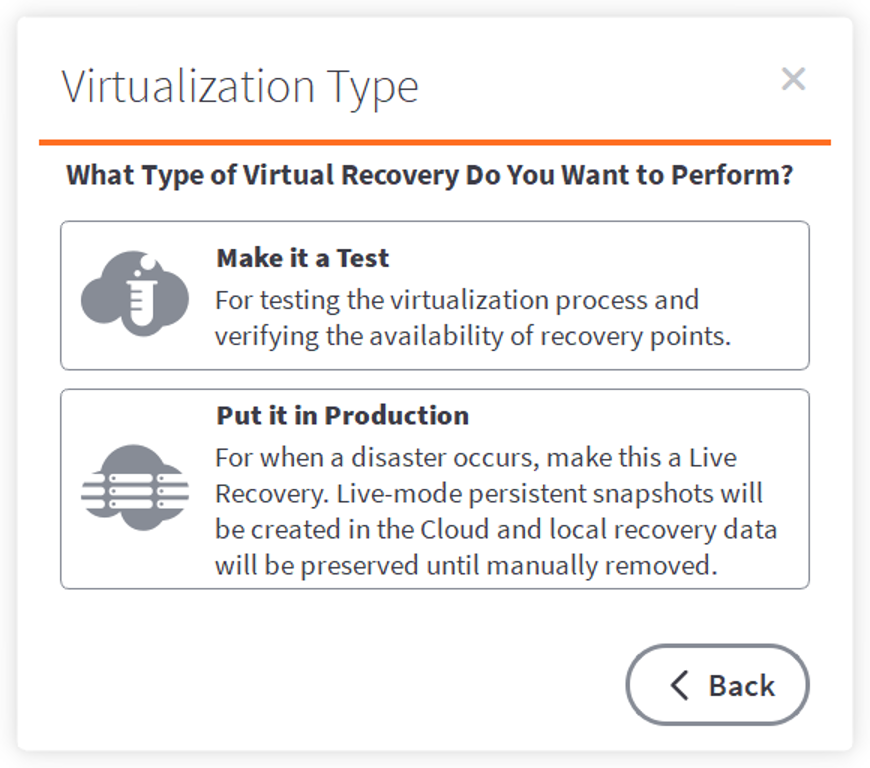
1. UNIQUE STEP: Select Make it a Test or Put it in Production.
-
Test Mode: Virtual Machines will default to having no network connectivity. If you choose to add a network connection, ensure the selected network has no access to the internet or the same subnet as the running production version of this protected system.
- When deleting Test Mode virtualize jobs from Recovery Center, the default action will be to also delete the Hyper-V guest virtual machine from the host.
-
Production Mode: Virtual Machines will default to at least one network connection. You should ensure the selected subnet has access to the internet, and ideally the same subnet as the original protected system.
- When deleting Production Mode virtualize jobs from Recovery Center, the default action will not be to also delete the Hyper-V. You should perform a live storage migration or otherwise take steps to preserve the recovered production system before deleting the Recovery Center job.
2. Common Step: Recovery Target 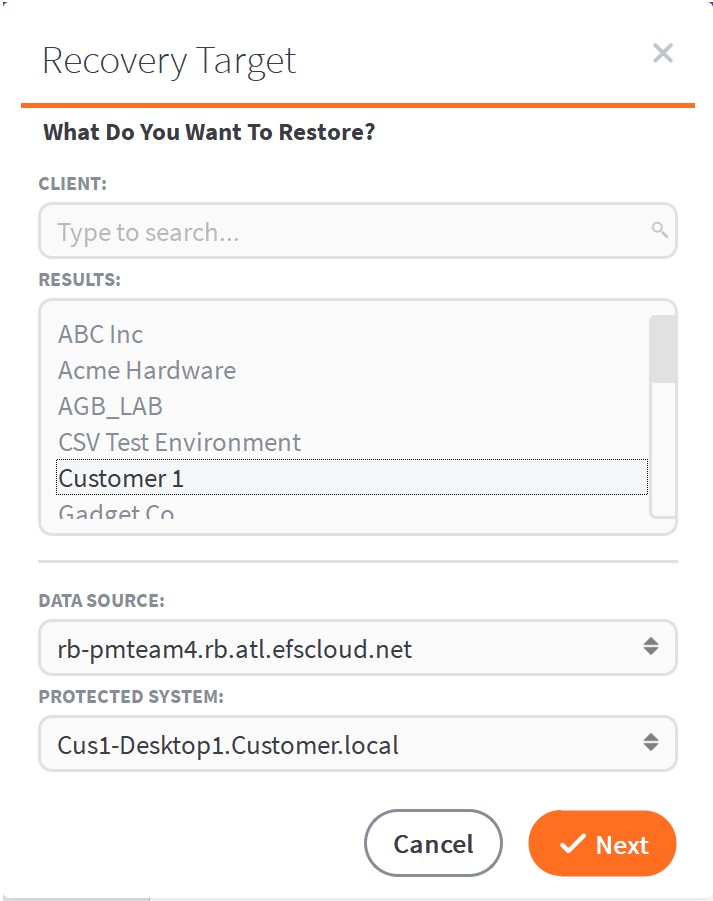
Click Next.
3. Common Step: Recovery Point. 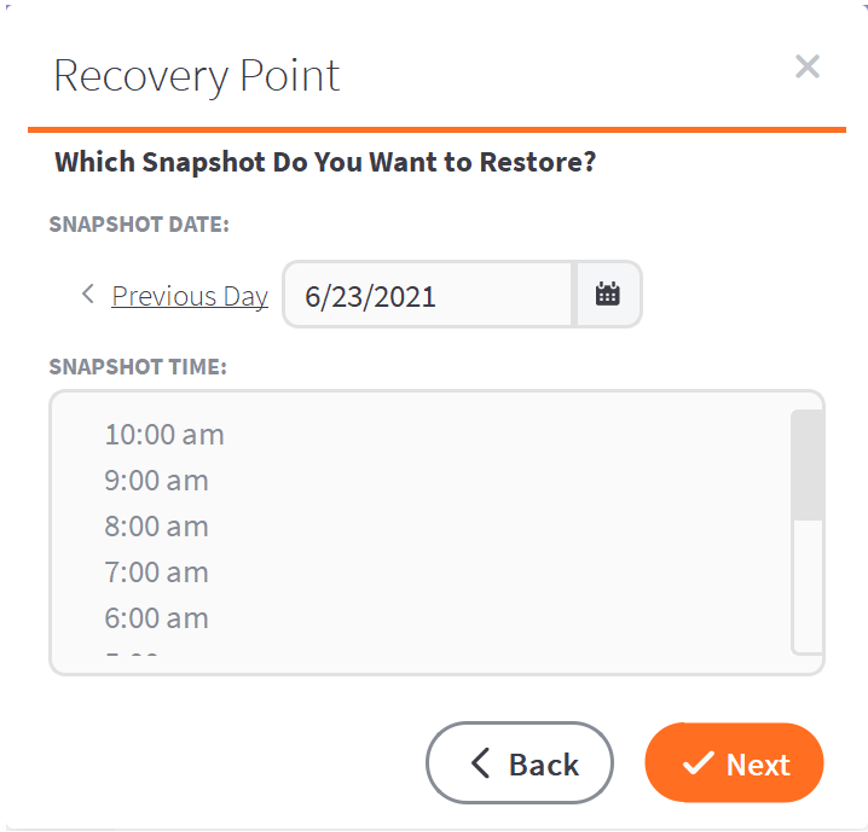
Click Next.
4. Common Step: Recovery Path.

Click Next.
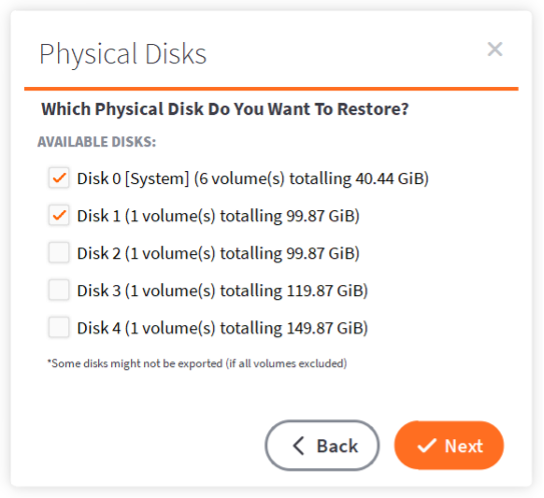
5. UNIQUE STEP: Use the checkboxes to select which physical disk(s) present in the snapshot you wish to recover. The disk volumes will be exported in Static or Thick format for better performance. Click Next.
6. UNIQUE STEP: Enter a Name for the Virtual Machine, specify RAM and CPU Cores to assign the system, and select a Network subnet if desired. You may click Add Network Adapter to assign multiple networks to the virtual machine.
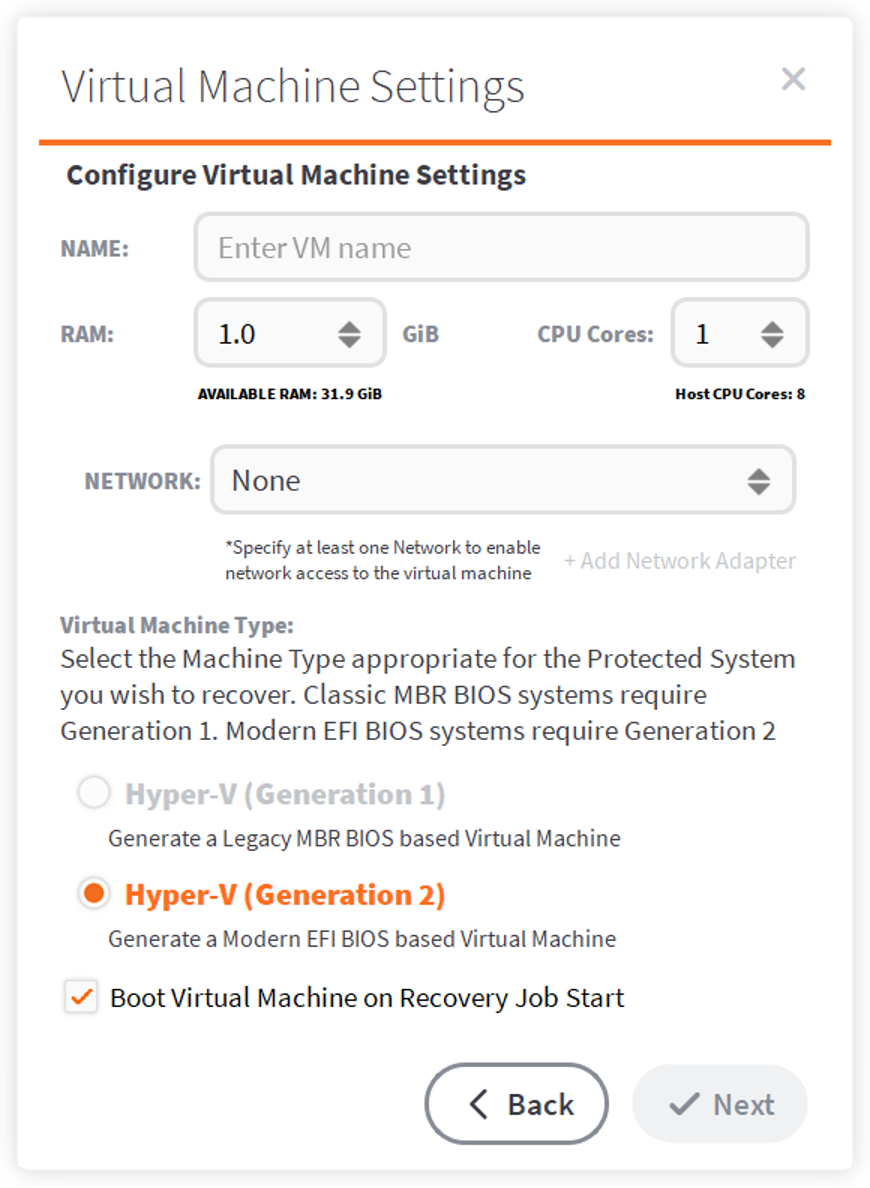
Recovery Center can usually identify if the Protected System requires Generation 1 or Generation 2. If not, select the appropriate Virtual Machine Type.
By default, Recovery Center will boot the virtual machine once the virtual disk export is completed and the Hyper-V virtual machine has been created. If this not desired, uncheck the box.
Click Next.
7. UNIQUE STEP: If you selected Hyper-V Generation 2 on the previous step, VHDX is required. For Generation 1, choose either VHD or VHDX disks.
- If your system has any disk larger than 2TB, you must select VHDX to successfully export.
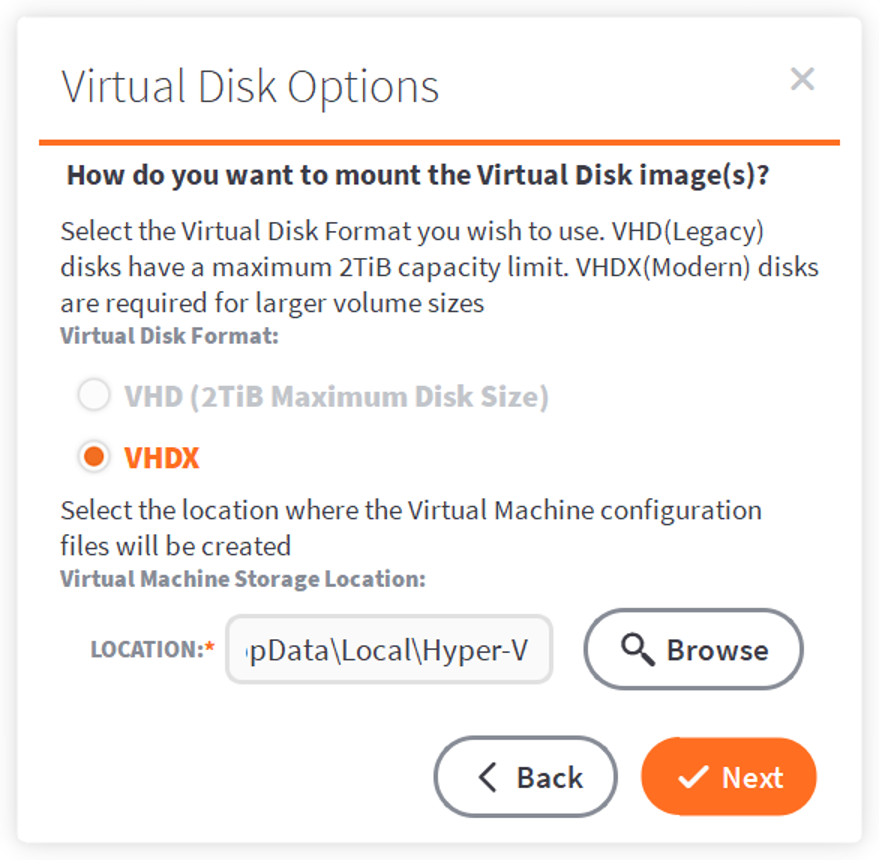
The Location specifies where the Hyper-V virtual machine definition files will be created. It is recommended to use the default, but you can click Browse to manually select a location.
Click Next.
8. UNIQUE STEP: Use the radio boxes to choose to Mount to Drive Letter or Mount to Filesystem Path.
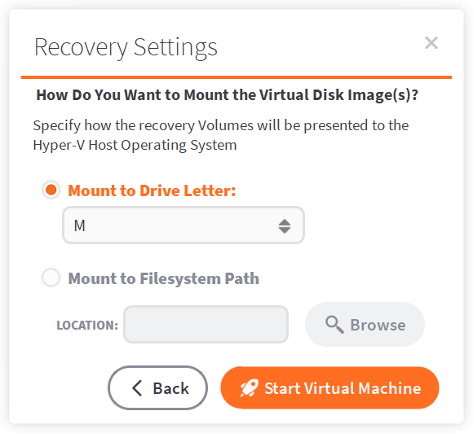
One virtual disk will be created for each physical disk in your protected system. These volumes will be created in a virtual NTFS volume that may either be mounted with its own drive letter, or mounted as a subfolder of an existing drive path.
Note: The default file permissions on the synthetic NTFS volume grant full read/write permissions only to the local Administrators and Hyper-V Administrators security groups.
Click Start Virtual Machine to begin the Recovery Job.
9. Common Step: Confirmation
Note: Once the job is 'Running' Virtual Disk image(s) will be present at the destination specified above during the wizard and a Virtual Machine definition leveraging these disks will be injected into Hyper-V. 'Running' means that the recovery engine is actively generating the virtual disk images on the system. The file exists as a virtual file within a synthetic NTFS volume that exists only in RAM and does not consume any local storage resources. Before 'Stopping' this recovery job, be sure to perform a Storage Migration of the Virtual Machine to move all virtual disk images associated with the VM onto real storage. Once the Recovery Job is stopped, the virtual disk image(s) being generated on the synthetic NTFS volume will disappear from the system and the Virtual Machine will lose access to them. If the VM has not been relocated via Storage Migration the VM will hang. Note that Storage Migration may be performed LIVE. You do not need to shut down the VM.
DeleteVirtual Disk Exports [See steps...]
Export a protected system as Virtual Disk Images.
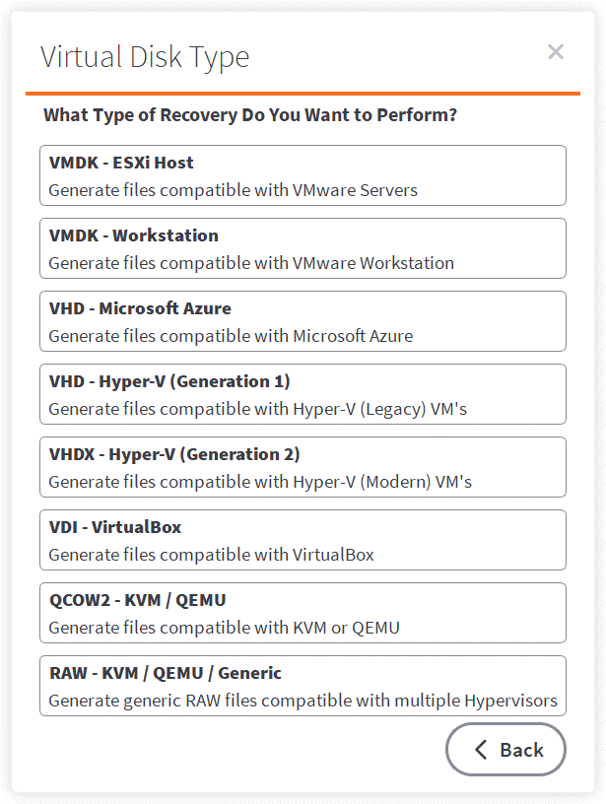
1. UNIQUE STEP: Select a Virtual Disk Type. Recovery Center supports all common virtual disk export formats for popular Hypervisor platforms, including a special format compatible with Microsoft Azure Cloud.
2. Common Step: Recovery Target
Click Next.
3. Common Step: Recovery Point
Click Next.
4. Common Step: Recovery Path
Click Next.
5. UNIQUE STEP: Use the checkboxes to select which available disk(s) in the snapshot you wish to recover. By default, all disks will be included, and exported disks will be created as Static or Thick volumes. If you wish to export Dynamic or Thin volumes, click the checkbox.
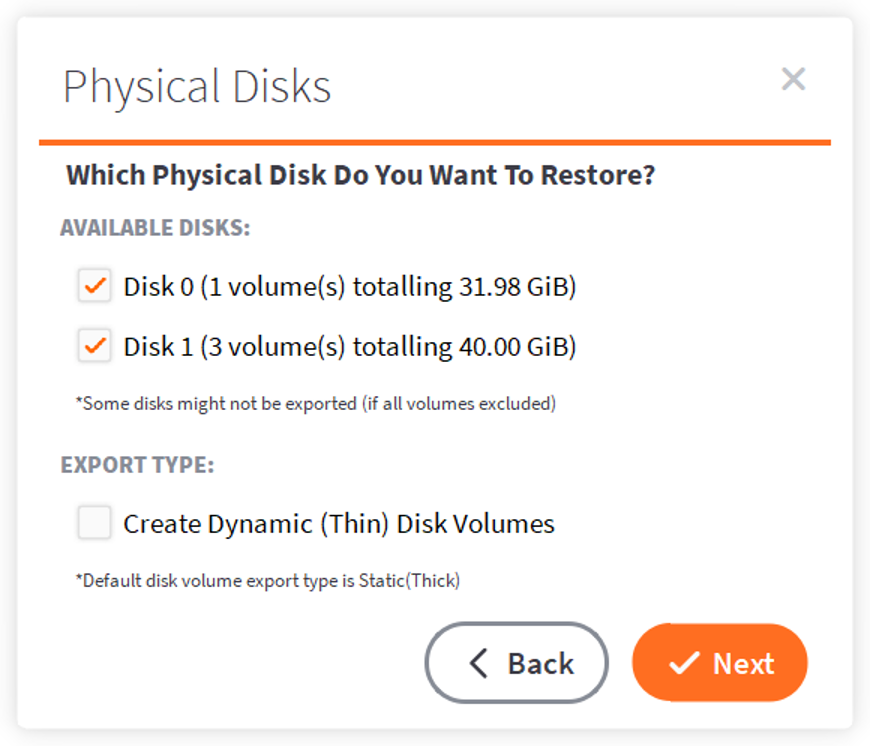
Click Next.
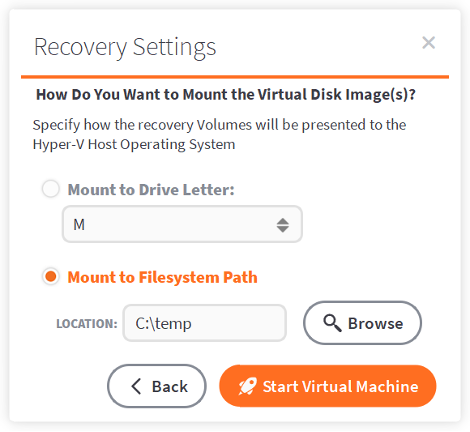
6. UNIQUE STEP: Use the radio boxes to choose to Mount to Drive Letter or Mount to Filesystem Path.
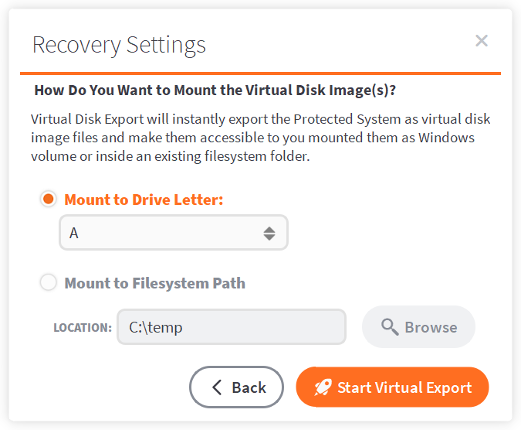
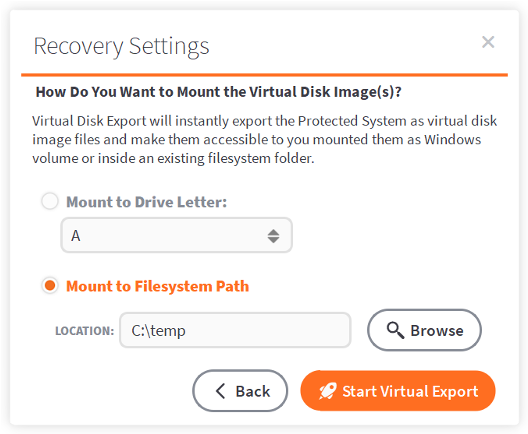
One virtual disk file will be created for each physical disk in your protected system. These volumes will be created in a virtual NTFS volume that may either be mounted with its own drive letter, or mounted as a subfolder of an existing drive path.
Note: The default file permissions on the synthetic NTFS volume grant full read/write permissions only to the local Administrators and Hyper-V Administrators security groups.
Click Start Virtual Export to begin the Recovery Job.
7. Common Step: Confirmation
Note: Once the job is 'Running' the Virtual Disk image will be present at the destination specified above during the wizard. 'Running' means that the recovery engine is actively generating the virtual disk image on the system. The file exists as a virtual file within a synthetic NTFS volume that exists only in RAM and does not consume any local storage resources. Before 'Stopping' this recovery job, be sure to copy this virtual disk image to real storage. Once the Recovery Job is stopped, this virtual disk image being generated on the synthetic NTFS volume will disappear from the system.
Delete
File & Folder Recovery [See steps...]
Perform basic file and folder recovery with the Recover Files option.
1. Common Step: Recovery Target
Click Next.
2. Common Step: Recovery Point.
Click Next.
3.Common Step: Recovery Path.
Click Next.
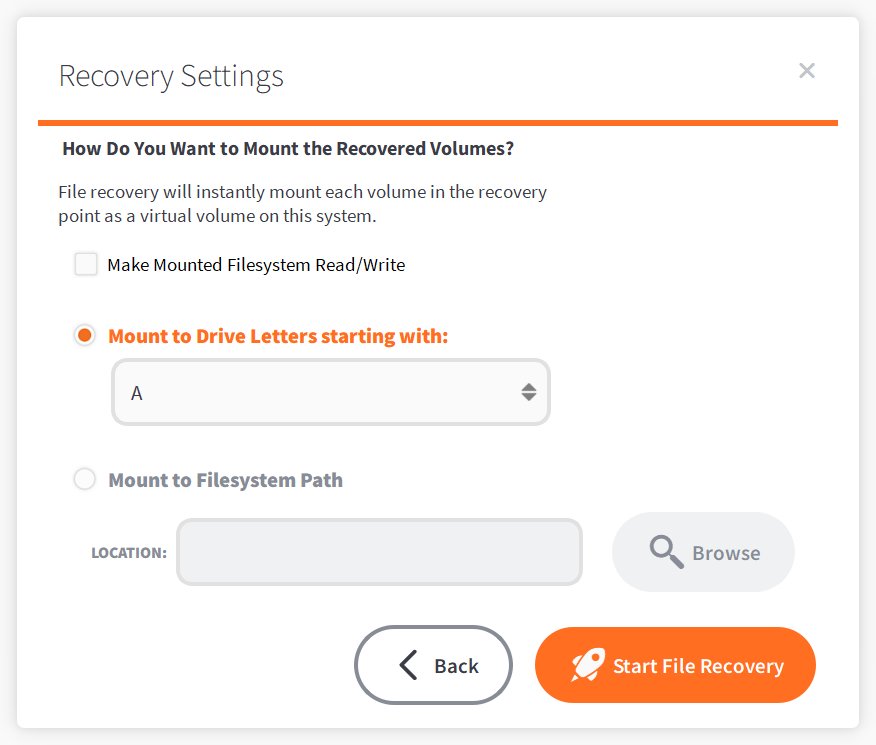
4. UNIQUE STEP: Use the radio boxes to choose to Mount to Drive Letter or Mount to Filesystem Path.
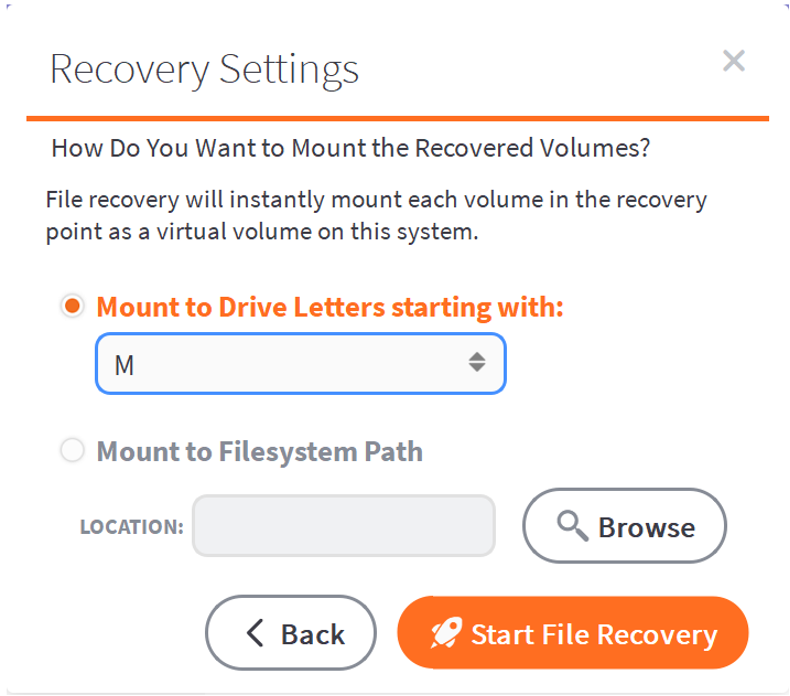
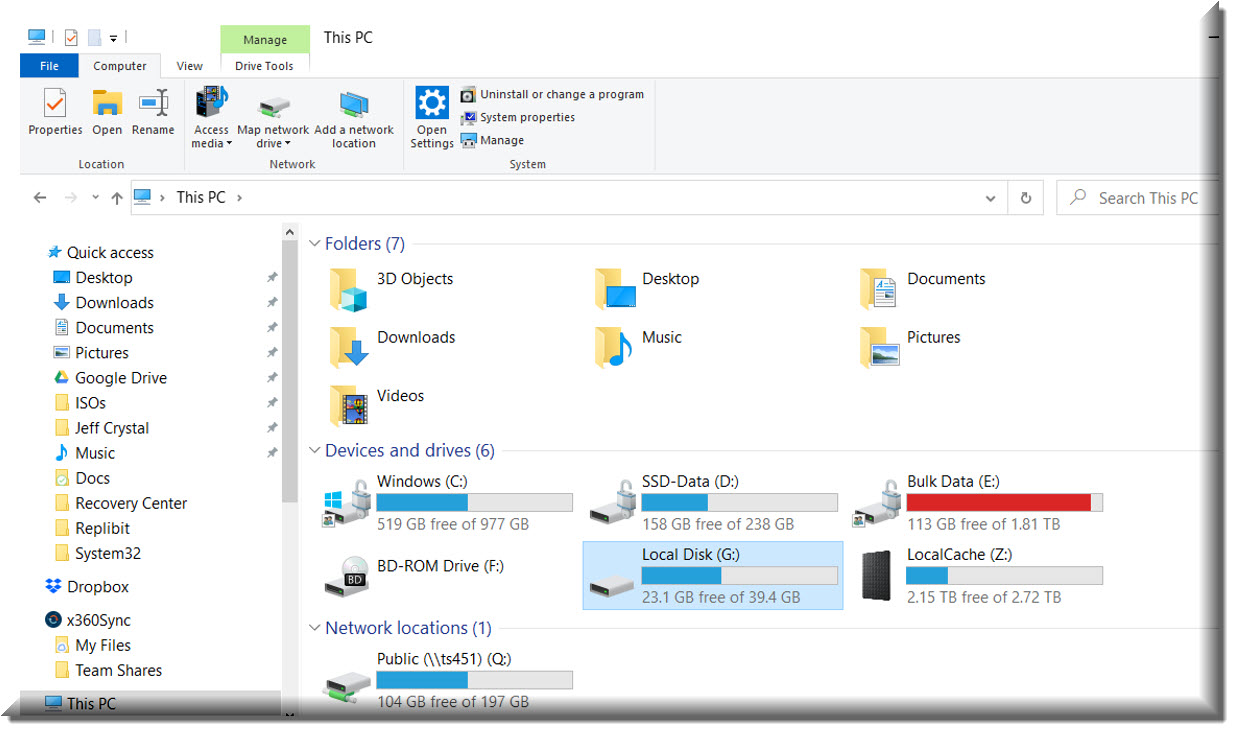
The disk volumes of the protected system you are recovering will be mounted to the local system. You can have each volume mounted to individual drive letters, starting with the first letter selected. (i.e. if the protected system has C, E, and F drives, you may choose to have them mounted beginning with drive G.)
Alternatively, you can mount all volumes to a single file path. Subfolders will be created for each protected system volume.
Click Start File Recovery to begin the Recovery Job.
5. Common Step: Confirmation
Note: Once the job is 'Running' the Disk volumes from the selected snapshot will be present at the destination specified above during the wizard. 'Running' means that the recovery engine is actively generating the virtual disk volume data on the system. The files exists as virtual files and folders within a synthetic NTFS volume that exists only in RAM and does not consume any local storage resources. Before 'Stopping' this recovery job, be sure to copy any data you wish to recover from this virtual disk volume(s) to real storage. Once the Recovery Job is stopped, this virtual disk image being generated on the synthetic NTFS volume will disappear from the system.
DeleteBare Metal Restore [See steps...]
Bare Metal Restore is the process where a protected system image is written directly back to a new hardware system from an offline recovery utility. This is located on the x360Recover Bare Metal Restore Utility ISO, which includes troubleshooting and diagnostics utilities in a Linux Live ISO.

1.4. Manage existing recovery jobs
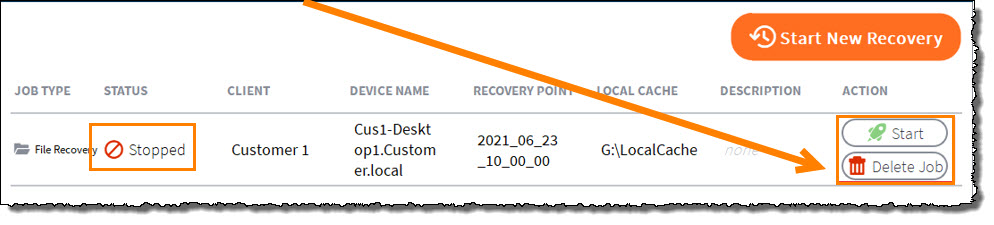
Once a job has been started, you can check its status on the Recovery Center Home page.
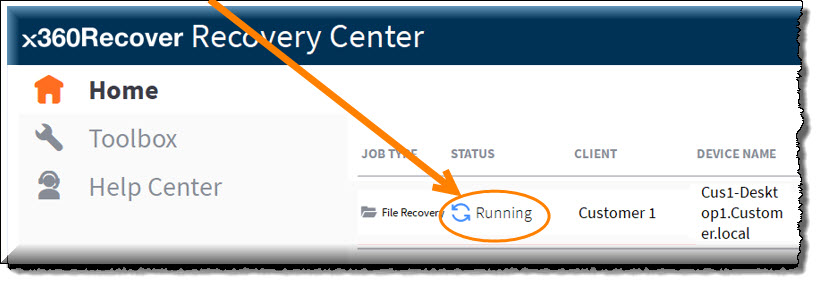
Statuses include:
- Starting - Job is locating the protected systems' data
- Initializing - Recovery data is being built
- Running - Job is active and recovered data can be accessed
- Paused - Job is not running but is still accessible
- Stopped - A manual action to stop the job; it is not active or accessible in this state and can be deleted.
Note: Jobs remain active until they are stopped or deleted. Multiple jobs can run simultaneously.
For information specific to each recovery job type, open the accordions below:
Perform Hyper-V Recovery
To view, edit, and manage your new virtual machine, open Hyper-V Manager. 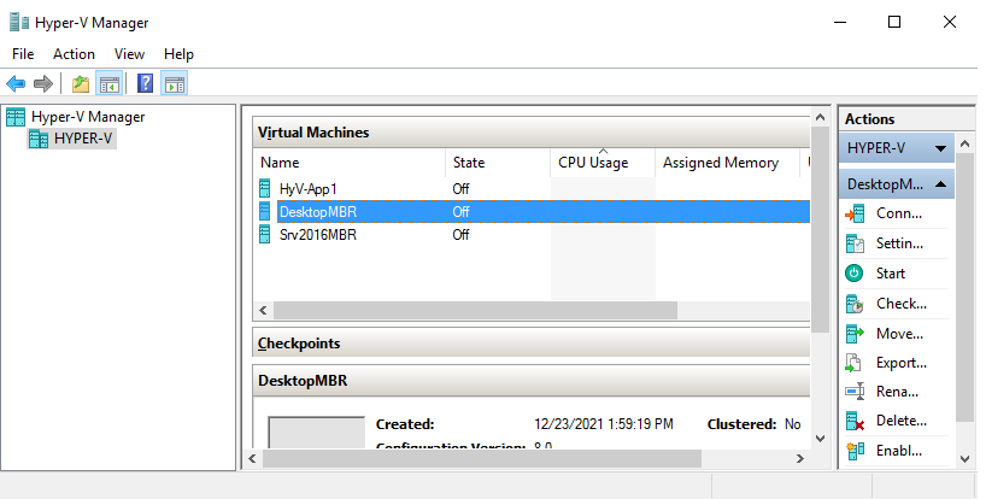
When performing a production recovery, it is best practice to boot and run the virtual machine from the Recovery Center virtual export disks and perform a live migration of the storage volumes, once storage space becomes available. This might be done immediately if deploying to a new Hyper-V host system or after the original has been repaired.
To perform a storage migration, select the virtual machine within Hyper-V Manager and click Move from the Action menu to open the migration wizard.
1. Before You Begin: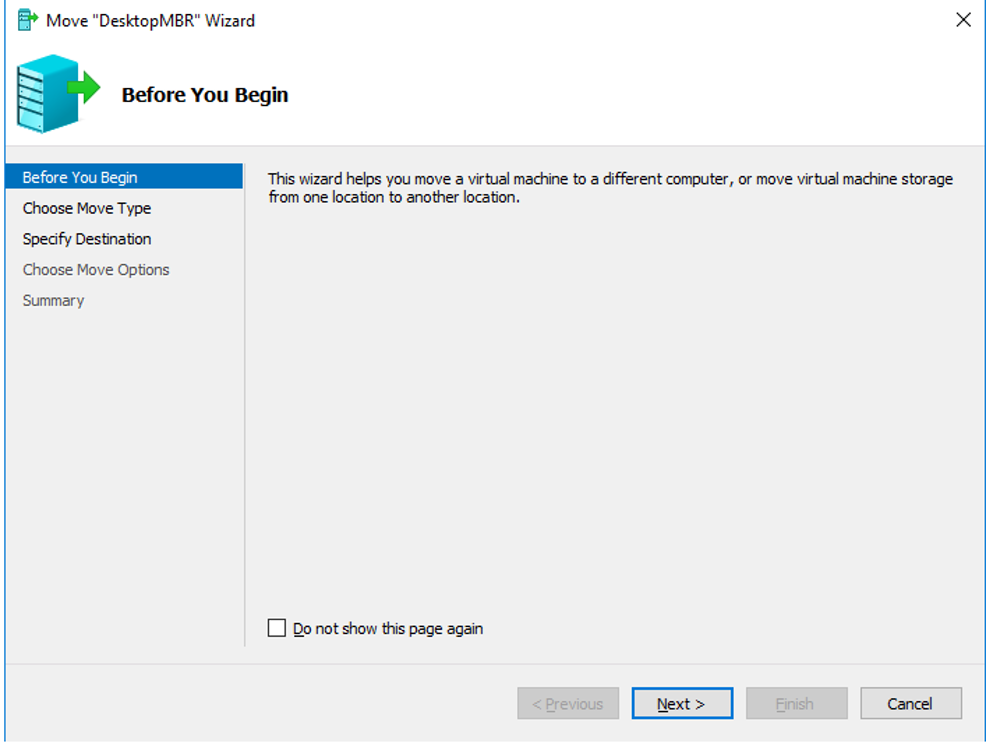
Click Next.
2: Choose Move Type: 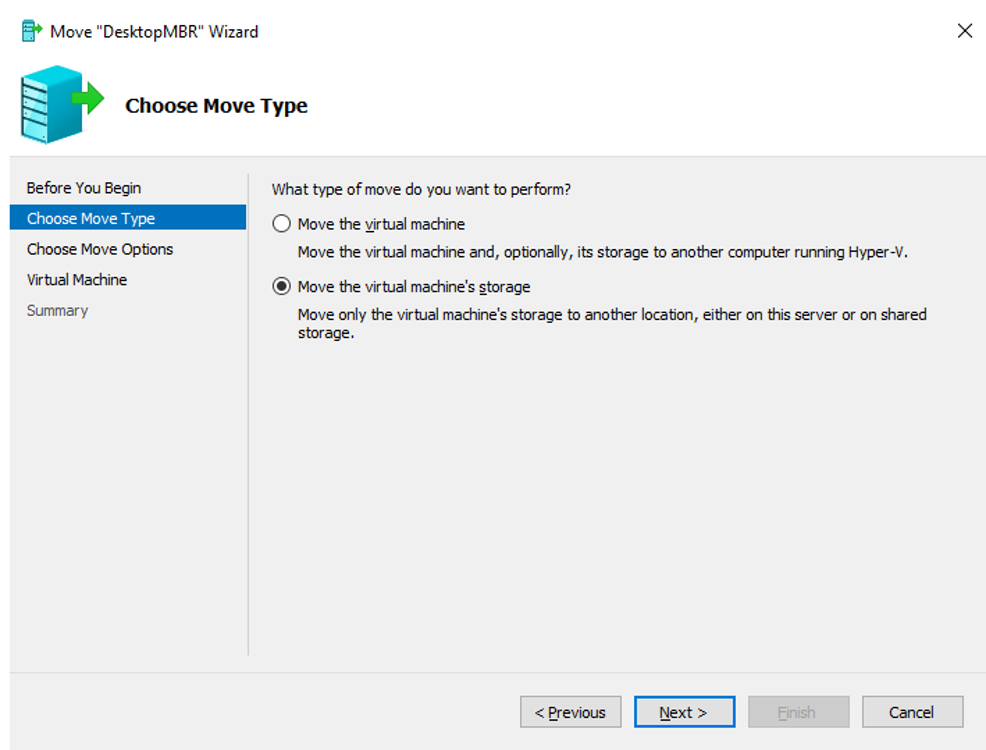
Select Move the virtual machine's storage and click Next.
3. Choose Options for Moving Storage: 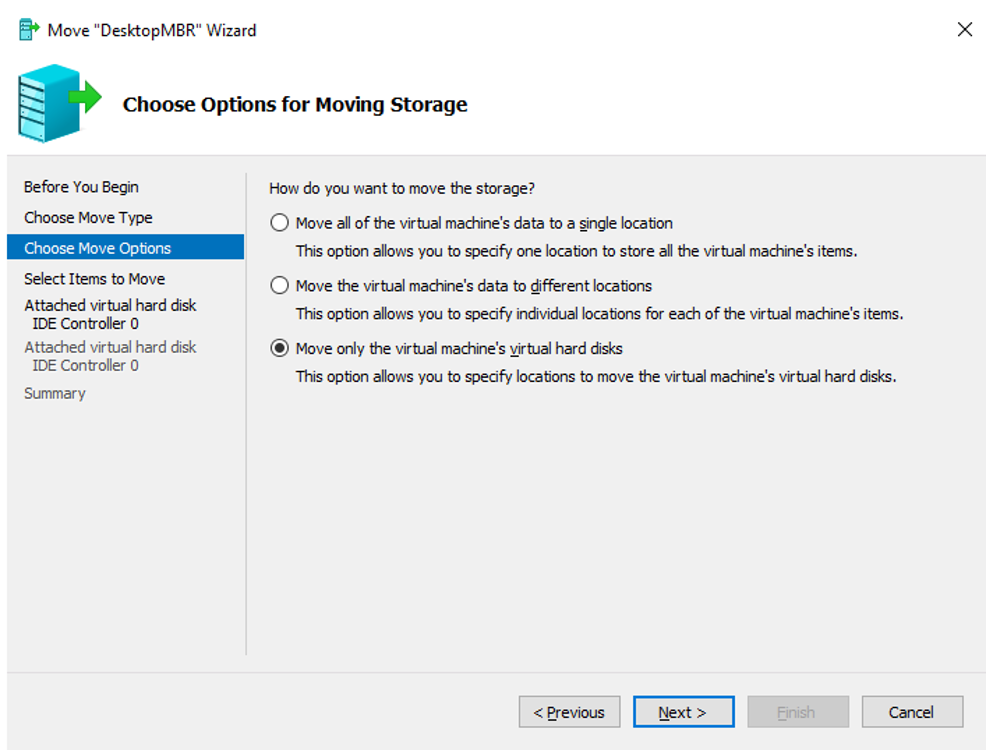 Typically, select Move only the virtual machine's hard disks. The virtual machine definition and swap files are already located on the Hyper-V host and don't normally need to be relocated, unless you are configuring a failover cluster or other complex arrangement.
The virtual disk files don't exist on storage at this point; they are being synthetically generated by Recovery Center from your backup data and Local Cache repository. To complete a production recovery, you must relocate these virtual disks to permanent storage before shutting down and deleting the job.
Note: If you must reboot the Hyper-V host, Recovery Center will retain persistent changes made to the virtual machine environment and restart all services and virtual machines once the host has been rebooted.
4. Select Items to Move: 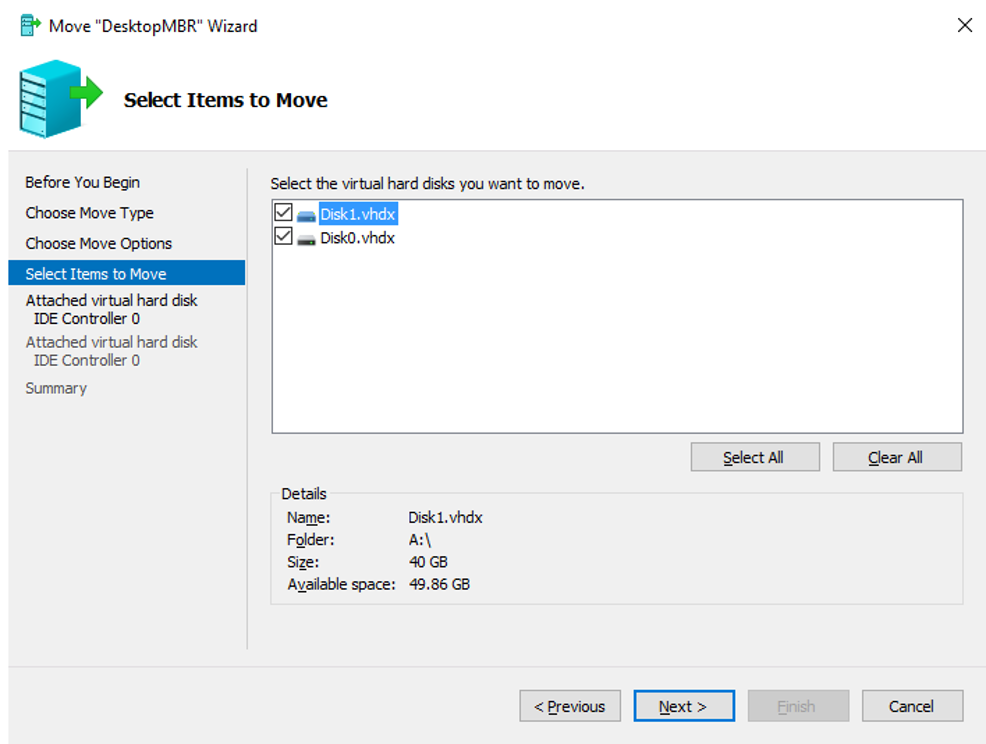 Select all virtual disks and click Next.
5. Choose a new location: 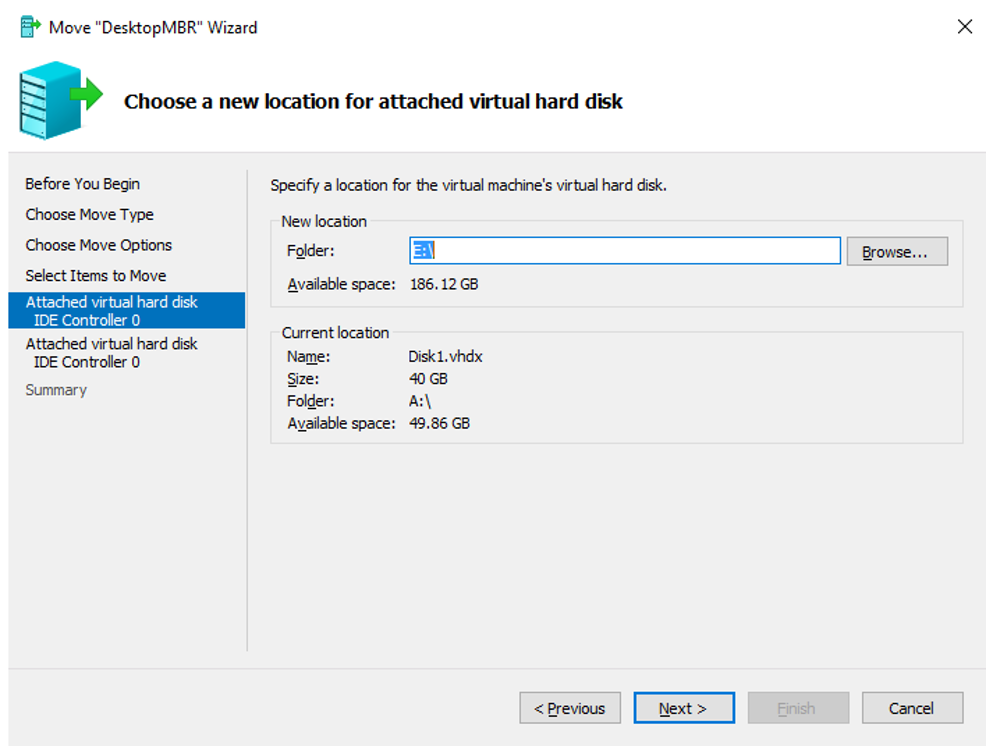 Specify a path for each virtual disk and click Finish.
Perform Virtual Disk Recovery
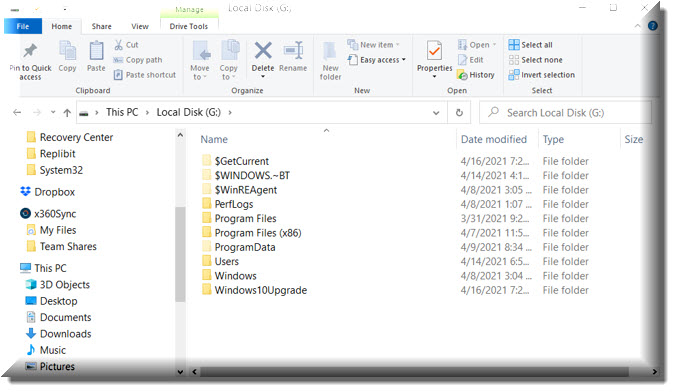
Once the Status on the Home page indicates a job is Running, all disk volumes should be exported and present on the local machine at the path specified in the job creation. Use Windows File Explorer to copy and paste disk image files to another folder, or manually create a virtual machine using Hyper-V Manager on the local system. 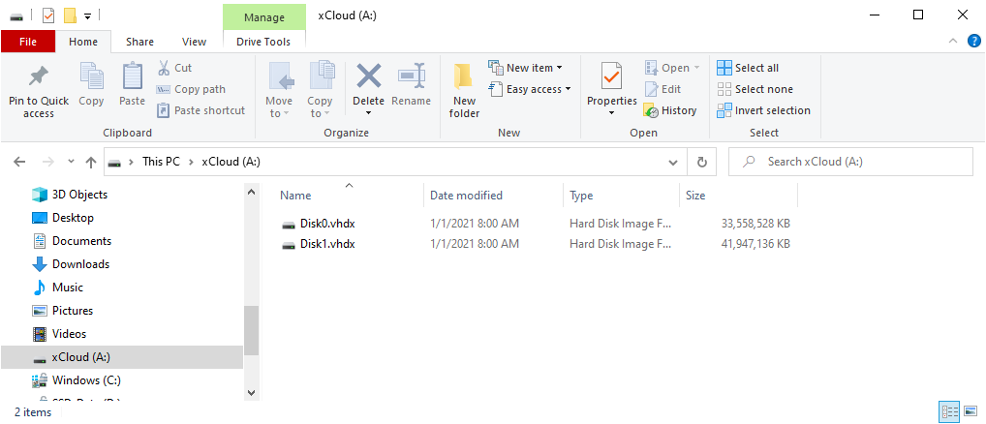
Perform File and Folder Recovery
Once the Status on the Home page indicates a job is Running, all disk volumes should be mounted and present on the local machine. Use Windows File Explorer to browse, search, copy, and paste files and folders you wish you recover.
Depending on your mount point selections, the volumes should either be listed as individual mounted drive letters or mounted within the folder path you specified during job creation.
Note: Since the recovery volumes are mounted as locally attached block devices, the original file and folder permissions from the protected system will be maintained.
Use Windows Explorer or other tools to copy files and folders from the mounted virtual recovery volumes back to the original system, network share, or other location.
 In Recover Files mode, all disk volumes are combined into a single virtual disk and mounted as a local block device on the recovery system. This disk is read-only by default and can be seen in Windows Disk Manager for reference.
When creating the job, you have the option to make the volume Read/Write. If the system (and logged-in user to which you are mounting the volume) does not have Windows ACL permissions to the recovered disk volume(s), you will need to mount the volume in Read/Write mode - to allow making changes to the ACL permissions to enable access.
Note: Any changes made to the recovered volumes are stored locally in the copy-on-write file only. The underlying Disaster-Recovery-Access-Layer volume and the source snapshot are immutable. Deleting the recovery job and recreating it for the same snapshot will revert any changes made to the volume(s) in the previous recovery session.
Original Protected System: 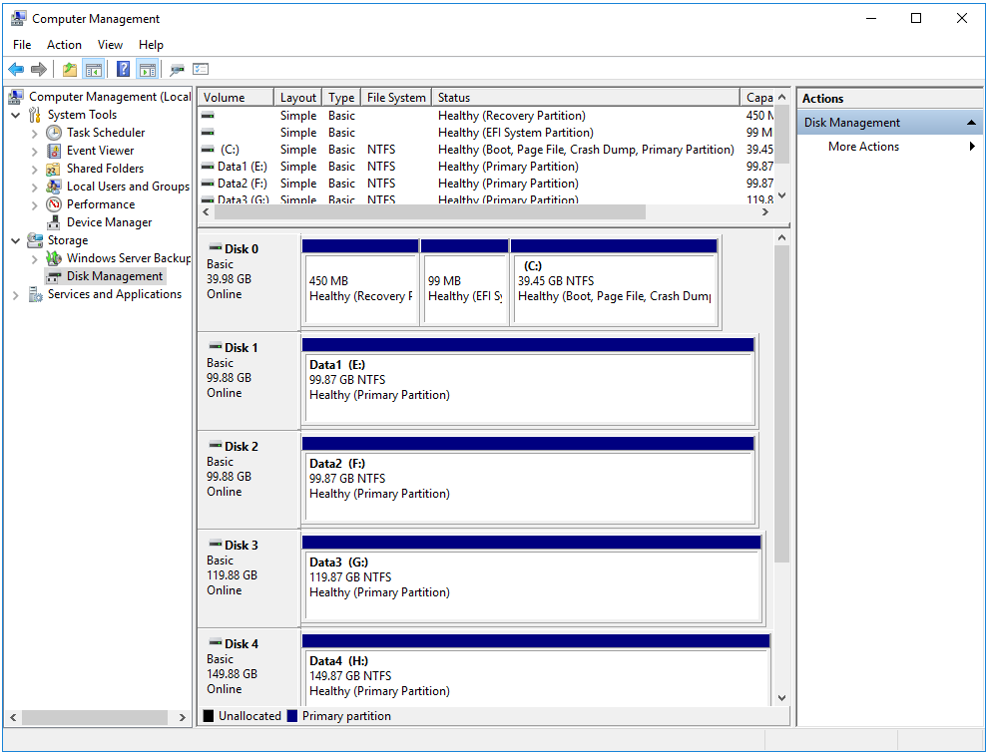
Recovery Center Volumes: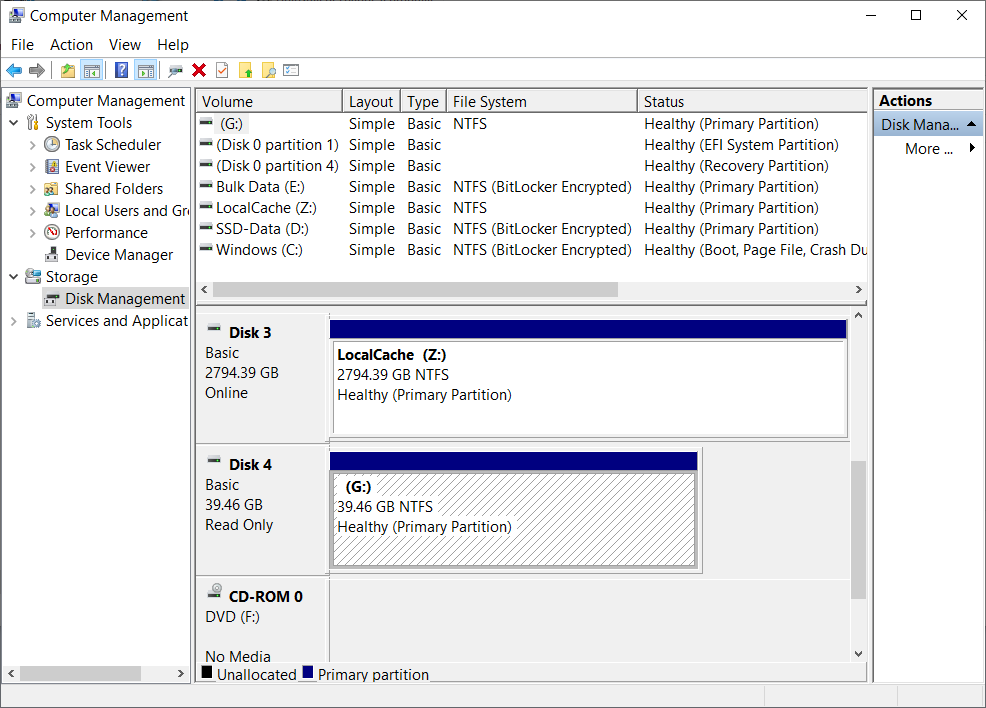
1.5. Delete recovery jobs
When you have finished performing a recovery, you should stop and then delete the configured jobs to remove them from the backend jobs service.
1.6. Recovery Center troubleshooting
Occasionally, the Recovery Center UI may fail to load on certain systems.
Here are some troubleshooting tips for specific error messages:
Specific errors
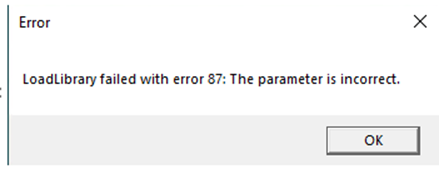
LoadLibrary failed with error 87
On rare occasions, the Recovery Center UI may fail to load on certain systems, displaying the following error message during the application launch:
loadlibrary failed with error 87
This error is due to incompatibility with the hardware OpenGL driver.
In most cases, this issue can be resolved by configuring Recovery Center to use software rendering for OpenGL.
To enable software rendering, edit C:\ProgramData\RecoveryCenter\config.json
and add the parameter “use_software_opengl”: true:
{
"use_software_opengl": true
}
ATI Radeon bug
There is a known issue with QT and the ATI Radeon catalyst driver which sometimes causes this issue when loading the UI.
QT attempts to load the hardware OpenGL driver - even when software rendering is requested.
The root cause of the issue is an incorrect registry entry, created when the AMD catalyst (AMD Radeon graphics drivers and application software package) was last installed.
To work around this issue, you may rename
atig6pxx.dll
to
atig6pxx.dll.bak
(This file is usually located in C:\Windows\System32)
Delete1.7. Other Recovery Center tools
Toolbox
The Toolbox contains links to other related Axcient recovery tools.
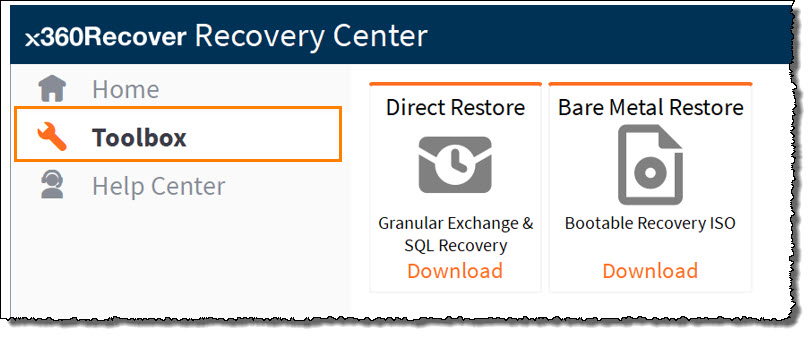
Direct Restore
Direct Restore is a granular recovery utility for Microsoft SQL and Exchange databases. With Direct Restore, you can open and browse Exchange and SQL databases and select individual objects, tables, folders, or emails to be recovered. Export recovered items to a file or directly back into a live Exchange or SQL system.
Click the Direct Restore tile in the Toolbox to download the latest Axcient Direct Restore installation package.
Bare Metal Restore
Bare Metal Restore (BMR) is the process by which a protected system image may be written directly back to a new hardware system from an offline recovery utility. The x360Recover Bare Metal Restore Utility ISO comes loaded with general troubleshooting and diagnostics utilities in a Linux Live ISO and includes the offline Driver Injector tool (used for recovering to dissimilar hardware when the original protected system image does not supply a driver.)
Click the Bare Metal Retore tile in the Toolbox to download the latest version of the x360Recover Bare Metal Restore Utility.
Analysis Tool
The Axcient Analysis Tool is a helpful utility for our Support team. Running the Analysis Tool gathers troubleshooting, diagnostic, configuration, and logs data from the running system and optionally uploads the to an open Support Ticket to assist in resolving any issues you might be having. Learn more about the Analysis Tool.
Live mode
Recovery Center 1.10.0 and newer now supports Live mode for recovery operations. What does this mean?
Other recovery alternatives
In addition to Recovery Center, Axcient offers other options for recovering your backup data including:
| Virtual Office |
| Virtual Office can be used to virtualize one or many protected systems in the Axcient Cloud. Virtual Office is fully self-managed and can be used by MSPs for true disaster recoveries or disaster recovery testing / client validation. |
| Bare Metal Recovery |
| Our x360Recover Bare Metal Recovery Utility hosts our Bare Metal Recovery wizard. With Bare Metal Recovery, simply boot a new-deployed or recently repaired system from ISO image and recover complete system images directly to the hardware. Bare Metal Recovery can operate directly from the appliance or vault, leverage previously downloaded Virtual Disk images, or perform recovery directly from the vault, with or without a local cache repository – just like Recovery Center. |
| File Browser |
| Mount a snapshot on any appliance or vault and use the web-based File Browser to quickly download individual files for recovery. |
| FTPS |
| For larger file and folder recovery operations, use our FTPS service to quickly download your bulk file and folder items using any standard FTPS client. FTPS offers faster, multi-threaded downloads, automatic retries, and resuming interrupted large file downloads. |
| Instant Disk Export |
| Perform an instant disk export from any appliance or vault. Then download a virtual disk image in any standard Hypervisor format, including VHD, VHDX, VMDK, VDI, and RAW |
SUPPORT | 720-204-4500 | 800-352-0248
- Contact Axcient Support at https://partner.axcient.com/login or call 800-352-0248
- Free certification courses are available in the Axcient x360Portal under Training
824 | 929 | 1159 | 1342| 1368 | 1457 | 1782