
|
Essential User Guide  This chapter of the Essential User Guide introduces features and settings within the appliance and vault UIs. Access these portals by navigating to the appliance or vault in x360Recover Manager and directly logging in via SSO. |
Other resources:
|
Overview
x360Recover Manager provides the user interface (UI) that lets you directly log into a vault (either on the Axcient Cloud or on a private vault) or into an appliance (for BDR services).You'll use the x360Recover Manager UI to manage a specific vault or appliance, including viewing protected devices, managing backup jobs, and recovering data.
What's the difference between the vault UI and the appliance UI?
The x360Recover vault UI provides essentially the same services and features as the x360Recover appliance UI, with a few differences in presentation and function.
The main differences stem from the intended uses of the two types of backup:
- An appliance is intended to be deployed at a single customer location.
- A vault is designed to be multi-tenant, which means the vault can securely accept replicated recovery point data from multiple customers and sites.
Vault UI
The UI features and options for a vault are slightly different from an appliance, with features split between Admin mode and User mode.
- Admin mode has access to all functions on the device, including user-specific features and options, such as mounting, virtualizing, and exporting protected systems.
- User mode has limited access to configurable settings on the device. Users do have full access to recovery and export options but ONLY for their own protected systems on the vault.
To allow clients to perform self service recovery operations on a vault, you may allow them to log in to the vault using the customer credentials you entered when creating the customer in the x360Recover License Portal. Client users will only have access to their own protected systems for recovery.
The Vault Settings menu does not appear on the vault.
x360Recover vault menus
Admin
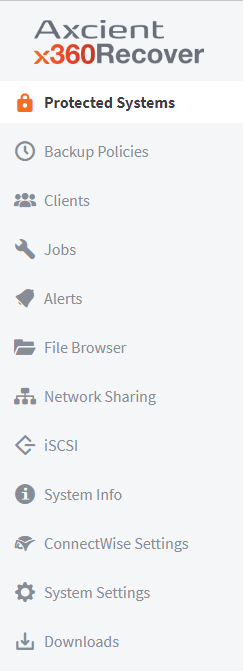
When logged in to a vault as an Admin, the following menus are present:
- The vault synchronizes periodically with the License Portal to retrieve all customer accounts and passwords. When logged in as Admin on a vault, the Clients menu will appear.
- From the Clients menu pane, the Admin user can access a list of all customer user accounts that have been created by the partner, and set customer-specific disk space quotas per customer to limit total storage usage on this vault.
- A digest of license usage for all customers is also displayed from the Clients menu page.
Customer
When logged in to a vault as a Customer, the following menus are present:
- Protected Systems
- Jobs
- File Browser
- NFS Exports
- iSCSI
- System Info
Customer accounts can only access protected systems and information related to their own account. When performing NFS Exports, virtual disk export, or browsing mounted recovery points, customer-related files are stored in customer-specific paths, secured to their login account.
x360Recover vault protected systems
- There is no Missed Backup Alert Hours setting present on the vault.
- Replication settings do not exist on the vault.
- The Replication button has been replaced with Recover – USB.
- Customer user accounts have access to all Snapshot actions and retention policy, but cannot configure bootVM or Migrate options.
Appliance UI
Protected Systems page
1. In the appliance left hand navigation, click on Protected Systems. You will see a list of the systems currently being backed up and protected by the appliance.
2. Use the controls to manage protected systems: 
- The Status column displays icons that indicate whether the system is currently running as a virtual machine (the first icon will be green) and whether replication is enabled for the system. (The second icon will be blue).
- System Name (Hostname), Operating System, and Currently Protected Volumes (disk volumes), are listed for identification and information.
- The Schedule column contains a dropdown list of available backup schedules. The assigned schedule displays. To change schedules, click the dropdown and select the preferred schedule. For more information, please review the Managing Schedules for Backup Jobs article.
- The Actions column allows you to delete or view the details of a protected system.
3. Click Refresh to update the display view with any newly discovered protected systems.
4. Click Import to retrieve protected systems being migrated or recovered via USB media and import the related data.
Protected System Details page
In the Protected System Details page, you can:
1. Click the Schedule Now button to schedule a full or incremental backup.

2. Click the Run Analysis Tool button to collect event-related information and submit to Axcient Support.
.
3. Find a snapshot and click the Mount button to browse and recover files from the snapshot.
4. Click the Export button to create a virtual disk export for download and for failback from the cloud.
5. Click the iSCSI button to virtualize a protected system in the Axcient Continuity Cloud for cloud failover.

System Info page
The System Info page displays detailed information about CPU usage, running processes, network data, disk usage, and more.

1. In the Local System Details section, review the system name, operating system, and RAM capacity details.
2. In the Disk Usage Statistics section, review information about each disk. You can view the name of the disk, as well as space used and space available.
3. In the Volumes section, review information about the Operating System volume. For example, you can view the encryption status, total space, used space, and free space.
4. In the Network Interfaces section, review network details, such as the MAC and IP address.
1472