
Table of Contents
Monitor virtual offices Edit virtual office settingsDHCP settingsPort forwarding Configure VM auto-shutoffMonitor virtual offices
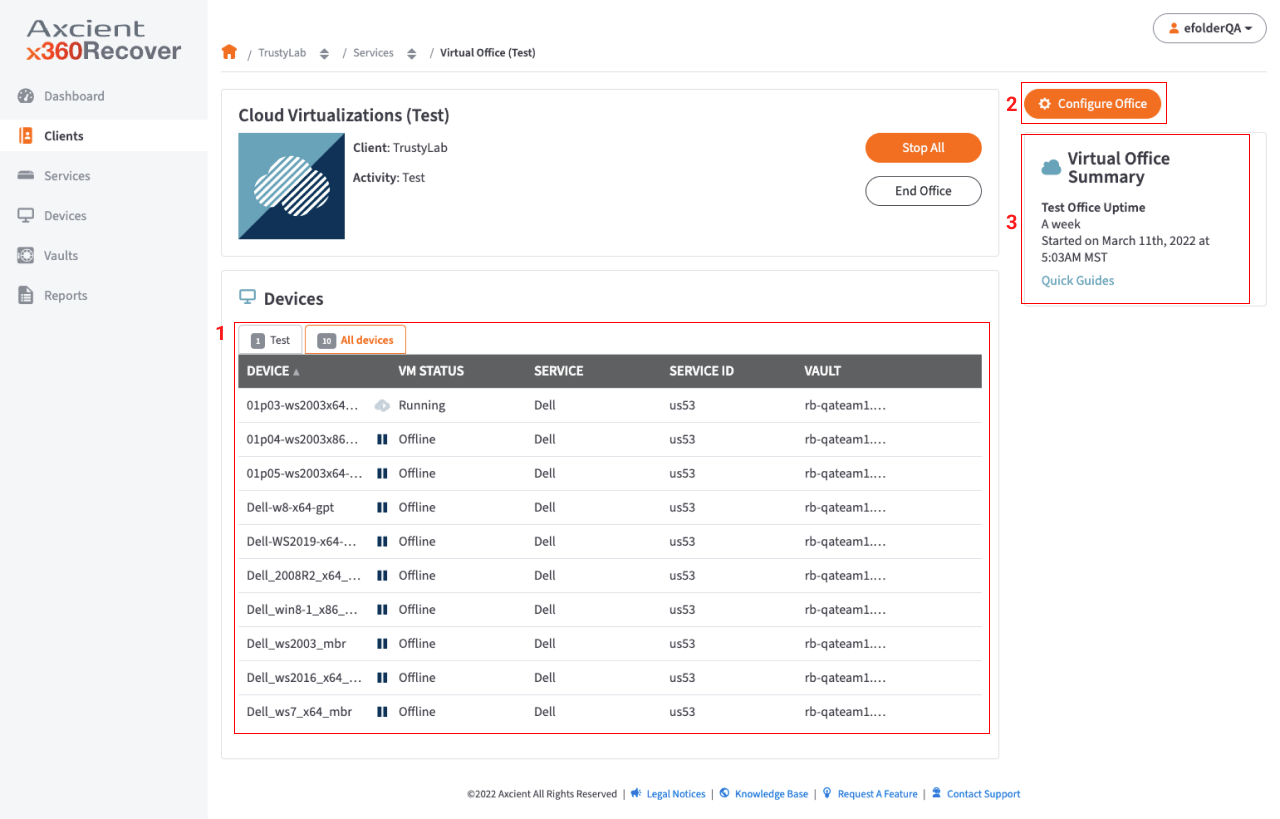
The Virtual Office page is accessible when a virtual office has been started. This page is the administrative page for each virtual office. From here, you can manage and administer the virtual office.
The main sections of the Virtual Office View page are:
-
Device List
- This section displays all protected devices under the Client as well as the device states. The three device states are explained below.
-
Configure Office
- This button launches the Virtual Office Configuration page where you can configure various aspects of the Virtual Office.
-
Virtual Office Summary
- This section displays information about how long the Virtual Office has been running.
Status definitions
A device will be listed in one of the following states:
- The Offline state indicates that the VMs have yet to be rendered. To render a device, click the Render button.
- The Ready state indicates that the VMs have been rendered. This means that you have allocated CPU cores and RAM to the VM. You can optionally click the Start button to start a device and make it accessible.
- The Running state indicates that the VMs are live and accessible through a VNC or RDP agent. You can optionally click the Stop button to return the device to a Ready state, log in to access the VM using the built-in web VNC agent, or click the Discard button to return the device to an Offline state.
Edit virtual office settings
While inside the virtual office in x360Recover Manager, you can configure the cloud failover environment as needed. To configure these options:
- Navigate to the appropriate Virtual Office page through the:
-
Dashboard tab; or
- Click on the Dashboard tab in the lefthand navigation of RMC.
- Open the Activities of Interest accordion.
- Open the Cloud Virtualizations accordion.
- Hover over the righthand side of the table under the appropriate Client.
- Click on the Manage Office text that appears.
-
Clients tab
- Click on the Clients tab in the lefthand navigation of RMC.
- Open the Activities of Interest accordion.
- Open the Cloud Virtualizations accordion.
- Hover over the righthand side of the table.
- Click on the Manage Office text that appears.
-
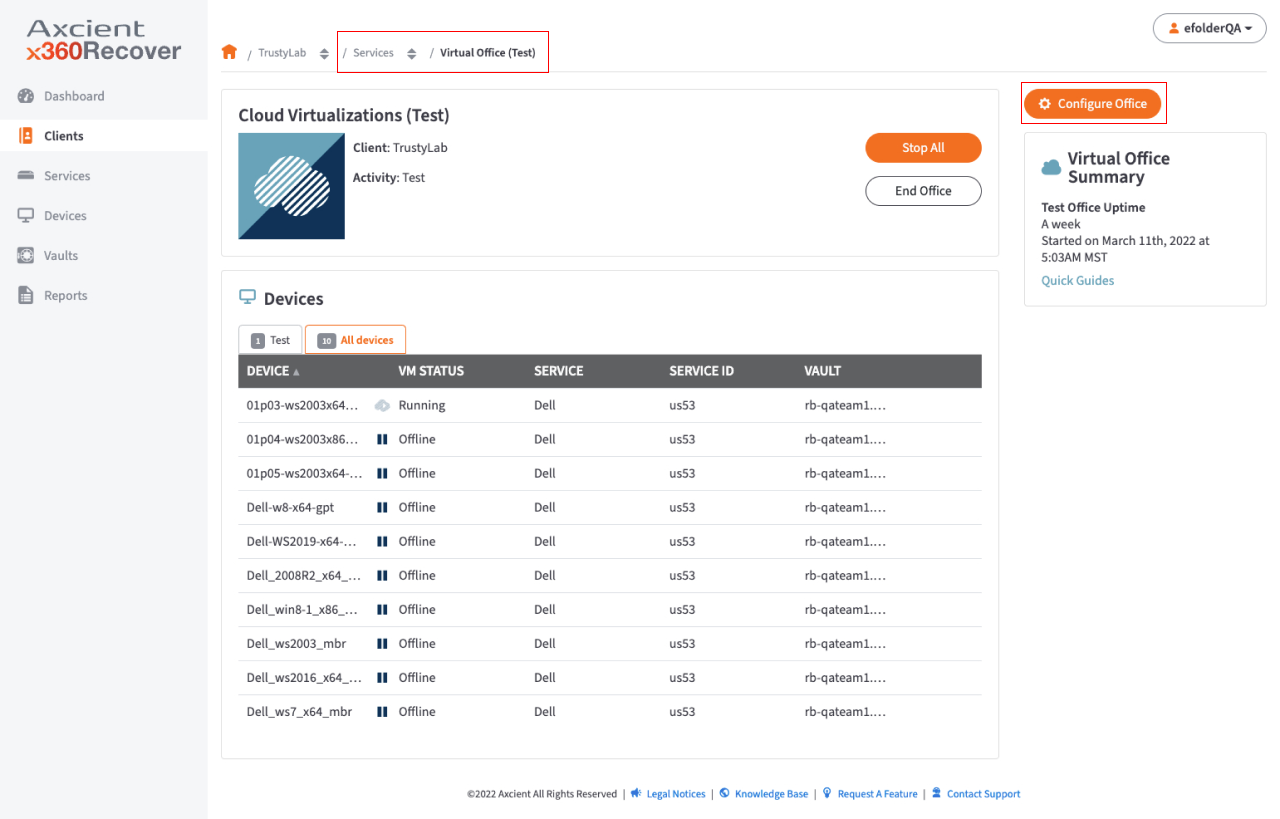
Dashboard tab; or
- On the Virtual Office page, click the Configure Office button.
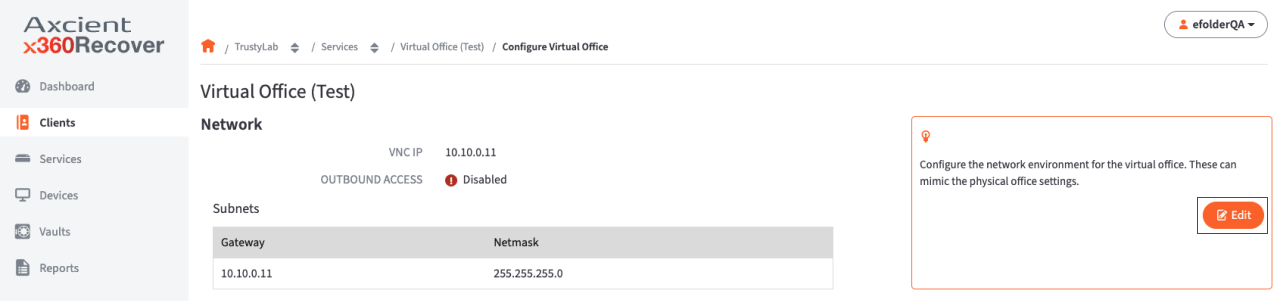
3. On the Configure Virtual Office page, click the Edit button in the Network section.
4. Enter a value for one or more of the following fields:
-
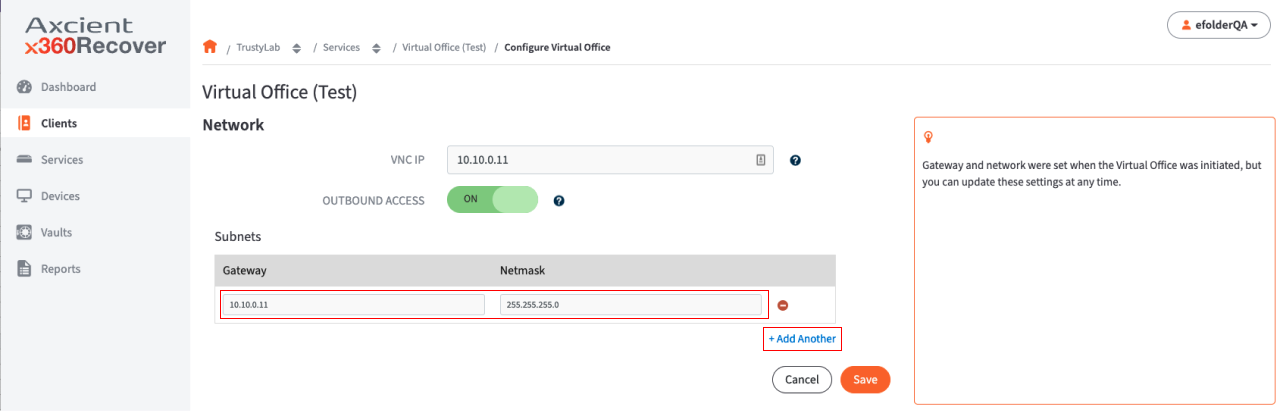 Required fields:
- In the Gateway field, enter a gateway IP address.
- In the Netmask field, enter the netmask value.r
- Optional fields:
- Add an additional subnet by clicking the +Add Another link.
- Please note that you can add up to ten subnets. Subnets must not overlap with other subnets on the Virtual Office.
- To delete a subnet, hover your mouse over the appropriate row and click the red Delete icon.
- Enter the IP address for the VNC clients in the VNC IP field
- VNC clients can be any available (unused) IP address in the Virtual Office.
- VNC clients typically use the Virtual Office Gateway address, so a separate IP address is not necessary. However, when testing a Cloud Failover while the original gateway is still active, an alternative IP address should be specified.
- Enable the Outbound Access option to allow outbound access to the Internet.
- Enabling Internet connectivity allows both outbound and inbound messages between external devices and the server VMs in the Virtual Office.
- Disabling outbound access means that only devices within the Virtual Office communicate with each other.
- Add an additional subnet by clicking the +Add Another link.
DHCP settings
DHCP is not enabled by default but can be configured to work in the Virtual Office environment. Please note that the DHCP applies only to virtualized devices and not for remote user IP addresses that are assigned through the VPN settings.
How to edit the DHCP settings
1. On the Configure Virtual Office page, click the Edit button in the DHCP section of the page. 
2. On the DHCP screen, enter a new value for one or more of the following fields: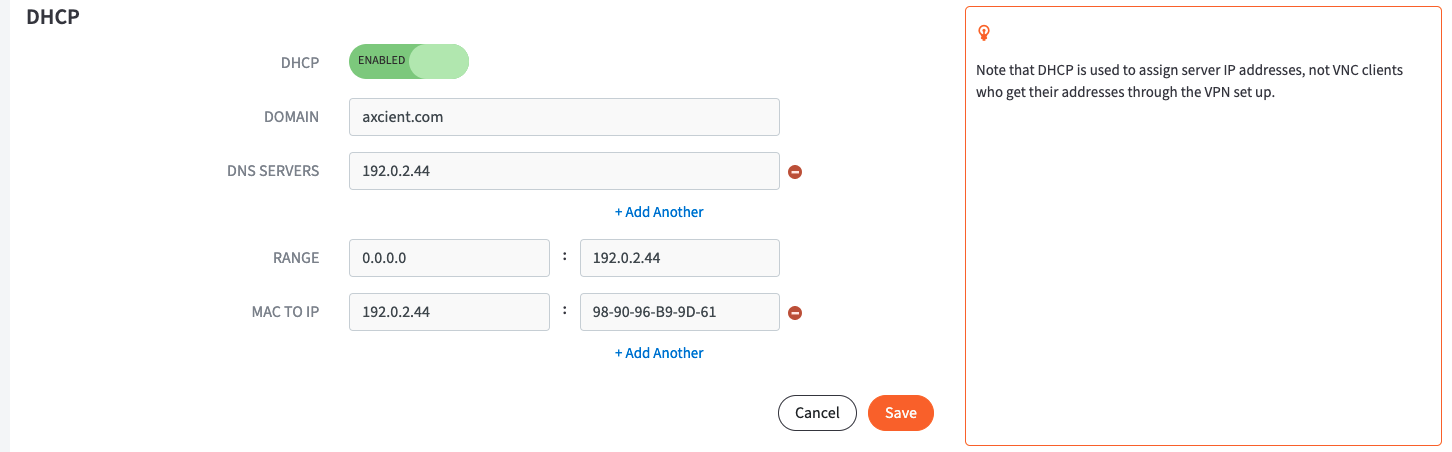
- Required fields:
- Enable the DHCP option.
- In the Domain field, enter the domain name.
- In the DNS Servers field, enter the host name or IP address of the DNS server. Click the Add Another button to add additional DNS servers.
- In the Range field, enter a range of IP addresses that can be used by the DHCP. The range must reside inside one of the Virtual Office's subnets.
- Optional fields:
- In the MAC to IP field, assign an IP address to a server by entering the MAC address and the desired IP address.
- Click the Add Another button to add more entries.
3. Click the Save button to save any new configurations.
Delete
Port forwarding
Port forwarding is not enabled by default but can be configured to work in a virtual office.
How to edit port forwarding settings
To configure or edit the port forwarding settings:
1. On the Configure: Virtual Office page, click the Edit button in the Port Forwarding section. 
2. On the Port Forwarding screen, update the following fields:
- Enable the Port Forwarding option.
- Enter the appropriate values to set the port forwarding rules:
- In the Ext Port field, enter the external port number to be forwarded.
- In the Internal IP field, enter the internal IP address. The internal IP address must fall inside one of the Virtual Office's subnets.
- In the Int Port field, enter the internal port number.
- Click the Add Another button to add additional entries. Repeat these steps as many times as necessary.
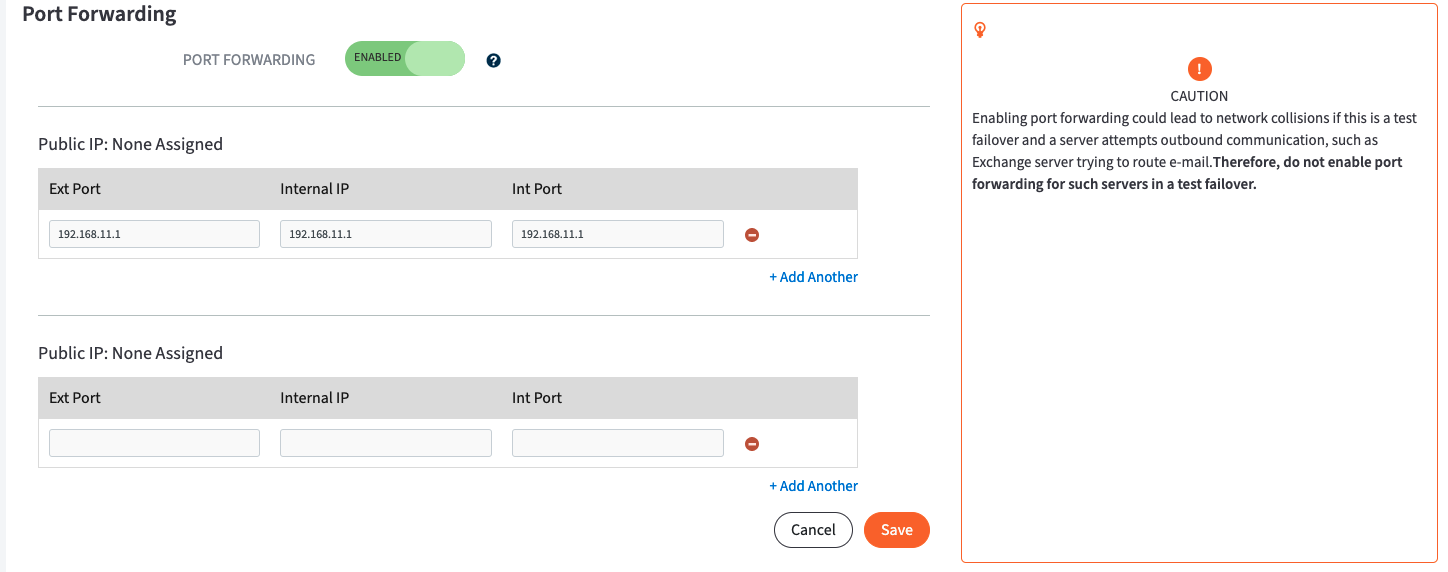
3. Click the Save button to save any new configurations.
Delete
Configure VM auto-shutoff
During a calendar year, each x360Recover protected system receives 30 days of free virtualization in x360Recover Virtual Office.
All virtual machines (VMs) in a Virtual Office test will be automatically shut off after the duration you configure in the auto-shutoff settings.
You can monitor, stop, or extend this automatic VM shutoff date at any time in the Virtual Office (Test) details page.
- If a VM is automatically shut off, its data is preserved until the entire Virtual Office is discarded.
- You are still able to manually turn on a VM that was automatically turned off.
- A Virtual Office test will automatically be discarded 30 days after all VMs (inside that Virtual Office test) remain shut off for 30 days.
- Time accrues for each VM (against its free Virtual Office allowance) only while the VM is running.
- If a VM runs longer than its allotted free time, a daily rate will be charged for each day the VM continues to run past its free allotment.