
|
Essential User Guide Section 5: Recover with x360Recover Subsection: Virtual Office with x360Recover Manager Other resources:
|
This user guide is meant to be a step-by-step guide, with any information essential to understanding and using x360Recover services.
In this section: Virtual Office with x360Recover Manager
- [This page] Virtual Office with x360Recover Manager
- Manage virtual offices
- Create and manage Runbooks
- Configure VPN for virtual offices
In this article:
What is a virtual office?
The cloud failover feature in x360Recover allows you to start virtual machines in the Axcient Cloud of one or more protected devices. You can then create a virtual office running within the Axcient data center, using matching existing server configurations.
Virtual office lets you self-manage using a secure, web-based application, which includes role-based authentication with required MFA.
What can you do with x360Recover virtual office?
- Configure network settings for that virtual office
- Provide secure access to that Virtual Office by configuring VPN
- Configure Site to Site Open VPN, so multiple remote networks connect to that Virtual Office
- Allow VMs to access the internet by enabling outbound connections (disabled by default)
- Establish Port Forwarding rules
- Start the Virtual Office VMs of each server from separate restore points
- Instantly recover production servers and workstations in the Axcient Cloud
- Perform regular full-office recovery tests to ensure backups are always recoverable
How does billing work?
Who is entitled to Virtual Office use?
All x360Recover partners are entitled to 30 days of Virtual Office use per endpoint (protected system) per calendar year.
What counts as use?
- Use is tracked per endpoint (protected system) whenever a system is both rendered and running within a virtual office.
- Merely creating or starting a virtual office for a client does not generate usage.
- Use is tracked based on actual running virtual machines within the virtual office.
- No distinction is made between test mode and live mode when calculating use.
How is use calculated?
Use is calculated per day. Any day in which an endpoint (protected system) is running within a virtual office for any length of time (5 minutes, 5 hours, or all day) will be counted as use.
Use is recorded in one-quarter day increments, such as:
| Virtual machine run time used: | Use calculation: |
| 5 minutes of virtual machine run time | 0.25 days of use |
| 7 hours of virtual machine run time | 0.5 days of use |
| 32 hours of virtual machine run time | 1.5 days of use |
How is overage use calculated?
- Total use is tracked per end point (protected system) per calendar year.
- A calendar year is considered to be January 1st thru December 31st.
- Overage charges apply when total use for any endpoint exceeds thirty days per calendar year
How are overage charges calculated?
Overage charges are calculated at a standard rate: (a) per day and (b) per end point. Please contact your representative with questions about your specific rate.
|
Example scenario:
Charges: Presuming there is no previous use in this calendar year for these end points, the first 30 days of use are included as part of Partner A’s Virtual Office entitlement. The remaining five days are billed as Virtual Office overage charges at Partner A's standard rate: Five (5) days x five (5) virtual machines x Partner A's standard rate |
Virtual office best practices
New and trial partners
- For newly-onboarded partners (and partners performing trials of x360Recover), please take note that Virtual Office use incurred during your trial period is tracked against your annual entitlement.
- Use incurred during your trial is not reset at the end of your trial period.
As a best practice, do not use production client environments for testing and training purposes during your trial period (unless you are specifically doing this at your client’s request).
Using live client machines for trials, testing, and training
We strongly recommend that you do not use live client machines to perform virtual office trials, technician training, onboarding, or other familiarization tests of virtual offices.
The best practice for trials, testing and training is to use your own internal protected systems or other test systems, rather than live client machines.
Monetize production tests
Virtual Office is definitely an opportunity to upsell your clients on enhanced recovery services by offering periodic cloud recovery testing.
Whether you offer testing on an annual, quarterly, or even customized schedule, capitalize on your Virtual Office entitlements to demonstrate full-up cloud recovery scenarios - any time you wish to ‘prove’ the recoverability of your client environments.
Best practice for monetizing production tests suggests that you take standard overage charges into account. Bill your client for testing at a rate that allows you to easily absorb any overages in the event a real recovery becomes necessary (as unexpected emergencies could lead to exceeding your entitlement for a client’s endpoints by a significant amount.)
Test virtual office frugally
Once again, remember that use is use.
- When you are performing virtual office testing, be frugal with your usage.
- Start only the virtual machine you need to test.
- Shut down virtual machines that are no longer needed.
- Do not leave virtual machines running over the weekend unless you are specifically testing something that requires it.
- Stop and discard your virtual offices when you are finished testing.
Unnecessary virtual offices left active with running virtual machines will incur unwanted overage charges.
1. Access the x360Recover Manager (previously RMC) and navigate to a Client Details page. Click the Recovery Wizard button. 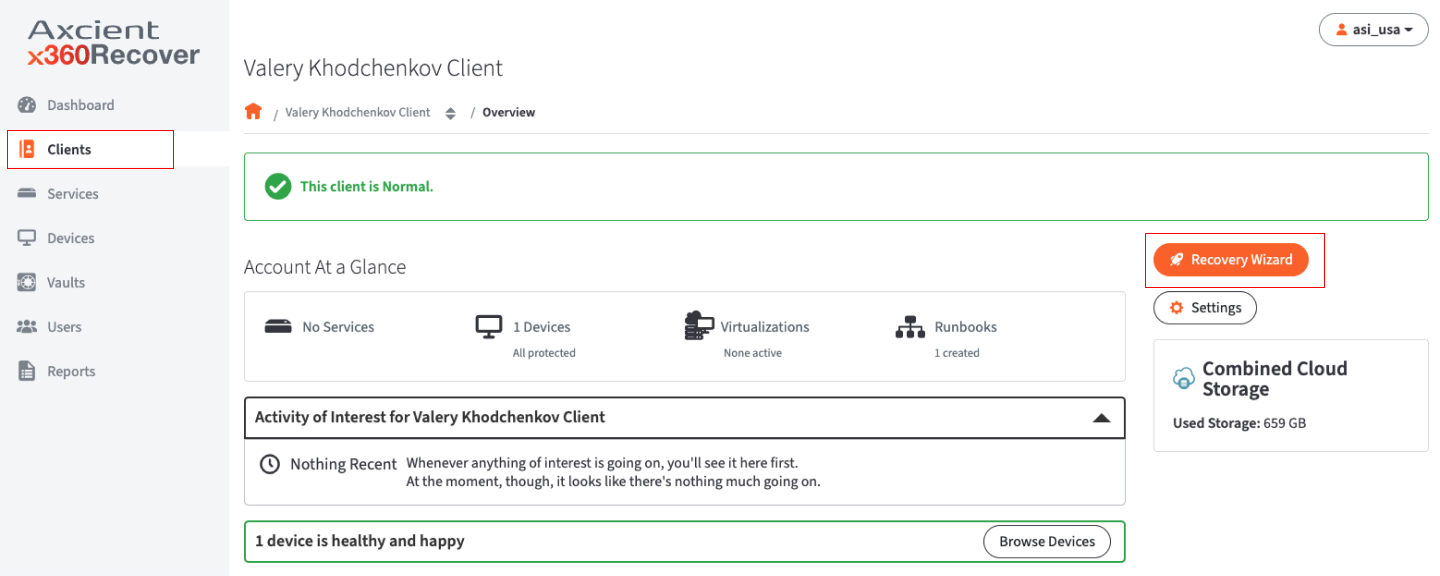
2. Click Make it Virtual. 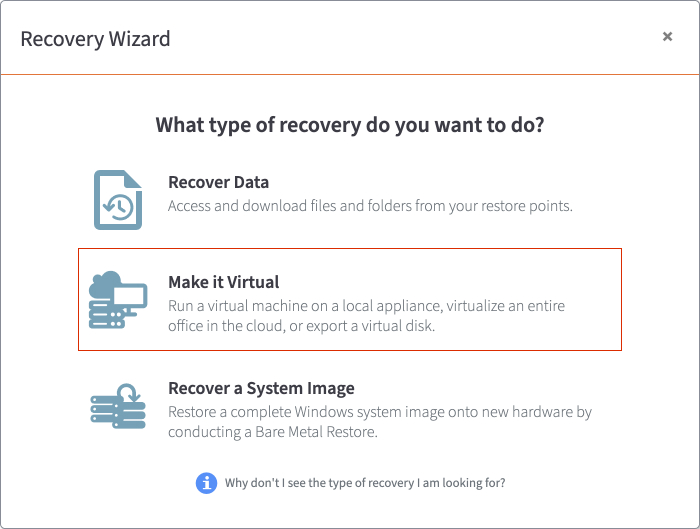
3. Click Start a Virtual Machine. 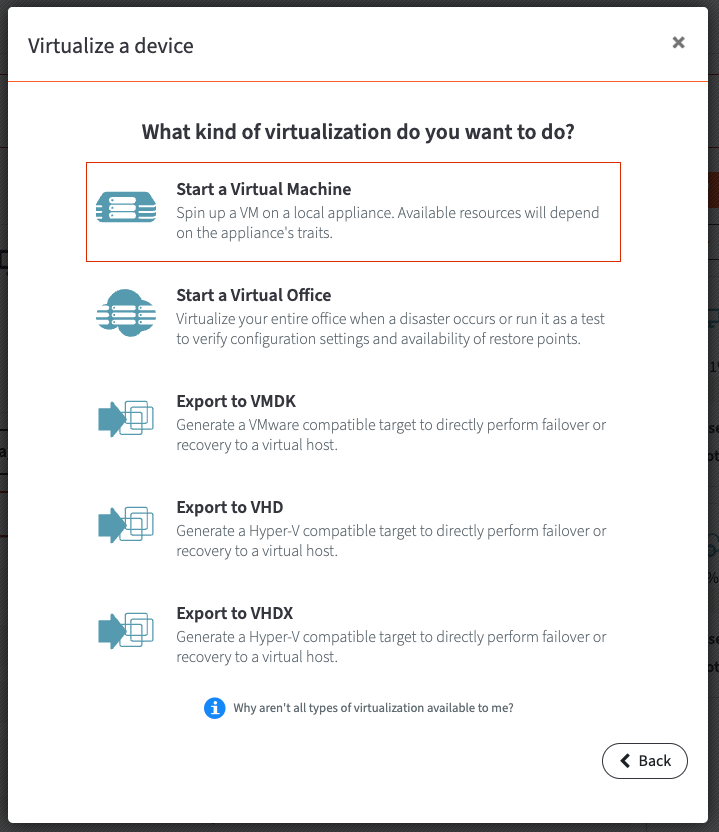
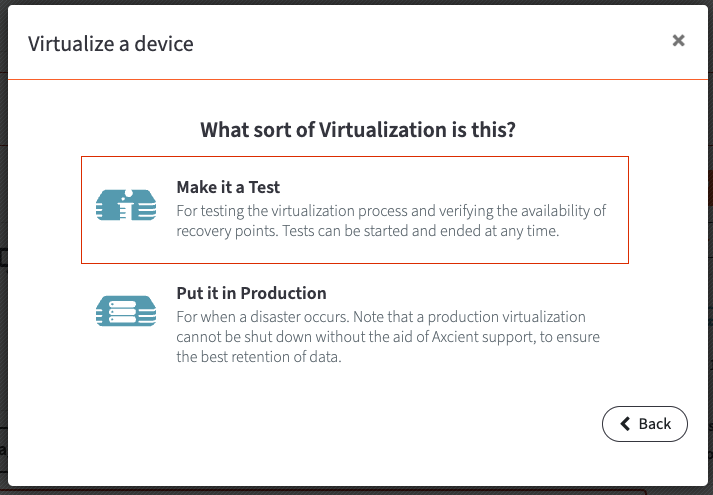
4. Choose the type of virtualization you'd like to do
-
Select the Make it a Test option to test the virtualization process
- This can also be used to verify the availability of recovery points in case of an emergency.
-
Select Put it in Production in the event of a disaster.
- This local failover VM can be used to temporarily replace production devices until a permanent replacement is ready.
5. Verify the settings from this virtual environment are correct.
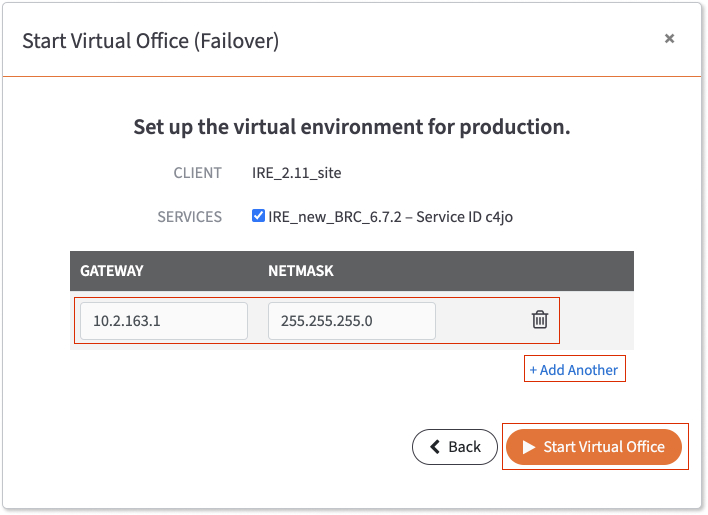
- Under Services, please note that the Direct To Cloud and Cloud Archive options are unselected by default unless the Virtual Office is being started for a Direct-to-Cloud or Vault-only device.
-
Confirm the Gateway and Netmask fields for this client are correct.
-
To set up a new subnet for the Virtual Office, configure the Gateway and Netmask fields.
In the Gateway field, enter the gateway IP address.
This address should be the same as the default gateway on the physical network that the Virtual Office is trying to replicate. For example, if devices are on the 192.168.1.xxx network, the gateway will most likely be 192.168.1.1.
In the Netmask field, enter the netmask value.
-
To add a new subnet for the Virtual Office, click + Add Another.
Please note that you can add up to ten subnets.
Subnets must not overlap with other subnets on the Virtual Office.
To delete a subnet, click the Trashcan icon
-
To set up a new subnet for the Virtual Office, configure the Gateway and Netmask fields.
Notes on default settings
The options available on this page depend on the type of devices this client has.
- The Direct To Cloud option will be displayed if this client has at least one D2C device
- The Cloud Archive option will be displayed if this client has at least one vault-only device.
When this page is initially opened for this client, no services or devices will be selected by default.
- When this page is opened for a service, only this service will be pre-selected by default.
- When this page is opened for an appliance device, only its service option will be pre-selected by default.
- When this page is opened for a D2C device, only the D2C option will be pre-selected by default.
- When this page is opened for a vault-only device, only the Cloud Archive option will be preselected by default.
When all information is correct, click Start Virtual Office to continue.
6. The Virtual Office is being set up. You will taken to the Virtual Office when it is ready.
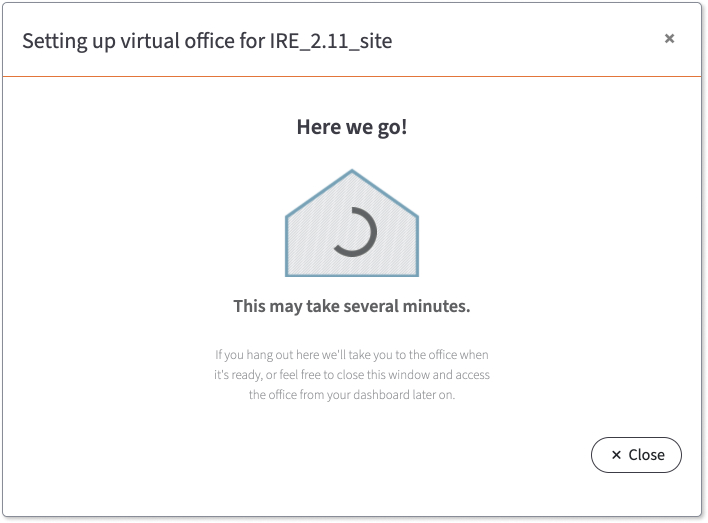
If you opt to close this window, you can access the Virtual Office from the dashboard later.
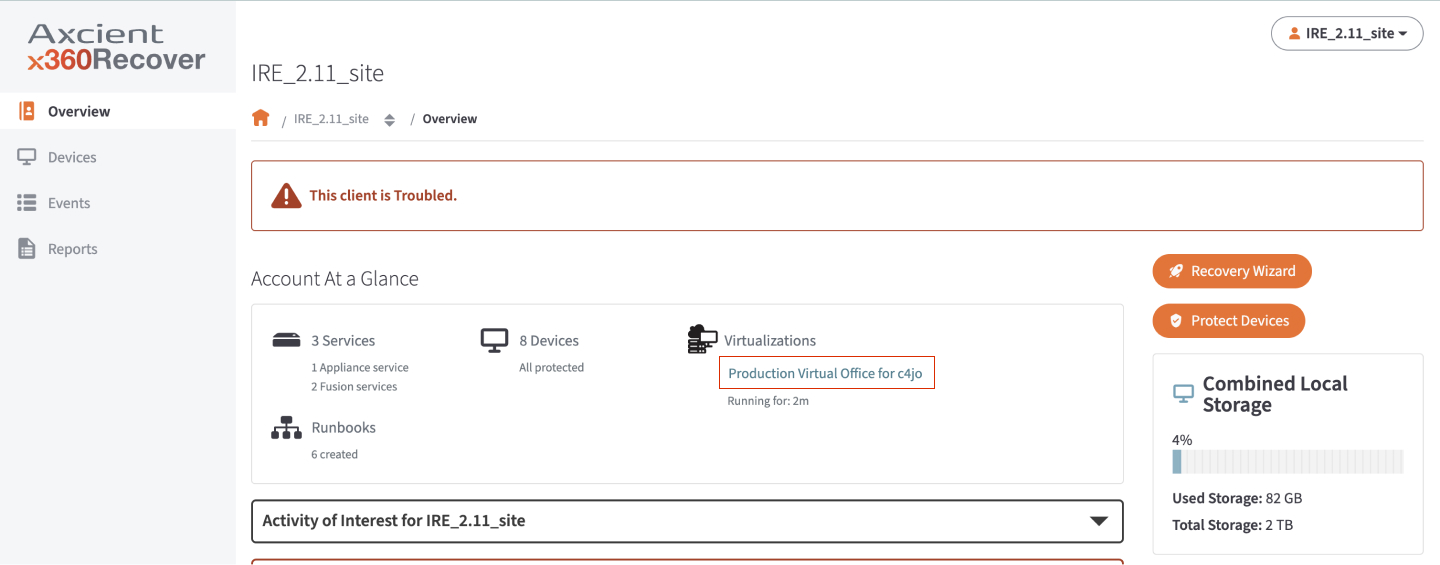
7. Stop and discard your virtual offices when you are finished testing.
For more information around editing and configuring virtual offices, view the next article.