
Steps to migrate to a new private vault
| Important note: Please migrate only ONE system at a time |
Stop and disable replication
STEP 1a. (For Direct-to-Cloud endpoints only) If you are migrating a D2C endpoint, first Stop and then Disable the Replibit Agent Service on the protected system.
STEP 1b. (For appliance endpoints only) If you are migrating an appliance endpoint, log in to the appliance, click the Protected Systems tab on the left navigation and select the appropriate System Name from the table.

STEP 2. Disable replication on the appliance for the desired protected system by following these steps:
2a. Select Replication

2b. Uncheck the Enabled checkbox (on the far-left side of the window.)
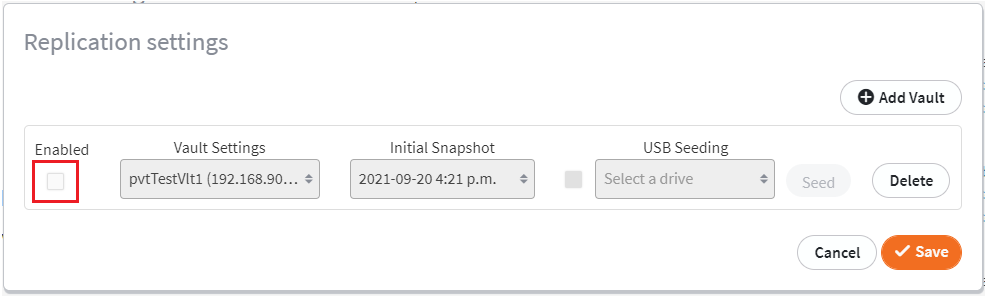
2c. Click Save.
Configure the original vault
STEP 3. On the original vault, set the retention policy for each protected system being migrated to Basic and -1 (keep forever)
Select migration type, add IP address and begin migration
STEP 4. Log in to the vault.
- Click the Protected Systems tab on the left navigation.
- Select the appropriate System Name.

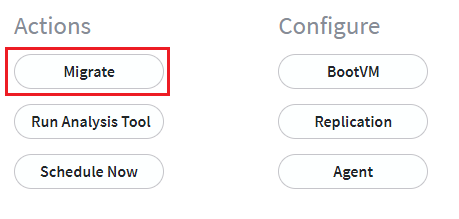
STEP 5. Select Migrate.
STEP 6. Choose a migration method by clicking on the corresponding radio button from the following settings:
Migrate over a network: 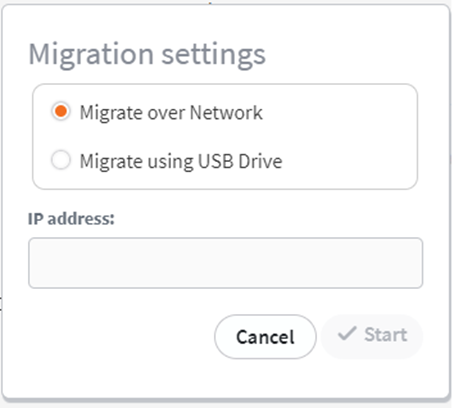 If you select Migrate over Network, enter the IP address of the target appliance If you select Migrate over Network, enter the IP address of the target appliance |
Migrate using a USB drive: 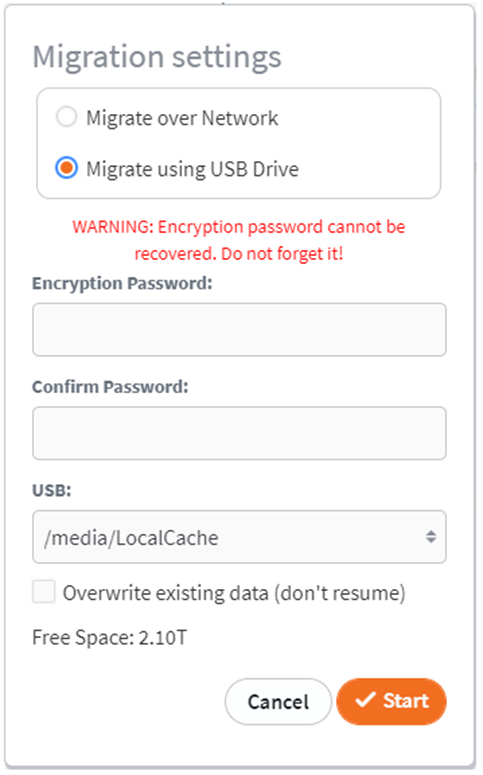 If you select Migrate using USB Drive, choose the desired attached USB disk target. (If no USB drive appears available for selection, the appliance has not detected any connected removable media. Make sure you have connected the USB drive to the original appliance.) If you select Migrate using USB Drive, choose the desired attached USB disk target. (If no USB drive appears available for selection, the appliance has not detected any connected removable media. Make sure you have connected the USB drive to the original appliance.)IMPORTANT NOTE: If you choose to migrate via USB, a manually-entered encryption password is required to secure the data. Please do not lose this password as it cannot be recovered |
STEP 7. Once you have selected your desired migration type and configured the settings, click the Start button to begin the migration process.
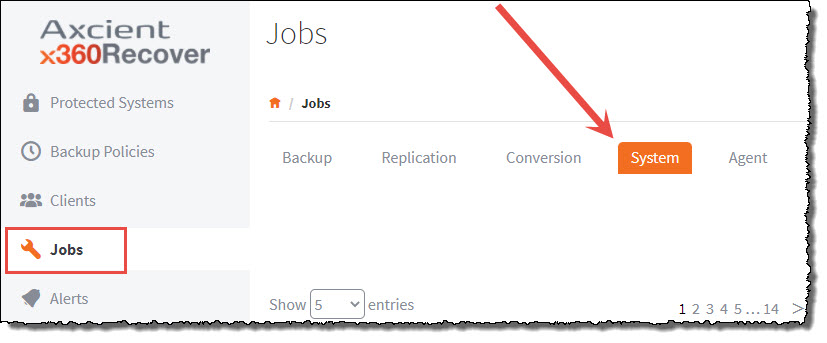
Note: You can monitor the progress from the System tab on the Jobs menu.
Verify the migration has completed successfully
|
7a. If you are migrating over a network , the migration process will automatically complete in a single step: Data will be streamed directly into the storage pool of the target vault. All data transferred is ingested upon receipt. Interrupted (or failed) jobs may be restarted or retried and all data previously sent will remain intact as the transfer is resumed.
Monitor the migration process from the System tab on the Jobs menu. |
|
7b. If you are migrating using a USB drive, wait until the export process completes on the original vault and then connect the USB drive to the target vault.
Monitor the migration import process from the System tab on the Jobs menu. |

STEP 8. Verify the job is successfully completed.
STEP 8a. On the original vault, reset the retention policy for each protected system post migration back to the original or desired policy.
(For D2C endpoints only) - Reconfigure the agent for the new vault
STEP 9a. (For Direct to Cloud endpoints only) After the migration has successfully completed, reconfigure the agent for the new vault.
- To update the agent on the protected system, edit the Aristos.cfg file on the protected system by changing the value of SERVER=<IP address> to that of the target appliance.
(For appliance endpoints only) - Add the new vault to appliance and enable
STEP 9b. (For appliance endpoints only) After the migration has successfully completed, you must (a) add the new target vault configuration to the appliance and (b) enable replication.
Vault configuration
- To add the new vault configuration to the appliance, log in to the appliance and select Vault Configuration from the left navigation. (If the new vault is not already configured, click Add Vault.)
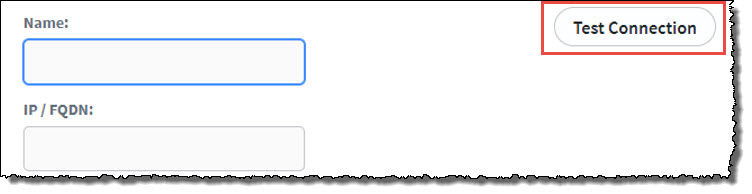
- Provide a friendly Name.
- Enter the vault FQDN or IP address. (This is how the appliance can connect to the vault over the internet.
- Click Test Connection
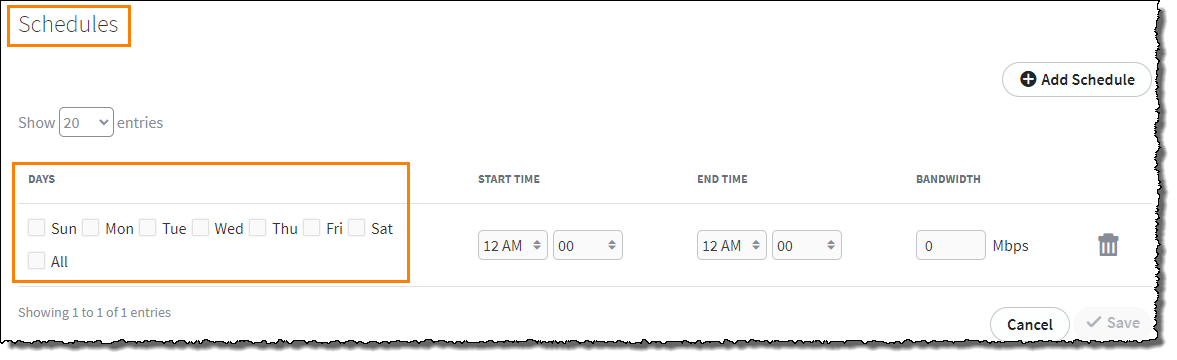
Configure replication schedule and bandwidth
Note: You may add additional segments to the schedule to create more granular network control, as needed.
- Select desired Days of the week
- Select Start time and End time ranges
- Specify Bandwidth, which assigns a maximum network upload speed.
- Click Save to save the vault configuration
Configure replication to the new vault
STEP 10. To configure and enable replication to the new vault, click the Protected Systems tab on the left navigation and select the appropriate System Name.
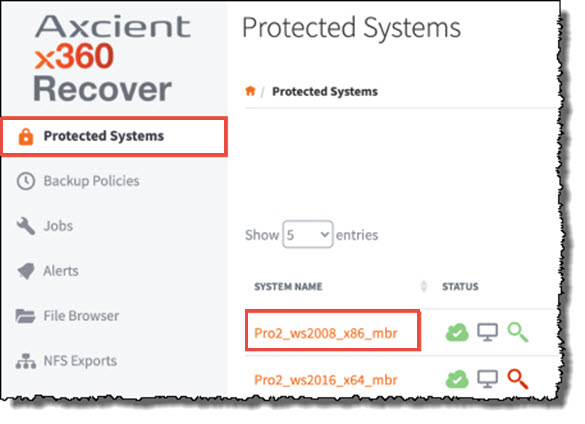
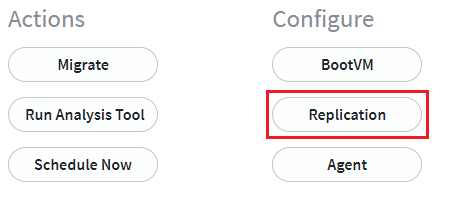
Select Replication.
In the Replication Settings popup, click Add Vault.
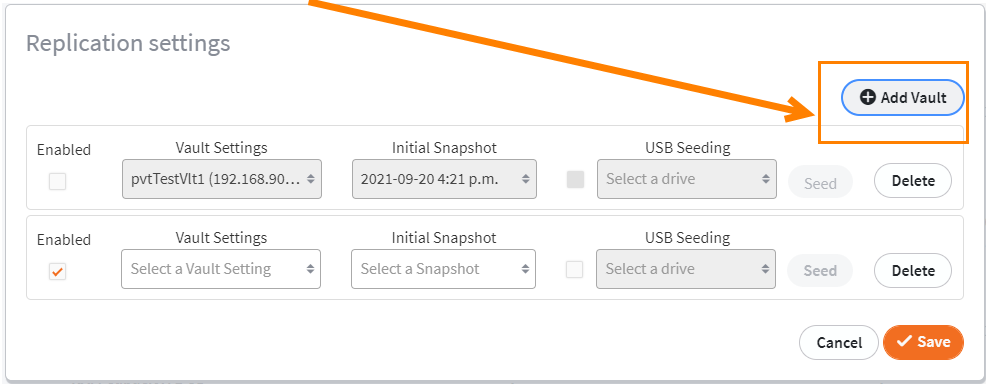
In the Replication Settings popup, click Add Vault
- Select the new vault from the dropdown list
- Select the OLDEST snapshot and click Save
- Do NOT select USB Seeding
Stop replicating to the original vault by deleting the settings
STEP 11. To stop replicating to the original vault, select Delete from the Replication Settings dialog box, and then click Save:
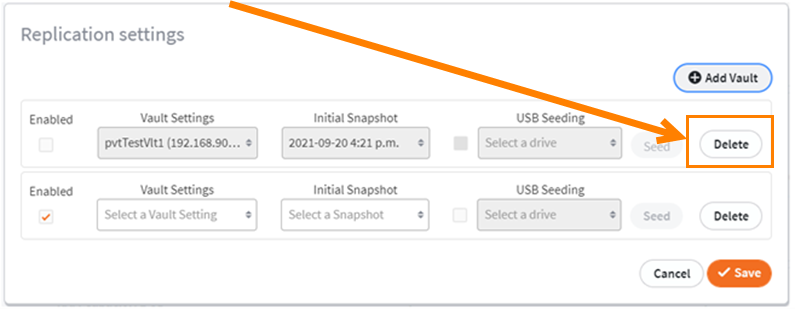
You have two choices in the Delete Replication Settings window:
- Delete Settings and Vault Data (Recommended) - We recommend that you select this choice. This selection deletes both (a) the replication configuration from the appliance and (b) the protected system data from the vault. Note: You must type in the case-sensitive hostname of the protected system to enable deleting the protected system from the vault.
Delete Replication Settings but leave Protected System on Vault - This choice deletes the replication configuration from the appliance .
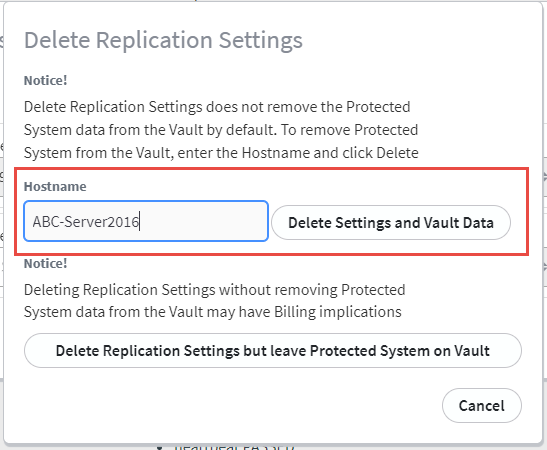
When you have finished, click Save.
Verify backup and replication
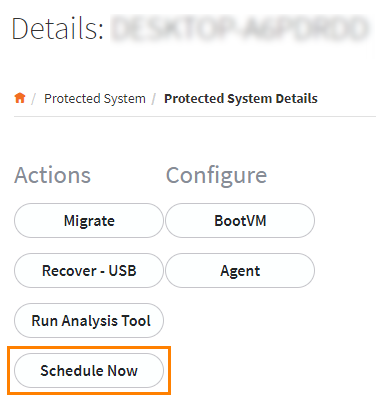
STEP 12. Perform a new backup by navigating to the Protected System Details page:
- For an appliance, the Protected System Details page is found on the appliance
- For D2C endpoints, the Protected System Details page is found on the vault
a. From the choices on the Protected System Details page click on Schedule Now:
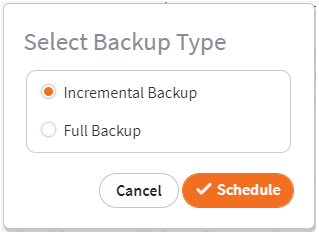
Now, verify that a new backup completes successfully (for both appliance and D2C endpoints).
- You should also verify that the appliance endpoints have successfully replicated the new snapshot to the target vault, once the backup is completed.
SUPPORT | 720-204-4500 | 800-352-0248
- Contact Axcient Support at https://partner.axcient.com/login or call 800-352-0248
- Free certification courses are available in the Axcient x360Portal under Training
- Subscribe to the Axcient Status page for a list of status updates and scheduled maintenance
885 | 1134