
Steps to migrate from one appliance to another
|
Prepare the target appliance
STEP 1. To prepare a new appliance, refer to the following: Appliance setup and first-time login
STEP 2. Verify that no backup or replication jobs are active for the protected system by checking the, Backup and Replication pages on the Jobs menu.
STEP 3. Stop and Disable the Replibit Agent Service on the protected system
Configure the original appliance
STEP 4. On the original appliance, go to the Protected System Details page of the system you are migrating, and select the Migrate button.
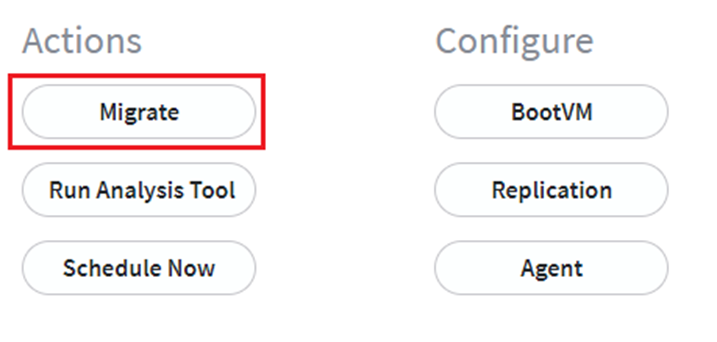
If replication is configured for the protected system, replication settings (including remote connectivity settings defined on the Vault Settings menu of the appliance) will be copied and migrated to the new appliance.
Note: If active backup jobs or recovery operations are in use for this protected system, you will receive this warning:
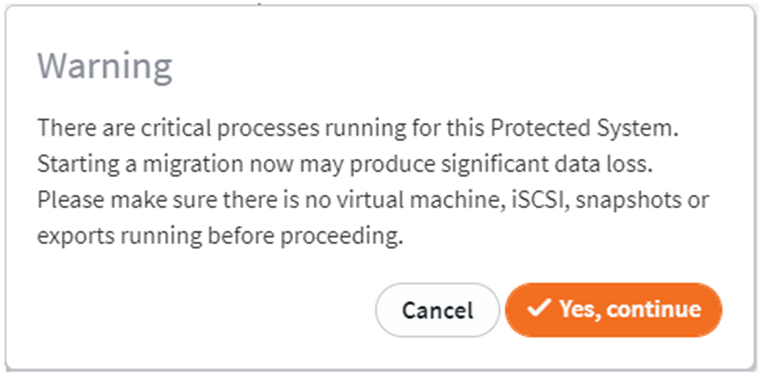
Before continuing, verify that (a) no active backups are running and that (b) no protected system snapshots are in use by any recovery operations.
Choose the appliance migration method
STEP 5. Choose a migration method by clicking on the corresponding radio button from the following settings:
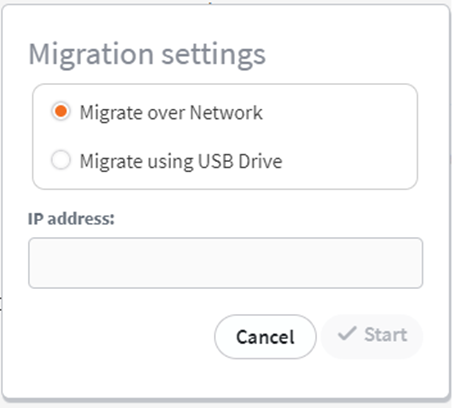
| Migrate over a network: |
| If you select Migrate over Network, enter the IP address of the target appliance.
|
Migrate using a USB drive: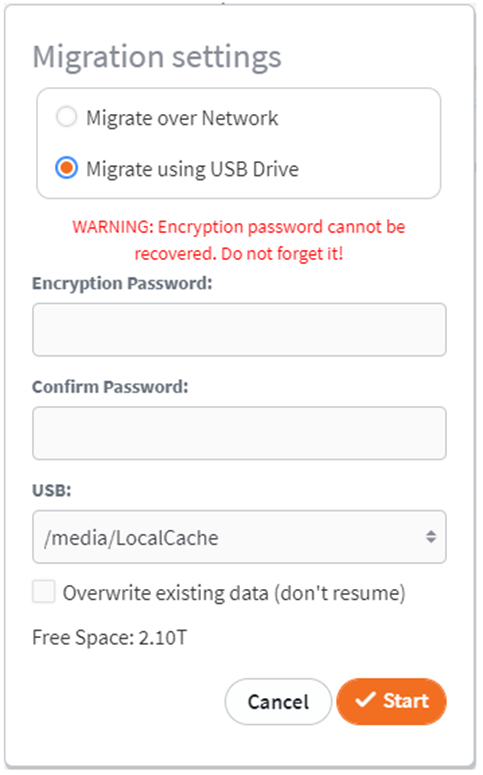 If you select Migrate using USB Drive, choose the desired attached USB disk target. (If no USB drive appears available for selection, the appliance has not detected any connected removable media. Make sure you have connected the USB drive to the original appliance.) IMPORTANT NOTE: If you choose to migrate via USB, a manually-entered encryption password is required to secure the data. Please do not lose this password as it cannot be recovered |
STEP 6. After you have selected your desired migration type and have configured the settings, click Start to begin the migration process.
Monitor the appliance migration
STEP 7. Monitor the progress from the System tab on the Jobs menu pane.
|
When migrating over a network: The migration process will automatically complete in a single step: Data streams directly into the storage pool of the target appliance. All data transferred is ingested upon receipt. Interrupted (or failed) jobs may be restarted or retried and all data previously sent will remain intact as the transfer is resumed.
|
|
When migrating using a USB drive: Once the export process completes on the original appliance, connect the USB drive to the target appliance. From the Protected Systems page, click Import and select the desired protected system. You will be prompted for the Password which you entered previously while exporting the USB. |

Configure the new appliance (agent or IP address)
STEP 8. Once the migration is successfully completed, you must either:
|
1. Configure the agent for the new appliance
|
or
|
2. Change the IP address of the target appliance to match the original appliance.
|
STEP 9. After the migration has completed, you will reassign licenses and remove the original appliance from x360Recover Manager.
To do this:
a. Shut down and power off the original appliance
b. Login to x360Recover Manager
c. Select the Licenses tab on the left navigation panel
d. Assign licenses to the new appliance
e. If you wish to fully decommission the original appliance, delete it.
To delete an appliance: Navigate to the Services (Appliances) page. Verify that the appliance is offline under the Health status column. Click the menu dropdown on the right edge of the Service row and select Delete.
f. If you prefer to keep the original appliance in an inactive state, remove all licenses assigned to that appliance.
STEP 10. IMPORTANT: The retention settings were temporarily adjusted during migration so that snapshots were not deleted while migration was performed. Don’t forget to reset these retention settings later on the target appliance, once migration from the original appliance has completed.
After successful migration, the appliance will automatically select to run a Full Backup as the next backup job.
Note: This "Full Backup" is actually an incremental backup plus fresh metadata. (It is not the same size as a full base snapshot.)
Subsequent backups will be incremental, as usual.
SUPPORT | 720-204-4500 | 800-352-0248
- Contact Axcient Support at https://partner.axcient.com/login or call 800-352-0248
- Free certification courses are available in the Axcient x360Portal under Training
- Subscribe to the Axcient Status page for a list of status updates and scheduled maintenance
885 | 1134 | 1666