
Manage alerts in the vault or appliance
The Alerts menu tab shows the status of any active or recent alerts generated.
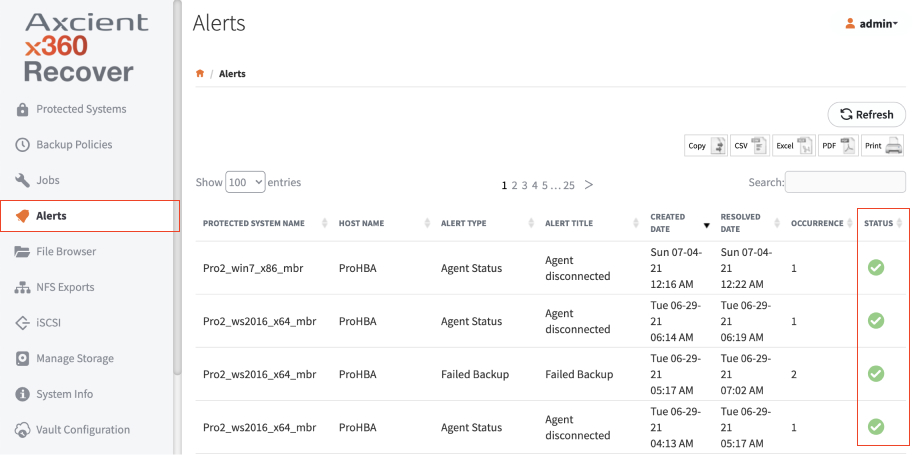
To view and manage alerts:
- Select Alerts on the left-hand navigation menu
- Use the Status column to understand the status of alerts. Alert status can be Active, Closed, or Auto Cleared.
Many types of alerts will be automatically cleared if the next attempt to perform the failed action succeeds.
Some types of alerts must be manually closed. Alerts in an Active state that can be manually closed will have a button in the Action pane.
Do I integrate in x360Recover Manager or in the vault/appliance?
If you'd like to integrate one Autotask or ConnectWise account at the organization or client level, you want to integrate in x360Recover Manager. If you apply PSA settings to your organization, you have the option to override those settings at the individual client level. Instructions are in this article: Integrate x360Recover Manager with PSA.
If you prefer a unique ConnectWise integration and/or alert settings at the vault or appliance level, integrate within the specific vault or appliance. Please note AutoTask integration is not available at this time. Details are covered in this article.
Please be aware the following are available in vault/appliances, but not the x360Recover Manager:
- alerts when a drive fails on an appliance
- bootVM screenshots (available in an x360Recover Manager alert, but not the alert itself)
Integrate an appliance or vault with ConnectWise
Configure ConnectWise
First, you'll want to verify ConnectWise is configured correctly for integration.
Note: You will need access to the System > Members page.
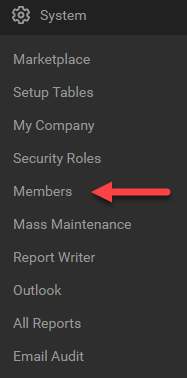
How to configure ConnectWise
1. Once in the System > Members page, go to the API Members tab and press the ‘+’ icon to add a new API Member.

2. For the Member ID, enter “Axcient”.
You will need to fill out all required fields.
If you will be using x360Recover to update your billing: When you get to the Role ID field, the member will need to be set to a role that has permissions to Add, Update, and Close tickets, as well as update quantities to products that have been added to a customer agreement.
Once the form is filled out, press the save button (Do not save and close).
![]()
3. Once you press the Save button, you will have access to the API Keys tab.
Open the API keys tab and press the ‘+’ to create an API key for x360Recover.

4. Type “x360Recover” into the description field then press the Save button.
When you press save, do not press close until you have obtained both the public and private key outside of ConnectWise.
ConnectWise will not allow you to view the private key once you close this screen.

When you press save, the screen should look similar to this:
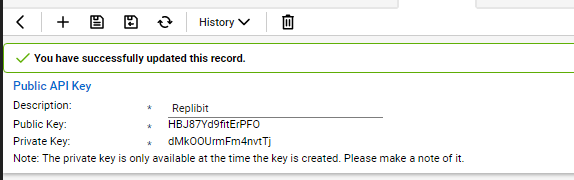
Make note of both keys and keep them somewhere safe. You will use these in the next section to configure x360Recover ConnectWise Integration.
5. Browse to System > Setup Tables > Service Board
6. Select the service board you wish to use for ticketing
7. Go to the Teams tab and confirm that a team is part of your service board.
Configure the appliance or vault
How to configure your appliance or vault:
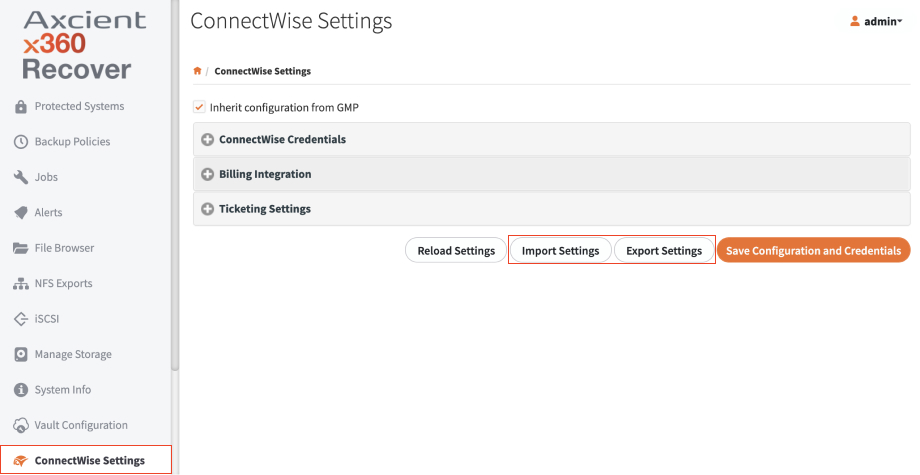
1. When logged into your x360Recover device, select ConnectWise Settings
2. Fill out the displayed information and select Test Connection.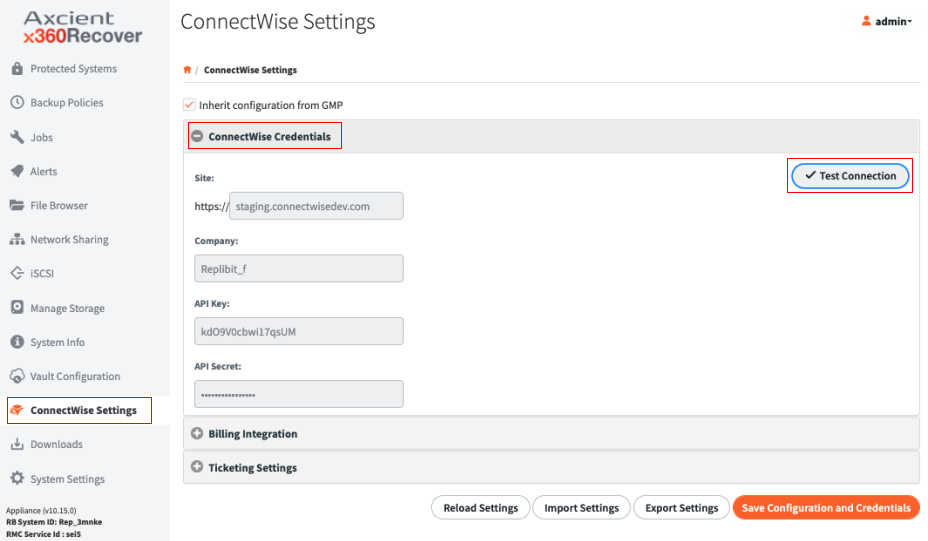 3. Once the connection is successful, the Billing Integration screen will be shown.
If you do not wish to enable billing integration, continue to step 5.
4. Click the box to the left of Enable Billing Integration and select your Customer, Agreement, and Addition. (The addition is updated with total usage in GB on the vault for the appliance you are configuring.)
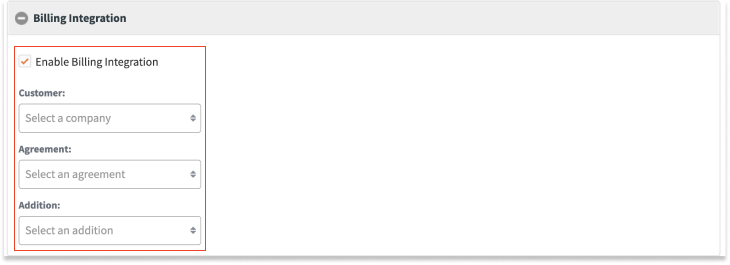
5. Once you have billing set up, click on Ticketing Settings to continue.
6. Select the Service Ticket Company that you wish this device to open tickets as.
7. Check off any alert type you would like to be notified of and select the Service board, New Ticket Status Mapping, and Closed Ticket Status Mapping.
8. Once you have the ticket mappings the way you wish, select Save Configuration and Credentials.
If you wish to use these ticket board settings on other devices, you can download and upload the configuration using the Import Settings and Export Settings buttons.
9. After your settings are saved, you can test them by selecting the type of alert you want to open a test ticket as and press the Create Test Alert button.
