
Overview
Before you can begin taking backups of your systems, you must first install the backup agent.
Agent installation can take various forms, depending on:
- the operating system you are deploying
- if you backup to an appliance (NOTE: Additional licenses may be required)
- whether you perform backups using Direct-to-Cloud (D2C)
- if you are manually installing agent software or using remote deployment (RMM)
Need details on how to deploy a D2C agent via ConnectWise Asio?
Refer to Deploy D2C agents via ConnectWise Asio
STEP 1. Windows, macOS or Linux?
For Windows operating systems, continue with the following steps.
- For macOS, see (macOS) Install an agent - x360Recover
- For Linux operating systems, see (Linux) Install an agent - x360Recover
STEP 2. Download the agent installer
 |
View the walkthrough simulation |
The x360Recover agent installation file can be downloaded from several locations.
- The appliance Downloads page
- The vault Clients page (for client-specific Direct-to-Cloud installer image)
-
Recover Manager (2 minute how-to video)
- The Dashboard page
- The Client page
- The Vault or Appliance details page
- The Axcient Downloads page
What's the difference between the download locations?
- When manually installing the agent in Direct-to-Cloud mode, the vault Clients page provides a download to a special version of the agent installer. This special version contains client information and a token ID in the filename. This token ID is used to identify which client the agent will register.
- When deploying in appliance mode (or for bulk distribution via RMM tools in either appliance or Direct-to-Cloud mode) you can use command-line parameters with the normal agent installer file to (a) perform silent install and/or (b) define the token ID for D2C.
- When downloading from Recover Manager you will be presented with a wizard to determine which type of installation and client you are deploying to. You will also be presented with the appropriate agent download based on your selections and starting point.
Note: To obtain the token ID for RMM deployment, you can select the ‘key’ icon from the Vault Clients page for the given client.
2.1. Click on the token ‘key’ icon in the row belonging to the desired client.


2.2.To obtain an agent file for user interactive installation in Direct-to-Cloud mode for a particular client, click on the Windows icon for the appropriate client
- This agent installation file will be specific to the client selected
- The agent installation file name will be embedded with the token id for the selected client
- All protected systems deployed with this installer will register as belonging to this selected client.
Notes on token IDs:
The installation file for Windows downloaded from this page contains a temporary token and identifying information embedded in the filename. Client-specific agent installation packages have a custom naming format that identifies the client and contains a special registration token ID specific to the client.

Starting with Agent version 2.41 and newer, it is no longer necessary to use the custom filename agent deployment method.
When using the standard ‘agentInstaller.msi’ named installer, the agent will (a) prompt you to select from appliance or Direct to Cloud mode, and (b) request the Token ID.
Clicking the ‘Key’ icon for the client will display the Token ID.

Token ID’s are now permanent and no longer expire automatically.
To revoke a Token Id, click the ‘Key’ icon to display the current token and click Replace to revoke it and generate a new one.
RMM tools may be used to deploy the agent in bulk or via policy
• We recommend using the standard ‘agentInstaller.msi’ file when deploying the agent for Windows and pass the /TOKENID command-line parameter to invoke silent installation of the agent
IMPORTANT NOTES: If you are converting an existing protected system on an appliance to Direct-to-Cloud, you must first uninstall the existing agent. (When an agent is already installed, the D2C installer cannot re-install in Direct-to-Cloud mode.) ALSO: Make sure you do not delete the agent installation folder after uninstalling the appliance agent. The configuration information left behind (after uninstalling the agent) is used to correctly identify the agent to the existing vault replica of the data.
For step-by-step instructions on how to convert an existing appliance agent to Direct-to-Cloud (D2C), refer to Convert an existing appliance agent to Direct-to-Cloud (D2C)
Important Note: Agent 3.x does not yet support upgrading and converting from older 2.x agent installations and vis versa. If you have previously installed an agent, when uninstalling and reinstalling, be sure to select the same agent family. Switching agent versions will cause a new protected system identity to be created on the appliance or vault. If you need to switch between 2.x and 3.x agent versions (not currently recommended) contact support for assistance in migrating the protected system identity settings in the agent configuration files.
2.3. Select agent version
x360Recover Agent for Windows now has 2 versions, the classic Replibit / x360Recover Agent for Windows (2.x) and the new xCloud / x360Recover Agent for Windows (3.x)
Agent 2.x for Windows
Agent 2.x for Windows is the traditional 32-bit agent binary that supports all versions of Windows, from Windows 7 / Server 2003 up through Windows 11 / Server 2025. This agent version supports both 32-bit and 64-bit versions of Windows.
Agent 3.x for Windows
Agent 3.x for Windows is a new 64-bit agent binary that supports ONLY 64-bit Windows operating systems, including 64-bit versions of Windows desktop, but NOT any 32-bit Windows versions. Agent 3.x for Windows requires Windows 8 (desktop), or Server 2008 R2 (server) operating system versions or NEWER.
Important Note: At this time, Agent 3.x for Windows is released ONLY for Windows on Arm CPU architecture. Full release of Agent 3.x for Windows on both Intel / AMD and Arm CPU systems will occur later in 2025.

Select which version of Agent for Windows you would like to download and then click the Windows Agent download button
Which Agent Should I Choose?
Until the full Agent 3.x for Windows is released later in 2025, always select Agent 2.x for Windows for Intel / AMD based systems, and only select Agent 3.x for Windows for Arm based systems.
STEP 3. Choose an installation method and perform install
|
View the walkthrough simulation |
Below are instructions for two methods available for installing the agent:
3.1. Perform interactive installation (User interaction is needed)
3.1.1. Copy the agent installer to the system (or to a network file location accessible from the system.)
3.1.2. Double-click on the installer to begin the installation.
3.1.3. Click Next to begin the agent installation.
 |
 |
3.1.4. Accept the license agreement and click Next.
 |
 |
3.1.5. Specify the installation directory for the agent. (Typically, you will accept the default value.) Click Next to continue,
Note: The agent needs space for index and hash files in the installation directory. Normally, the required space is approx. 500KB for each TB of total disk size for every volume in the system (plus space for log files, etc.)
If your C: drive is tightly constrained on free space, you may wish to install the agent onto another drive with more space available.
 |
 |
3.1.6. Select the agent installation mode (either Direct-to-Cloud mode or Appliance mode) and click Next to continue.
 |
 |
3.1.7. You will now install the agent, using either Direct-to-Cloud mode or Appliance mode.
Direct-to-Cloud installation
If you have selected to install the agent in Direct-to-Cloud mode, enter the TokenID value for the client and vault being configured.
 |
 |
Note: When you are installing using a client-specific Direct-to-Cloud agent, the appliance IP field will be greyed out. The vault address will be automatically retrieved, based on the token ID you provided in the agent installer filename.
Click Next to continue,
Appliance mode installation
(NOTE: Additional licenses may be required for appliances)
3.1.7.a. (Required step) Enter the appliance IP address
 |
 |
Note: Enabling the System Tray Application will display an agent-monitoring application to the user in the Windows System Tray. For further details see: (Windows) Systray Monitor Utility - x360Recover
3.1.7.b Optional step: You may choose to assign an appliance access control password to this agent.
Enter the password twice in the fields provided to confirm you typed it correctly.
IMPORTANT: If you choose to enter an optional password, the specified password will be required every time you wish to access the backup data on this protected system. This means you will need to provide the password when you perform any data recovery, when you make agent configuration changes using the application UI, and when you delete the protected system or any of its snapshots.
Note: If you later decide to add, change, or remove this optional password, you can do so using a Powershell script located in the agent installation folder. For instructions, see Change or reset an agent access control password
3.1.7.c. Optional step: You may specify a limited set of disk volumes to be backed up.
- By default, this value is left blank, indicating that all supported volumes are to be included in the backup.
Note: Volumes which are always excluded (by default) from backup include:
- Volumes using incompatible filesystems, like FAT or ReFS
- Volumes being used by the agent for Local Cache
- Nested volumes (such as a VHDX file on C: mounted as C:\VMDisk; The mount point will be excluded, because Microsoft VSS cannot snapshot both the mount point and the physical disk image file in the same dataset.)
3.1.7.d. Optional step: Enable the Systray Agent Monitor Utility
Enabling the System Tray Application will display an agent-monitoring application to the user in the Windows System Tray. For further details see: (Windows) Systray Monitor Utility - x360Recover
3.1.8. When you have completed all desired fields, click Install.
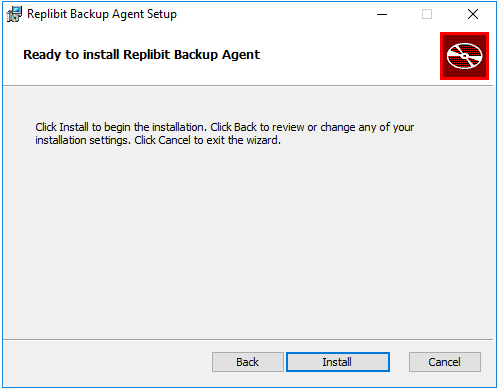
3.1.9. Click Finish to close the installer.
Delete3.2. Perform silent agent installation (For mass deployment using scripting or RMM)
REQUIRED parameters for silent install
The x360Recover agent supports a set of command-line parameters for performing a silent install during mass agent deployment using scripting or RMM tools.
The presence of one of these parameters implies that the agent will be installed silently, with no user interaction.
- One of these two parameters is REQUIRED
- Only ONE may be specified
The agent understands the following parameters:
IMPORTANT NOTE:
Agent 2.x for Windows is a Microsoft Installer (MSI) installer package. Deploying an MSI package from the command line utilizes the MSIEXEC command, for example:
msiexec agentSetup.msi SERVER=192.168.90.20 ENABLE_SYSTRAY=true
Agent 3.x for Windows is an executable (EXE) installer package. Deploying an EXE installation package simply requires executing the installer from the command line, for example:
xcloud-agent_arm64.exe /SERVER=192.168.90.201 /ENABLE_SYSTRAY=true
Note that MSI and EXE packages have slightly different formats for passing command line parameters
| One of these mandatory parameters is REQUIRED | Example |
|
SERVER=<appliance IP address> Specifying the parameter SERVER=<appliance IP address> installs the agent in appliance mode and registers it with the appliance as the specified IP address |
2.x Agent /SERVER=192.168.90.201 |
|
TOKENID=<Token ID> Specifying TOKENID=<Token ID> installs the agent in Direct-to-Cloud mode and registers it with the vault from which the token ID was retrieved (the client account used to create the token) |
2.x Agent /TOKENID=8858e64411f942a3b55497120d50587e |
Optional parameters
| Description of optional parameter | Example of parameter | |
| Specify volumes to include in the backup |
2.x Agent /BACKUP_VOLUMES=<Drives> |
2.x Agent BACKUP_VOLUMES=C,E,G 3.x Agent BACKUP_VOLUMES=C,E,G |
| Specify the Access Control password Note : When setting Access Control passwords, enclose arguments with special characters in double quotes. |
2.x Agent /PASSWORD="<Access Password>" |
2.x Agent PASSWORD="MyP@55w0rd!"
|
| Configure presence of the Agent Monitor System Tray Application |
2.x Agent /ENABLE_SYSTRAY=[true\|false] |
2.x Agent /ENABLE_SYSTRAY=true |
| Specify the path to use for maintaining a Local Cache (Direct-to-Cloud only) |
2.x Agent /LCPATH=<path> |
2.x Agent LCPATH=\\MyNAS\Shared\LocalCache 3.x Agent / LCPATH=”\\MyNAS\Shared\LocalCache” |
| Specify the network share User Account for Local Cache (Direct-to-Cloud only) |
2.x Agent /LCUSER=<User Account> |
2.x Agent /LCUSER=MyDomain\CacheUser |
| Specify the network share User Password for Local Cache (Direct-to-Cloud only) |
2.x Agent LCPASSWD=<Password> 3.x Agent /LCPASSWD=<Password> |
2.x Agent /LCPASSWD=L0c@lC@ch3!! |
Notes on local cache:
- Local cache should only be used when deploying in Direct-to-Cloud mode. (It serves no purpose in local appliance mode.)
- The local cache path must be specified as a local drive path when using locally-attached storage, such as a USB disk.
For example: LCPATH=Q:\LocalCache -
IMPORTANT: The local cache path CANNOT BE specified as a local drive path when using network storage. You must use UNC path nomenclature, like ‘\\<Server>\<Share Name>\<Folder Name>’ etc. Network shares mounted to a drive letter in the user environment are not accessible to the agent services, so the agent needs to know where the actual shared folder exists on the network.
Perform a silent installation of the agent
Important: Always use the generic agentInstaller.msi package or xcloud-agent.exe file when performing command-line installation. Do not use the client-specific agent installer package. (The tokenid parameter present within the agent installer filename will override any command-line SERVER or TOKENID value passed when executed.)
Note: If you have downloaded the client-specific agent installer package, simply rename it (i.e. to 'agentInstaller.msi' etc.) to remove the token and client information from the installer before deploying.
STEP 1. Launch the agent installer from the command-line, either
(a) directly inside a Windows CMD.exe shell, or
(b) via scripting run via Group Policy or via RMM management utilities.
The 2.x agent uses Microsoft Installer:
| msiexec /i <installer file name> /q SERVER=192.168.90.201 <more parameters> |
The 3.x agent uses an executable Installer:
| xcloud-agent_arm64.exe /SERVER=192.168.90.201 <more parameters> |
STEP 2. Deploying in Direct-to-Cloud mode looks something like this on the managed system:
| msiexec /i AgentInstaller.msi /q TOKENID=6484c41f970d49ac8156b9c967e7a295 <more parameters> |
STEP 3. You may also include other command-line options (such as PASSWORD) to set the agent password/ passphrase, etc.

Or for defining local cache parameters.

Note: To completely hide the Agent 2.x installation in the background, include the ‘/q’ option. Omitting ‘/q’ with msiexec will display the installation progress window during installation.
Agent 3.x is fully silent in the background whenever you provide /SERVER or /TOKENID parameters.
Managing the Systray Agent Monitor Utility
Configuration of the Systray Agent Monitor Utility can be managed on existing agent deployments using the agent installer.
To mass enable or disable the presence of the systray utility on the protected system with Agent 2.x for Windows, you can use the agentSetup.msi installer package and redeploy the agent with the ENABLE_SYSTRAY=<true|false> parameter.
Using your RMM or other tools, issue the installer command
msiexec /i AgentInstaller.msi /q ENABLE_SYSTRAY=[true|false]
For both 2.x and 3.x agent installations, you may configure the Systray parameter from the Agent Settings tool on the Vault or Appliance protected system details page

SUPPORT | 720-204-4500 | 800-352-0248
- Contact Axcient Support at https://partner.axcient.com/login or call 800-352-0248
- Free certification courses are available in the Axcient x360Portal under Training
- Subscribe to the Axcient Status page for updates and scheduled maintenance
1582 | 1820 | 1852 | 1979