
Runbooks allow you to configure an automatic deployment plan for virtualized devices. Configuring a Runbook allows you to specify:
- Devices to be virtualized
- The order in which the devices should be virtualized
- Resources to allocate to each device
- Wait time between the deployment of each device
Runbooks can be leveraged for both Test and Production virtual offices and are unique to each virtual office.
You must first configure a subnet in the Network section that matches the subnet of the devices to be virtualized. By default, the subnet settings in the Network section are set by the network settings of the appliance.
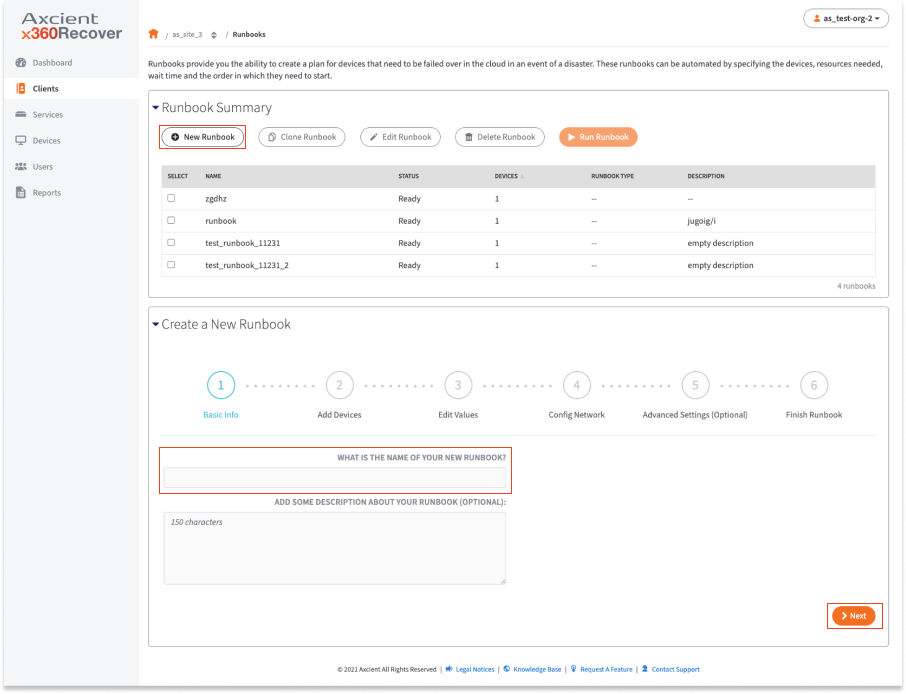
Create a new Runbook
How to create a new Runbook
1. On the Client Details page, click the Runbooks link.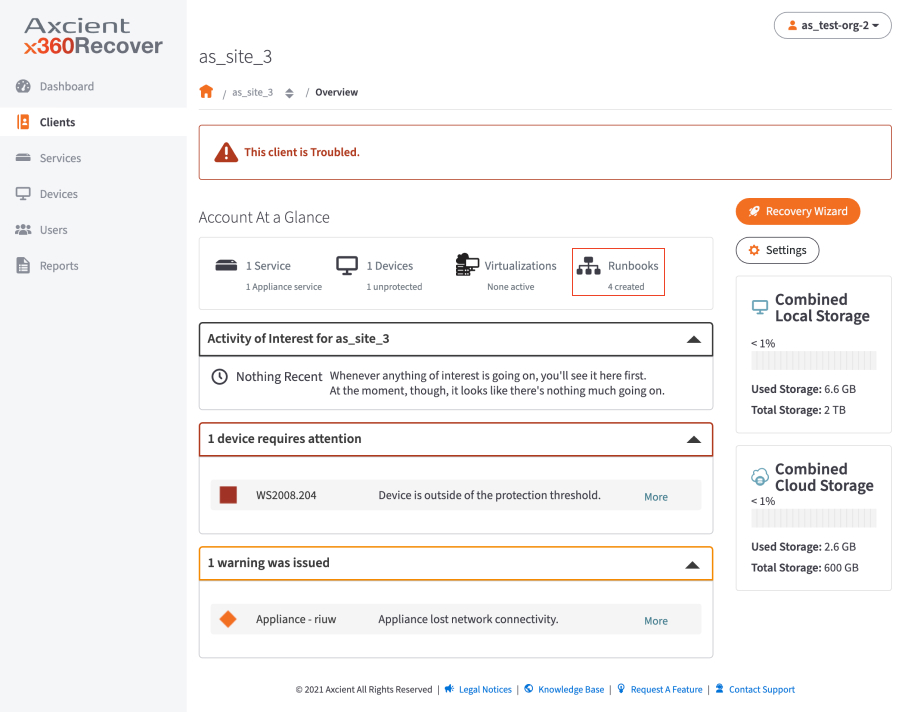
2. In the Create a New Runbook section of the page, enter the name of the new Runbook.
- Optionally, enter a description for the Runbook. Click the Next button to continue.
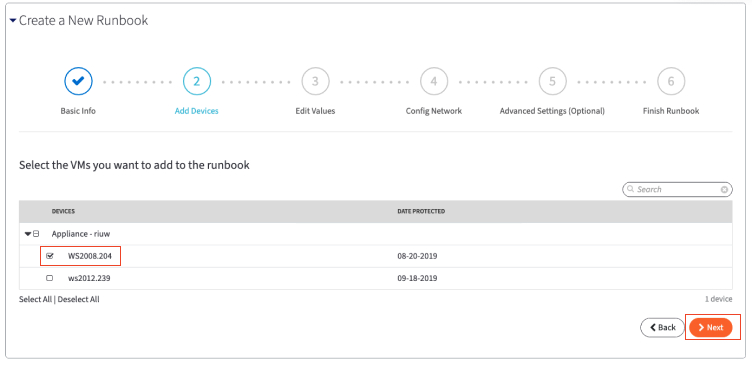
3. In the Add Devices screen, use the checkboxes to select the devices to include in the Runbook.
Click the Next button to continue.
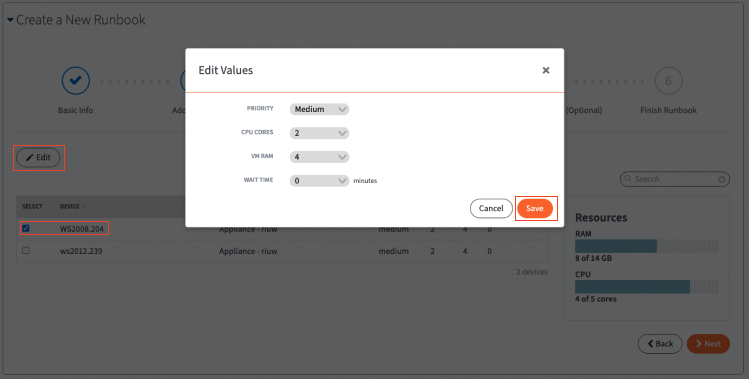
4. In the Edit Values section, review the selected devices.
Click the Edit and Delete buttons to edit or delete any of the devices.
You will be able to edit the following:
- In the Priority tab, specify the boot priority of the selected device(s). Devices with the same boot priority will be started at the same time.
- In the CPU Cores tab, specify the number of CPU cores to allocate to the selected device(s).
- In the VM Ram tab, edit the amount of virtual RAM to allocate to the selected device(s).
- In the Wait Time tab, edit the wait time between boot priority. For example, if you have a device with a Medium boot priority and a 15 minute wait time, and then a second device with a Low boot priority, the Runbook will wait 15 minutes before deploying the Low priority device. You can also configure different wait times between devices with the same priority.
Click the Save button when you are finished.
Click the Next button to continue.
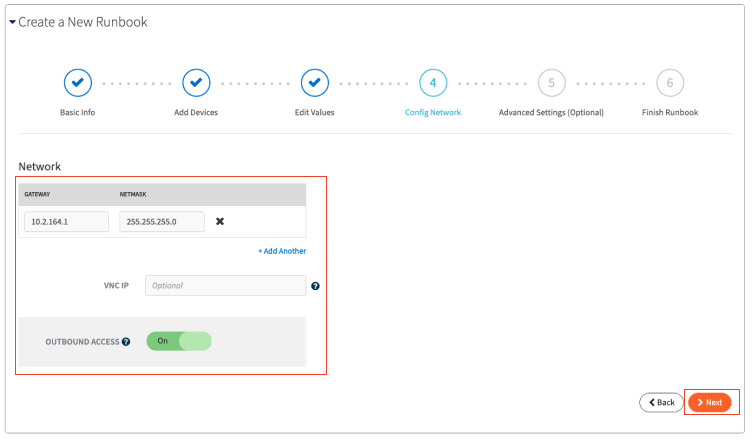
5. In the Network screen, you can configure the following:
- In the Network section, configure the Gateway IP and Netmask of the virtual office. The Gateway IP is the address that all running virtual machines will use as the default network gateway for internet access
- In the VNC IP section, enter the IP address for the VNC clients, which can be any available (unused) IP address in any of the configured Virtual Office LAN subnets. This field is optional when you configure the network in the Runbook. If you leave this field blank, it will default to the Gateway IP address defined above. Each running Virtual Machine will have a unique VNC Port number assigned randomly. To connect with your VNC client, establish a VPN connection and connect to the VNC IP address on the port assigned to the system you wish to connect to.
- Optionally, enable the Outbound Access option to allow outbound access to the internet. Enabling outbound access configures firewall rules to allow outbound internet communications from any of the Virtual Office LAN subnets
Click the Next button to continue.
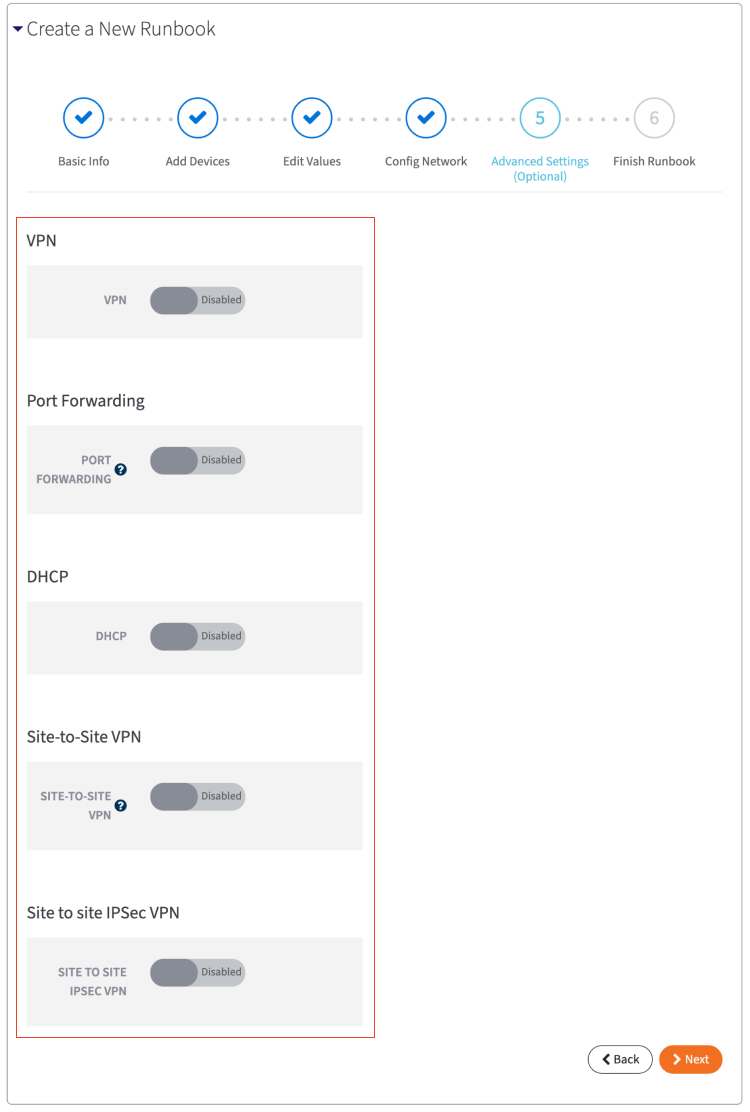
6. In the Advanced Settings section, you can enable and configure the following methods for accessing devices in the virtual office:
- VPN
- User Authentication
- Port Forwarding
- DHCP
- Site-to-Site VPN
- Site-to-Site IPSec VPN
You can also update these settings after the Runbook has started from the Configure Office page.
Click the Next button to continue.
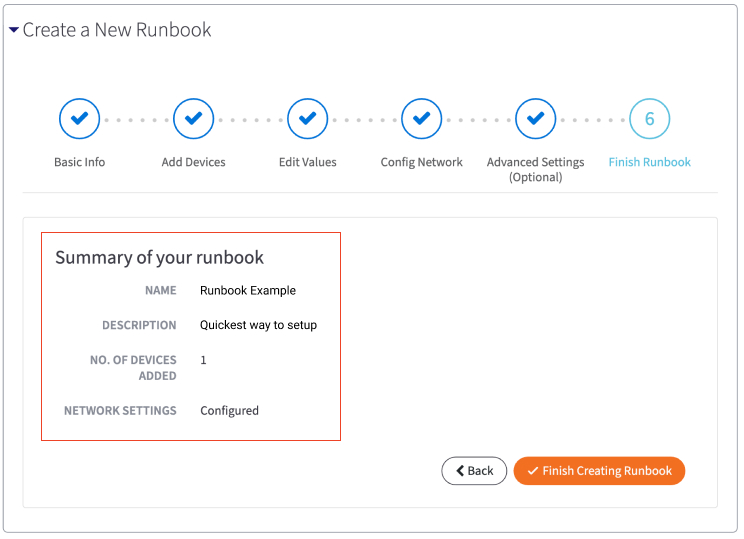
7. In the Finish Runbook screen, review summary information to confirm that the Runbook settings are correct.
Click the Finish Creating Runbook button to create the Runbook.
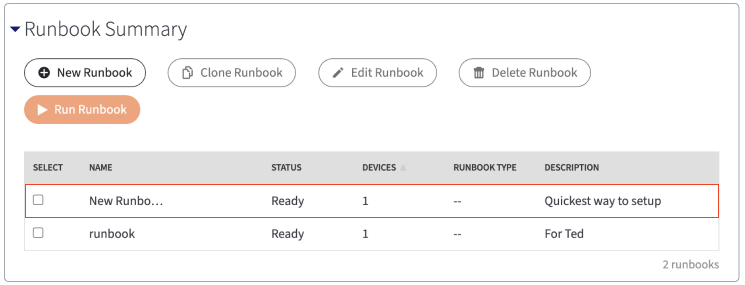
The Runbook will now be listed under the Runbook Summary section where you can edit or delete as needed.
Start an existing Runbook
How to start an existing Runbook
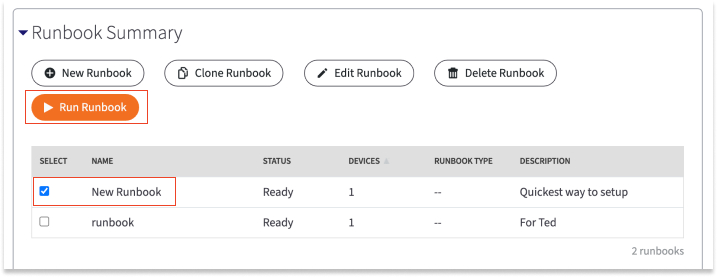
1. On the Client Details page, click the Runbooks link found in the Account at a Glance section of the page.

2. In the Runbook Summary section of the page, use the checkboxes to select the Runbook and then click the Run Runbook button.
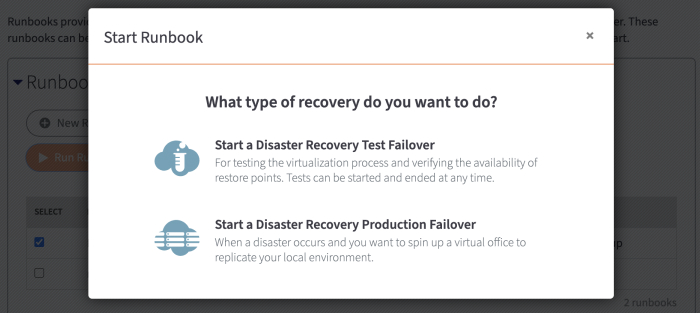
3. On the Start Runbook screen, select the type of Virtual Office to deploy (Test or Production).
4. The Runbook will start and the Starting Runbook screen will display the progress.
You can click the Close button to leave the screen while the Runbook starts.
DeleteYou can start a Runbook in one of the following ways:
- On the Site or Service page, click the Recover button and then select a Runbook.
- On the Runbook page, select a Runbook and then click the Run Runbook button.
A Runbook cannot be started if:
- A virtual office or Runbook is already running -- Runbooks are site-specific and only a single Runbook may be running at a time
- No Subnet is configured in the Runbook for at least one device
- If a subnet is configured for only one or some of the devices, you will need to create the additional subnets in the Virtual Office Configuration page in order to virtualize the remaining devices when the Runbook is in a running state.
Edit a Runbook
How to edit a Runbook
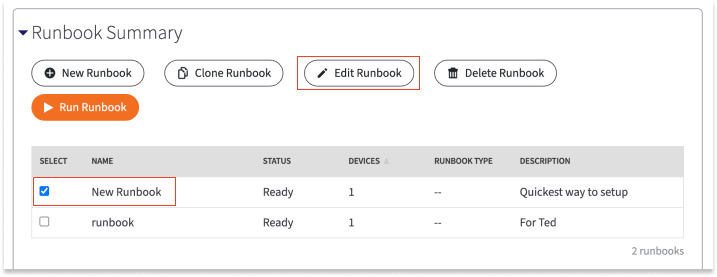
1. On the Client Details page, click the Runbooks link found in the Account At A Glance section of the page.

2. In the Runbook Summary section of the page, use the checkboxes to select the Runbook and then click the Edit Runbook button.
Update the Runbook as appropriate.
DeleteYou can edit a Runbook whenever needed, including when the Runbook is inactive and when it is running.
- While a Runbook is inactive, all aspects of the Runbook and Virtual Office can be edited; however, not all aspects of the Runbook can be edited while the Runbook is running. For example, you cannot edit included devices when the Runbook is running, but you can edit network information.
- If the Runbook is running, you can incorporate changes on the Advanced Settings page. However, these changes will not apply until you restart the Runbook. Additionally, if you update Virtual Office settings from the Runbook, the settings will not change for the running Runbook.
Clone a Runbook
You can create a clone copy of an existing Runbook and modify it as required instead of creating a Runbook from the scratch.
How to clone a Runbook
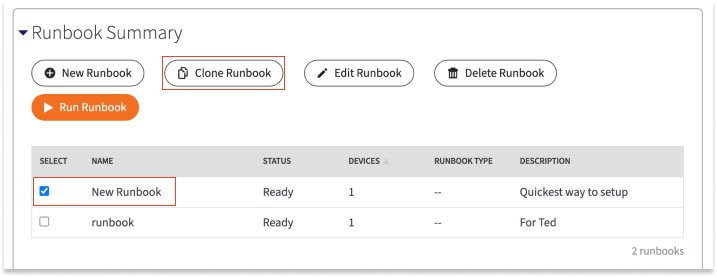
1. On the Client Details page, click the Manage Runbooks link found in the Virtualization section of the page.

2. In the Runbook Summary section of the page, use the checkboxes to select the Runbook and then click the Clone Runbook button.
A clone of the selected runbook will be created, and you may modify the clone as required.
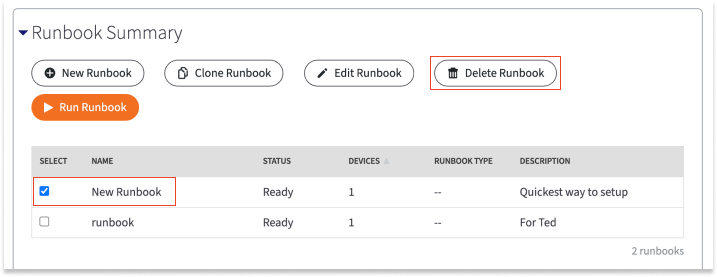
DeleteDelete a Runbook
Note: When a Runbook is deleted, it is permanent and cannot be recovered.
How to delete a Runbook
1. On the Client Details page, click the Manage Runbooks link found in the Virtualization section of the page.

2. In the Runbook Summary section of the page, use the checkboxes to select the Runbook and then click the Delete Runbook button.
The Runbook is now permanently deleted.
Delete1354