
Overview: BRC as a virtual machine on VMware hypervisor hosts
Traditionally, BRC is deployed as a physical hardware appliance, using enterprise-grade server hardware certified by Axcient for compatibility and support.
With increased demand for more deployment options, Axcient now offers the option of deploying BRC as a virtual machine (vApp) on VMware hypervisor hosts.
Considerations when deploying BRC as a virtual machine
Speed of nested virtualization
Because the appliance is already running as a virtual machine, adding virtualized protected systems on this appliance requires enabled nested hardware virtualization on the hypervisor host. (This allows virtualization to work within a virtualized environment.)
Nested virtualization is inherently inefficient. Performance of virtual machines running under nested virtualization may be slower than physically virtualized machines.
Minimum memory requirements for vApp appliance
The vApp appliance requires enough memory to operate properly and efficiently.
- 16GB of RAM is the minimum recommended for deployment of the appliance
- Additional memory is necessary if you intend to virtualize your protected systems for recovery. Each running virtual machine will require additional RAM to operate
Fixed storage requirements for vApp appliance
Axcient vApp is deployed using "thick" (fully provisioned) virtual disks for best performance.
"Thin" provisioned devices may suffer from fragmentation and poor performance over time. Because of this, we recommend deploying your virtual appliance using thick provisioning.
NOTE: vApp appliances are deployed using a fixed storage size that cannot be expanded or reduced later.
Available storage size options include 1TB, 2TB, 4TB, 6TB, 10TB,14TB, and 20TB.
Hypervisor host space requirements
In addition to the vApp appliance storage requirements, the hypervisor host also requires additional space for operational purposes (including virtual machine swap files.)
- At a minimum, allocate at least 10-15% additional free space for the hypervisor
- Best practice allocates 20% or more additional free space for the hypervisor
What is genuinely 'useable storage' on a hard disk?
Calculating ‘usable storage’ is one of the most confusing aspects of BDR provisioning.
Due to marketing considerations, most hard disk manufacturers "play fast and loose" with disk capacity labeling.
For example, almost all computer applications consider storage in base-2 binary denominations:
1 kilobyte (KB) = 1024 bytes, 1 megabyte (MB) = 1048576 bytes, and so on.
The hard disk industry uses base-10 decimal denominations:
1KB = 1000 bytes, 1MB = 1000000 bytes, and so on.
Unfortunately, this discrepancy becomes exponentially more extreme as it scales up:
- At the megabyte (MB) level, the discrepancy is only 48K
- At the gigabyte (GB) level, the discrepancy is 72MB
- At the TB level, the discrepancy is nearly 100GB
This means a typical ‘1TB’ hard drive is actually only about 930GB.
This discrepancy gets worse as the hard drive becomes larger. For example, an ‘8TB’ hard drive is only 7.4TB in reality - and ‘16TB’ drives are only 14.9TB in size.
Please keep these discrepancies in mind when you are calculating storage capacity and selecting physical hard drives for your hypervisor host.
Redundancy
With a physical backup appliance, you have a fully redundant environment hosting your backup and disaster recovery system.
When deploying a virtual appliance, we recommend that you also provide that same independent redundancy for your appliance. Use a dedicated hypervisor host with dedicated storage (internal or otherwise). This will ensure that whatever future failure brings down your production environment doesn’t also lay waste to your backup system
Steps to install x360Recover BRC vApp appliance
The x360Recover BRC vApp appliance is a ready-to-deploy virtual machine template for VMware ESX/ESXi.
To deploy a new vApp appliance, download the virtual machine image .OVA file provided by Axcient customer service and perform the following steps:
STEP 1. Login to ESX host or vCenter
For the purposes of these instructions, the steps are shown as performed directly on the host web management UI. (Deployment using vCenter is essentially similar, with a few extra selections to specify the target host.)
Navigate to the ESX host IP address in a web browser and login.
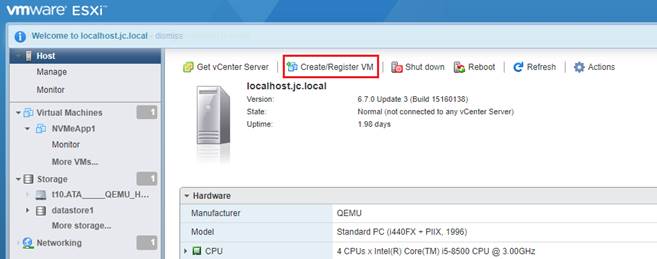
STEP 2. Import the virtual machine template and configure options
2a. Select Create / Register VM from the top menu
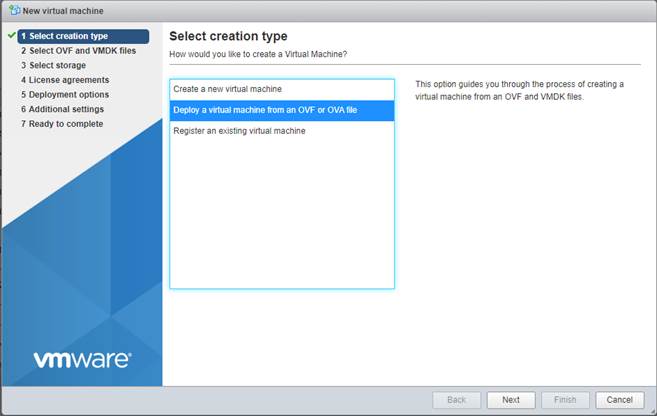
2b. On the Select creation type page, select Deploy a virtual machine from an OVF or OVA file.
Click Next to continue.
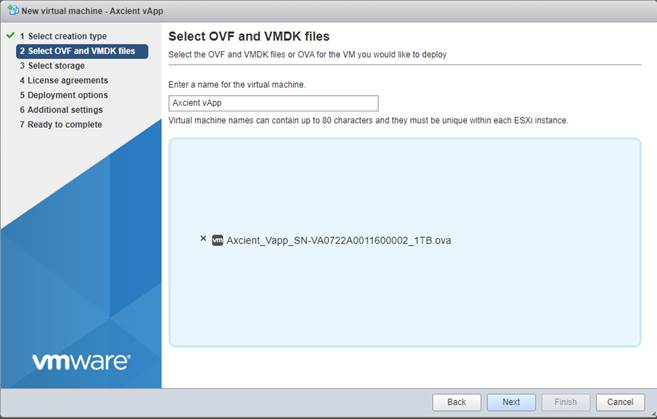
2c. On the Select OVF and VMDK page, enter a name for the virtual machine and click to select the virtual machine image file.

NOTE: The vApp download is distributed as a Zip archive. (You must first unzip the downloaded file so that you can access the OVA file inside.)
Once you’ve selected the image file, click Next to continue.
2d. On the Select storage page, choose a storage location for the VM and click Next to continue.
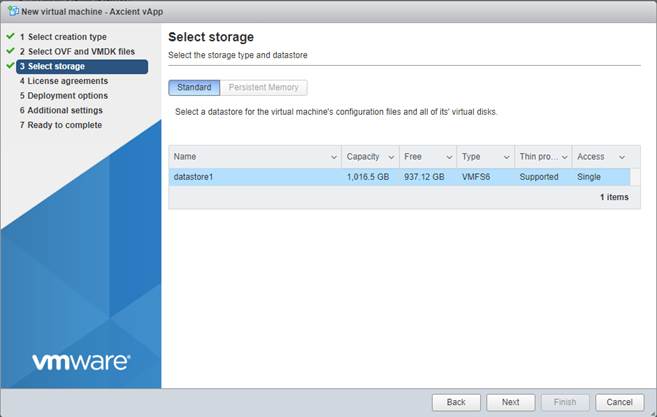
Important notes: Axcient vApp is deployed using a thick (fully provisioned) virtual disk. Available storage capacity options include 1TB, 2TB, 4TB, 6TB, 10TB, 14TB, and 20TB.
|
STEP 3. On the Deployment options page, select the desired network and disk provisioning options.
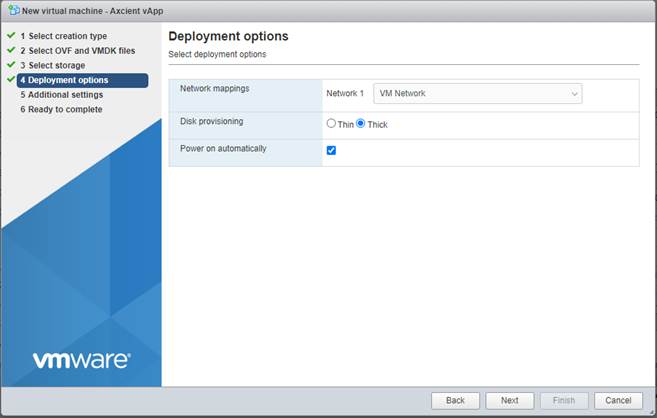
Note: It is important to specify Thick provisioning of disks. This will prevent potential performance problems over time.
Click Next to continue.
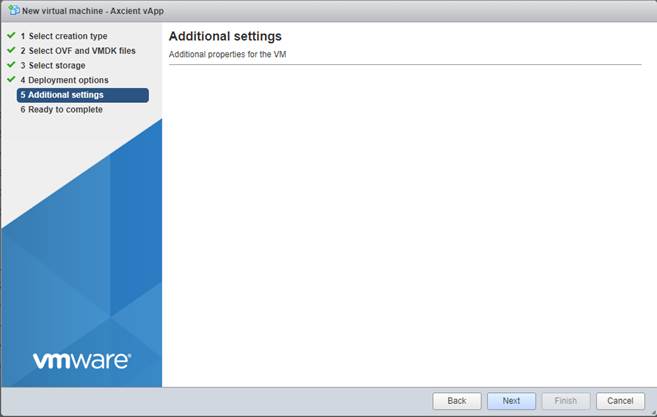
When the Additional Settings page opens, click Next to continue.
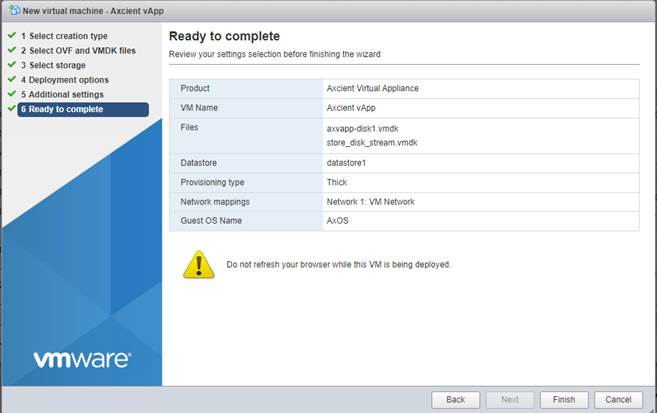
STEP 4. Review your selections and click Finish to deploy the virtual machine.
STEP 5. Monitor the progress of the deployment from the Recent Tasks pane.

STEP 6. Enable nested virtualization
The virtual machine must be configured to allow nested virtualization. (This allows the vApp to perform virtualization of protected systems i.e. virtualization within another virtualized environment.)
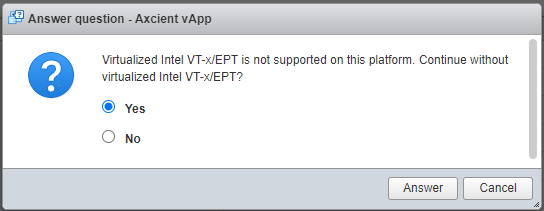
Note: If you receive an alert message stating Virtualized IntelVT-x/EPT is not supported, please select Yes and click Answer. (This alert occurs if a VM is powered on before the nested virtualization settings have been configured.)
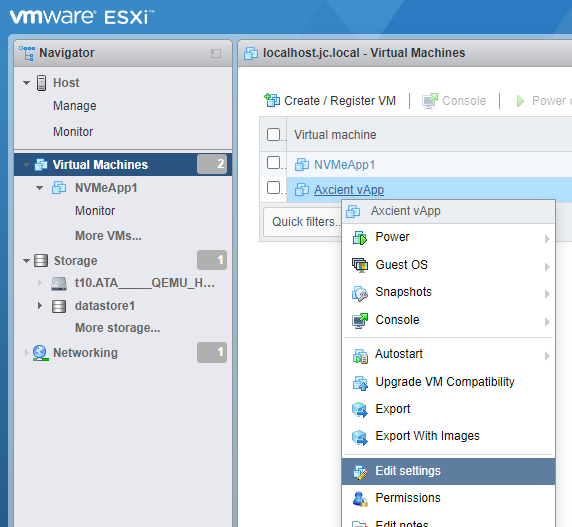
6a. Select Virtual Machines from the left menu pane.
6b. Locate the Axcient vApp appliance.
6c. Right-click and select Edit Settings to make changes to the VM configuration.
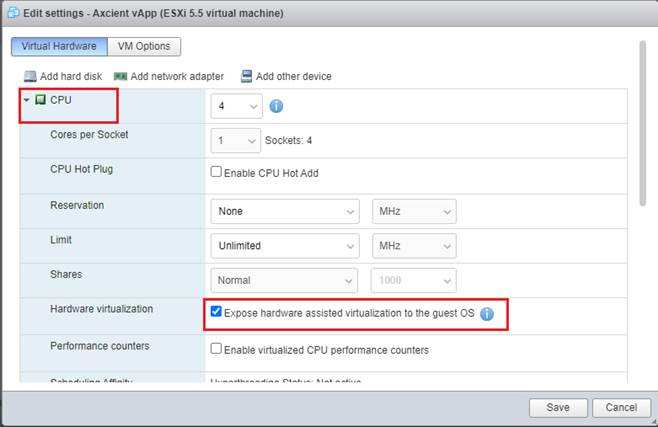
6d. Click to expand the advanced CPU settings.
6e. Under Hardware virtualization, click to enable the option Expose hardware assisted virtualization in the guest OS
Click Save.
Finishing up
Your vApp is ready for use.
Power on the virtual machine and begin managing protected systems from x360Recover Manager - just like you would with a physical appliance.
SUPPORT | 720-204-4500 | 800-352-0248
- Contact Axcient Support at https://partner.axcient.com/login or call 800-352-0248
- Free certification courses are available in the Axcient x360Portal under Training
- To learn more about any of our Axcient products, sign up for a free one-on-one training
- Subscribe to the Axcient Status page for a list of status updates and scheduled maintenance
1270