
We offer a variety of choices if you decide to use an Axcient backup appliance.
You can choose to purchase or lease BDR hardware appliances from us (and, of course, x360Recover installs in <10-minutes on any Ubuntu certified hardware.)
Plus, you can decide whether to have the hardware shipped to you or directly to your customer.
Your appliance options
Hardware devices
We offer a range of high performance BDR hardware devices, shipped directly to you or your customer . The following options are available:
Pico

The x360Recover Pico is Axcient’s most compact and affordable BDR solution, built on the ASUS Dual M.2 NUC platform. It features a dedicated OS disk and a 1.5TB usable storage disk, optimized for protecting one to three systems.
- Pico-1500 has 1.5TB of usable storage and 16GB of RAM
Pico appliances cannot be upgraded and do not have field replaceable parts.
- Set up details are in the 2025 x360Recover Pico Quickstart Guide
Appliance warranty | Appliance warranty FAQs
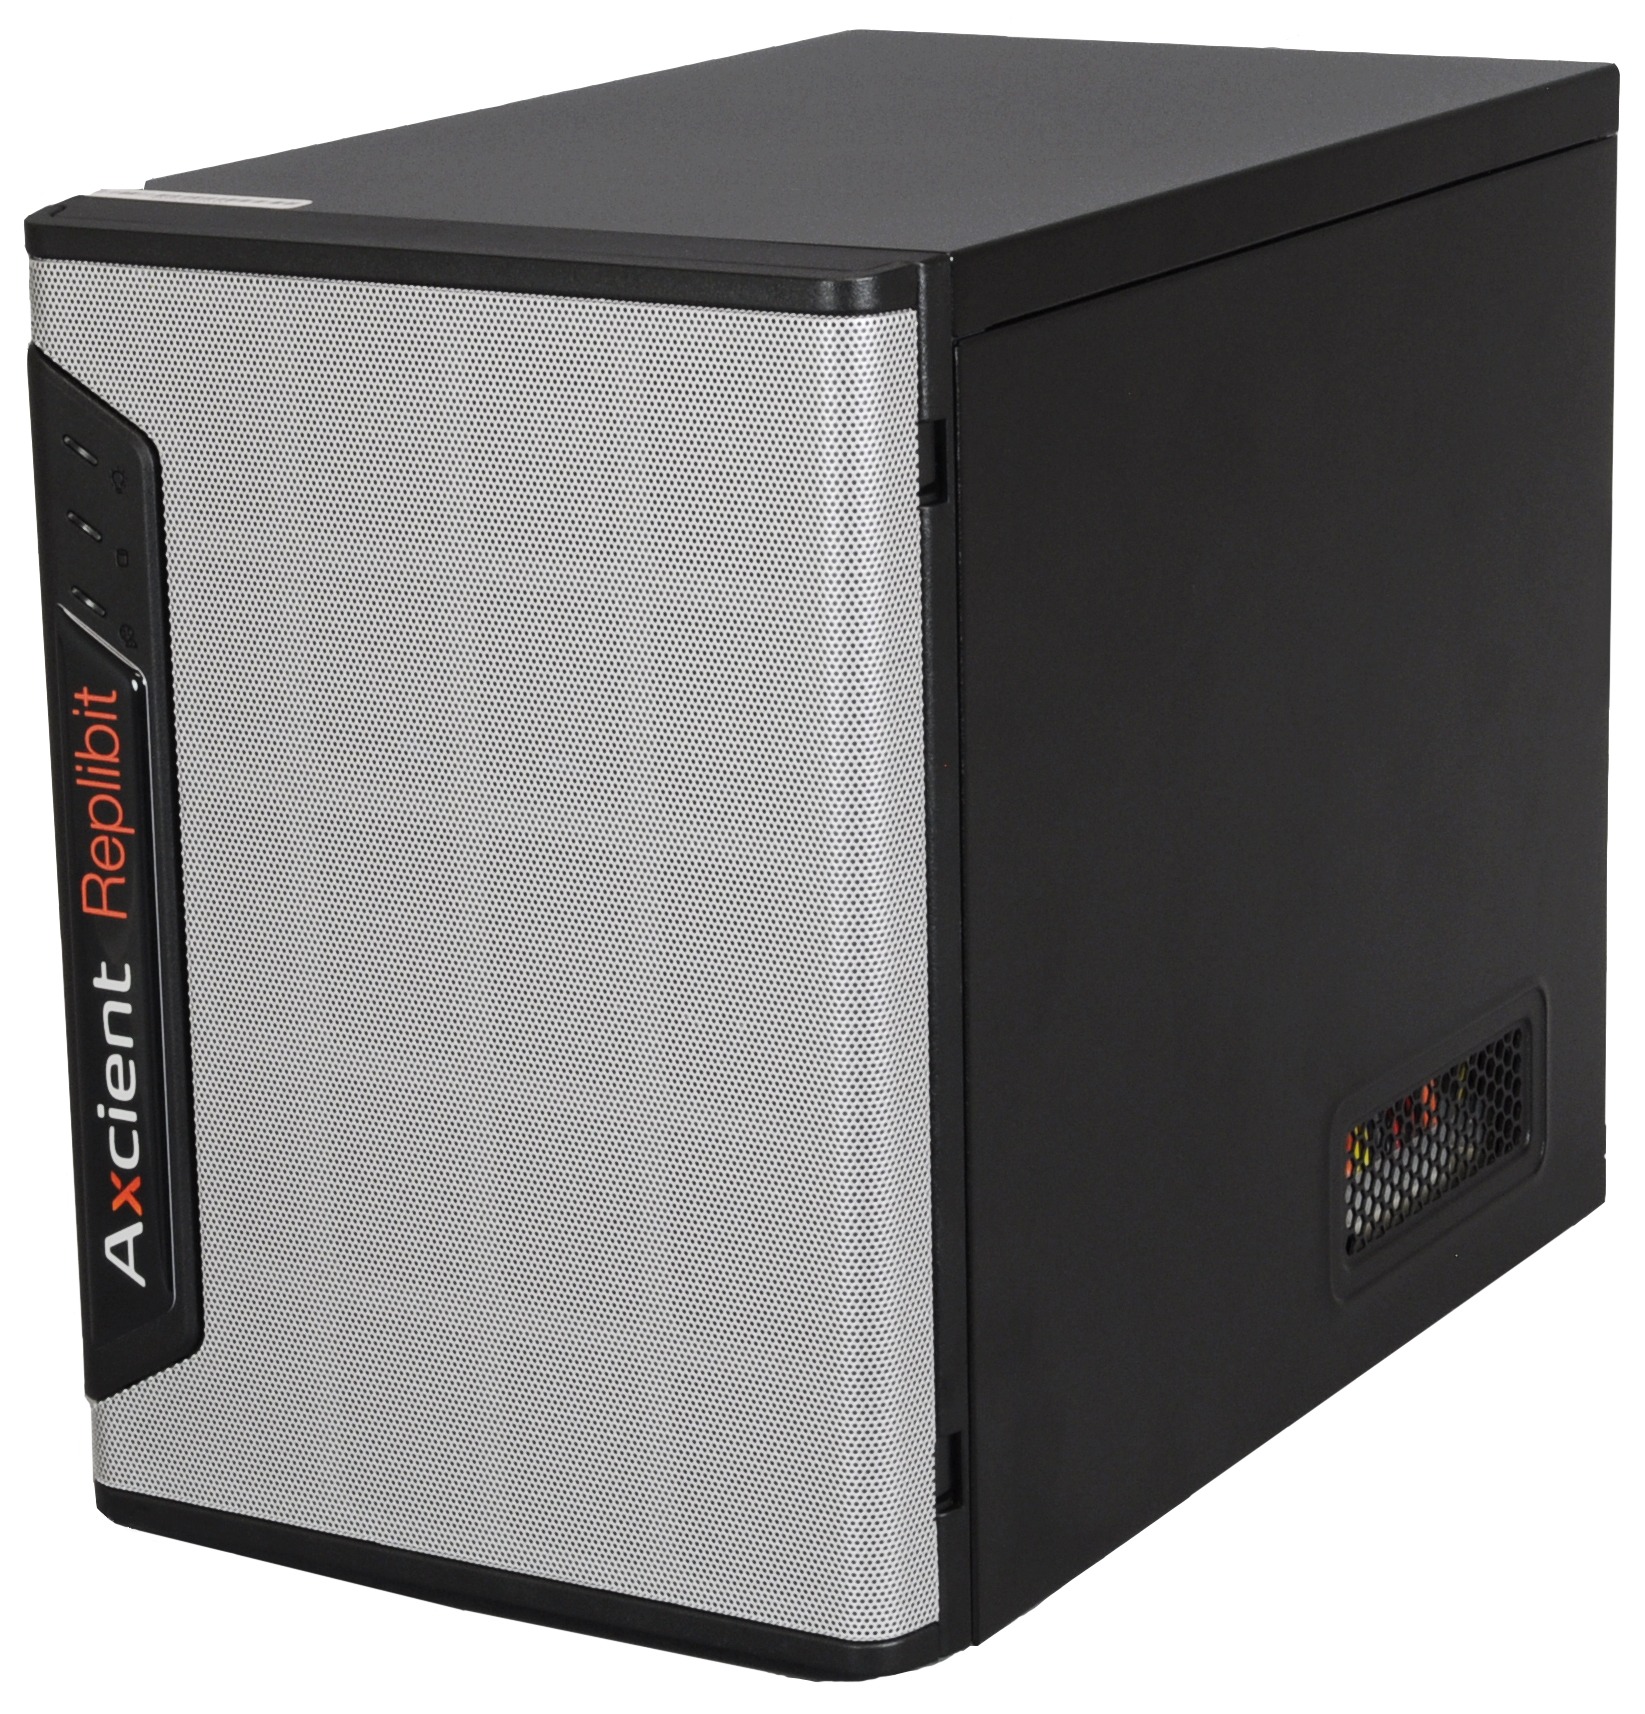
Eco
The x360Recover Eco is a compact server with IMPI and comes in three models:
- Eco 1500 has 1.5 TB usable storage and 16 GB of RAM
- Eco 3000 has 3 TB of usable storage and 16 GB of RAM
- Eco 6000 has 6 TB of usable storage and 16 GB of RAM
Any non-SSD Eco models use Enterprise HDD's for storage hard drives.
Eco appliances cannot be upgraded and do not have field replaceable parts
- Set up details are in the 2025 X360Recover Eco Quick Start Guide
Appliance warranty | Appliance warranty FAQs
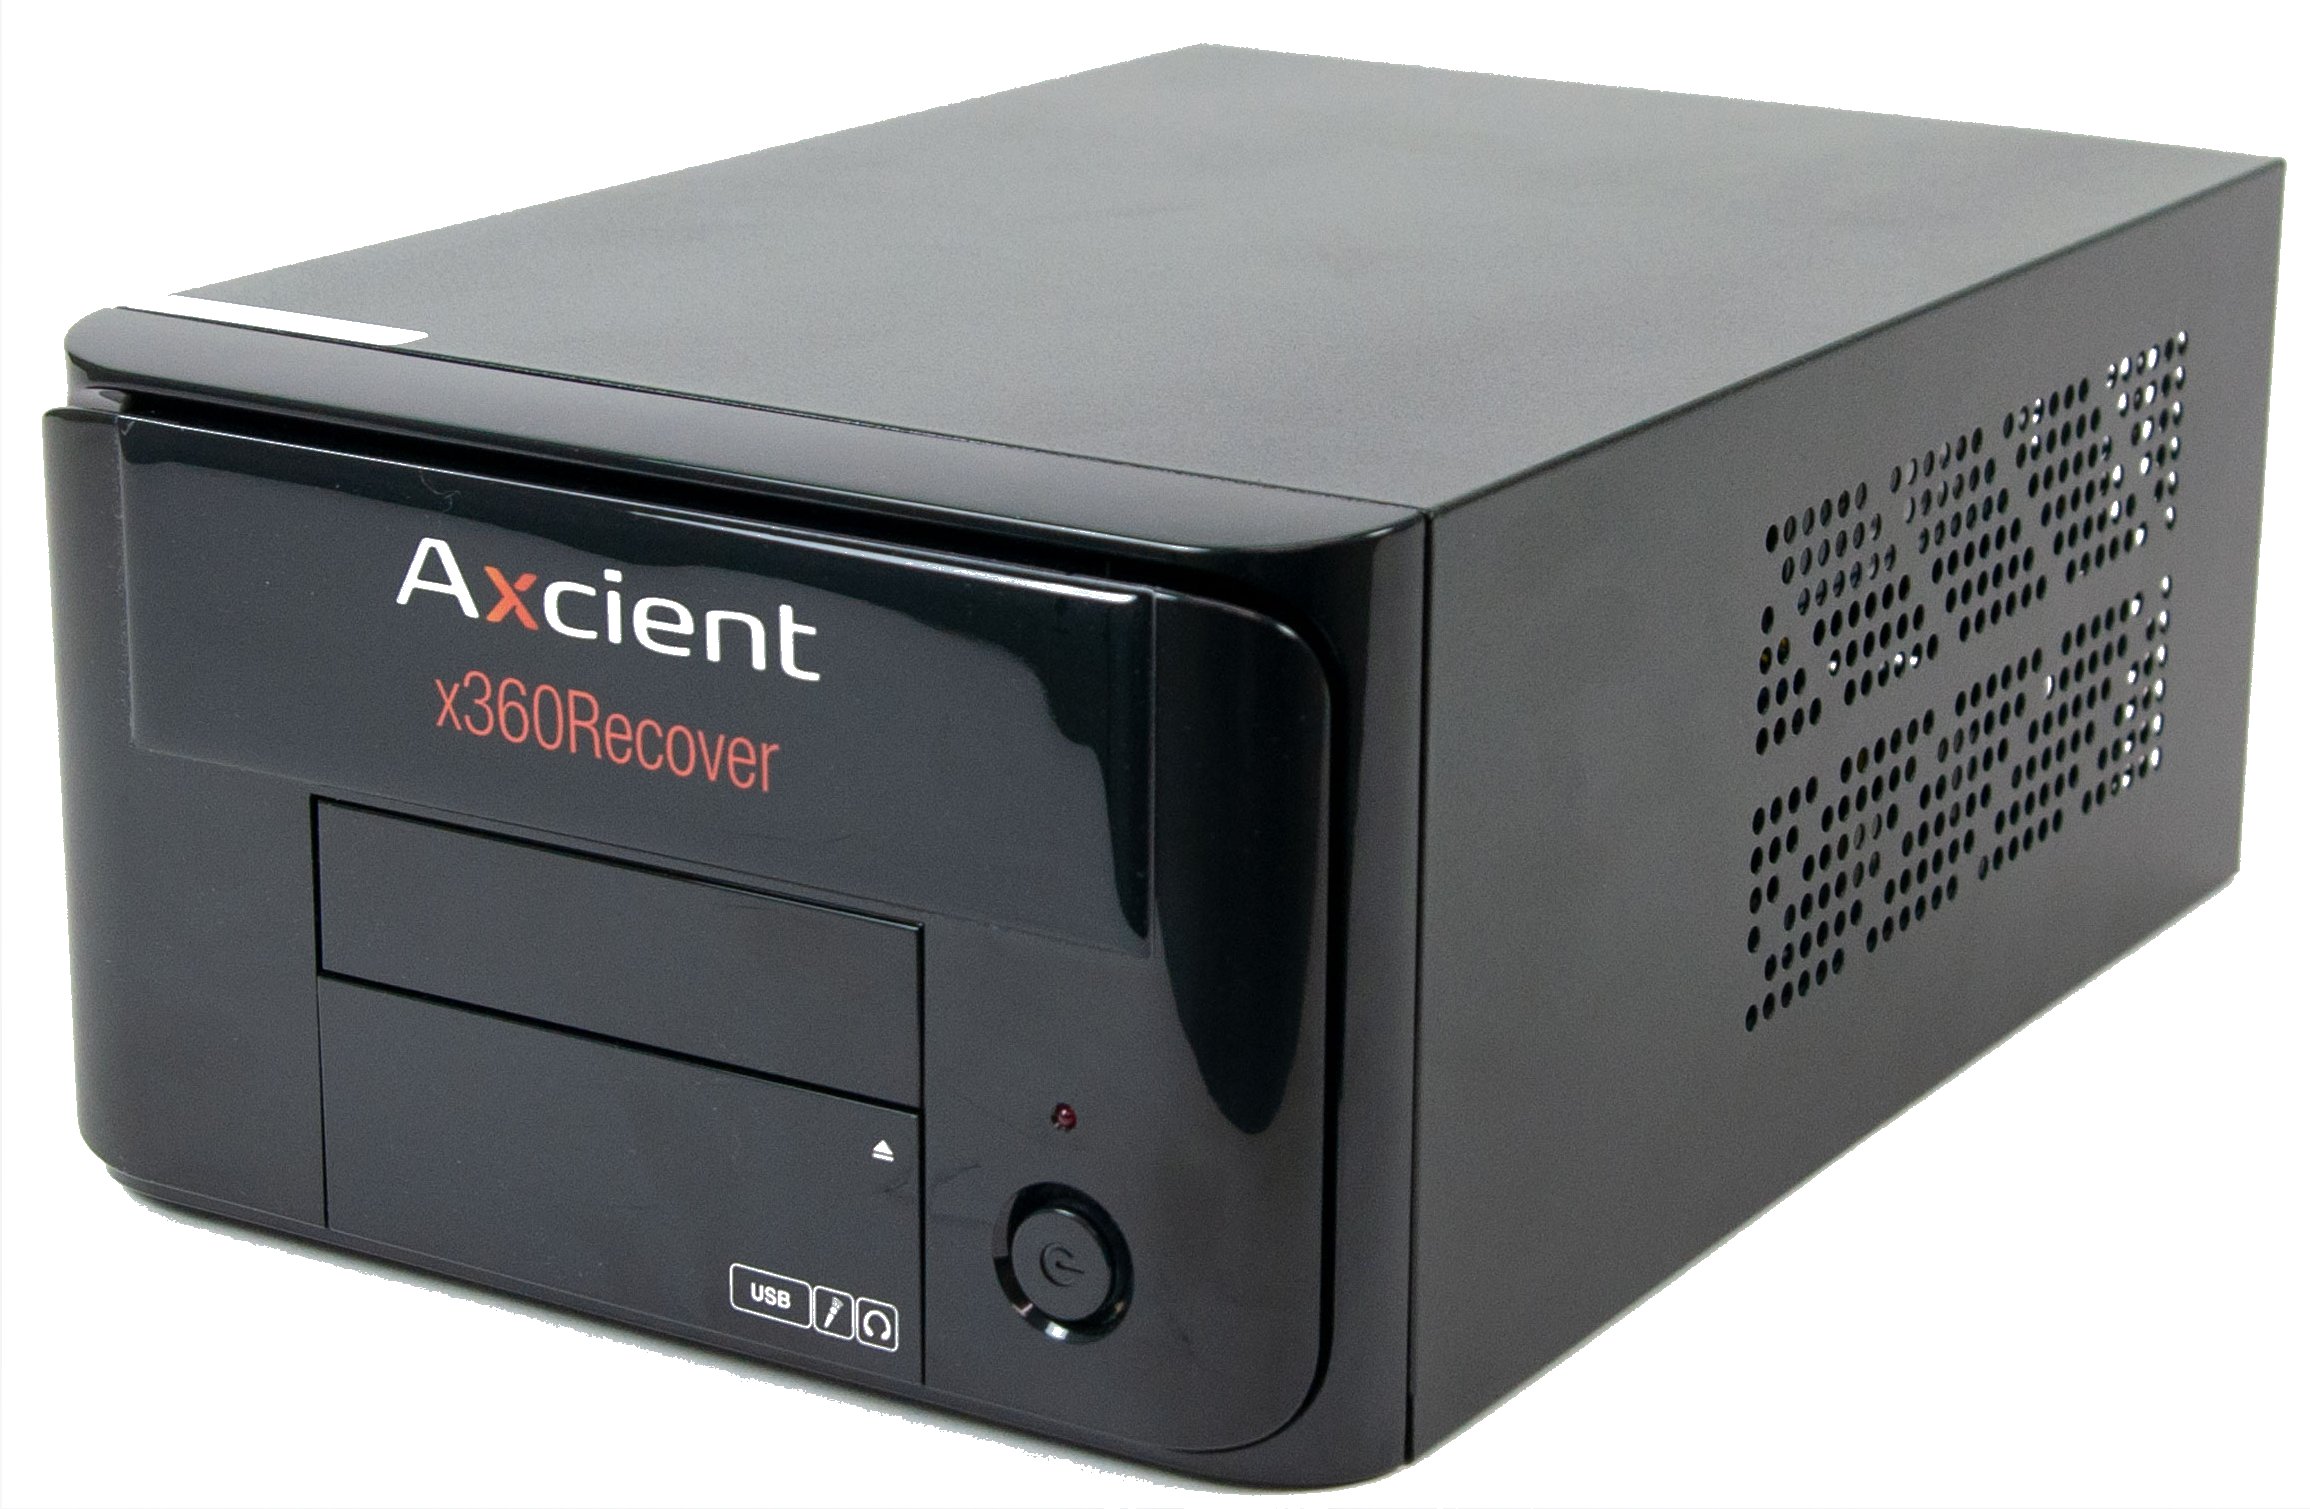
DeleteMini
The x360Recover Mini BDR appliance provides Axcient’s most popular storage capacities and price points.
- Set up details are in the Mini Quick Start Guide
The Mini is a mini tower which includes a Xeon E-2126G, 32GB RAM, and a 3-year warranty. (The Mini-6000 and Mini-12000 are available with 64GB RAM.)
Extended 4 or 5 year warranties are available at the time of purchase.
Features include:
- Hot-swap drive bays for easy storage drive replacement
- IPMI for remote access
- Field upgrade to 1.5, 3 or 6 TB of usable storage for hybrid variants (depending on the original model purchased)
- Spare parts kits available for hybrid units
- Any non-SSD Mini models use Enterprise HDD's for storage hard drives.
| TIP: Did you know that you can use the empty drive trays already in the Mini tower to upgrade your Mini appliance? You'll use our storage upgrade kit (which includes drives and screws) Read how here: |
Minis are available in the following models:
SKU |
Storage |
Configuration |
Mini-750-SSD |
750 GB usable storage - All SSD |
3x500GB SSDs RAIDZ1 (N+1 Parity) |
Mini-1500-SSD |
1.5 TB usable storage - All SSD |
3x1TB SSDs RAIDZ1 (N+1 Parity) |
Mini-3000-SSD |
3 TB usable storage - All SSD |
3x2TB SSDs RAIDZ1 (N+1 Parity) |
| Mini-6000-SSD |
6 TB usable storage - All SSD |
3x3.84TB SSDs RAIDZ1 (N+1 Parity) |
Mini-1500* |
1.5 TB usable storage |
2x2TB Enterprise-class HDD RAIDZ |
Mini-3000* |
3 TB usable storage |
2x4TB Enterprise-class HDDRAIDZ |
Mini-6000* |
6 TB usable storage |
2x8TB Enterprise-class HDD RAIDZ |
| Mini-12000 | 12 TB usable storage | 4x8TB Enterprise-class HDD RAIDZ |
* Field (storage) upgrade kits and spare parts kits are available for certain hybrid units.
Appliance warranty | Appliance warranty FAQs
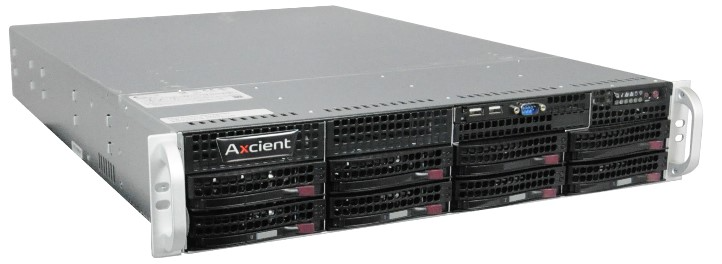
DeleteRack
The Axcient x360Recover Rack BDR appliance is a standard 2U 19” server rack chassis with (8) 3.5" hot swap drive bays. The default configuration is four bays populated with 2, 4, or 8 TB disks. The remaining four slots can be populated with like-sized disks to double the initial storage capacity.
Any non-SSD Rack models use Enterprise HDD's for storage hard drives.
The Rack is a turnkey BDR appliance that ships pre-configured with x360Recover backup software and can be requested with end-customer configurations during ordering for direct-drop shipping.
- Set up details are in the Rack Quick Start Guide
- How to expand memory for the Rack
Description |
Rack-4500 |
Rack-9000 |
Rack-18000 |
Rack-27000 |
Available capacity |
5 TB |
10 TB |
21 TB |
36 TB |
|
Recommended usable capacity (85% available) |
4.5 TB |
9 TB |
18 TB |
27 TB |
Field upgradable to (Total Usable) |
9 TB |
18 TB |
36 TB |
54 TB |
Storage redundancy |
RAIDZ1 (N +1 Parity) |
RAIDZ1 (N +1 Parity) |
RAIDZ1 (N +1 Parity) |
RAIDZ1 (N +1 Parity) |
CPU* |
12-core Intel Xeon |
2x 12-core Intel Xeon |
2x 12-core Intel Xeon |
2x 12-core Intel Xeon |
RAM |
64 GB |
128 GB |
256 GB |
256 GB |
RAM Field Upgrade |
256 GB |
512 GB |
512 GB |
512 GB |
10G Network |
Two RJ45 10GBase-T Ethernet LAN ports |
Two RJ45 10GBase-T Ethernet LAN ports |
Two RJ45 10GBase-T Ethernet LAN ports |
Two RJ45 10GBase-T Ethernet LAN ports |
Remote Management (IPMI) |
Yes |
Yes |
Yes |
Yes |
Hot swappable drives |
Yes |
Yes |
Yes |
Yes |
Warranty |
3 years |
3 years |
3 years |
3 years |
Upgradable warranty |
Added 1 or 2 years |
Added 1 or 2 years |
Added 1 or 2 years |
Added 1 or 2 years |
Dimensions |
2U Rack Mount |
2U Rack Mount |
2U Rack Mount |
2U Rack Mount |
*as of Sept 9 2024
Buy or lease?
You can choose to buy an Axcient appliance or you can opt to lease.
You'll make the choice between buying and leasing during the online purchase process, when you also choose the payment terms that best meet your business needs.
What happens at the end of your lease?
At the end of the lease period, if you are not in default, you will have the option to:
(a) return the equipment to us in accordance with the terms and conditions of your agreement or
(b) purchase all of the equipment (on written notice to us, given at least 60 days prior to the end of the lease term) for a purchase price equal to the monthly rental payment multiplied by nine (plus all applicable taxes). Upon payment of such option purchase price and applicable taxes, we will transfer the title to the equipment to you as-is.
Note: If you fail to exercise the purchase option, you must return the equipment to us in accordance with the terms of your lease agreement.
NOTE: If you leased your BDR appliance from us before January 15, 2024, the buyout price will be the monthly rental payment multiplied by 3. If you a leased your BDR appliance after January 15, 2024, the buyout price will be the monthly rental payment multiplied by 9
DeleteWhat happens after your lease ends?
End of lease options
At the end of the lease period, if you are not in default, you will have the option to:
(a) return the equipment to us in accordance with the terms and conditions of your agreement or
(b) purchase all of the equipment (on written notice to us, given at least 60 days prior to the end of the lease term) for a purchase price equal to the monthly rental payment multiplied by nine (plus all applicable taxes). Upon payment of such option purchase price and applicable taxes, we will transfer the title to the equipment to you as-is.
Note: If you fail to exercise the purchase option, you must return the equipment to us in accordance with the terms of your lease agreement.
NOTE: If you leased your BDR appliance from us before January 15, 2024, the buyout price will be the monthly rental payment multiplied by 3. If you a leased your BDR appliance after January 15, 2024, the buyout price will be the monthly rental payment multiplied by 9
Please see Appliance warranty for terms and Appliance warranty FAQs for complete details.
Delete
Ready to order an Axcient BDR appliance?
You can order BDR appliances to use with x360Recover from the Axcient x360Portal:
Step by step instructions on how to place your Axcient BDR appliance order
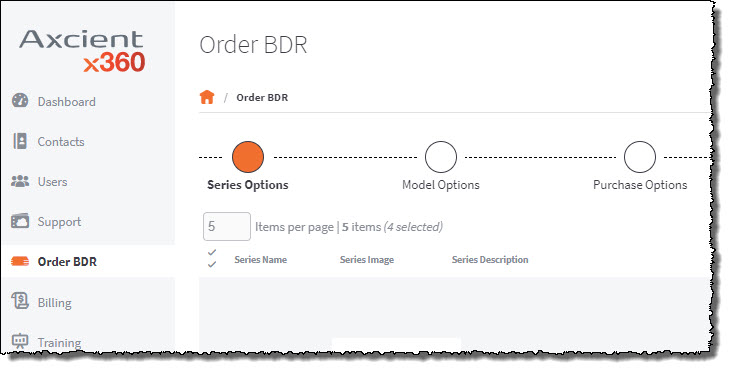
When you access the Order BDR menu item inside your x360Portal, you will be greeted with a wizard-style ordering system that allows you to purchase multiple appliances at a time.
This ordering system is a new feature and we'll be expanding functionality over time.
If you have recommendations, please use our Request a feature function found in the product footers.

Steps to order Axcient BDR devices
The BDR ordering process involves six steps, presented in a wizard format.
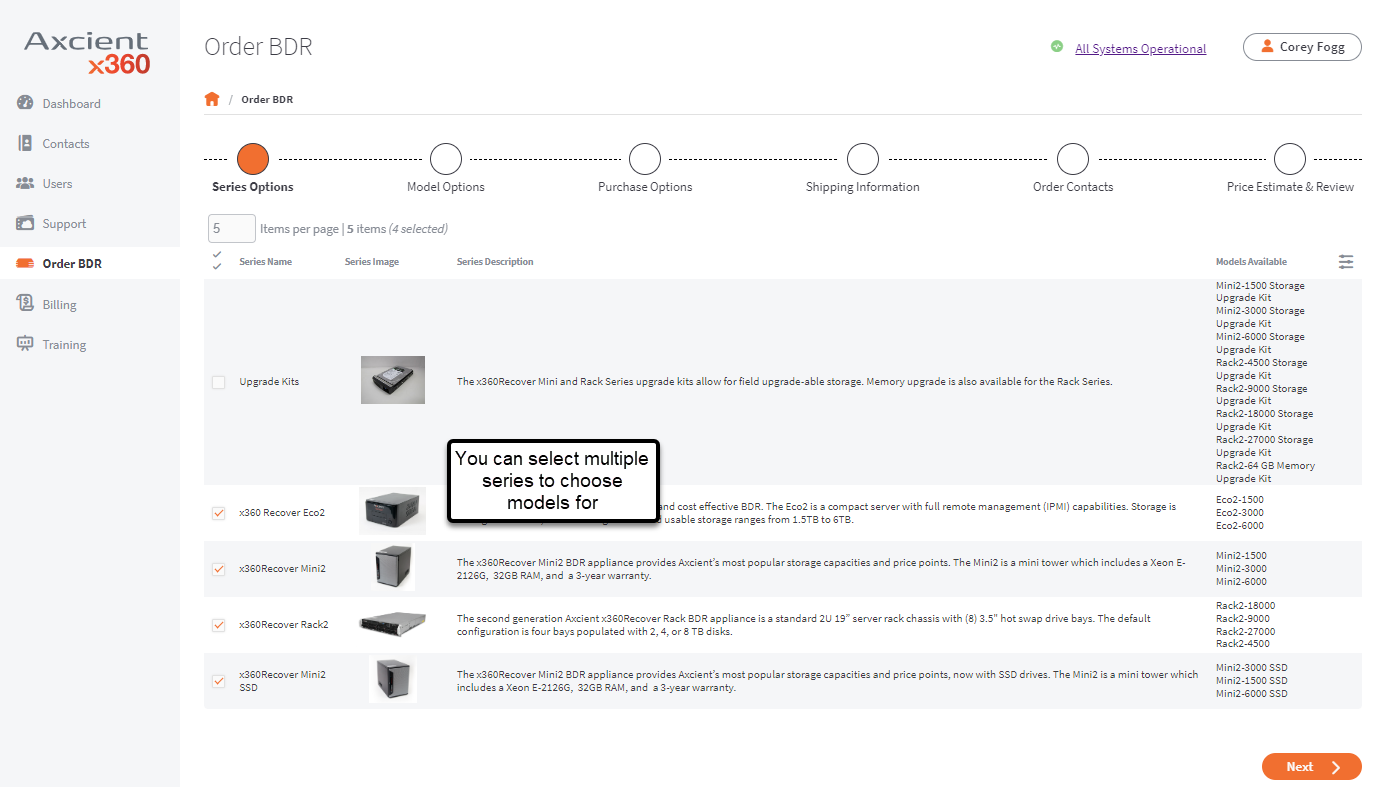
STEP 1. Choose your series
Each Axcient BDR model belongs to a series. (We also offer upgrade kits.)
This first step when ordering is to choose the series you would like to shop for.
When you select multiple series, you will see a list of models that apply to each series.
- NOTE We only display ten series at a time, so if you have selected more than ten, you'll have to scroll through the results pages.
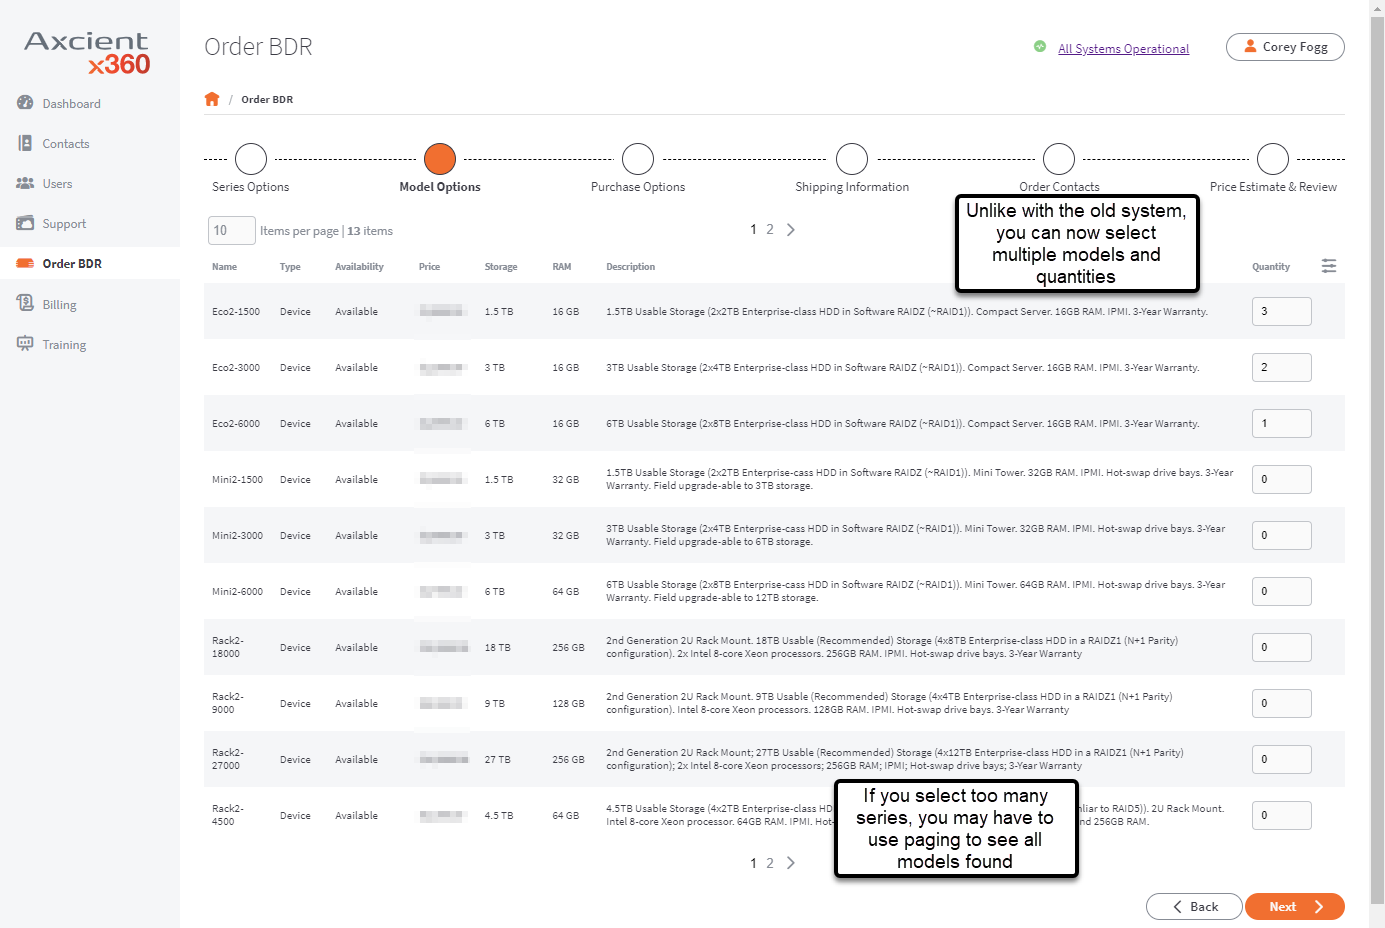
STEP 2. Choose your model options
Our new system allows you to select multiple models (and quantities) for a single order.
Each device is listed by current price and statistics.
Please refer to the listings within the x360Portal for the latest details.
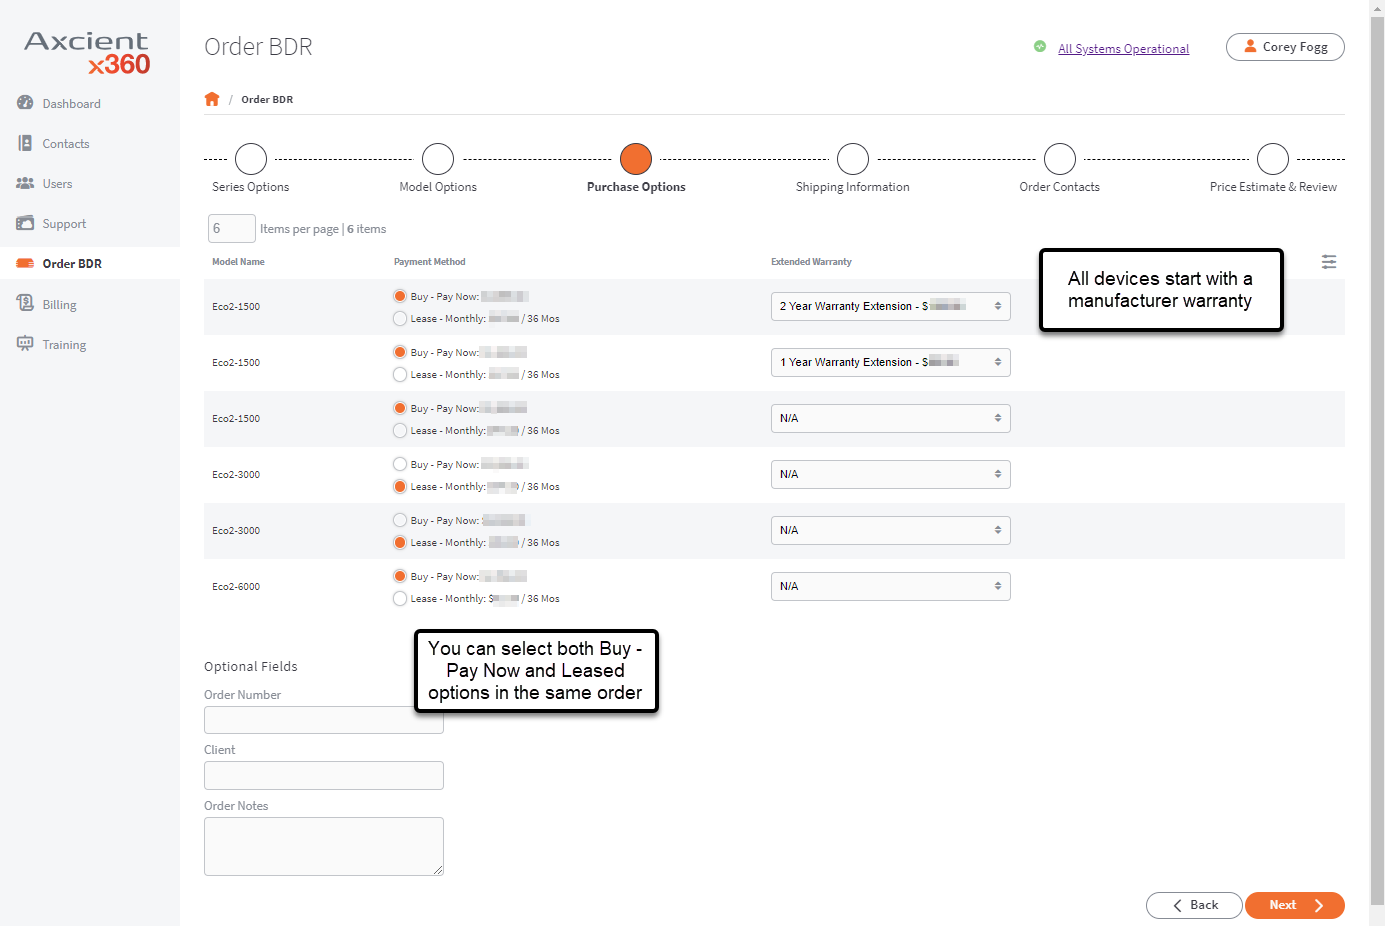
STEP 3. Choose your purchase (and/or leasing) options
In this step, you can mix and match (a) which devices you would like to purchase now and (b) which devices you prefer to lease.
- You can select to both buy a device now and lease additional devices on the same order.
What happens at the end of a lease?
At the end of the lease period, if you are not in default, you will have the option to:
(a) return the equipment to us in accordance with the terms and conditions of your agreement or
(b) purchase all of the equipment (on written notice to us, given at least 60 days prior to the end of the lease term) for a purchase price equal to the monthly rental payment multiplied by nine (plus all applicable taxes). Upon payment of such option purchase price and applicable taxes, we will transfer the title to the equipment to you as-is.
Note: If you fail to exercise the purchase option, you must return the equipment to us in accordance with the terms of your lease agreement.
NOTE: If you leased your BDR appliance from us before January 15, 2024, the buyout price will be the monthly rental payment multiplied by 3. If you a leased your BDR appliance after January 15, 2024, the buyout price will be the monthly rental payment multiplied by 9
Warranties
All devices include a manufacturers warranty.
Appliance warranty | Appliance warranty FAQs
- If you choose to purchase: When you purchase a device now, you will have the option to extend the manufacturers warranty.
- If you chose to lease: When you opt to lease a device, the warranty selection is disabled.
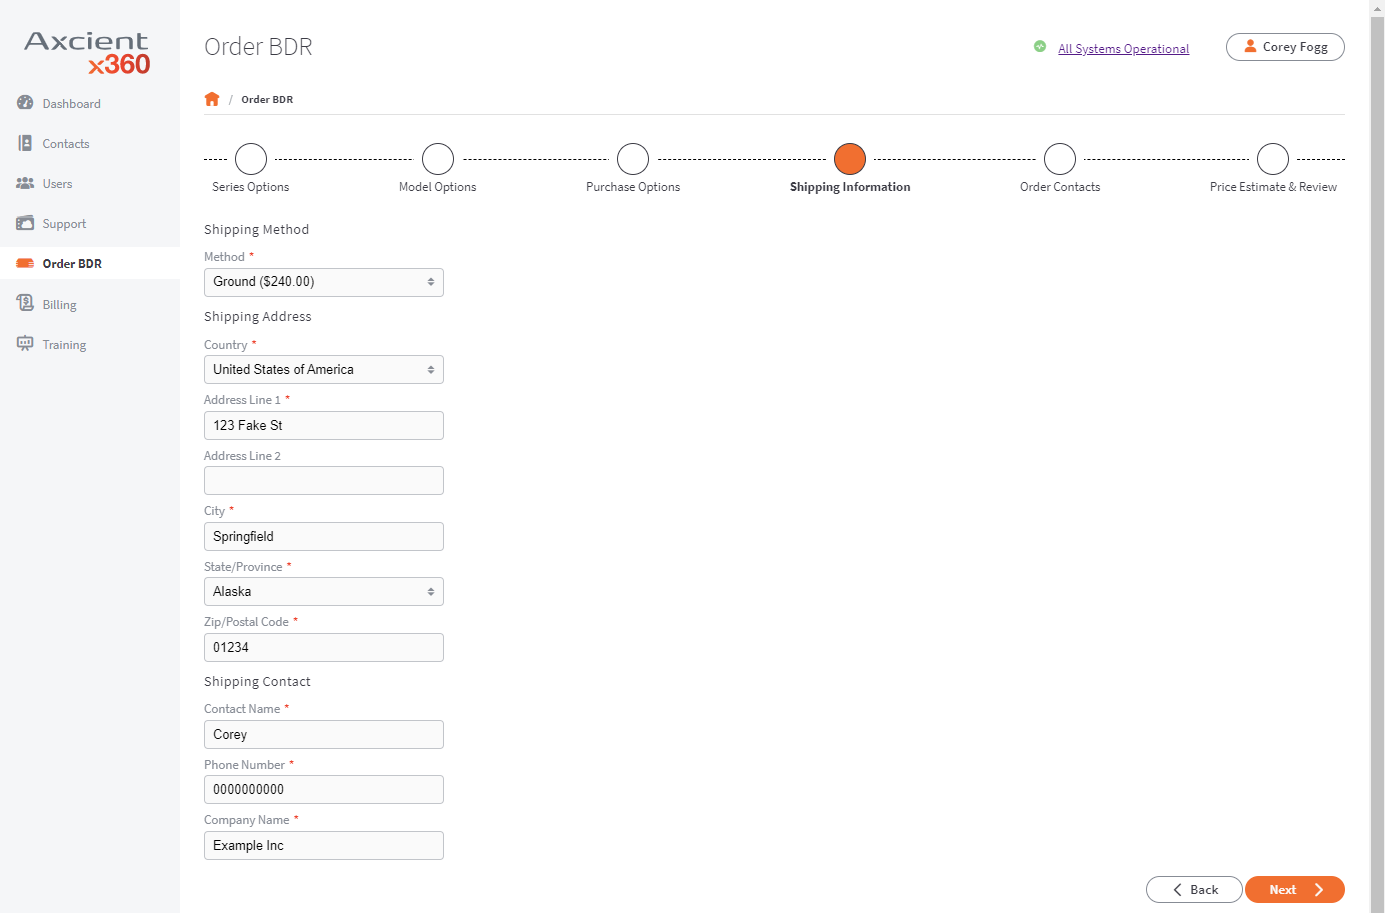
STEP 4. Enter your shipping information
You can choose where you want the device(s) to be shipped.
You can also select the shipping method you prefer.
We will send your devices using the information you specify on this page:
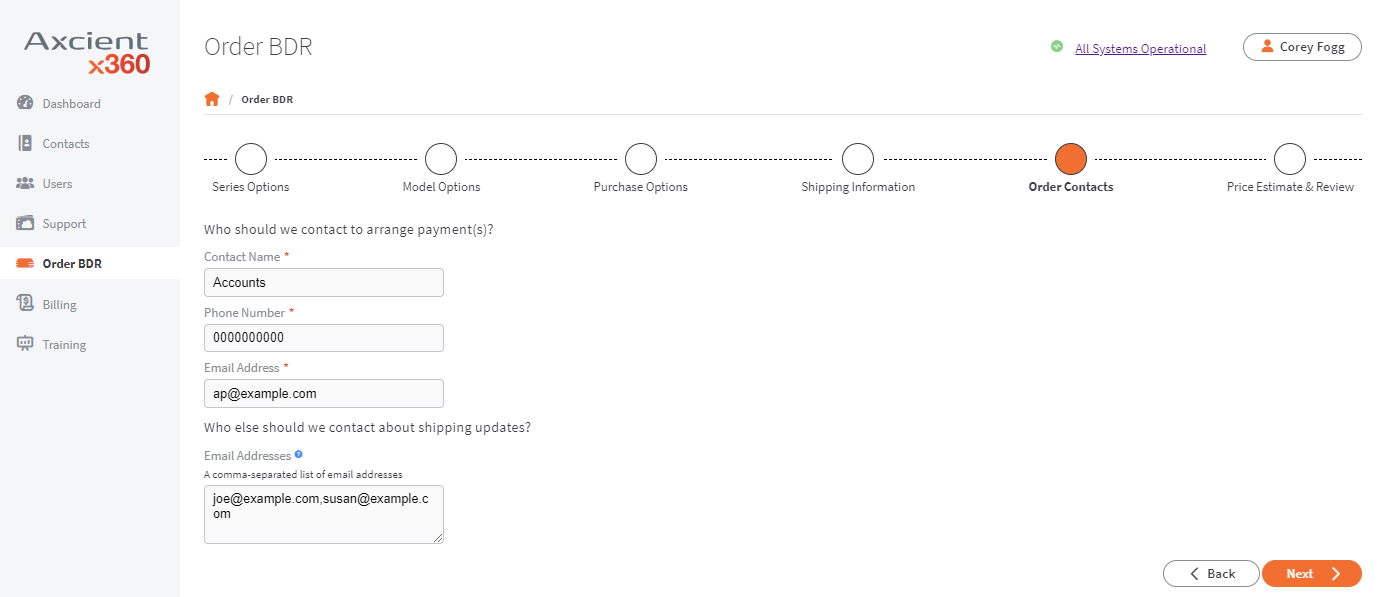
STEP 5. Provide contacts for this order
Who would you like us to notify about the order and who do we contact for payments?
We will contact you with an invoice after we have processed and verified the device details.
STEP 6. Price estimate and order review
The last step in the BDR ordering process is to review the final price estimate and confirm that the information on the order is complete and accurate.
You'll do this review just before you submit your order.
If you have any leased items, you'll be given the chance to review and accept the terms and conditions for leasing.
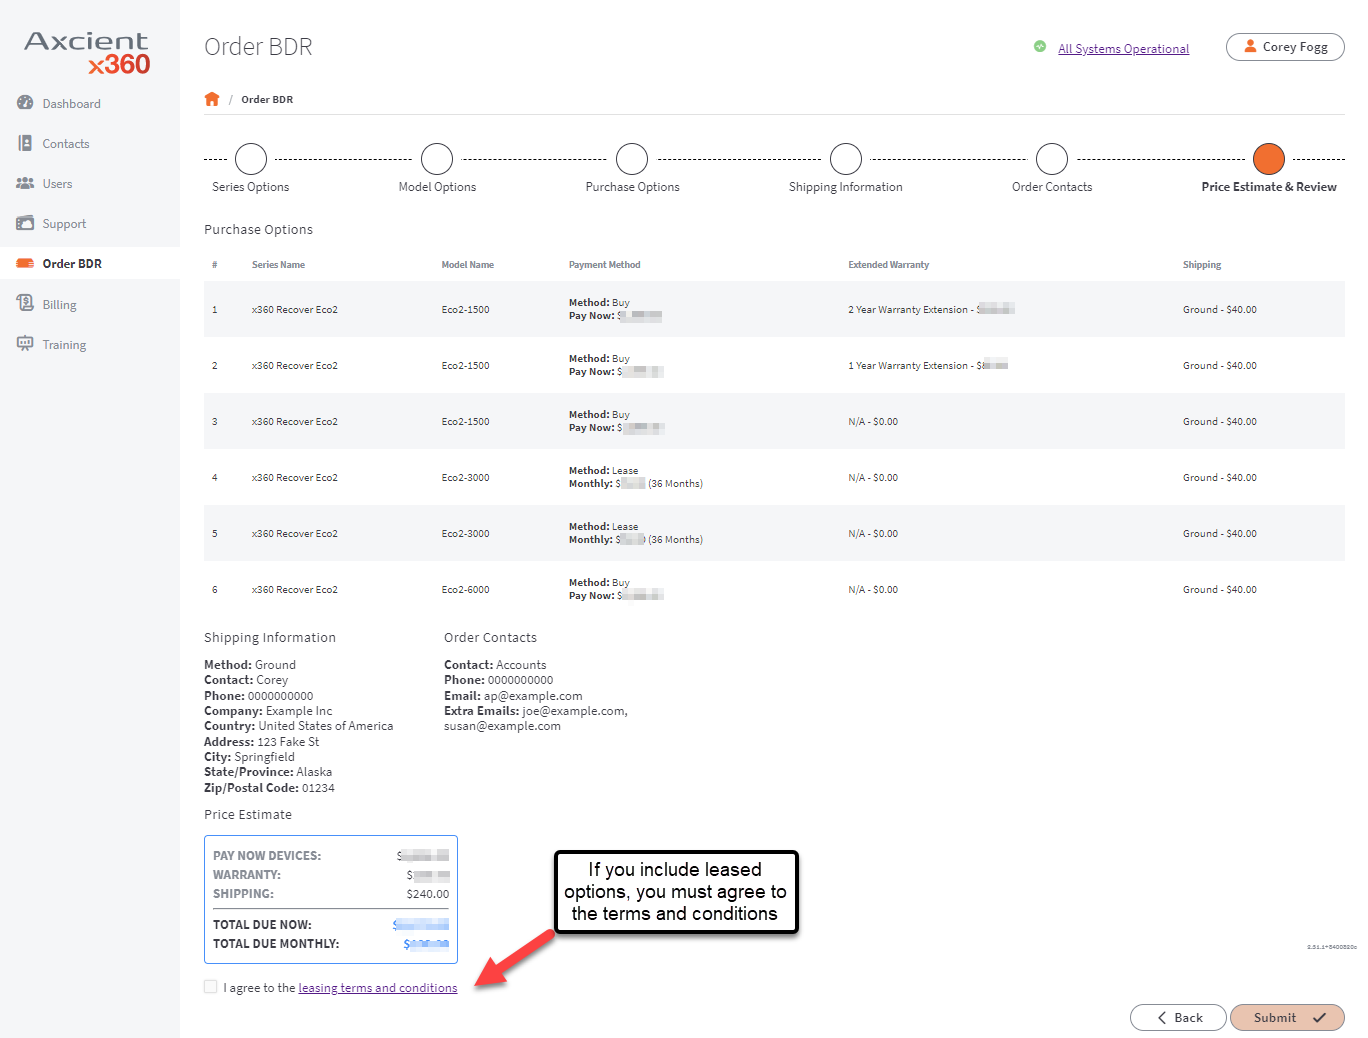
Once you have reviewed and confirmed the information on this page, click Submit to send the order to us for fulfillment.
What happens after you submit your order?
- After you have placed your order, you'll receive a confirmation number to use when talking to our support or customer service team.
- Your submitted order will also display a Print option, which allows you to save a PDF for your records.
- IMPORTANT: At this time, if you don't save this PDF before leaving the ordering screen, you wont be able to view this submitted order again.
- Your order confirmation number corresponds to an Axcient ticket. You'll get an email from us, confirming we have received a ticket on your behalf.
- If you need to contact our support or customer service teams, please have your order confirmation number available.
IPMI Quick Start Guide
The IPMI interface allows system administrators and other authorized users to access their system remotely, control the power of their system, redirect the console, utilize a remote graphics console display, monitor system health and configure additional settings.
The IPMI interface provides remote access to multiple users at different locations for ease in troubleshooting, diagnostics, networking, and other maintenance activities.
When ordering your appliance, you will specify your network information for this IPMI feature. This means your appliance will arrive preconfigured with your IP address when it is shipped to you.
IPMI Interface Quickstart Guide [PDF] - for x360Recover BDR appliances
Default configuration on a new BDR appliance
|
Default configuration When you purchase or lease a new x360Recover appliance from the x360Portal, it will ship to you with a default configuration. When you receive the BDR, you will set up customer specific configurations such as network configuration and login/authentication credentials.
|
Appliance warranty | Appliance warranty FAQs

Quick Start Guides
We've developed these Quick Start Guides to help you to:
- Set up your x360Recover BDR appliance hardware (Pico, Eco, Mini or Rack)
- Connect the power and network cables
- Locate ports on the appliance
- Power on your x360Recover appliance (Pico, Eco, Mini, or Rack)
| SKU | Quickstart Guide |
| x360Recover Pico | 2025 x360Recover Pico Quickstart Guide |
| x360Recover Eco | 2025 x360Recover Eco Quickstart Guide |
| x360Recover Mini | 2025 x360Recover Mini Quickstart Guide |
| x360Recover Rack | 2025 x360Recover Rack Quickstart Guide |
| x360Recover Dell | Dell Quickstart Guide |
| x360Recover Dell (Card) | Dell Add-on Card installation instructions |
SUPPORT | 720-204-4500 | 800-352-0248
- Contact Axcient Support at https://partner.axcient.com/login or call 800-352-0248
- Free certification courses are in the Axcient x360Portal under Training
- Learn about Axcient products with free one-on-one training
- Subscribe to the Axcient Status page for updates and scheduled maintenance
744 | 830 | 1114 | 1201 159 |1689 |1695 |1808 |1870 | 2023 | 2029 | 2058