
Recover a protected system using NFS-exported virtual disks
In a VMware environment, the NFS Export feature on an appliance or vault can be used as a temporary datastore for the ESXi host.
Note: VMDK (VMware ESX) supports all versions of ESX/ESXi from 4+
This method of recovery is best when (a) the underlying storage of the host server has been compromised, but (b) the physical host is still in operation.
Steps to begin recovery of the affected protected systems:
STEP 1. From the web interface, navigate to the Protected System Details page.
STEP 2. Select the recovery point for the protected system that you want to restore.
STEP 3. Click Export.
STEP 4. In the Export settings window, select VMDK(VMware ESX) as the format.
Note: VMDK (VMware ESX) supports all versions of ESX/ESXi from 4+
Click Start to begin the export process.

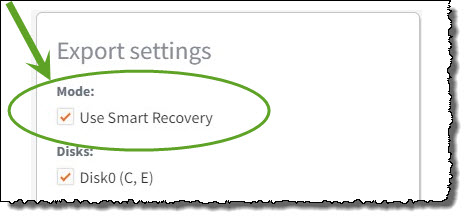
NOTE: With x360Recover 12.4.0 and newer, we recommend that you select Use Smart Recovery to return the protected system disks identically to the original system.
The check box for Use Smart Recovery is the first item under Mode in the Export settings choices:
STEP 5. Verify the export completed successfully by checking the progress of the operation on the Conversion tab in the Jobs menu pane.
NOTE: If you select the option Export to USB, the job may take a considerable time to complete, as the exported virtual disks will be copied to the selected USB destination.
STEP 6. From the web interface, navigate to Network Sharing and select Enable NFS Exports.
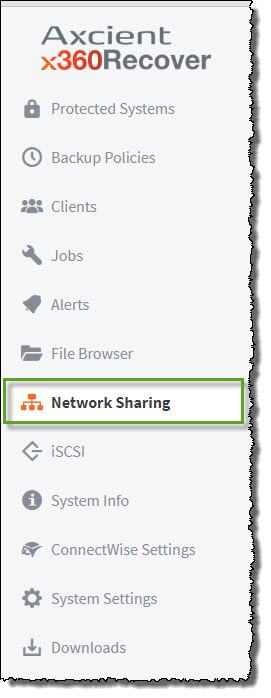
STEP 7. If the ESXi host IP address is not already present, click Add Allowed IP, and add the IP address of the VMware host server.
In multi-server VMware environments, add all host addresses in your cluster to the allowed IP list if you desire to enable vMotion operations between hosts.
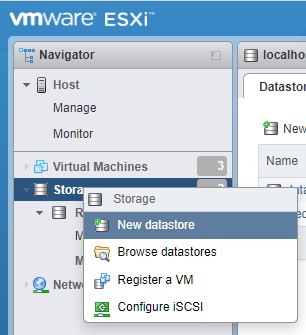
STEP 8. Using either vCenter or the VMware web console of each ESXi host, add the Axcient x360Recover device as an NFS storage location.
8.1. From the left menu, right click Storage and then click New datastore
8.2. From the popup, select Mount NFS Datastore and click next.
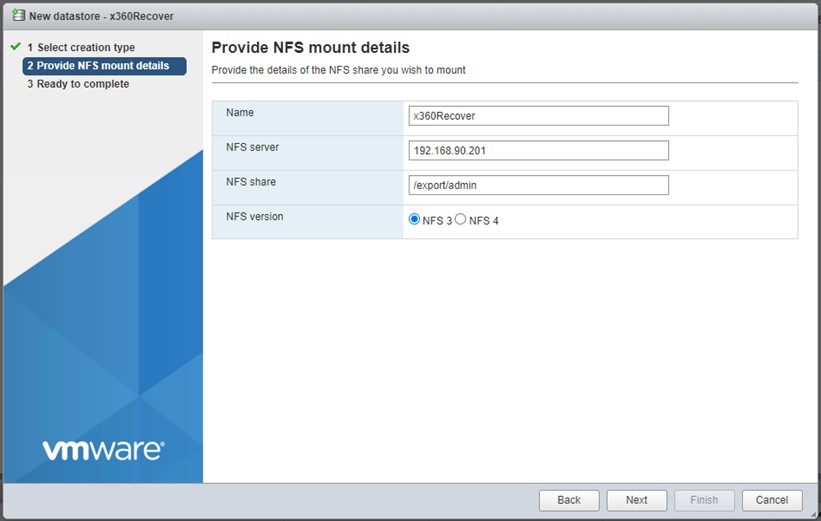
8.3. Enter a Name for the datastore (I.e. x360Recover)
8.4. Enter the Appliance IP address for NFS Server.
8.5. Enter the NFS Share path. For an appliance, this will be /export/admin.
If you are using NFS Export on a self-hosted vault, the path will be /export/<customer>
8.6. Select NFS 3 for NFS version and click Next.
8.7. Verify selections are correct and click Finish.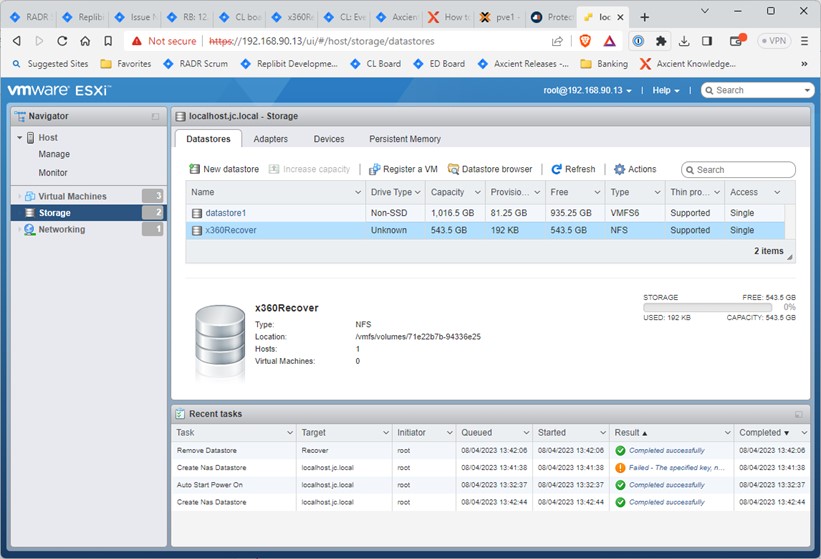
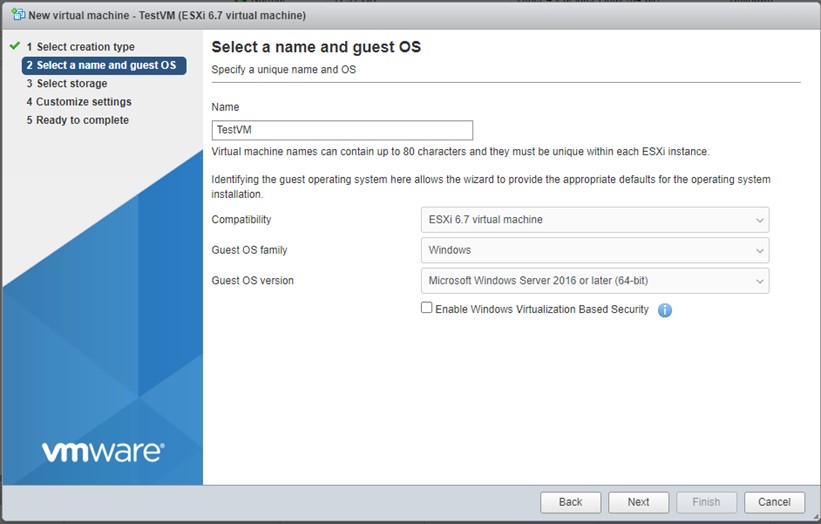
STEP 9. Create a new virtual machine
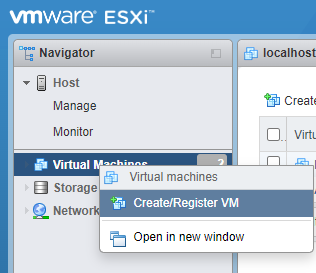
9.1. Right-click virtual machines from the left pane and click Create/Register VM

9.2. In the popup, select Create a new virtual machine and click Next.
9.3. Enter a Name for your virtual machine
9.4. Next, select
- VMware host compatibility
- Guest OS family (i.e. Windows)
- specific Guest OS Version
Then click Next.
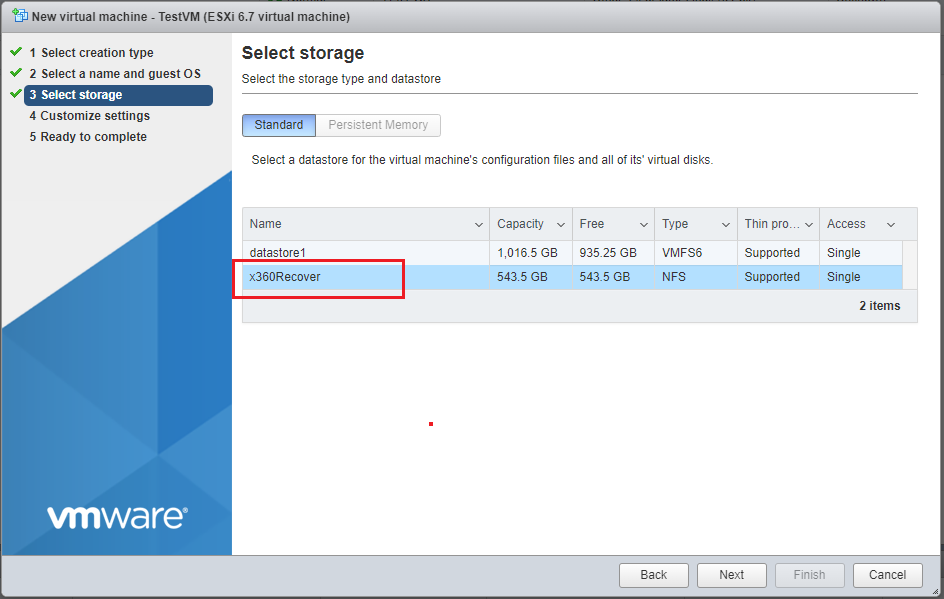
9.5. Select the datastore previously mounted from the x360Recover appliance and click Next.
 9.6. Delete the default disk assignment from the new VM.
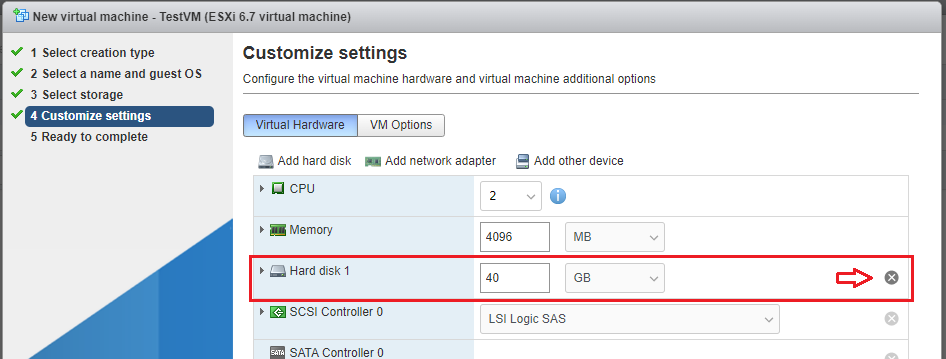
9.7 Click Add hard disk and select Existing disk.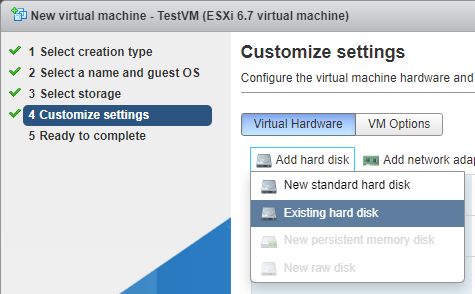
9.8. Browse the datastore to locate the exported boot disk for this protected system and click Select.
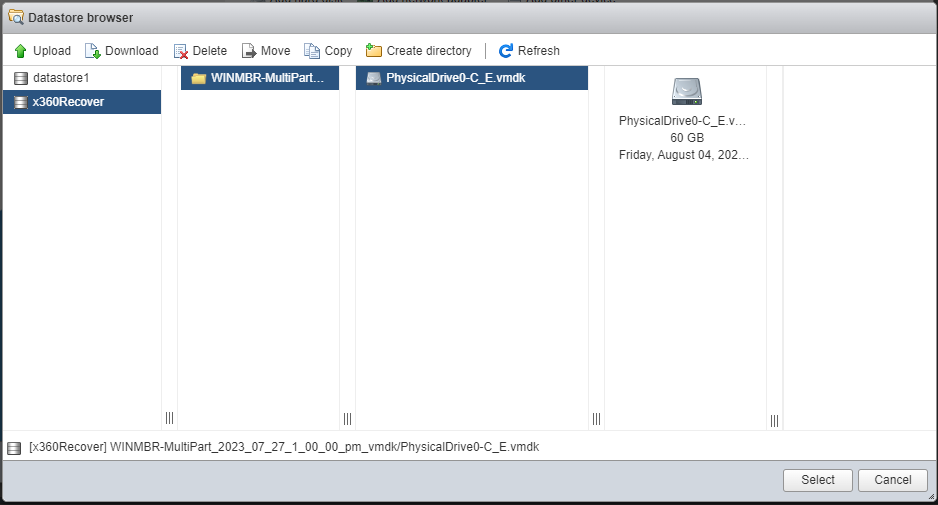 Repeat steps. 9.7. and 9.8. above to add additional disk volumes, if necessary.
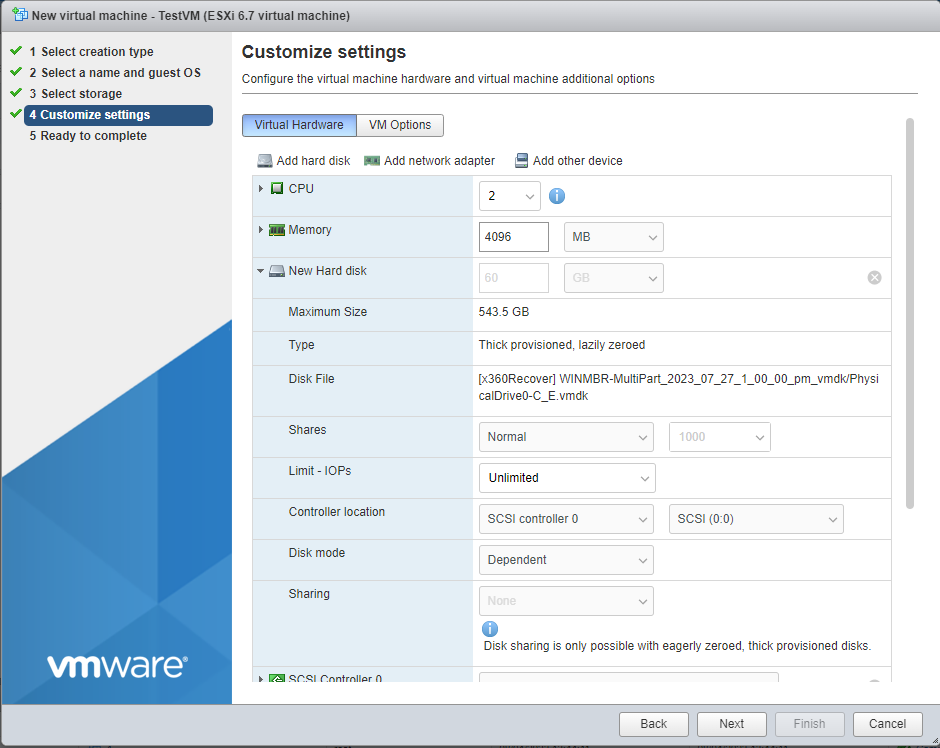
STEP 10. Confirm and adjust remaining virtual machine properties and click Next.
STEP 11. Verify settings and click Finish.
Finishing up
Power on and boot your new VM to recover it on the VMware host.
- You may continue to run the virtual machine from the x360Recover NFS datastore until you have repaired or replaced the failed ESXi host permanent storage datastore. Once your primary storage pool is available again, proceed with migrating the virtual machine to permanent storage.
- If you have Enterprise licensing for VMware, you may use Live Storage vMotion to relocate the virtual machine from the temporary x360Recover NFS share onto a permanent ESXi datastore location without shutting down the virtual machine.
- If you have Standard or Essentials VMware licensing, you may still use Storage vMotion to relocate the virtual machine, but you will have to perform the migration while the virtual machine is powered down (perhaps after hours, or over a weekend.)
Recover a protected system using Bare Metal Recovery
You may use the x360Recover Bare Metal Recovery wizard to recover a protected system onto a VMware host. Start by creating a new virtual machine
Create a new virtual machine
1. Right click Virtual machines from the left pane.
2. Then click Create/Register VM
 3. Within the popup, select Create a new virtual machine and click Next.
4. Enter a Name for your virtual machine
Then, select
- VMware host compatibility
- Guest OS family (i.e. Windows)
- specific Guest OS Version
Click Next to continue.
 5. Select a datastore.
6. Confirm and adjust remaining virtual machine properties and click Next.
 7. Verify settings and click Finish.
Now, you'll download the ISO, upload to the datastore and proceed with BMR
Download the ISO, upload to the datastore and proceed with BMR
1. Download the x360Recover Bare Metal Recovery ISO from https://help.axcient.com/software-downloads/downloads.
2. Upload it to a datastore location where you keep ISO images
3. Boot from the Bare Metal Recovery ISO and proceed with a bare metal restore of the protected system.
For instructions, please see Bare Metal Restore Utility
SUPPORT | 720-204-4500 | 800-352-0248
- Contact Axcient Support at https://partner.axcient.com/login or call 800-352-0248
- Free certification courses are available in the Axcient x360Portal under Training
- Subscribe to the Axcient Status page for updates and scheduled maintenance
1577