
In some situations, the x360Recover appliance can be the core customer-facing component of the x360Recover solution.
The appliance might be chosen to hold the backup data received from installed agents, manage replication to off-site vaults, provide the web interface for the local site, and host the virtual machine environment.
Appliance setup and first-time login
Once the underlying x360Recover operating system has been installed, the next steps are to complete the provisioning and configuration of the new device.
Note: Before proceeding with deployment: If this device is being deployed as an appliance at a client location, first verify (a) that a customer account has been created and that (b) the customer account has an unallocated location available. If you need help setting up a customer account or identifying the locations available, please review the instructions for managing licenses in x360Recover Manager.
Configure a new BDR appliance
Whether you ordered an Axcient BDR appliance or decided to use your own hardware, the next step is to configure the appliance for use. These steps will differ depending on which appliance option you selected.
BYOD appliance hardware only: Pre-installation steps
If you are using your own appliance hardware, also referred to as the BYOD option, you will need to download and install the software and create a bootable flash drive. The steps below reference the Linux Live USB Creator (or LiLi) software, but you can use your preferred USB-creation software.
NOTE: These steps are only required if you selected to use your own BYOD Appliance hardware.
If you ordered an Axcient BDR appliance, you can skip these pre-installation steps.
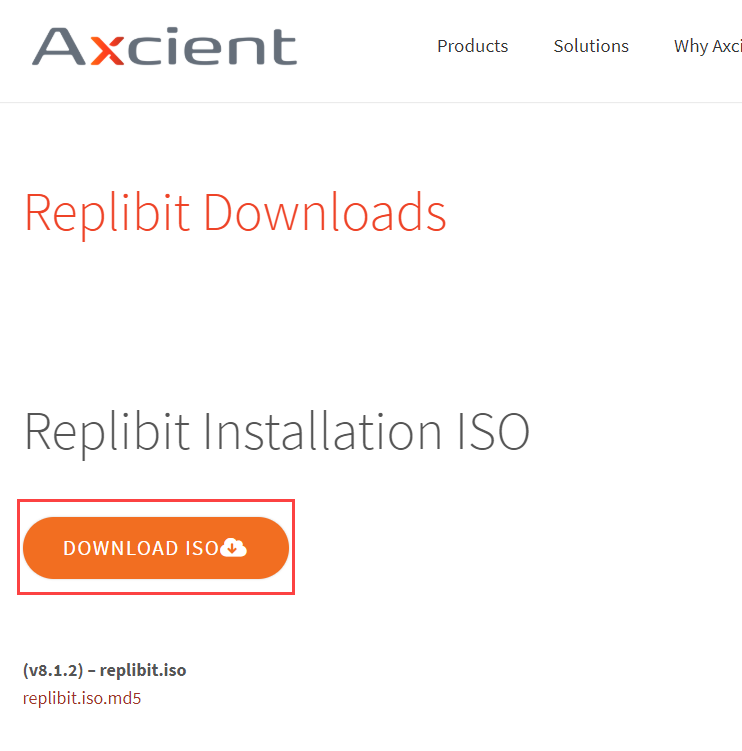
1. Navigate to the Downloads site and download the ISO file
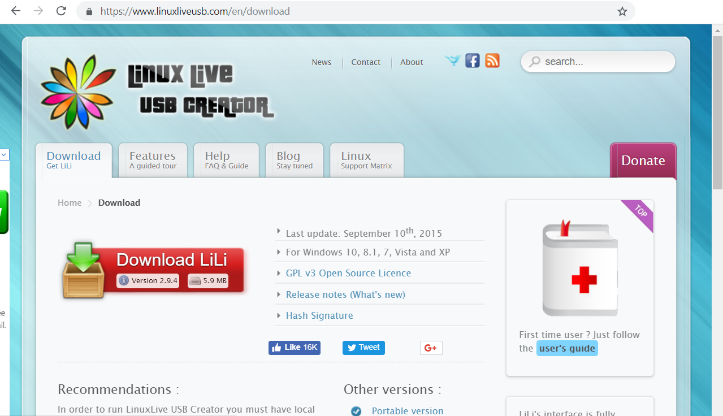
2. Navigate to the Linux Live USB Creator site (or your preferred USB-creator software site) and download and install the LiLi application.
3. When LiLi is installed, insert a USB drive into your computer.
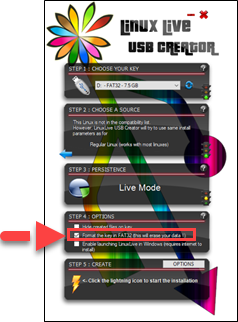
4. In the Step 1 section of the LiLi application, click the blue Refresh button and select your USB drive from the drop-down menu. 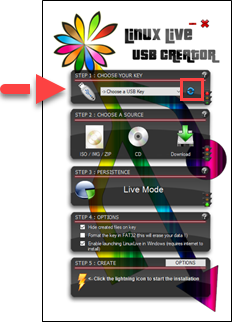
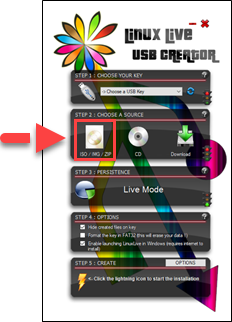
5. In the Step 2 section, click the ISO/IMG/ZIP icon and select the ISO file previously downloaded from the Downloads site. When the ISO is verified, you might notice an error message. You can safely ignore this message.
6. In the Step 4 section, select the Format the Key checkbox.
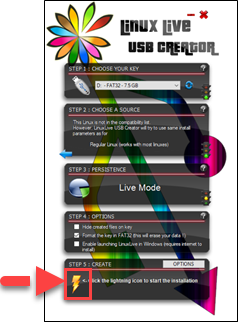
7. In the Step 5 section, click the lightning icon to create the bootable flash drive.
BYOD appliance hardware only: Install the software
When you have a bootable flash drive, you can begin installing the software.
Note: These steps are only required if you selected to use your own BYOD appliance hardware. If you ordered an Axcient BDR appliance, you can skip these installation steps.
1. Insert your USB drive into the BDR appliance and power on the appliance.
2. When booting the OS, a message displays, prompting you to select an installation type.
3. If you are setting up an Axcient-branded Nano device, select Nano. Otherwise, select Standard Installation.
4. When the installation process is complete, you can remove your USB flash drive and click the Restart Now button to restart your machine.
Configure your device as an appliance
When your appliance has the operating system software installed, you can begin the provisioning and configuration process. The appliance must have Internet access to complete this process.
Note: If you ordered a preconfigured Axcient BDR appliance, you can skip this step.
1. Power on the appliance.
2. Record the IP address listed on the screen. If you do not see an IP address, wait a few minutes and then press the Enter key on your keyboard to refresh the screen.
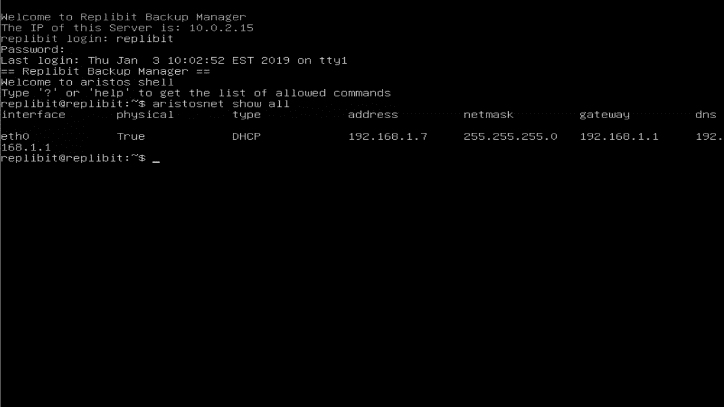
3. When you have recorded the correct IP address, open a browser on a different machine within the same network. Make sure your appliance is turned on, because you will not be able to access this location when the appliance is turned off.
4. Click the Proceed button to continue.
5. Follow the provided steps and configure the appliance: Appliance setup and first-time login - x360Recover
Log into the appliance UI
When the appliance is configured and ready to be used, you will be able to access the appliance Web interface from any browser in the network. If you ordered a preconfigured Axcient BDR appliance, you will be able to access the appliance Web interface as soon as you turn on your appliance. You will need to use the password you defined during the ordering process.
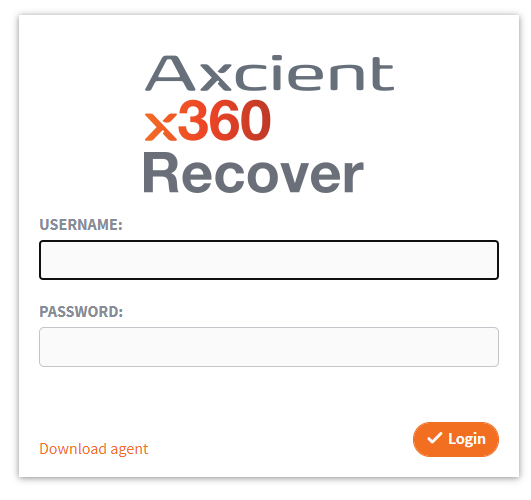
1. With the appliance turned on, type the IP address of your appliance into the address bar.
2. When prompted, type your Username (admin) and your Password and then click the Login button.
3. In the Appliance Web interface, you can now manage settings and add a storage pool.
Auto-enable Remote Assist
When you first log in, a pop-up window displays, prompting you to configure the Auto-Enable Remote Assist feature. We highly recommend selecting Yes.
When you enable this feature, Remote Assist is automatically enabled for 7 days following an upgrade of the software. Remote Assist allows Axcient Support to access your BDR devices without your intervention in order to perform troubleshooting tasks. Axcient monitors all BDR devices through Telemetry and attempts to proactively correct issues that might occur during updates.
Add and manage a storage pool
Unless you ordered a preconfigured BDR appliance, you will be prompted to create the storage pool when you first log in to the device.
1. In the left-hand navigation menu, click Manage Storage.
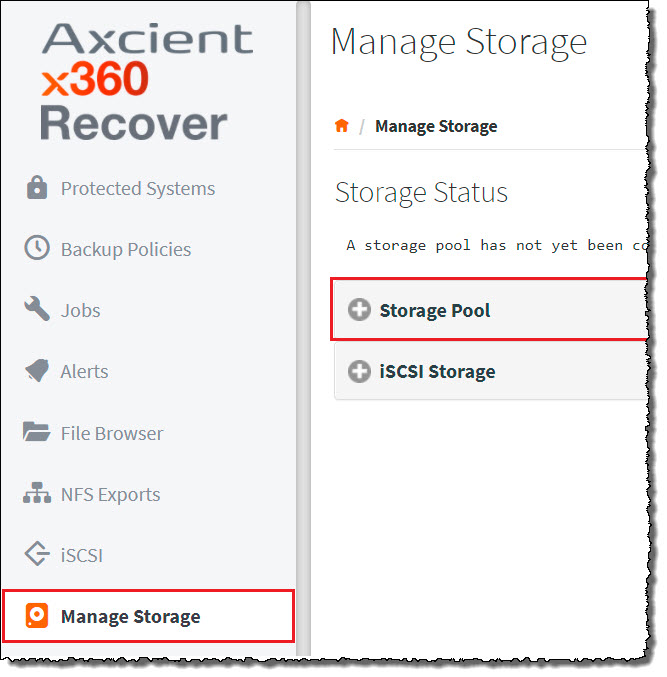
2. In the Storage Pool page, click to expand the Storage Pool heading and then click to expand the Unused Disk(s) heading.
3. You will select and configure the following settings:
- RAID level
- Compression level
- Disks
4. Click the Create Storage button when you are finished.
|
Best practice: Storage Pool settings
When setting up the Storage Pool, you will need to consider RAID level, compression level, and disk selection.
Note: While you can expand the Storage Pool after initial configuration, the Storage Pool must be expanded by the same number of disks chosen during the initial setup, using the same RAID level.
RAID level
Consider the following best practices when setting up RAID level for the Storage Pool:
RAID-0 should never be used for production, as this option provides no redundancy. The loss of any disk in the Storage Pool will corrupt its data integrity. |
RAID-1 requires a minimum of 2 disks. All disks in a RAID-1 set are mirror copies of the data, and the total usable data size is equivalent to the size of 1 disk. Note that it is possible to allocate more than 2 disks in a RAID-1 set, but not common practice. |
RAID-5 requires a minimum of 3 disks. In RAID-5, data is written across each disk in the set sequentially, with every 4th block being parity data. This distributes the data and parity information evenly across all disks in the set. The total usable space with RAID-5 is the total of all disks in the set, minus 1 disk of parity. For example, 3 disks that are each 2TB in RAID-5 yields 4TB. |
RAID-6 requires a minimum of 4 disks. In RAID-6, data is written across each disk in the set sequentially and parity data is stored using an advanced data guarding algorithm. This distributes the data and parity information evenly across all disks in the set. The total usable space with RAID-6 is the total of all disks in the set, minus 2 disks of parity. For example, 4 disks that are each 2TB in RAID-6 yields 4TB. |
Note: Expansion of the Storage Pool is performed through spanning. With spanning, multiple RAID-1, RAID-5, or RAID-6 disk sets are expanded together by creating a RAID-0 set of RAID sets. This is sometimes referred to as RAID-10, RAID-50 or RAID-60.
Compression level
Consider the following best practices when setting up Compression Level for the Storage Pool:
| ZSTD-3 mode is recommended for all devices. LZ mode has slightly lower compression but higher performance. | |
| GZIP-4 mode has higher compression at the expense of lower performance. |
Unused disks
Consider the following best practices when selecting disks for the Storage Pool:
- We recommend never selecting more than 10 disks in a single RAID set.
- The more total disks you have within your storage pool, the better the overall disk performance will be.
- Adding many disks to a single RAID set increases the risk of data loss, as you can only lose 1 (RAID-5) or 2 (RAID-6) disks in the set before losing data integrity.
- Spanning together multiple smaller RAID sets increase performance with less risk, as there are more total parity drives, and you are less likely to lose data integrity.
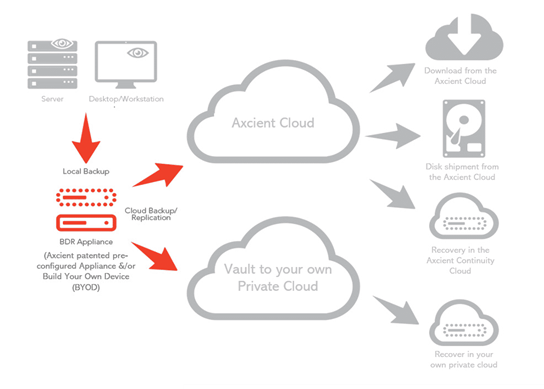
Deploy a new BDR appliance
Whether you ordered an Axcient-branded BDR appliance or decided to use your own hardware, the next step is to connect and configure the appliance for use. You will deploy an appliance at each customer location to hold the backup data received from installed agents, manage replication to the Cloud vault, provide the Web interface for the local site, and host the virtual machine environment.
Role of the BDR appliance
The appliance is the core customer-facing component. You deploy an appliance at the customer site to:
- Hold the backup data received from installed agents,
- Manage replication to off-site vaults,
- Provide the web interface for the local site, and
- Host the virtual machine environment for local disaster recovery.
Turn on an Axcient BDR appliance
If you are using your own appliance hardware, plug in your appliance and make sure it is connected to the Internet.
If you ordered an Axcient BDR appliance, follow the instructions below to plug in and power on your BDR appliance.
1. Open the shipping case and remove the appliance, the power cord, and the Ethernet connection cable.
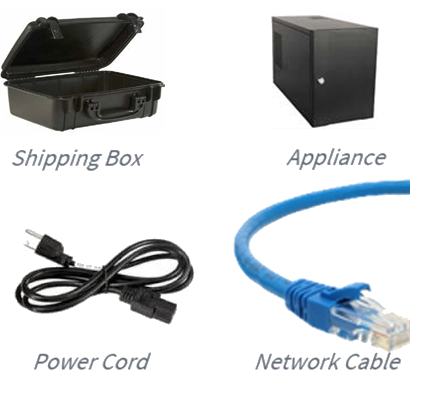
2. Connect the power cable to the back of the appliance and plug it into a power source.
3. Connect one end of your network cable to the back of the appliance and the other end to your network connection.
Optionally, you can connect a keyboard and a monitor to the appliance so that you can read and record the IP address from the Login screen after powering on your device.
4. Press the Power button to turn on your appliance (as an example, the Mini BDR appliance is pictured here).
Configure key appliance settings
After the storage pool is configured for the appliance, you can begin to browse the appliance web interface and configure key settings.
To configure settings for the appliance:
1. In the left-hand navigation menu, click the Settings tab.
2. In the Settings page, click to expand each section that you want to update.
For example, click the License Details section to view the number of licenses available for use.
Note: Before you deploy the agent, we recommend reviewing the licensing information to make sure the agent will properly register with the appliance.
If no licenses display, return to the License Details page and click the Sync button to force the appliance to resync with x360Recover Manager.

You can assign licenses as needed to the appliance from x360Recover Manager.
- Refer to Manage licenses in x360Recover Manager for detailed instructions on assigning licenses.
3. Click the Email Notifications section to configure an email server and turn on email notifications. To configure an email server:
- Click the Enabled button.
- Enter information about the email server, including a From Email address, the username and password of a valid email account on the email server, and the IP address and port of the server.
- Select your connection security preference.
- Enter one or more email addresses that should receive alerts generated by the Appliance.
- Select the types of alerts that should be generated by the Appliance.
- Click the Test Mail button to test your settings and then click the Save button. To configure email delivery without a mail server account (which is not recommended) leave the Username and Password fields blank. In the Connection Security field, select None
4. Click the Change Machine Name section to change the name of the appliance, ensuring that the appliance is easily recognized. This name will display in the Global Management Portal. To change the machine name:
- In the Machine Name field, enter the new machine name.
- Click the Change button when you are finished.

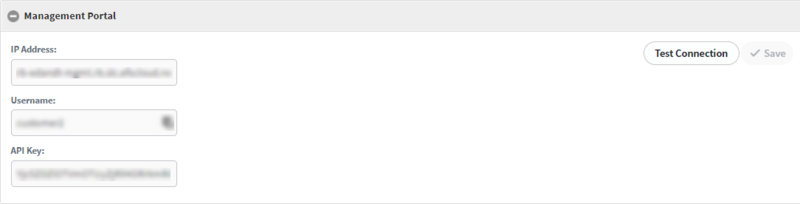
5. Click the Management Portal section to enter the IP address of your Global Management Portal. When you connect an appliance or vault to the Global Management portal, you will be able to monitor all protected systems from one centralized management portal.
As a first step, you may choose to create a customer-specific Username and API Key for this appliance in the Global Management Portal, or use the existing Admin user and API Key.
To connect to the Global Management Portal:
- In the IP Address field, enter the Global Management Portal IP address or URL (without the https).
- In the Username field, enter the username from the Users tab in Global Management Portal.
- In the API Key field, enter the API key associated with the username in the Global Management portal.
- Click the Test Connection button to test your settings and then click the Save button.
6. Click the Time Settings section to confirm that your time settings are correct. To update time settings:
- In the Time Zone drop-down menu, select the time zone of the Appliance.
- In the Time field, enter the current time.
- In the Date field, enter the current date.
- Click the Save button when you are finished
7. Click the Update Manager section to enable automatic updates for the system. When enabled, x360Recover will update the appliance automatically. If you do not want x360Recover to automatically update your systems, then periodically schedule time on your calendar to manually check for updates. To turn on auto updates:
- Click the Enable Auto Update checkbox to turn on the Auto Updates feature.
- Click the Auto-Enable Remote AssistWhen Upgrading checkbox to allow Axcient Support to remotely support the Appliance during updates.
- Optionally, click the Check for Updates button to manually check for available updates.
Configure replication to the vault
Once your vault is configured and accessible, you can begin the replication process for protected systems.
Scheduling replication is a multi-step process:
- First, navigate to the appliance web interface and enter vault details into the vault settings page. As part of this process, you will define a replication schedule.
- Then, for each protected system, assign a replication schedule and select a snapshot to serve as the base image.
- Optionally, preload (or seed) a large data set to the vault.
Preload (seeding) options
Before you begin the replication process, you should determine if preloading (or seeding) a protected system data set is right for you. You might want to preload if a data set is large and bandwidth is limited at the customer location.
Axcient offers a round-trip preloading service for U.S. partners, which includes everything required to properly preload a protected system data set. Shipping and processing might take several days, so we recommend starting the process as soon as possible. You can choose from the following preloading options:.
- WebSeed—With WebSeed, you can copy data to your own USB device and then upload the data to the cloud from a location with sufficient bandwidth. For most preloading operations, we recommend WebSeed as the least expensive and more efficient option. Please reference the WebSeed Guide.
- USB—After submitting a request to the Axcient team, we will send you an Axcient USB seeding device. You can then copy your data to the device and ship it back to us. Contact Axcient to request a preload (seed) drive
Create a vault schedule and assign replication to the vault
After choosing your preload (seeding options), you can begin configuring the replication process.
To schedule replication to the vault:
1. Log in to the appliance web interface.
2. Optionally, if you are preloading (or seeding) a protected system data set, attach a USB drive to the appliance.
3. In the left navigation menu, click the Vault Configuration tab.
4. In the Vault Settings page, click the Add Vault button.
5. In the Vault Settings page, enter information about the vault:
- In the Name field, enter a descriptive name for the vault.
- In the IP Address field, enter the server name or FQDN of your vault. Do not include https. Click the Test Connection button to verify the connection.
- Click the Enabled checkbox to active replication.
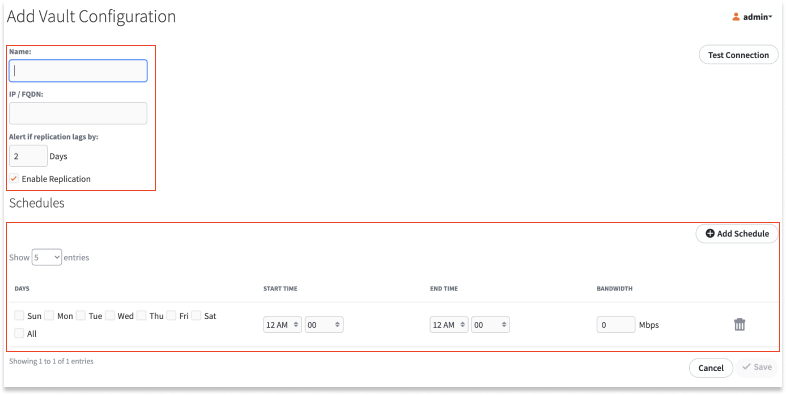
6. In the Vault Schedules & Bandwidth section of the page, define the Days, Start Time, End Time, and Bandwidth (Mbps).
7. Click the Add Schedule button to define an additional schedule. You can define schedules with different bandwidths for each day and hour.
8. Click the Save button to save your settings. Schedule changes take effect immediately. This new replication schedule will display in the Vault Settings page and can be edited if needed.
9. To assign replication to a protected system, click the Protected Systems tab in the left hand navigation.
10. Find the protected system and click the appropriate System Name.
11. In the Protected Systems Details page, click Replication.
12. With the Enabled checkbox selected, use the dropdown menus to select the vault and the initial snapshot that should serve as the base image.
Optionally, if you have decided to preload (or seed) a dataset, click the USB Seeding checkbox and select the drive where you attached the USB device. Click the Seed button to begin the seeding process.
13. Click the Save button when you are finished.
- If you did not select the USB Seeding checkbox, replication will begin over the Internet within a 15-minute time period.
- If you did select the USB Seeding checkbox, you can monitor the export process from the Jobs page (in the Seeding subtab).
Additional setup tasks
Other tasks you may need to complete during appliance setup include prepping your BIOS, resetting the administrative password, verifying the appliance license and creating a bootable USB flash drive.
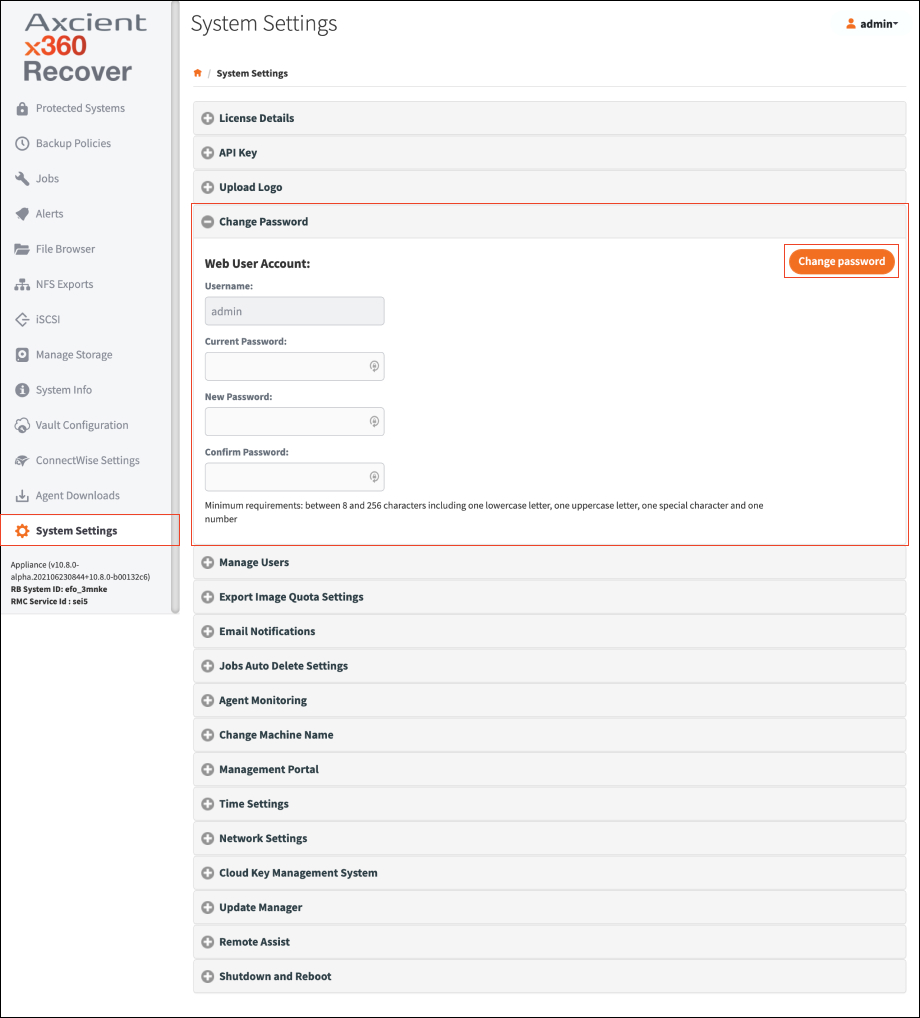
Reset the admin password
If the current admin password is known:
1. Sign into the appliance and select System Settings on the left navigation.
2. Select Change Password. Make changes and click Change Password.
If the current admin password is not known:
STEP 1. Log into the x360Recover Console using the Root password.
This can be done in one of three ways:
a) Use the keyboard on the appliance
b) Use a browser on the local machine by going to the address https://xxx.xxx.xxx.xxx/ssh
c) Use the terminal icon on the Managed Systems tab on the Global Management Portal (GMP)
You can right click on the screen and select "White On Black" and then repeat to select "Black On White" to more easily see the cursor.
STEP 2. Log in with Root username / password.
| If the Root password is unknown, refer to the following KB article on resetting the Root password: |
STEP 3. Enter the following commands:
- flask
- repenv
- python changePassword.py admin
STEP 4. Enter the new password at the Enter Password: prompt.
STEP 5. Enter the password again at Re Enter Password: prompt.
STEP 6. You will see a Password Changed Successfully notification.
STEP 7. Type exit to close the session
DeleteVerify a license
Once the Storage Pool is set up, you should verify that licenses have been assigned to the appliance.
If no licenses display, return to the License Details page and click the Sync button to force the appliance to resync with x360Recover Manager.

You can assign licenses as needed to the appliance from x360Recover Manager.
- Refer to Manage licenses in x360Recover Manager for detailed instructions on assigning licenses.
Create a bootable USB
You can use any bootable USB creation tool you prefer.
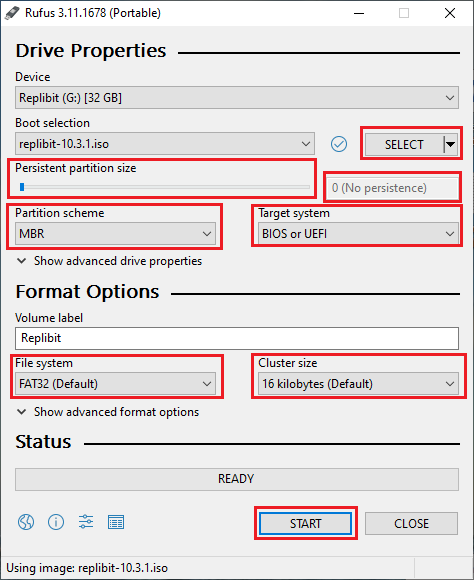
We recommend Rufus as a good all-around USB creation utility: https://rufus.ie/
How to use Rufus to create a bootable USB flash drive:
|
1. Insert your USB media into your system and launch Rufus. It should automatically detect and select your device; If it does not, select the correct device from the device drop-down list 2. Click Select and select the x360Recover ISO image you wish to install. 3. Ensure that the persistent partition size is set to 0 (No persistence). 4. Ensure that Partition scheme and target system type is set to MBR partition for BIOS or UEFI-CSM. 5. Ensure that File system is set to FAT32 as the default, or select FAT32 from the drop-down list. 6. Ensure that the Cluster size is set to the default, typically 16 kilobytes. 7. Enter a New Volume label if desired. 8. Click the Start button and wait for the file copy process to complete. |
 |
SUPPORT | 720-204-4500 | 800-352-0248
- Contact Axcient Support at https://partner.axcient.com/login or call 800-352-0248
- Have you tried our Support chat for quick questions?
- Subscribe to the Axcient Status page for status updates and scheduled maintenance
1365 | 1497 | 2090