
Thinking about using your own hardware?
Because x360Recover is hardware agnostic, you can choose to use your own hardware, so long as it meets the minimum hardware requirements. BYOD is particularly convenient when you already have access to hardware that you want to reuse.
The BYOD option requires that you download and install the software onto your hardware. This means you'll need to pay special attention to hardware requirements.
Below are some things to be aware of as you get started with x360Recover as a Bring Your Own Device (BYOD) platform.
Before you get started: Requirements
Prepare for install
Note: The x360Recover appliance and vault use the same ISO image for installation. The procedures are exactly the same for installing any of x360Recover’s main components. You will assign the device to a particular role during the "Setup & Configuration" stage, which is performed after installing the base operating system.
- x360Recover automatically updates all of the software and agents so you do not have to worry about managing the underlying operating system. Additionally, the Axcient support team is available to assist you whenever necessary. Review the How to use the Linux shell article for instructions on accessing our simplified Linux command line environment.
- Prior to your first deployment of x360Recover , please review x360Recover Best Practices. This should answer many of the questions you may have during your installation process, and provide you with an understanding of best practices to use when deploying the product.
Ubuntu Linux
x360Recover does not require you to purchase proprietary hardware. You can choose your own hardware if it meets the minimum hardware requirements; however, the hardware you choose must be compatible with Ubuntu Linux 22.04. Current versions of x360Recover ship an updated kernel, so please consult the following links to determine whether or not the hardware you want to use will support Linux.
- https://ubuntu.com/certified?category=Server
- https://ubuntu.com/certified?category=Desktop
- For individual components, like NICs or HBA controllers, visit www.ubuntu.com/certification/catalog
You do not need to know Linux in order to run and operate x360Recover software, as all management and operations are performed from within the Web Management interface. However, a basic understanding of Linux, and common Linux shell commands can be useful when troubleshooting and maintaining the product. See our Linux primer here:
Bare metal install
We recommend that you install the x360Recover appliance software on bare metal for the best performance and to take advantage of automated backup verification booting.
Note: If you are deploying x360Recover as a Virtual Machine on Vmware, as of x360Recover v17.0.0 (Ubuntu 22.04 LTS) the minimum required version of ESXi is now v7.1.
|
Minimum hardware configuration Please see this Supported Configuration KB section Operating System (OS) resource minimums that will open in a new tab. |
Preinstall prerequisites
To ensure that the installation can complete successfully, the system should be connected to a network with DHCP and open Internet access.
Note: After deployment and provisioning it is recommended to configure the device to use a Static IP address and DNS Servers assignment.
After installation of the basic operating system, provisioning and configuring the x360Recover device requires Internet access to perform any necessary software updates.
When booting from a USB device, it may be necessary to change the default boot order of the system.
- Power on the system and press the appropriate key (Typically <Del>, <F1> or <F2> on most white-box systems, or <F9> on HP servers) to enter the BIOS setup menu.
- Locate the boot order management page within the BIOS and configure the system to enable booting from USB Flash drive.
- Ensure that the boot order places the USB device before internal Hard Drives. Alternatively, press the Boot Menu key (Typically <F9>, <F10>, or <F11> on most systems) and directly select the USB device to boot from.
Note: x360Recover and the Linux operating system do not support booting from motherboard (fake) RAID controllers (BIOS has an option to select RAID for the onboard SATA ports). This onboard ‘RAID’ functionality is really software-based RAID that requires Windows-only drivers that are not available on Linux. If your motherboard has such an option, ensure that the SATA ports are configured in SATA or AHCI mode for compatibility with Linux.
Consult your system motherboard documentation for instructions on selecting between RAID and SATA/AHCI boot modes.
DeleteInstall the operating system
x360Recover runs on a custom Ubuntu 64-bit Linux operating system. The x360Recover installation ISO will deploy the basic operating system along with all x360Recover application components.
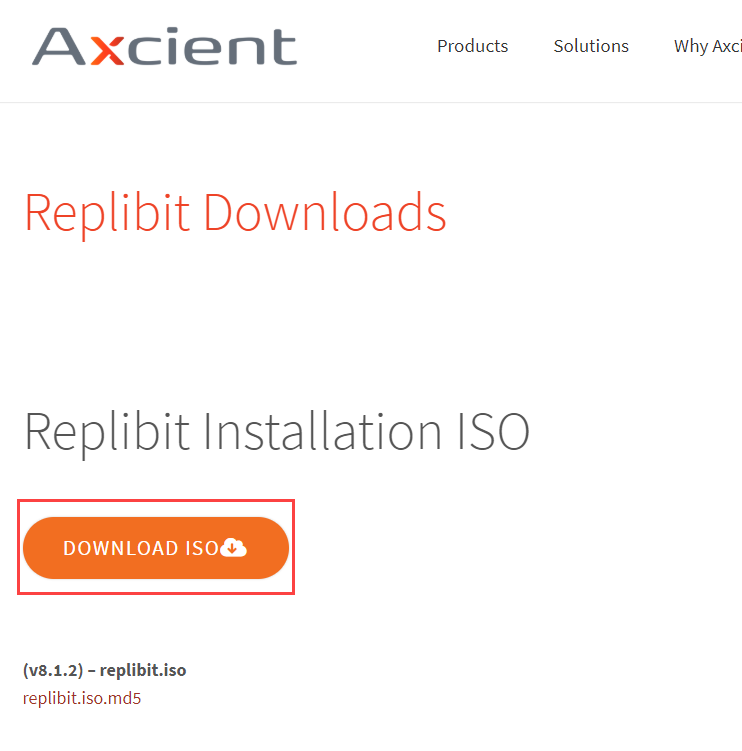
- Download the latest x360Recover installation ISO here.
Once you have downloaded the ISO, you can make a bootable image of the installer on a USB flash drive (the steps below reference the Linux Live USB Creator, or LiLi, software, but you can use your preferred USB-creation software).
Create a bootable USB drive
1. Navigate to the Downloads site and download the ISO file.
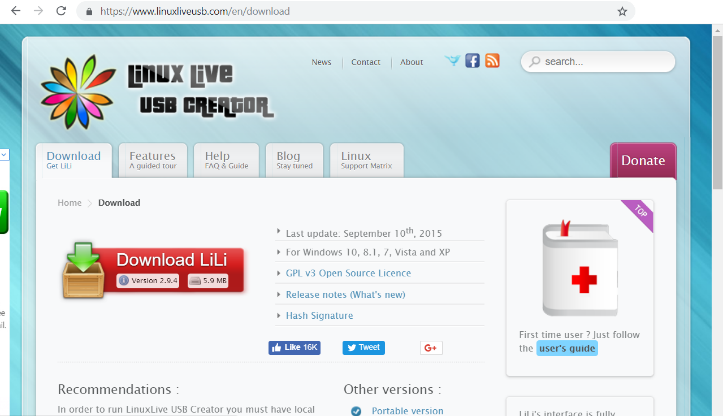
2. Navigate to the Linux Live USB Creator site (or your preferred USB-creator software site) and download and install the LiLi application.
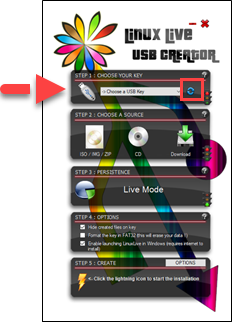
3. When LiLi is installed, insert a USB drive into your computer.
4. In the Step 1 section of the LiLi application, click the blue Refresh button and select your USB drive from the drop-down menu.
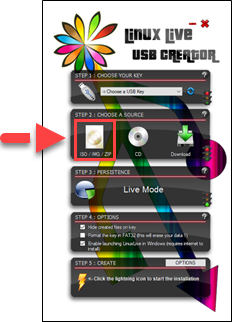
5. In the Step 2 section, click the ISO/IMG/ZIP icon and select the ISO file previously downloaded from the Downloads site. When the ISO is verified, you might notice an error message. You can safely ignore this message.
6. In the Step 4 section, select the Format the Key checkbox.
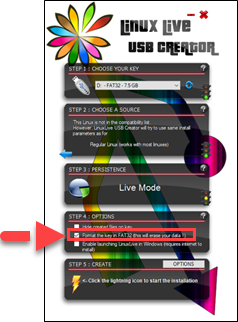
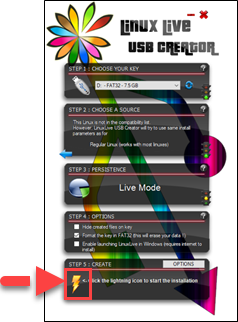
7. In the Step 5 section, click the lightning icon to create the bootable flash drive.
The following steps describe the installation of the underlying x360Recover operating system.
Prepare to install
Once the BIOS configuration has been completed:
- Ensure that the DVD or USB flash drive is inserted into the system.
- Exit from the BIOS after saving any settings changes.
- Reboot the machine.
The x360Recover installer should now load on the system.
Install x360Recover
STEP 1. Boot the x360Recover OS.

The initial Boot Menu defaults to booting to the local hard drive.
Use the cursor keys to scroll up and down in order to select one of the available installation options
- Standard Install - HWE Kernel is the recommended option in most cases. This installs x360Recover using the standard Ubuntu 20.04 Linux Kernel.
- Standard Install - HWE Kernel (Safe Mode) is available if you experience video issues during the installation process
-
Single Disk / Nano Install is available for installing onto devices with only a single physical disk volume. This special installation mode has support for installing x360Recover onto systems that have only a single hard drive that will be shared for both the operating system and data storage. x360Recover typically installs the operating system on a dedicated volume and then stores data on a separate set of multiple disks. This is intended to provide redundancy for your backup data in the event of a disk failure.
IMPORTANT NOTE: We highly recommend using the standard installation method when building your own x360Recover BDR hardware! You will not have any data redundancy. You will not be able to perform an OS Recovery. You will not be able to expand the storage volume.
Once you select an option, the installer will boot to the Installation Wizard.
The x360Recover splash screen will be displayed while the installer loads.
STEP 2. Select installation type.
The Axcient x360Recover installer menu appears.
Select Erase Disk and Install x360Recover.
Note: Do not select encryption and do not select LVM partitioning.
IMPORTANT NOTE: If any other operating system is installed on the system, it will be destroyed, and replaced with the x360Recover operating system.

Click Continue
STEP 3. Select the drive to be used
Select the drive where you wish to install the x360Recover operating system.
Typically, this choice will be (sda):

After you have selected the preferred drive, click Install Now.
Note: This disk will be formatted and erased during the installation.
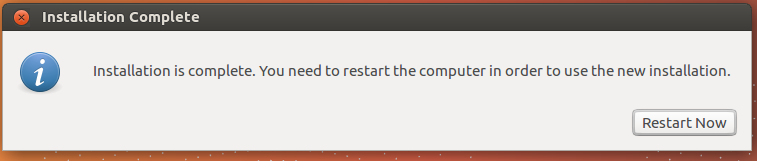
STEP 4. Complete the installation
Installation will now proceed. Please wait for this step to fully complete. Loading the operating system may take several minutes, depending on the hardware and type of USB installation media being used.

When the installation is complete, remove the DVD or USB flash drive from the system.
Then, click Restart Now.
Note: Depending on your system BIOS, it may be necessary to press the <Space> bar once to continue (if the reboot appears to be stalled.)
Once the system has finished rebooting, the login screen will be presented.

Note the IP address presented and continue with provisioning the setup and first-time login to the appliance.
DeleteConfigure the device as a appliance
When your appliance has the operating system software installed, you can begin the provisioning and configuration process. The appliance must have Internet access to complete this process.
1. Power on the appliance.
2. Record the IP address listed on the screen. If you do not see an IP address, wait a few minutes and them press the Enter key on your keyboard to refresh the screen.

3. When you have recorded the correct IP address, open a browser on a different machine within the same network. Make sure your appliance is turned on, because you will not be able to access this location when the appliance is turned off.
4. Proceed to this KB article for detailed instructions on provisioning a new device and first time login
Appliance Setup and First Time Login
First Time Login
When the appliance is configured and ready to be used, you will be able to access the appliance web interface from any browser in the network. If you ordered a preconfigured Axcient BDR appliance, you will be able to access the appliance web interface as soon as you turn on your appliance. You will need to use the password you defined during the ordering process.
1. With the appliance turned on, type the IP address of your appliance into the address bar.
2. When prompted, type your Username (admin) and your Password and then click the Login button.
3. In the appliance web interface, you can now manage settings and add a storage pool.
Auto-enable Remote Assist
When you first log in, a pop-up window displays, prompting you to configure the Auto-Enable Remote Assist feature. We highly recommend selecting Yes.
When you enable this feature, Remote Assist is automatically enabled for 7 days following an upgrade of the software. Remote Assist allows Axcient Support to access your BDR devices without your intervention in order to perform troubleshooting tasks. Axcient monitors all BDR devices through Telemetry and attempts to proactively correct issues that might occur during updates.
Add a Storage Pool
Unless you ordered a preconfigured BDR appliance, you will be prompted to create the storage pool when you first log in to the device.
1. In the left-hand navigation menu, click Manage Storage.
2. In the Storage Pool page, click to expand the Storage Pool heading and then click to expand the Unused Disk(s) heading.
3. Select the following settings:
- RAID level
- Compression level
- Disks
4. Click the Create Storage button when you are finished.
Best practice: Storage pool settings
When setting up the Storage Pool, you will need to consider RAID level, compression level, and disk selection. All of these settings are discussed below.
RAID level
Consider the following best practices when setting up RAID level for the storage pool:
RAID-0 |
RAID-0 should never be used for production, as this option provides no redundancy. The loss of any disk in the Storage Pool will corrupt its data integrity. |
RAID-1 |
RAID-1 requires a minimum of 2 disks. All disks in a RAID-1 set are mirror copies of the data, and the total usable data size is equivalent to the size of 1 disk. Note that it is possible to allocate more than 2 disks in a RAID-1 set, but not common practice. |
RAID-5 |
RAID-5 requires a minimum of 3 disks. In RAID-5, data is written across each disk in the set sequentially, with every 4th block being parity data. This distributes the data and parity information evenly across all disks in the set. The total usable space with RAID-5 is the total of all disks in the set, minus 1 disk of parity. For example, 3 disks that are each 2TB in RAID-5 yields 4TB. |
RAID-6 |
RAID-6 requires a minimum of 4 disks. In RAID-6, data is written across each disk in the set sequentially and parity data is stored using an advanced data guarding algorithm. This distributes the data and parity information evenly across all disks in the set. The total usable space with RAID-6 is the total of all disks in the set, minus 2 disks of parity. For example, 4 disks that are each 2TB in RAID-6 yields 4TB. |
Expand the storage pool
- While you can expand the storage pool after initial configuration, the storage pool must be expanded by the same number of disks chosen during the initial setup, using the same RAID level.
- Expansion of the storage pool is performed through spanning. With spanning, multiple RAID-1, RAID-5, or RAID-6 disk sets are expanded together by creating a RAID-0 set of RAID sets. This is sometimes referred to as RAID-10, RAID-50 or RAID-60.
Compression level
Consider the following best practices when setting up the compression level for the storage pool:
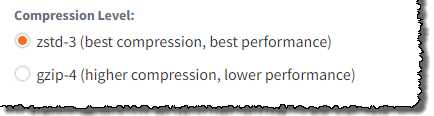
- ZSTD-3 mode is recommended for all devices. LZ mode has slightly lower compression but higher performance.
- GZIP-4 mode has higher compression at the expense of lower performance.
Unused disks
Consider the following best practices when selecting disks for the storage pool:
- We recommend never selecting more than 10 disks in a single RAID set.
- The more total disks you have within your storage pool, the better the overall disk performance will be.
- Adding many disks to a single RAID set increases the risk of data loss, as you can only lose 1 (RAID-5) or 2 (RAID-6) disks in the set before losing data integrity.
- Spanning together multiple smaller RAID sets increase performance with less risk, as there are more total parity drives, and you are less likely to lose data integrity.
Create the storage pool
Once you have selected the correct RAID level, the required compression level, and the desired storage disks, click Create Storage to create the storage pool.
The Storage Status section at the top of the page will list the availability status and pool configuration once the pool has successfully been created.
640 | 874
DeleteMigrate an existing appliance
There are situations when you may decide to relocate a protected system in x360Recover from one device to another. For instance, you might want to migrate to a new appliance or create a better balance of storage consumption between vaults.
In order to facilitate this process, x360Recover has the ability to perform a full migration of protected systems, including all recovery points, job histories, and metadata from one device to another.
Steps to migrate an existing appliance
STEP 1. Before beginning migration, prepare a new appliance for the customer by doing the following:
- Review the information at Licensing in x360Recover Manager (RMC)
- Add a new location to the existing user account. See Manage users and passwords in x360Recover Manager for details
- If you intend to continue taking backups on the new appliance, assign the appropriate licenses to the new location to support the protected systems being migrated.
- Select this customer and this new location when you begin provisioning the new appliance.
STEP 2. Verify that no backup or replication jobs are active for the protected system by checking the, Backup and Replication pages on the Jobs menu.
STEP 3. Stop and Disable the x360Recover Agent Service on the protected system.
STEP 4. On the appliance, set the retention policy. See Snapshot retention settings for details.
STEP 5. On the appliance, go to the Protected System Details page of the system you are migrating, and select the Migrate button.
If replication is configured for the protected system, replication settings (including remote connectivity settings defined on the Vault Settings menu of the appliance) will be copied, and migrated to the new appliance.
STEP 6. Choose a migration method by clicking on the corresponding radio button from the following settings:
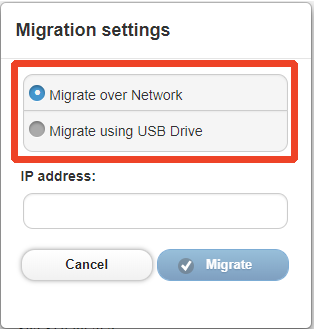
Note: If migrating via USB, an encryption password is required.
IMPORTANT NOTE: Please do not lose this password as it cannot be recovered!
STEP 7. When you have selected your desired migration setting, and entered your encryption password, click the Migrate button to begin the migration process.
Note: You can monitor the progress from the System tab on the Jobs menu pane.
|
---7a. If migrating via network , the migration process will automatically complete in two steps: (a) Migration Export on the source appliance, and then (b) Migration Import on the target appliance. Once the Export job is completed successfully on the source appliance, the Import job will automatically start on the target appliance. Then: - Verify that the migration job completes successfully on the source appliance. |
|
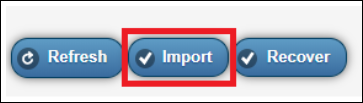
---7b. If migrating via USB, once the export process completes on the source appliance, connect the USB drive to the destination appliance. From the Protected Systems page, click the Import button, and then select the protected system being migrated. You will be prompted for the Password.
|
STEP 8. Monitor the migration import process from the System page on the Jobs menu.
Verify that the job completes successfully.
STEP 9. Once the migration has successfully completed, reconfigure the agent for the new appliance, or change the IP address of the new appliance to match the old appliance:
- To update the agent on the protected system: Edit Aristos.cfg on the protected system, and change the IP address to that of the new appliance being migrated to.
- If migrating within a cluster, once the job is successfully received on the destination appliance you must reconfigure the Agent to point to the new Appliance IP address.
STEP 10. Once migration of all protected systems has been completed (from the original appliance to the new appliance) , delete the location associated with the original appliance. For details, review Manage client accounts in x360Recover Manager
This will revoke assigned licenses and remove the protected system data from Recover Manager.
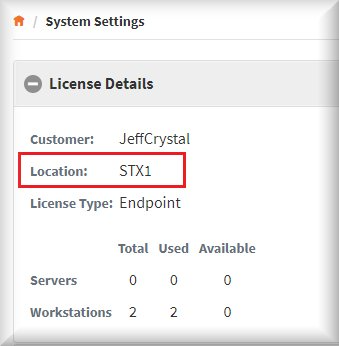
Note: Verify that you are deleting the correct location.
On the original appliance, navigate to System Settings -> License Details and note the location.
|
Have you considered ordering a non-configured appliance from Axcient? That's a scenario where you buy or lease an Axcient-branded BDR appliance, pre-installed with the operating system, but not yet configured for a particular environment. This option saves you the time and money of installing the software on your own hardware and simplifies the ordering process. When you select this option, you will be responsible for setting up customer-specific settings, such as network options and authentication credentials during the provisioning process. What to Consider: Ordering a non-configured appliance from Axcient tends to be the least expensive way to order a BDR appliance. Each Axcient BDR appliance comes pre-installed with the needed software and ships instructions. |
SUPPORT | 720-204-4500 | 800-352-0248
- Please contact your Partner Success Manager or Support if you have specific technical questions.
- Subscribe to the Axcient Status page for a list of status updates and scheduled maintenance.
1377 | 1544 | 1648