
Welcome to Axcient's web seeding platform
- NOTE: We have deprecated using SFTP for preloading, and replaced that process with the steps described below. Please contact support if you have questions about this change

WebSeed is the most efficient way to seed your backup data to your Axcient Data Center.
- If you do not yet have a WebSeed account, please create a new Support ticket in the x360 Portal.

- Webseed Portal Username
- The seed file name
- Name of the vault where the seed needs to be ingested on
- Name of customer
For a general overview of the preload (seeding) process, please review Overview of Preloading (Seeding)

How to access WebSeed
Depending on your data center, you will access your WebSeed login using one of these links:
- https://webseed.slc.efscloud.net/
- https://webseed.atl.efscloud.net/
- https://webseed.ams.efscloud.net/
- https://webseed.ylw.efscloud.net/
Questions about accessing your Webseed login? Please create a Support ticket in the x360 Portal.
 How to use the Home Screen
The home screen is composed of the Upload a file area (a and b) and the Current File Listing (c).

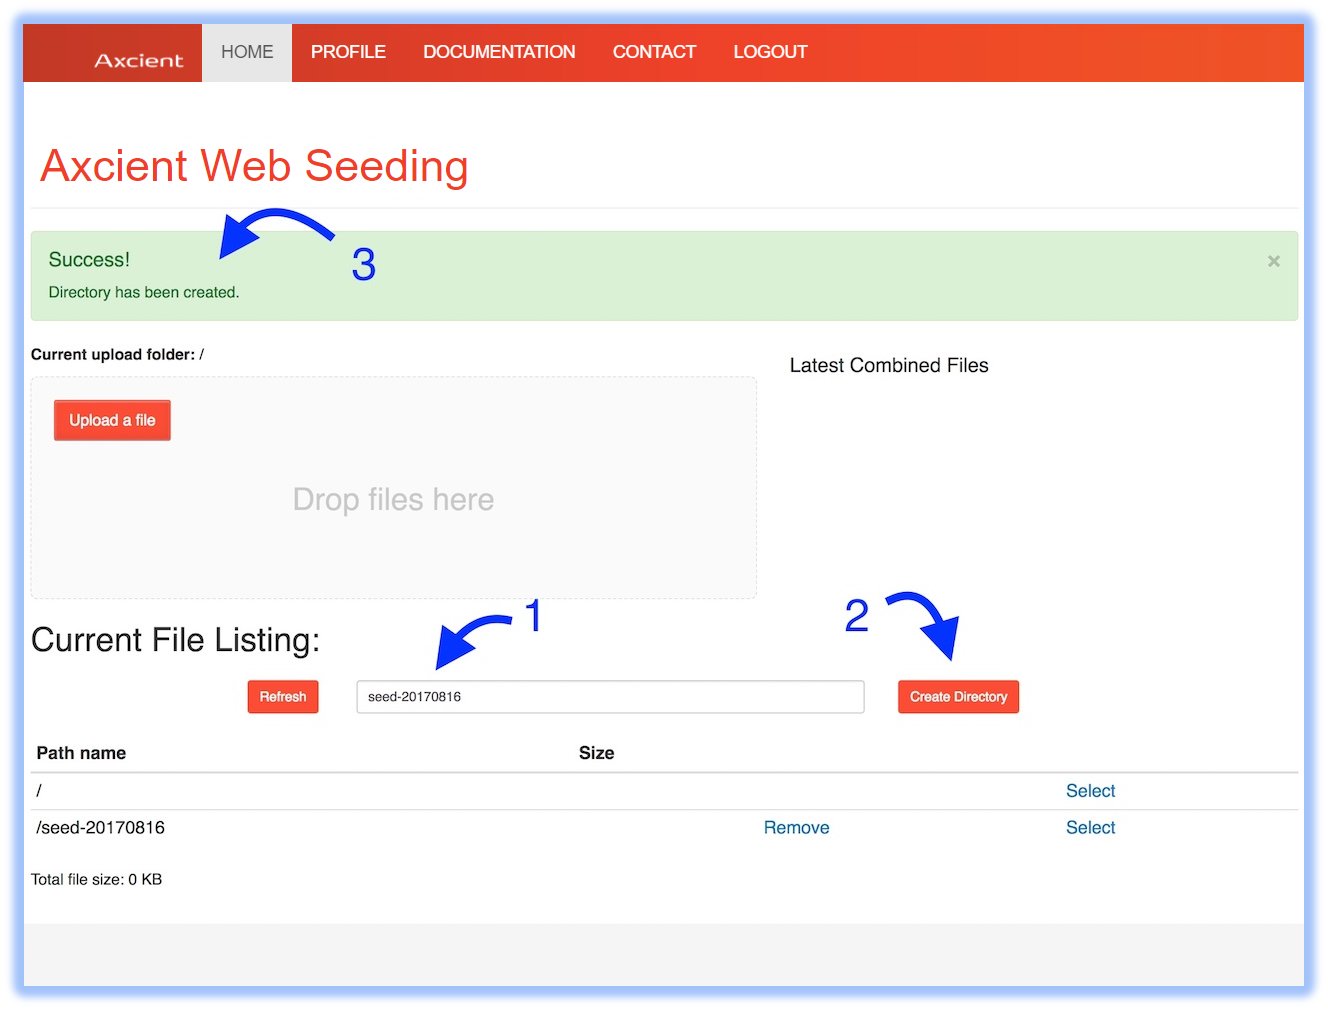
Directory creation
To create a directory for your uploads, first enter the directory name into the input field (1), then click the Create Directory button (2). The confirmation message should appear (3) and the directory should be listed in the Current File Listing area.
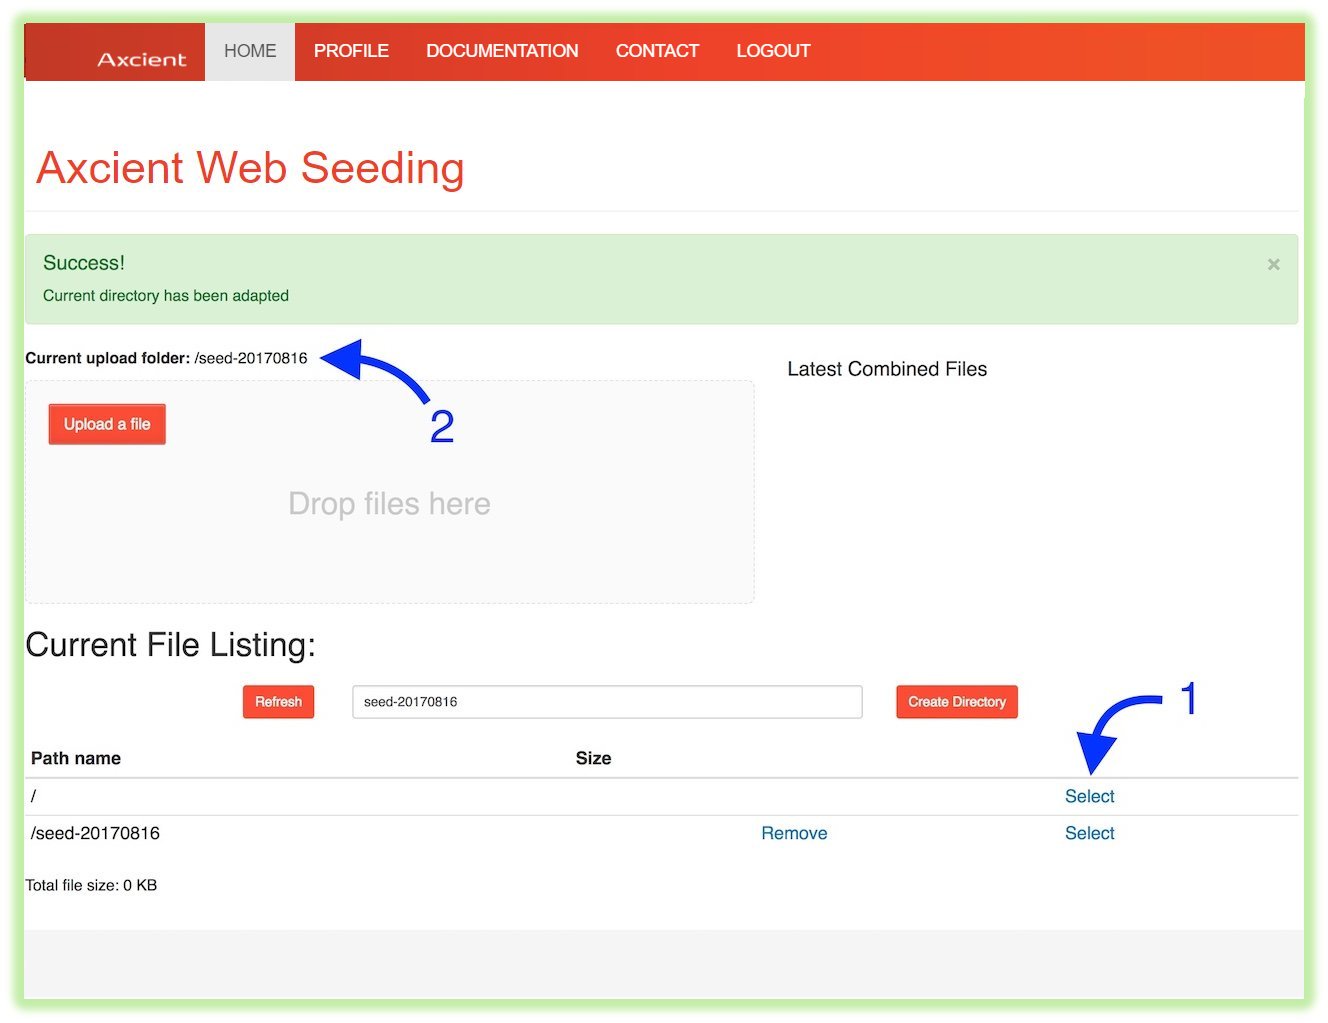
Directory selection
The current directory (where your files will be uploaded) is displayed (2). When you click a Select link (1), this directory changes and any subsequent files will be uploaded to that newly selected directory.
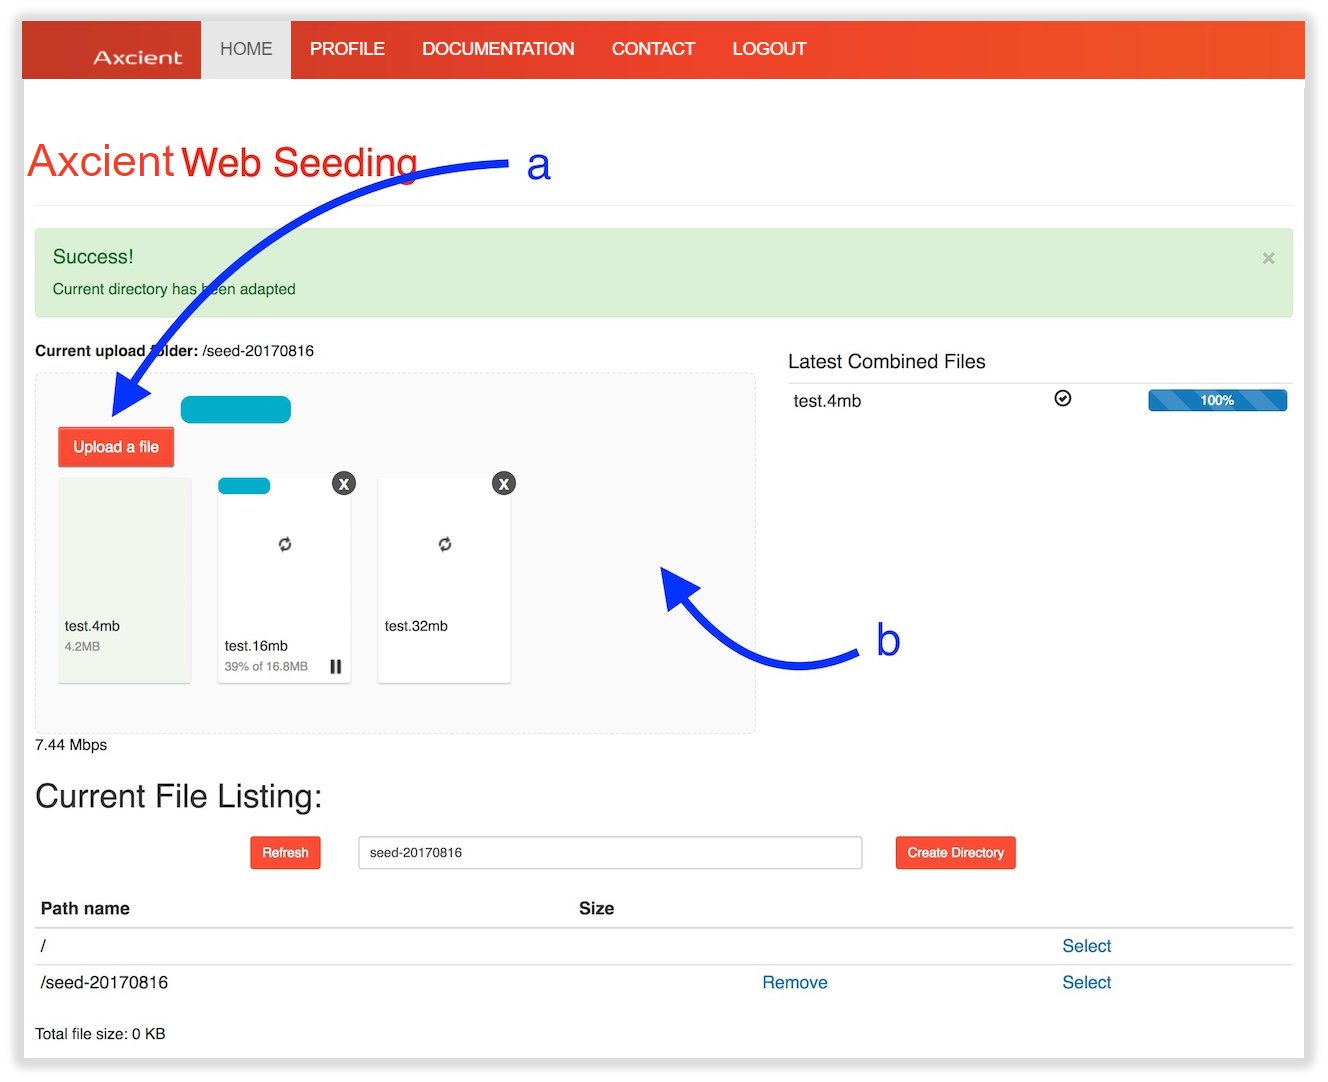
 File upload
To upload a file, you can either click on the Upload a file (a) button and select the file(s) you want to upload or you can directly drag and drop the file(s) into the upload zone (b).
NOTE: You can directly drag and drop folders, but keep in mind this feature is only supported when using Chrome 21+ and Opera 15+ versions.
After the upload of a file is complete, it should appear quickly within the Current File Listing area.
NOTE: Large files may need extra processing before they appear. Please see the "Chunk Combination" section of this documentation below:
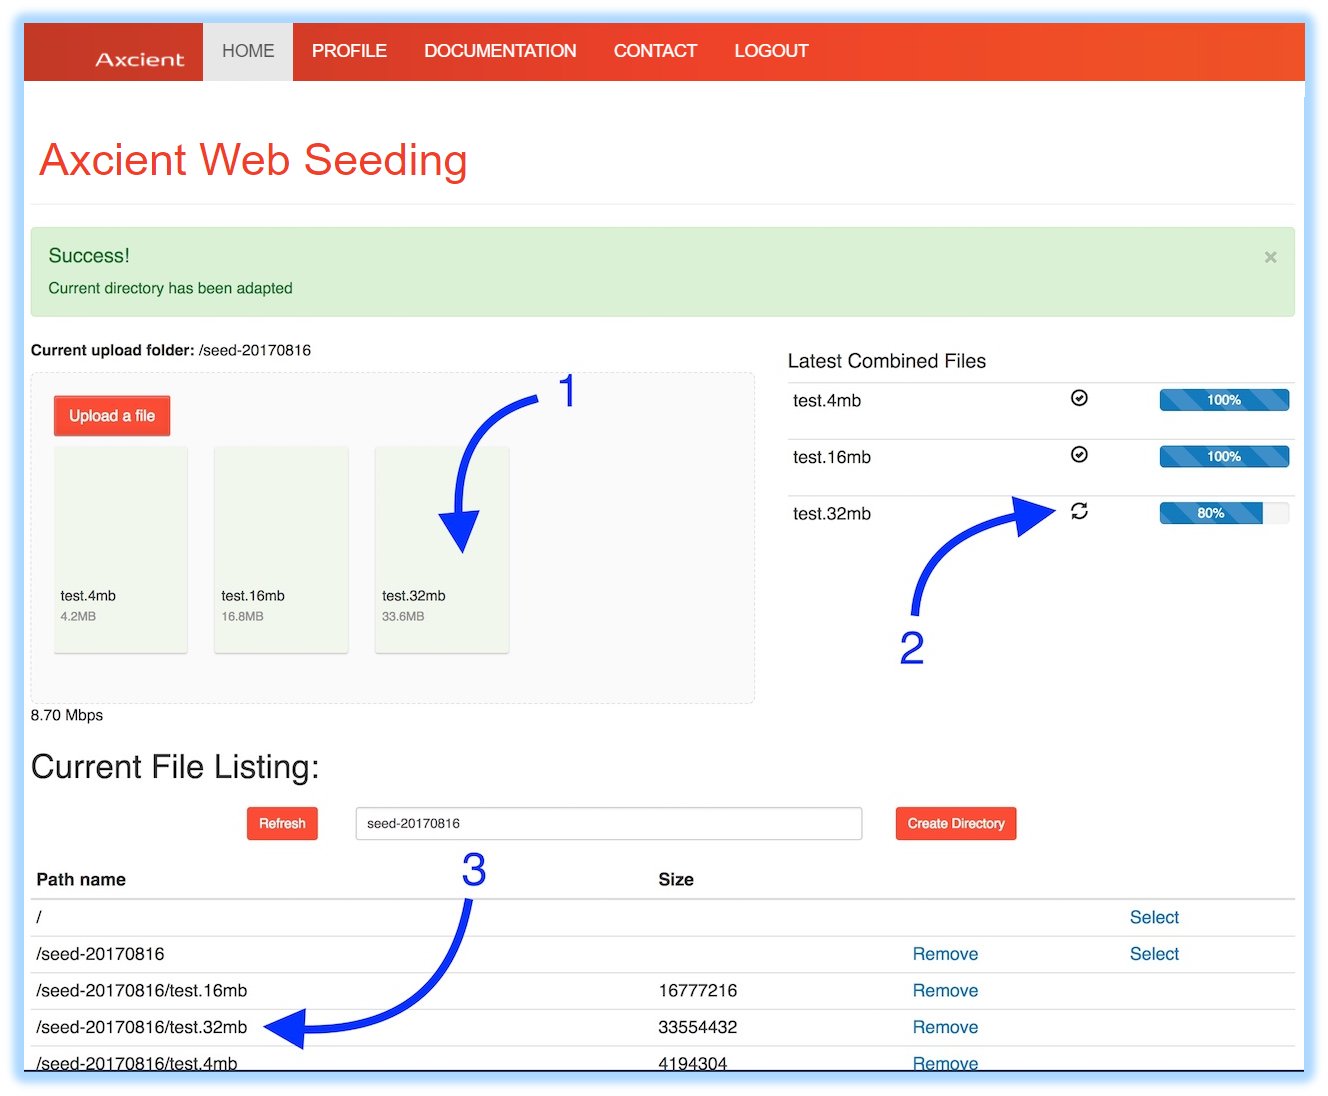
Chunk combination
Chunk combination is the process of combining the different pieces of a large file which has just been uploaded.
- When a large file is uploaded, it is split into multiple chunks
- Chunks may be uploaded in parallel
- You may pause/resume an upload when using this process
When a large file upload is done (1), an entry may appear under the Latest Combined Files (2) section of the screen, which allows you to track the background job processing your upload. When the background job is completed, the file will then appear in the Current File Listing (3).
File deletion
To delete a file or directory, click the Remove (1) link beside the entry you want to delete and then click OK to confirm (2).
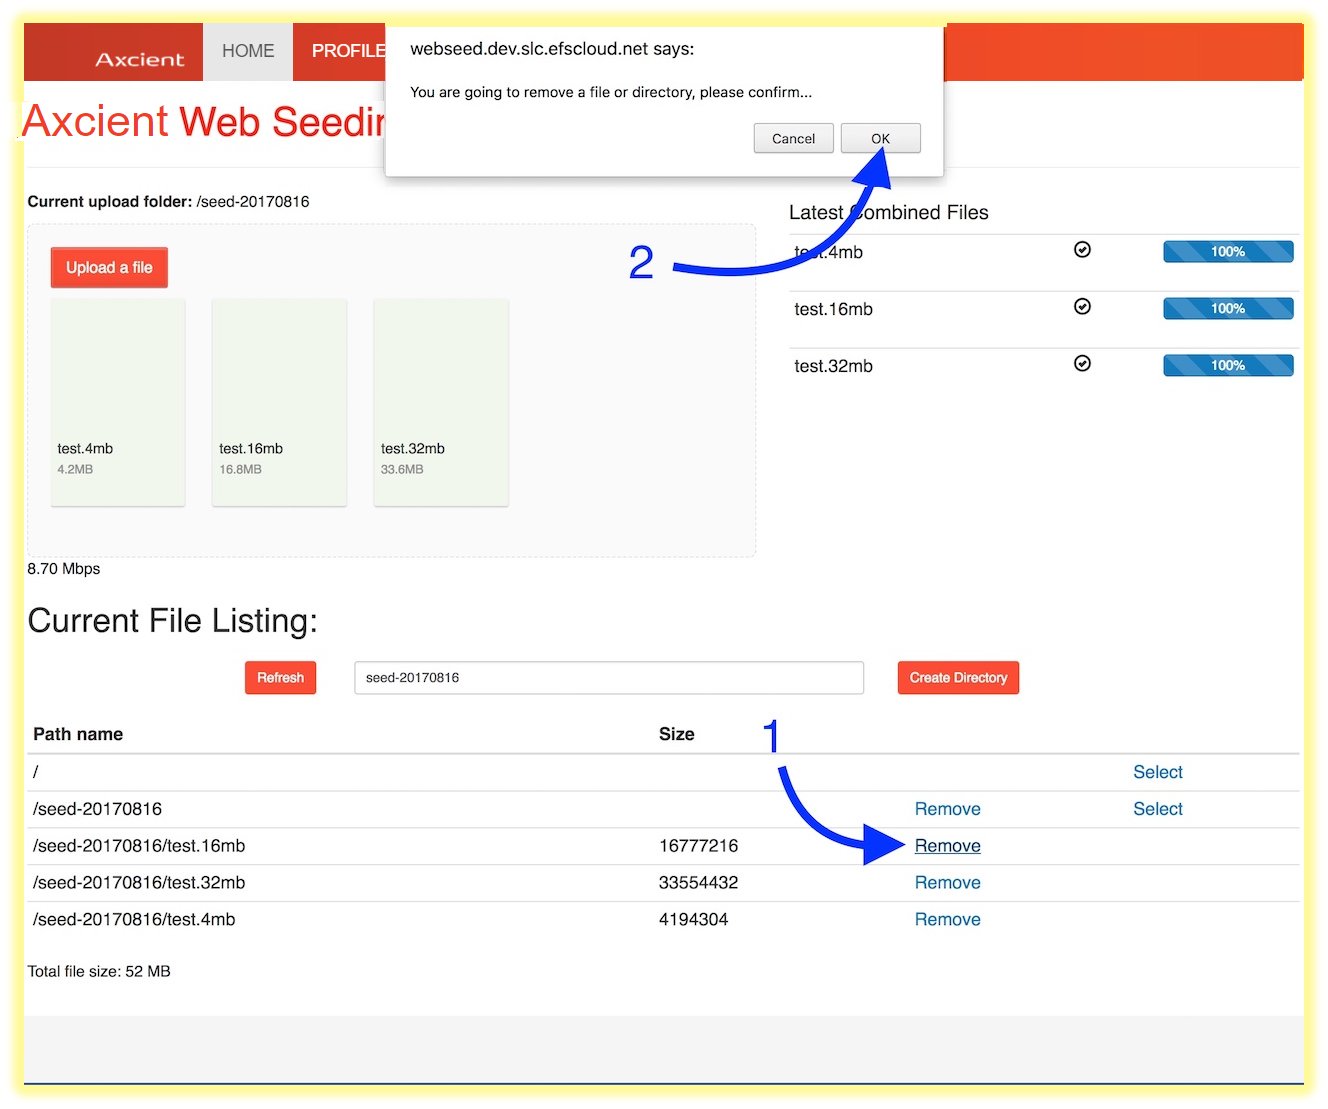
NOTE: Large files or directory removal may take some time to process.
NOTE: Uploads are subject to auto expiration after a fixed delay (which defaults to 30 days.) If you need a longer file upload retention, please contact your support representative.
SUPPORT | 720-204-4500 | 800-352-0248
- Contact Axcient Support at https://partner.axcient.com/login or call 800-352-0248
- Have you tried our Support chat for quick questions?
- Free certification courses are available in the Axcient x360Portal under Training
- Subscribe to Axcient Status page for updates and scheduled maintenance
1908