Perform bare metal restore from a vault with no local cache
Bare metal restore is most often used with hardware devices but the process can be applied to virtual machines, as well.
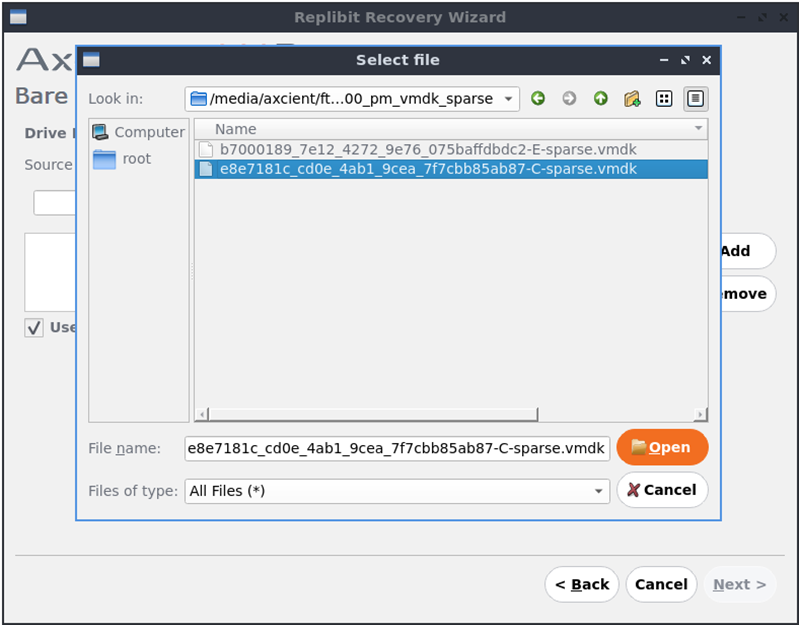
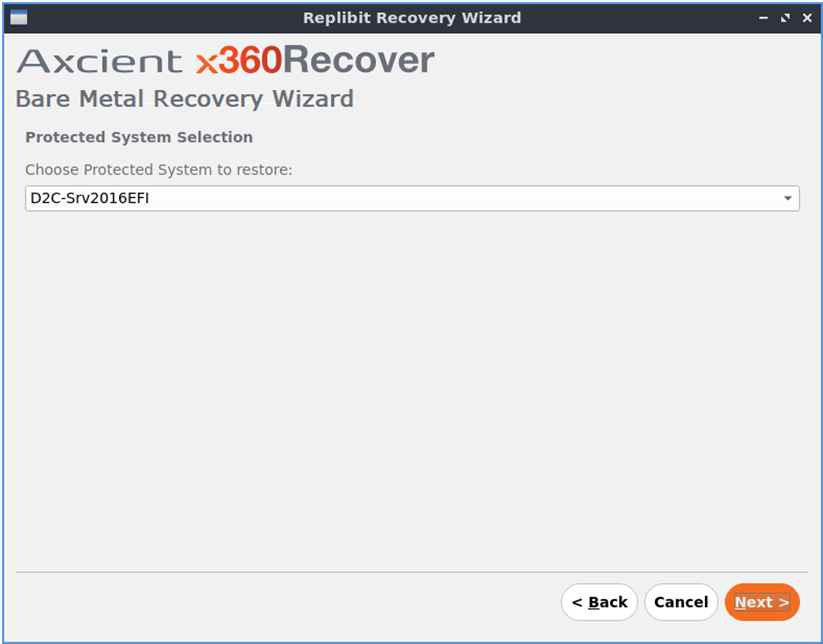
If your protected system is either (a) an appliance-based end point or (b) a Direct-to-Cloud (D2C) endpoint, the bare metal restore wizard can recover directly from your vault.
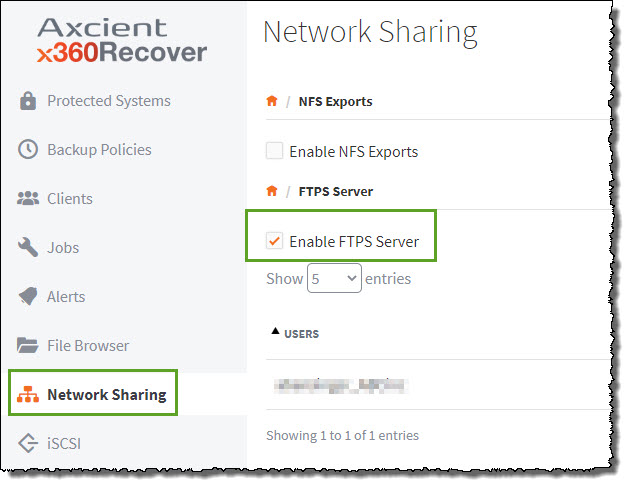
Note: This recovery method relies on FTP access to the vault. Before proceeding, ensure that FTP access is enabled by doing the following:
Log in to the vault using admin credentials or access the vault via x360Recover Manager
Ensure that the protected system is not already mounted in the File Browser on the vault. If the protected system is already mounted in the File Browser on the vault, dismount it before starting the recovery from the vault.
Navigate to Network Sharing from the left menu
Click to select Enable FTPS Server
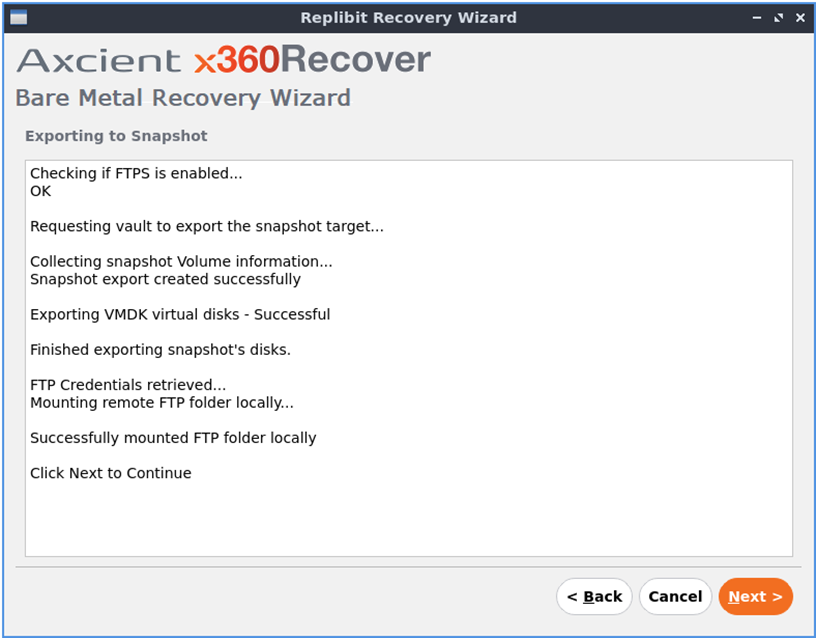
Now that FTP access is available, proceed with the following steps.
Prerequisite #2
Note: We recommend that you remove existing partitions on the destination disk before performing BMR. Please review the instructions below before beginning your BMR:
How to remove existing partitions on the destination disk before performing BMR:
Before beginning a bare metal restore, we recommend that you first inspect the destination disk and remove any existing partitions. This will ensure that you have a successful recovery.
STEP 1. After booting the x360Recover BMR ISO, run GParted from the desktop.
STEP 2. Select each disk you intend to overwrite with the recovery from the top right dropdown menu.
NOTE: You must remove any locked partitions (such as LVM groups or swap partitions) because the system will block these locked partitions from being overwritten:
To delete locked LVM partitions, first select the partition and click Partition -> Deactivate
To delete locked swap partitions, first select the partition and click Partition -> SwapOff
STEP 3. To remove the chosen partitions, select each partition, one at a time, and click the red-circle-x icon on the toolbar.
Then, after all desired partitions are removed, click the green check iconto save these changes.
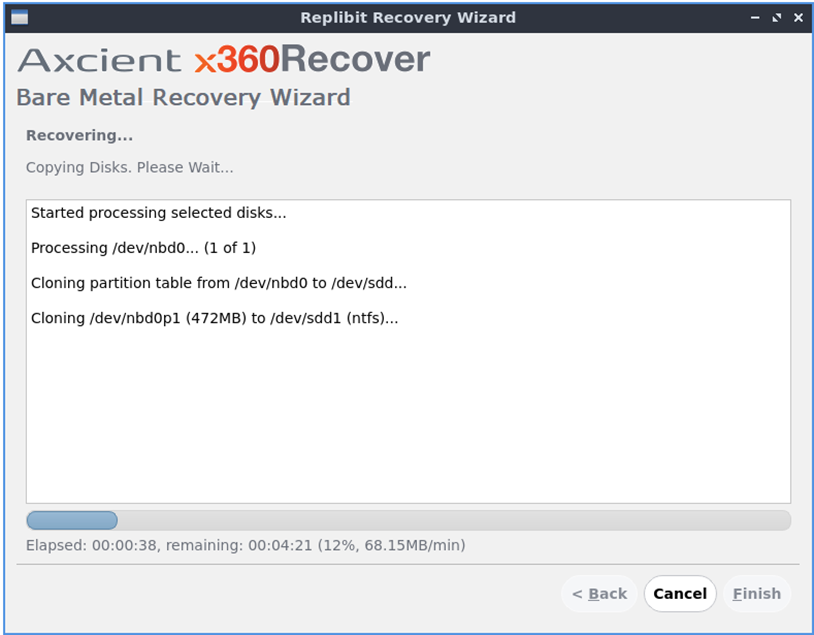
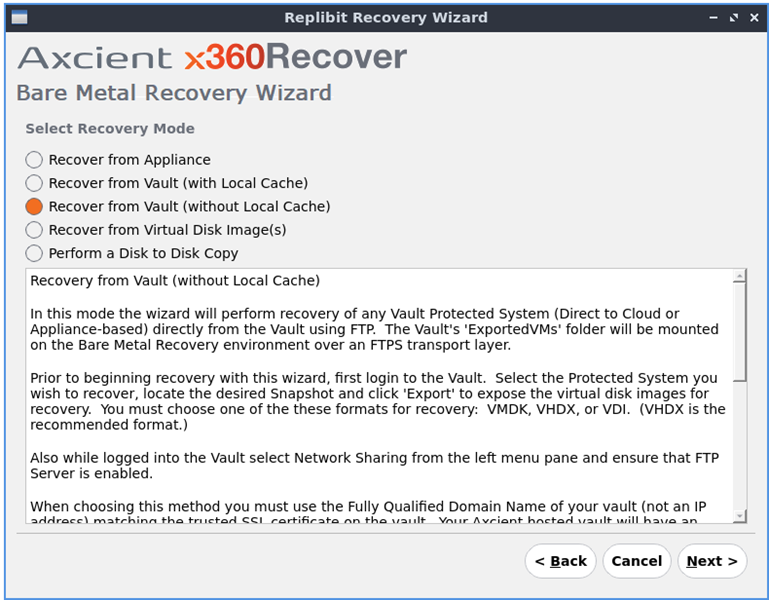
STEP 4. Once the selected destination disk(s) have been cleared, open the Recovery Wizard,and proceed with the bare metal restore operation


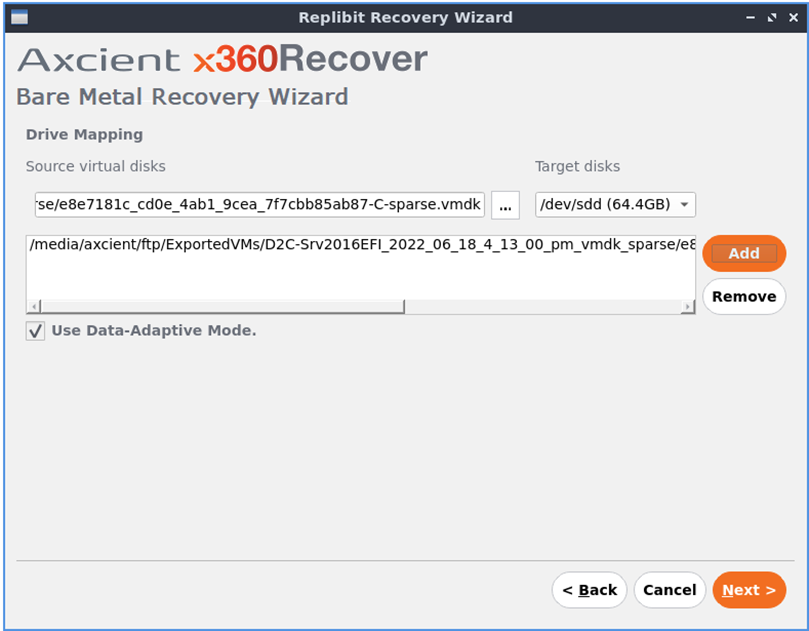
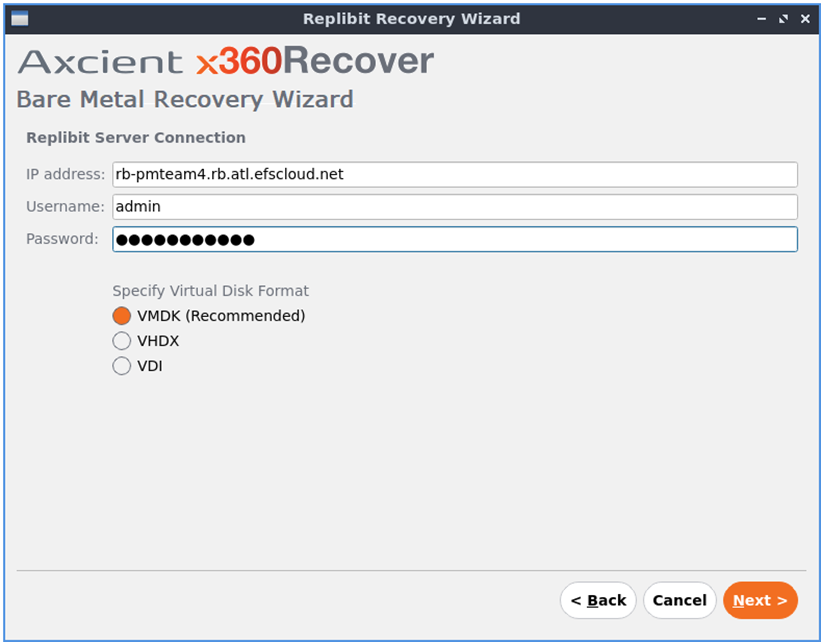
 Now that FTP access is available, proceed with the following steps.
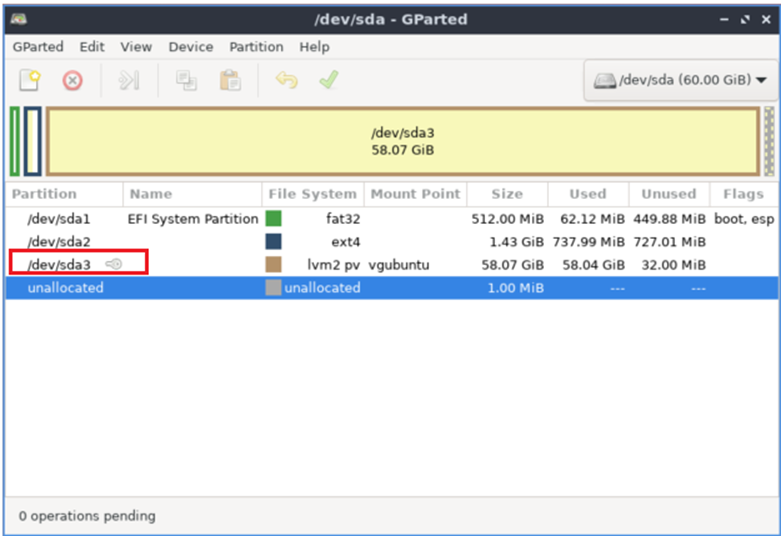


.png)