

The following instructions will walk you through the invoice-paying process in the x360Portal.
1. Prepare to get started: Assign the correct roles
Please make sure that you have granted an Administrator role to each of the people in your company who will be managing these invoicing tools on the x360Portal. As the lead contact for your company, you manage all of your users and assign their roles when you set up your new x360Portal. For complete details on how to set up permissions, please see Create a new user account - x360Portal
2. Log in to the Axcient x360 Portal and open the Dashboard
You can access the Axcient x360 Portal here: https://partner.axcient.com/login
![]()
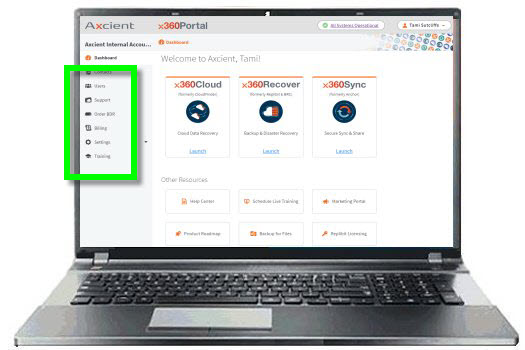
After you log in to your portal, you'll see the Dashboard, with navigation tools on the left.
To review these navigation tools, please see Navigate x360Portal - Dashboard overview
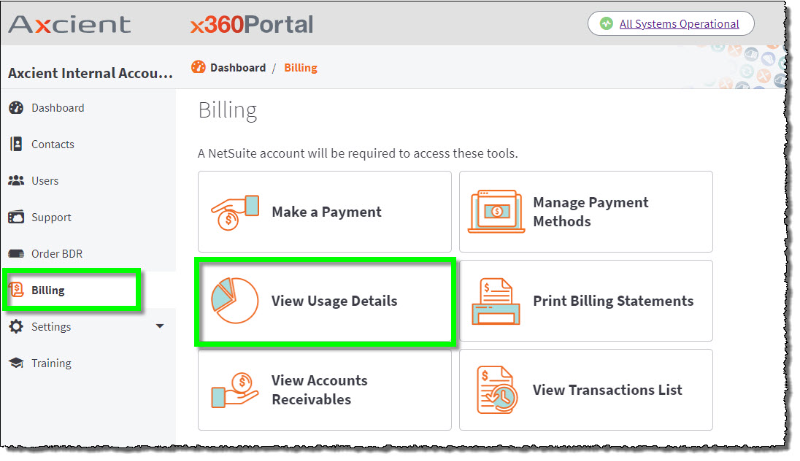
3. Click the Billing tab
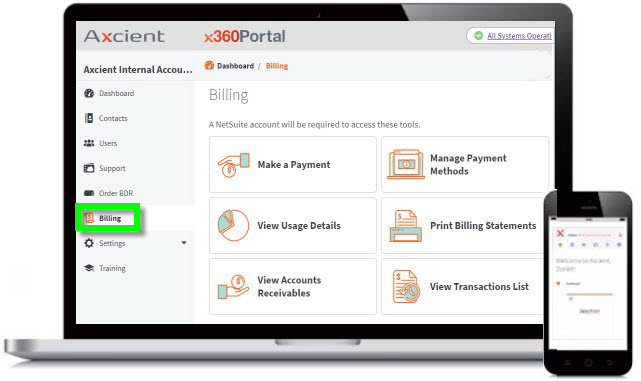
Click on the Billing tab in the left navigation to enter your Billing dashboard.
From the Billing dashboard, you can select several options:
- Make a payment
- Manage available payment methods
- View usage details
- Print or email individual statements by specific date
- Display a list of A/R for a specific date range
- Display a list of transactions (credit memos, deposits, invoices.)
Note: A NetSuite account is required to access these billing tools.
Clicking on any of these tiles from the Billing page will take you directly to the NetSuite page, where you will proceed with that task.
4. Make a payment
Select the Billing tab in the left navigation, and then click the Make a Payment tile:
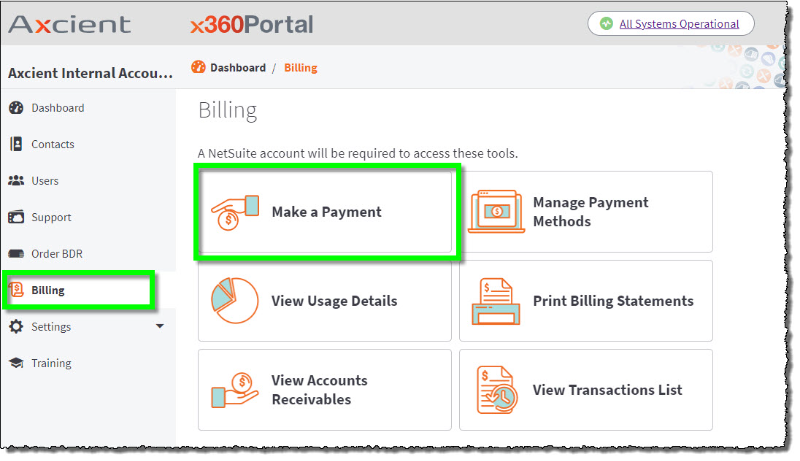
The NetSuite Payment screen will open:
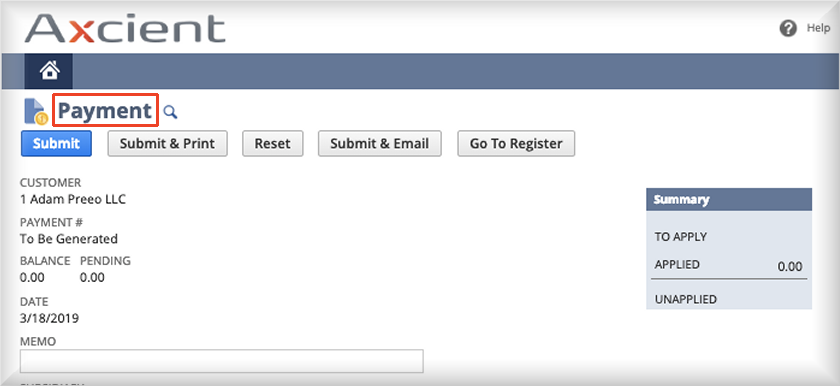
How to pay with a credit card
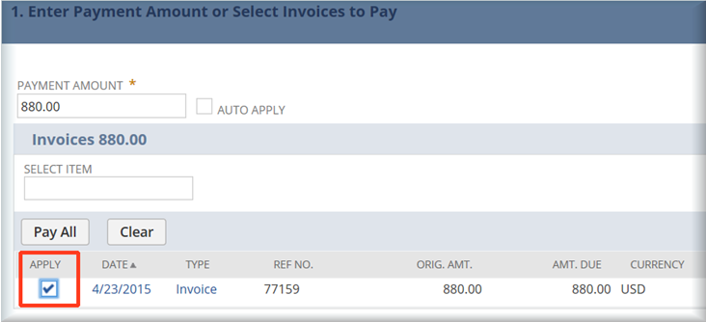
a.) Scroll down to the Enter Payment Amount or Select Invoices to Pay section.
b.) Using the Apply checkbox, select the appropriate invoice(s) you wish to pay.
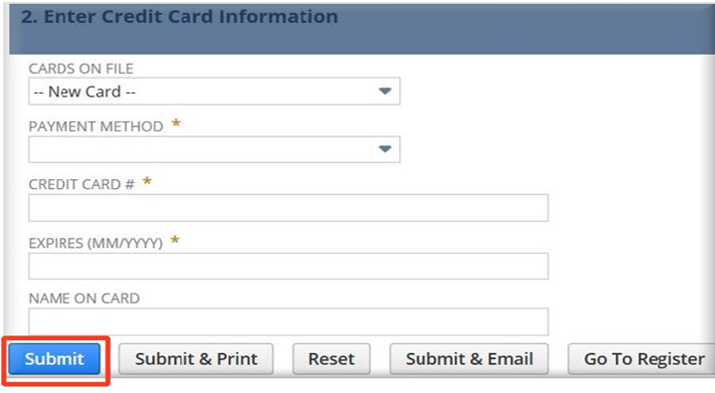
c.) Scroll down the page to the Enter Credit Card Information section.
d.) Complete all of the required credit card information fields. Remember to check "Save this card" and "Make Default" if this card will be used every time you pay invoices.
e.) Click the Submit button to save your changes. Or, if you prefer, click the Submit & Email button to receive an email copy of your receipt
Note: You can edit your payment information at any time.
How to view a transaction list
Return to the Billing page and click the View Transactions List tile:
![]()
This will take you to the NetSuite Transactions page:
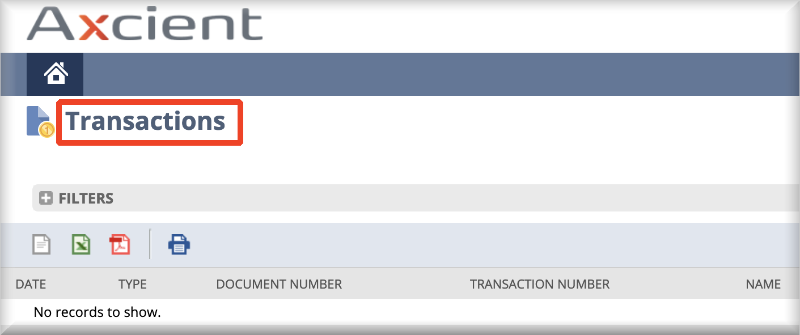
You can choose to export the transaction records as text files, as an Excel CSV file or as a PDF.
You can also print the selected documents.
How to view usage details
Return to the the Billing page and click the View Usage Details tile:
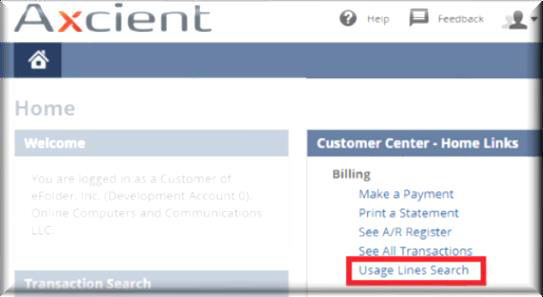
1. On the NetSuite Customer Center home page, locate the Customer Center – Home Links panel
2. In the Customer Center – Home Links panel, click the Usage Lines Search link.
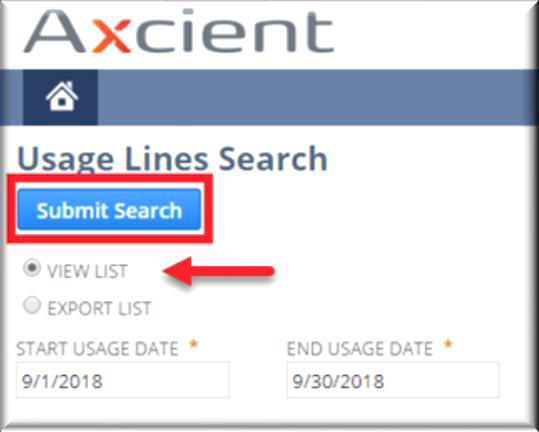
3. To generate an HTML table of usage lines:
- Click the View List radio button
- Enter the Start Usage Date and End Usage Date range
- Click Submit Search button. You can view and optionally copy the content in the HTML table.
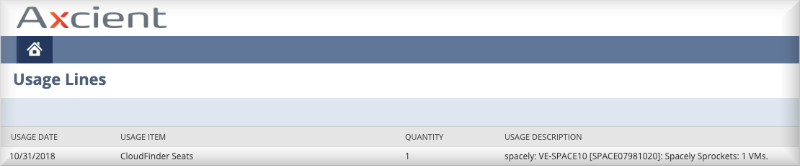
The Usage Lines report shows the date, item, quantity and a brief description:
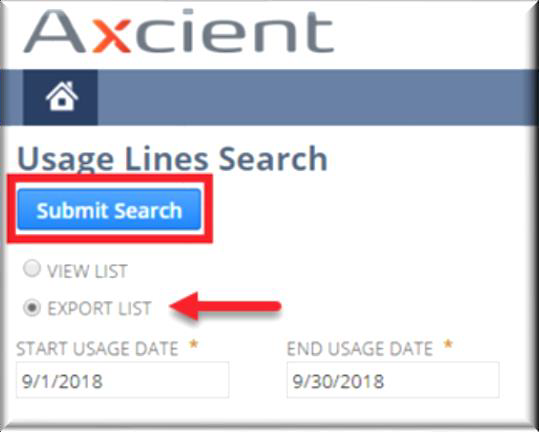
4. Alternatively, generate and download a CSV report to your local machine.
- Click the Export List radio button
- Enter the Start Usage Date and End Usage Date range
- Click the Submit Search button
|
Note: While you are working within the NetSuite pages, you can go to the NetSuite Home menu at any time by clicking the "house" icon in the upper left corner of any NetSuite screen: The NetSuite Home menu contains the same links for
|
How to activate Auto Pay Settings
| IMPORTANT NOTE: Please be aware that once Auto Pay settings have been activated, it requires Axcient's intervention to turn those settings off. You cannot disable the auto payment feature yourself once it is activated. |
1. Log in to the NetSuite Customer Center
2. Click the Auto Pay Settings section in the upper right corner:

3. When the data entry screen opens, enter the desired credit information for the auto payment.
Once the credit card information is submitted, check the box for autopayment to enable it.

- Please be aware that once Auto Pay settings have been activated, (once the box is checked) it requires Axcient's intervention to turn those settings off.
You cannot disable or uncheck the auto payment feature yourself once it is activated.

SUPPORT | 720-204-4500 | 800-352-0248
- Contact Axcient Support at https://partner.axcient.com/login or call 800-352-0248
- Free certification courses are available in the Axcient x360Portal under Training
- Subscribe to the Axcient Status page for updates and scheduled maintenance
1605 | 2025