
What is the x360Sync Thin Client?
Before Thin Client, x360Sync kept a local copy of your files in sync with the cloud. Users chose which files to store locally through selective sync, and which to keep cloud-only.
However, as data and file counts grow, the storage footprint to keep that data synced locally also grows – consuming an increasingly large amount of local storage. Meanwhile, user devices are shrinking in size and storage capacity for better mobility and battery uptime.
Clients want the ability to access all of their files locally, without needing to fully download them onto a device selectively.
Using the x360Sync Thin Client, end users can access their files, folders, and shared content from a multitude of end points, including the web portal, a mobile device, or their desktop client.
Now, in addition to using the classic desktop client, users can manage local files and folders with the x360Sync Thin Client.
How to use the x360Sync Thin Client
|
By default, the Thin Client helps you conserve local storage resources by only storing files and folders in the cloud. Files and folders will still display in your local Synced Folder to help you visually monitor and manage your content.
If you need to edit cloud content without an internet connection, you can simply mark content as Pinned. Your file will quickly download and become available for offline use. If you no longer need offline access to your content, we recommend that you mark the file or folder as Unpinned for improved storage management.
When you download and install the Thin Client, you can access your files and folders directly on your computer (local machine).
Download the Thin Client
To download the Thin Client on a Windows machine:
1. Log in to your x360Sync account. Go to the button with your account name in the upper right corner of your dashboard and click Download Apps:
 The Download page displays.
2. In the Download page, go to the Desktop Clients section and select the Windows Thin Client button.

The selected file will start to download, or you will be prompted to save the file, depending on your browser type.
3. When the file finishes downloading, click the installation file to launch the Setup Wizard.
4. Select your language and click the OK button to continue.
5. Click the Next button to start the Setup Wizard.

6. In the License Agreement screen, click the I accept the agreement radio button if you accept the license. Then, click the Next button to continue.

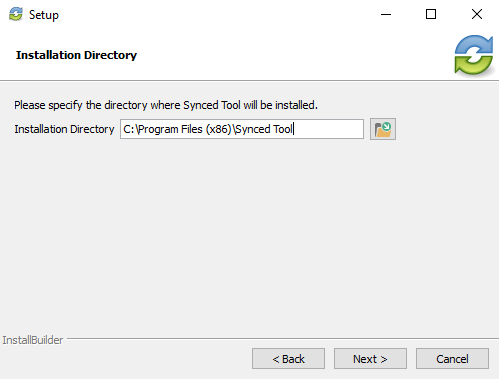
7. In the Installation Directory screen, select the location where you want the installation files to reside on your local machine. In most instances, you can accept the default location. Alternatively, manually input a new directory or click the Folder icon to select a new directory on your local machine. Click the Next button to continue.
8. In the Ready to Install screen, click the Next button to begin the installation process.
9. When the Setup Wizard completes, you can optionally click the Create a Desktop Shortcut checkbox. Then, click the Finish button.

NOTE
You must restart your computer to complete the installation process.
Now that you have installed the Thin Client, you need to register so your files will be connected properly. Click here for instructions on how to register.
797