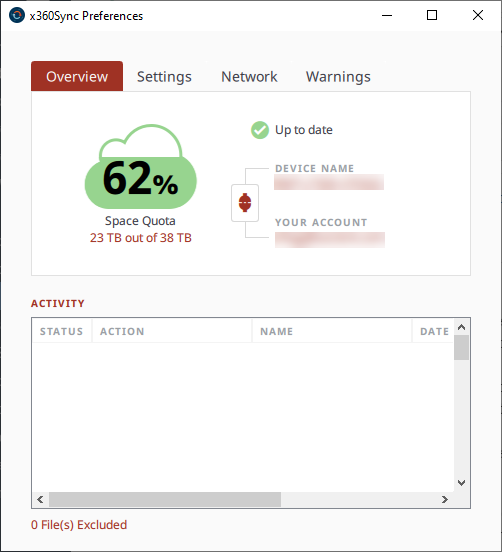
|
You can use the x360Sync system tray icon to
|
Use the system tray icon to manage your preferences or change your settings
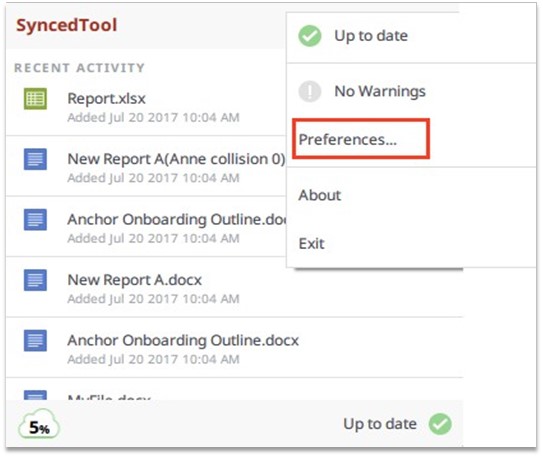
1. Click the x360Sync system tray icon to begin. This system tray icon is typically found in the toolbar which runs along the bottom of your Windows desktop.

2. In the popup window, click the Manage icon.
![]()
3. Select Preferences to open the Preferences window.
The Preferences dialog box displays, showing five tabs:
- Overview
- Sync
- Settings
- Network
- Warnings
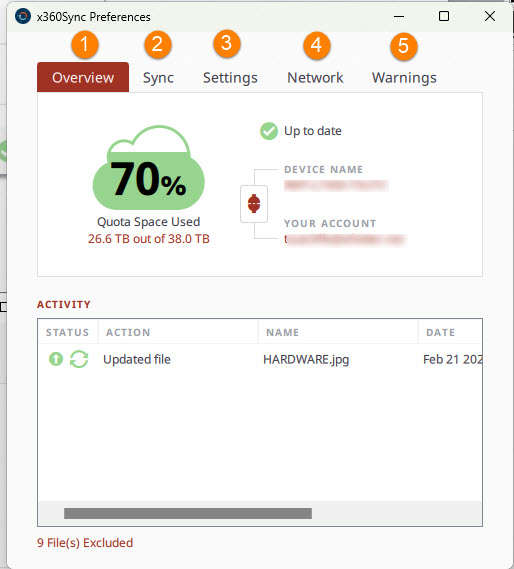
Click the Overview tab to view important information and status updates, including:
|
|
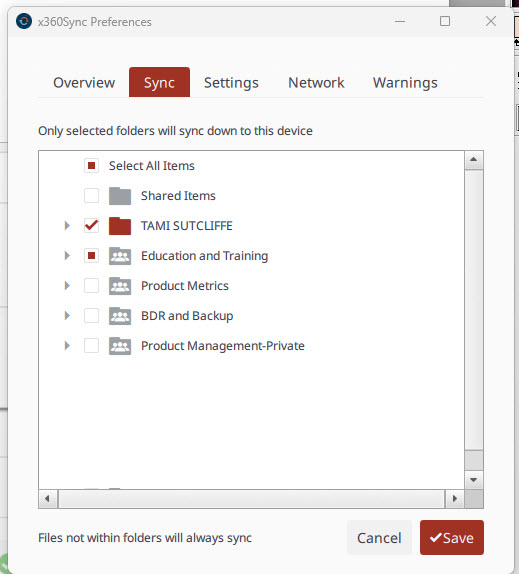
Click the Sync tab to select the desired folders to be synced.
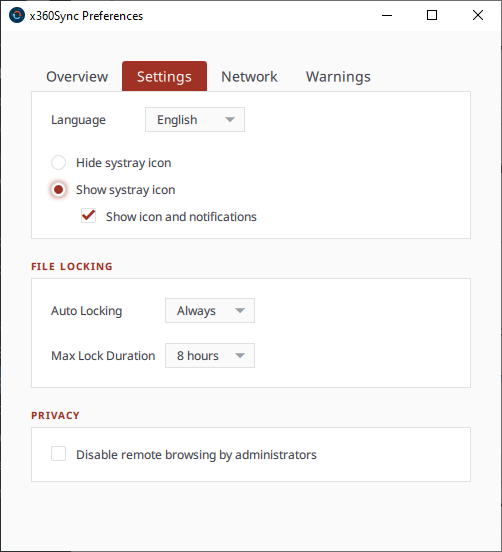
Click the Settings tab to specify language, locking, and remote browsing settings.
| Click Language to select preferences and to show or hide desktop notifications. In File Locking, click Auto Locking to set preferences. If your administrator has turned on Auto-Locking for a Team Share, you can automatically lock, never lock, or receive a prompt each time you open a supported Word, PowerPoint, or Excel file in a Team Share. In Privacy, click Disable Remote Browsing to prevent administrators from remotely browsing the contents of your Synced Folder. |
|
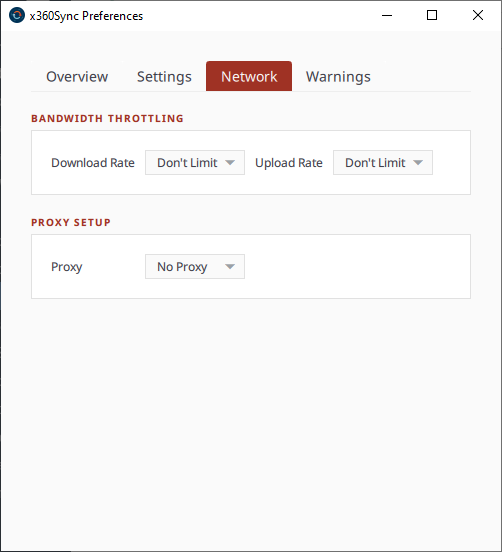
Click the Network tab to manage LAN Sync, bandwidth, and proxy settings:
|
Use Bandwidth Throttling to set a specific limit, or to opt not to limit bandwidth. (Administrator settings might override your settings.)
|
|
Click the Warnings tab to view a list of file sync warnings.
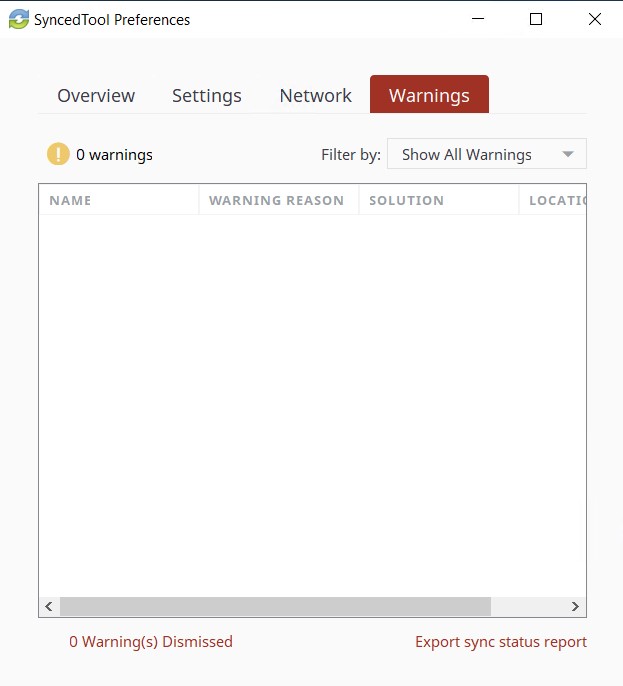
While in this tab, you can also click the Export Sync Status Report link to save information about the current sync status to a text file.
DeleteHow to pause a sync process using the system tray icon
There are times you may wish to pause the sync process, such as when you are boarding a plane, when you need to conserve bandwidth, or if you would like to work in isolation.
To pause a sync process on a Windows or Mac machine:
1. Click the system tray icon.
![]()
2. Hover over the Status message. (In this example: Up to date).
On a Windows machine, the status message is located in the lower right-hand corner of the screen.
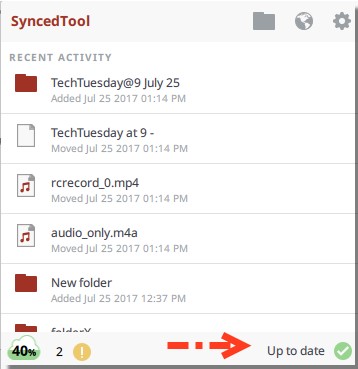
3. When the text changes, click the Pause button.
4. To resume the sync process, hover over Paused and select Resume.
How to view a warning message using the system tray icon
In addition to managing preferences and pausing a sync process, you can view the Thin Client warning messages and resolve issues directly from the system tray icon.
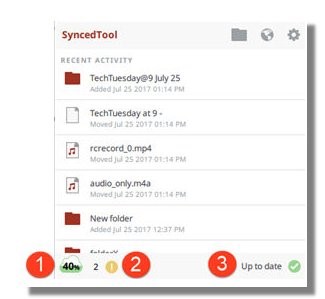 |
1. Space Quota displays space currently in use.
|
How to review a product update notice
When product changes have been released for the Thin Client, your system will automatically update and alert you of important new features through the system tray icon.
Note: The Thin Client will only update when you are connected to the Internet.
As a best practice, we recommend that you review these notifications to learn about key features and functionality.
1. Click the system tray icon.
![]()
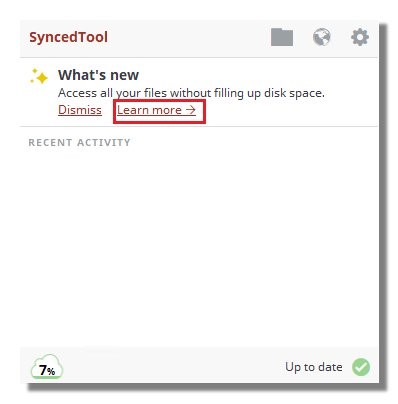
If new features have been released, you will see a What's New notification.
2. Click the Learn more link to learn about key new features and functionality.
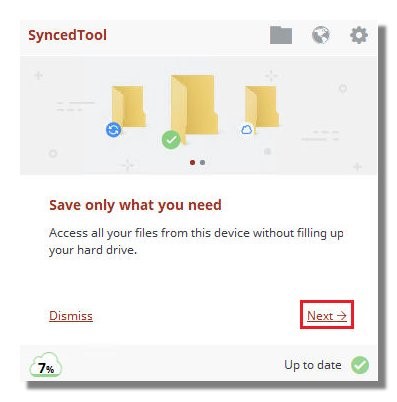
3. Continue reviewing product change information by clicking the Next link when available.
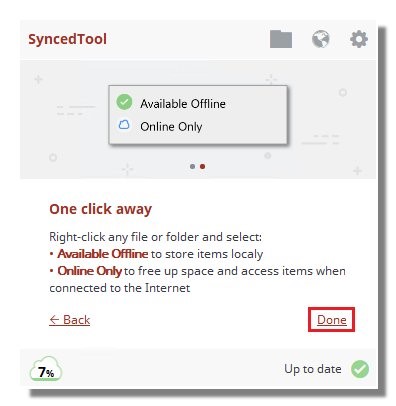
4. Click the Done link when you are finished.
SUPPORT | 720-204-4500 | 800-352-0248
- Contact Axcient Support at https://partner.axcient.com/login or call 800-352-0248
- Have you tried our Support chat for quick questions?
- Free certification courses are available in the Axcient x360Portal under Training
- Subscribe to Axcient Status page for updates and scheduled maintenance
1733
