
Overview
Team Shares allow users to collaborate on shared content in one centralized area. You might create separate Team Shares for each department, or for project teams, to allow subscribers to collaborate on the same files and folders.
To support the collaboration process, subscribers can be assigned to roles that control their access rights within the Team Share. Roles can be assigned at the Group level, or to individual user accounts.
Use Case
For example, you can create a Team Share for HR forms and documents, and subscribe every user account in the organization as a Viewer. These user accounts can now view these forms from the web portal, their desktop clients, or their mobile devices.
The HR group, however, can be given the Co-Owner role so that they can add and edit forms and documents as needed. Each time a form or file is edited, these changes sync to every subscribed device.
More to Come: Permission features are currently being developed and implemented in carefully planned stages. In addition to Team Share permissions, the x360Sync team will soon be implementing the following:
|
Roles
The following roles can be assigned to each account or Group subscribed to the Team Share:
Note: System Administrators have Co-Owner access to all Team Shares. Organization administrators and standard user accounts can be assigned permission roles as needed.
- The Co-Owner has total control over content. This role is the best option for administrators.
- The Collaborator (default role) has the ability to seamlessly work with others by creating share links and modifying all content locally and on the web. This role is the best option for team leaders and project managers.
- The Editor is similar to the Collaborator, but without the ability to generate share links. This role is the best option for individual contributors who need to collaborate or modify content locally and on the web.
- The Web Editor is similar to the Editor, but without the ability to download or sync content locally. Web Editors can edit the content within the Collaborative Web Editor only. This role is the best option for users who need to collaborate with guests outside of the organization.
- The Viewer is a restricted role, only giving users the ability to view content. This role is the best option for individual contributors who need to view content locally or on the web, but who do not need to edit content.
- The Previewer is a restricted role, only giving users the ability to preview content in the web portal. This role is the best option for publishing content externally to the public on the web.
- The Uploader is a restricted role, only giving users the ability to view folder structures (not files) and upload files and folders on the web. This role is the best option if you need to request content from the user.
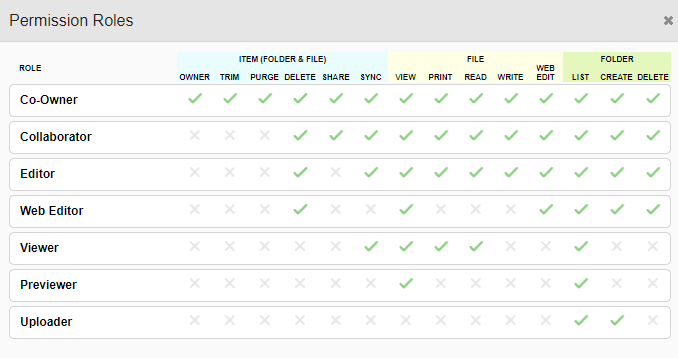
Permission descriptions for each role
The following table provides a description of each permission type.
Item (File or Folder) | |
Owner: |
Can change the permission of the file or folder |
Trim: |
Can trim revisions (delete revisions) of the file or folder |
Purge: |
Can permanently purge the file or folder |
Delete: |
Can delete the file or folder |
Share: |
Can create a share link to the file or folder |
Sync: |
Can download and sync the file or folder (and folder contents) to devices |
| |
View: |
Can preview file contents (cannot download or print) |
Print: |
Can print |
Read: |
Can download and sync the file to devices |
Write: |
Can modify the file |
Web Edit: |
Can modify the file on the web only |
| |
List: |
Can view the list of contents within a folder (does not imply any access to listed files) |
Create: |
Can create a folder or file within this folder |
Delete: |
Can delete a folder of file within this folder |
Access rights for roles and Windows ACL
The access rights of various permission roles are enforced based on a user’s local environment. This provides a better user experience, and allows an early notification to users attempting to perform a non-permitted action. To enforce the access rights of a permission role in a Windows environment, x360Sync uses a standard Windows Access Control List (ACL).
For details, please reviewDesktop Client 2.7.0.1366 for Windows and the Access Control List (ACL)
Assign Team Share roles
To configure permissions for a Team Share:
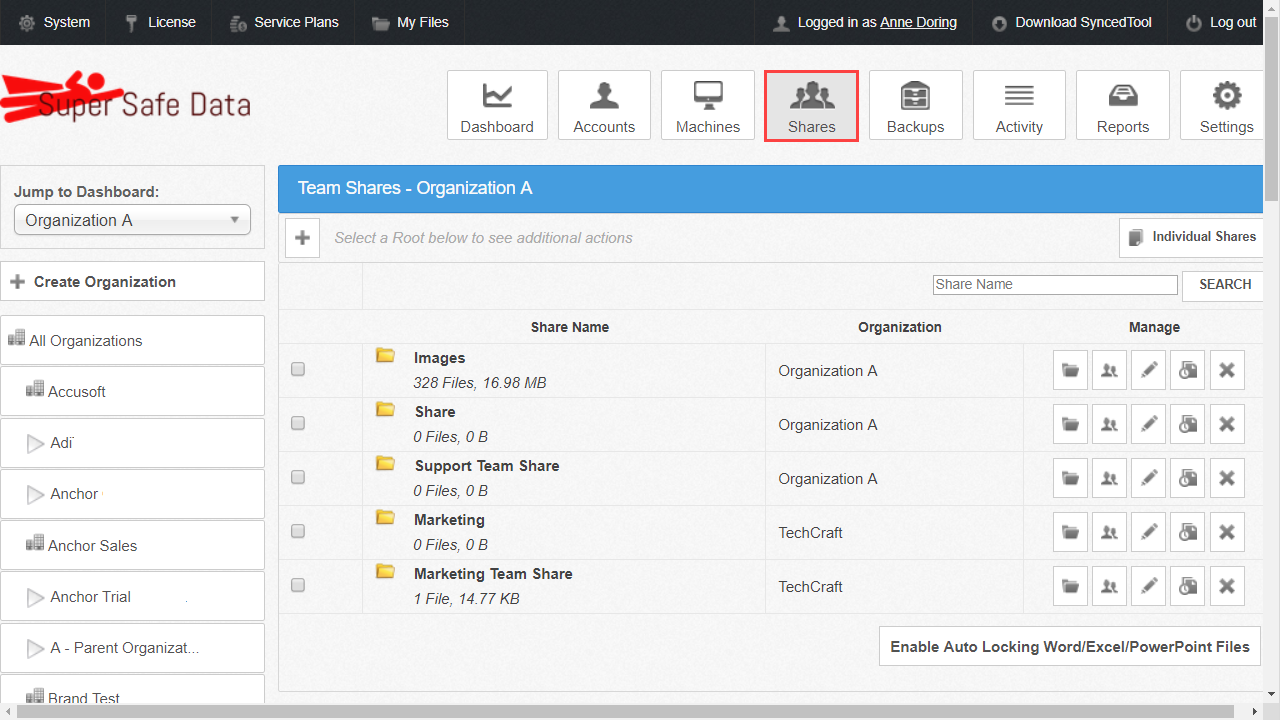
- In the Organization navigation menu, select the organization where the Team Share resides. The selected organization displays.
- Within the organization, click the Shares tab. The Shares page displays, listing all Team Shares available within the organization.
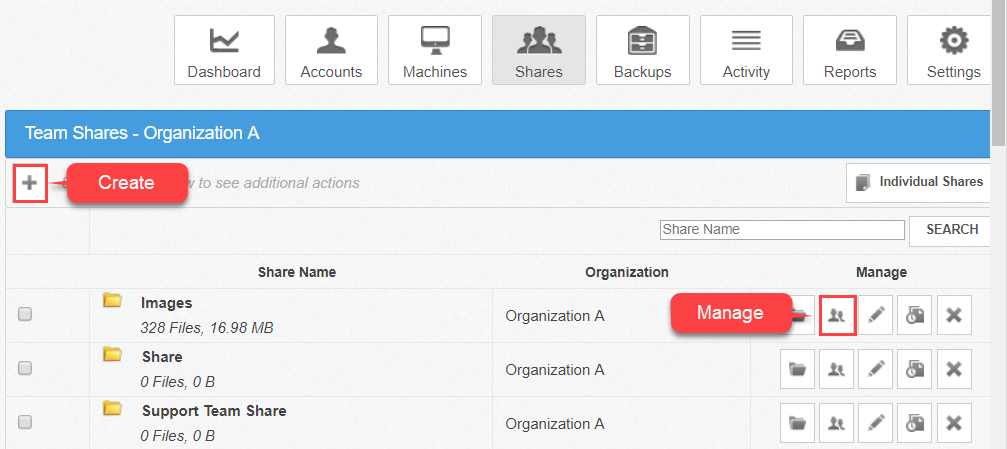
- Click the Create button to create a new Team Share. Alternatively, to update an existing Team Share, click the Team Share’s Manage Subscribers button.
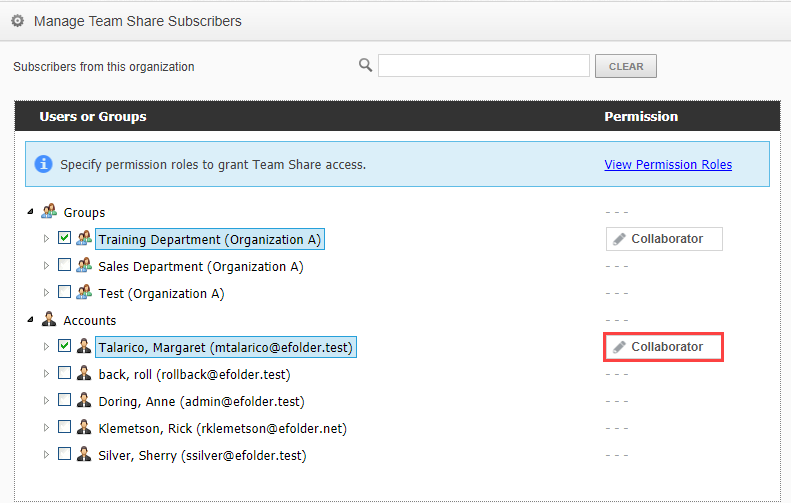
- In the Subscribers section, use the checkboxes to select the Accounts or Groups who will
have access to the Team Share.
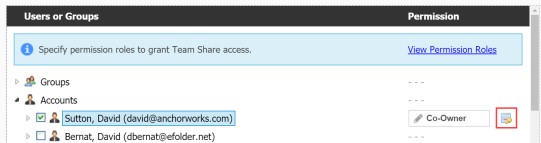
Please note that when you select an entire Group, all members of that Group will be automatically included as subscribers. For instructions on creating Groups, please reference the Create and Manage Groups Knowledgebase article. - After each group and account has been selected, use the Permissioncolumn to assign a role at the Group or Account level.
- By default, each selected subscriber is assigned the Collaborator permission. Click the Collaborator button to edit the user's permission.
- Select the appropriate role for the user. For a description of each role, please reference the table above.

3.After permissions are set, you can optionally view all roles assigned to the user. For a complete listing of roles, click the Effective Permissions button.
- By default, each selected subscriber is assigned the Collaborator permission. Click the Collaborator button to edit the user's permission.
If this is a cross-organization Team Share, you can also define permissions for invited subscribers. Use the Permissions column to set specific permissions for each of the invited subscribers. For more information about cross-organization Team Shares, please reference the Creating and Managing Team Shares Knowledgebase article.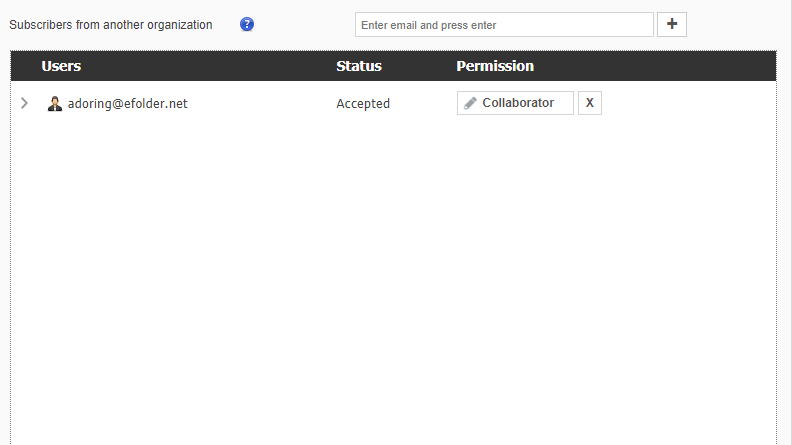
- Click the Save button to save your changes.
Assign Team Share roles in the accounts tab
You can also define Team Share roles when adding individual accounts to an organization.
- In the Organization navigation menu, select the organization in which you want to create the new user account. The selected organization displays.
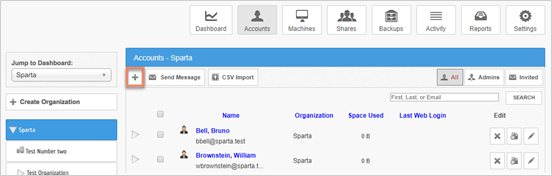
- Click the Accounts tab. The Accounts page displays.
- In the Accounts page, click the Create Account button.
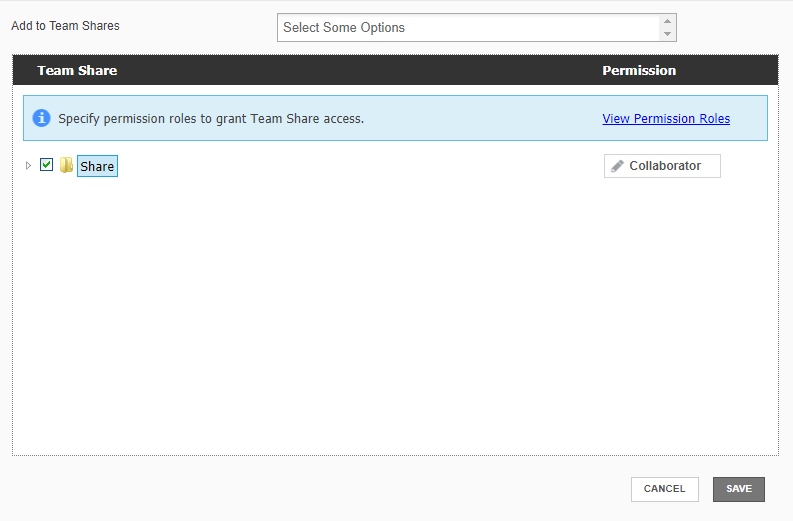
- In the Subscribe to Team Shares section, select the Team Shares to which the user should be given access. You can optionally use the search box to search for Team Shares.
- Within the same section, use the Permission column to assign a role for this user within the specific Team Share.
- Click the Save button to save your changes.
The End User Experience
The Web Portal Experience
When working in the web portal, users who attempt to perform an unauthorized action will receive an error message:

The Desktop Client Experience
When working from the desktop client, users who attempt to perform an unauthorized action will receive an error message.

In some instances, a user might encounter a file sync warning.
To resolve a Team Share role warning:
- When an issue occurs, the user will see a Resolve Sync Warning icon over the system tray icon and within the system tray menu:

- Click the system tray icon and select the Sync Warnings button.
The Preferences dialog box displays, showing the Warnings tab. An error related to permissions will be noted.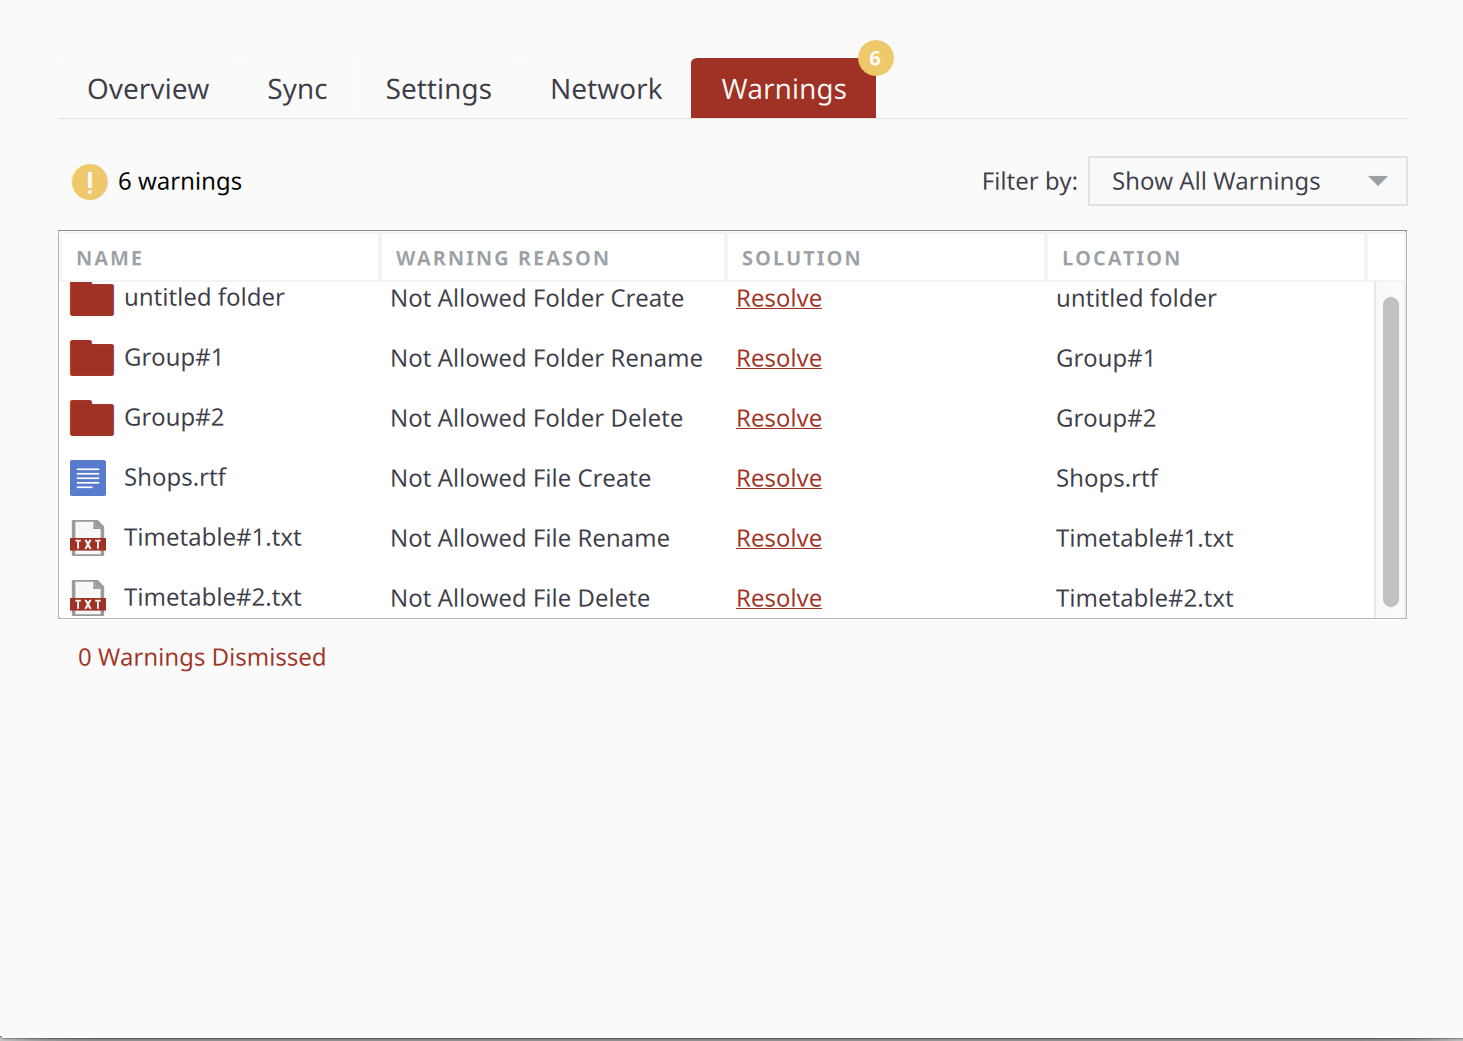
- Click the Resolve link to learn more about the warning. A pop-up window displays, explaining the permission conflict.
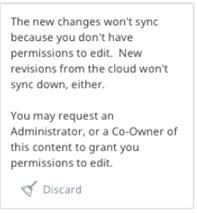
- Click the Discard button to discard the copy without saving changes.
SUPPORT | 720-204-4500 | 800-352-0248
- Please contact your Partner Success Manager or Support if you have specific technical questions.
- Subscribe to the Axcient Status page for a list of status updates and scheduled maintenance.