
Scenario
Active Directory, or any LDAP authentication source, can act as a source for user accounts within an organization. In most instances, administrators configure separate authentication sources for each individual organization and suborganization.
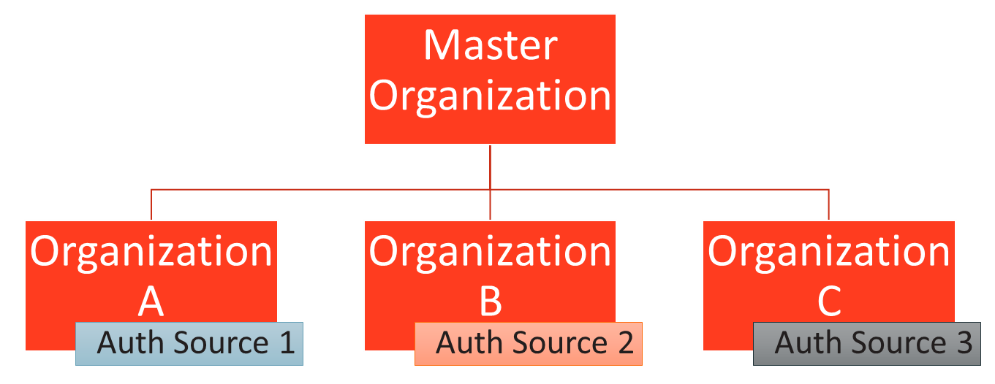
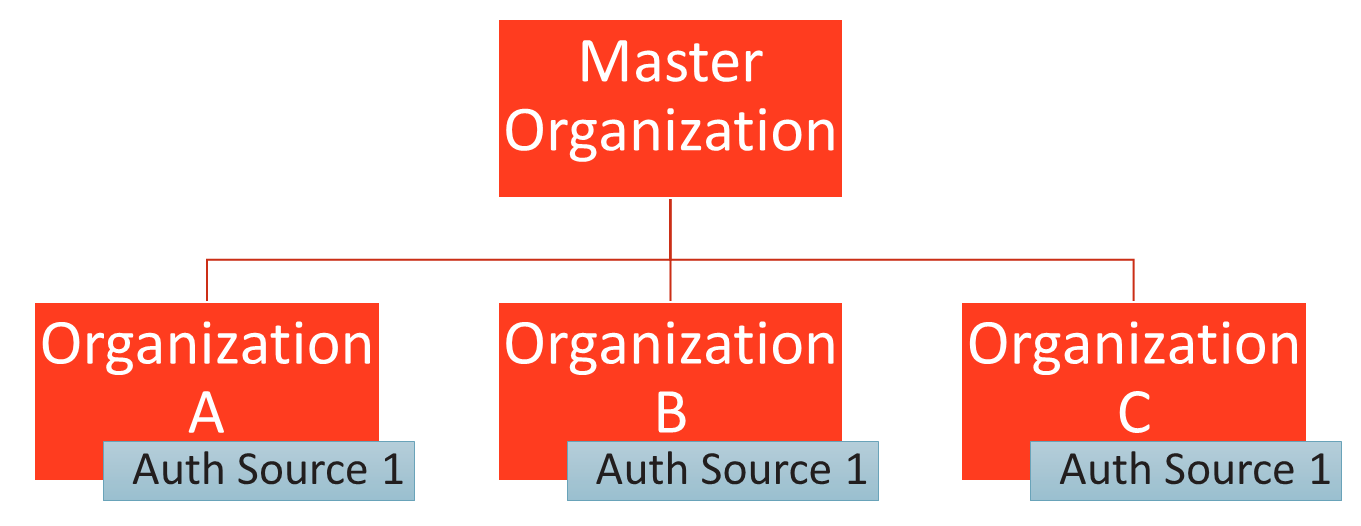
In some instances, you might need to utilize one authentication source for multiple organizations through the Machine connection method (as opposed to the Server connection method, which requires that the Active Directory be publicly accessible).
For more information, please review Integrate Active Directory
Method
Step 1: Create an Authentication Source Using the Machine Method
1. On the server that houses the authentication source, download and install the desktop client. For instructions on installing the desktop client, please reference Installing and Configuring the Desktop Client.
2. After you install the desktop client, register the desktop client to a user account. As a best practice, we recommend registering the desktop client to a service account that is not actively utilized by a true user (for example, First Name: AD; Last Name: Server).
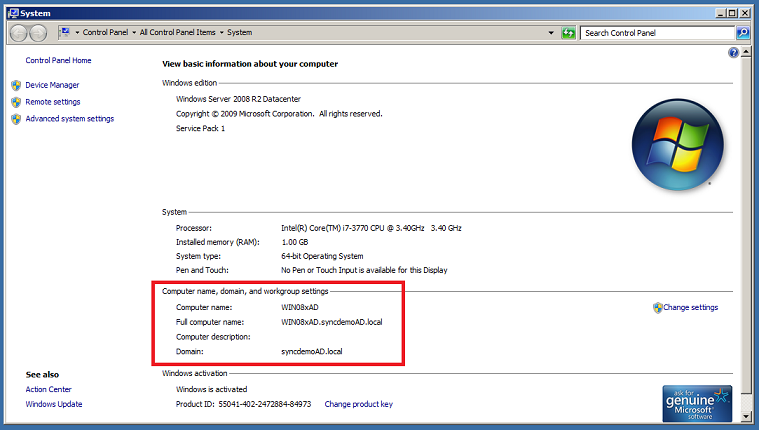
3. While still in the server that houses the authentication source, record the computer’s full computer name.
- Click the Start menu, right-click Computer, and select Properties. The System window displays.
- In the System window, find the informational field titled, Full Computer Name. Record the full name of the computer so that it can be referenced later.
- When you are finished installing and registering the desktop client, launch the administrative web portal.
- While in the appropriate organization, click the Settings tab. The Settings page displays.
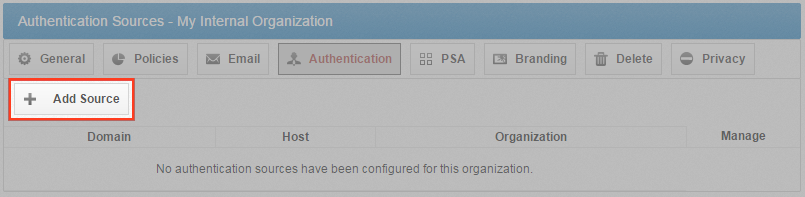
- In the Settings page, click the Authentication tab. The Authentication section displays.
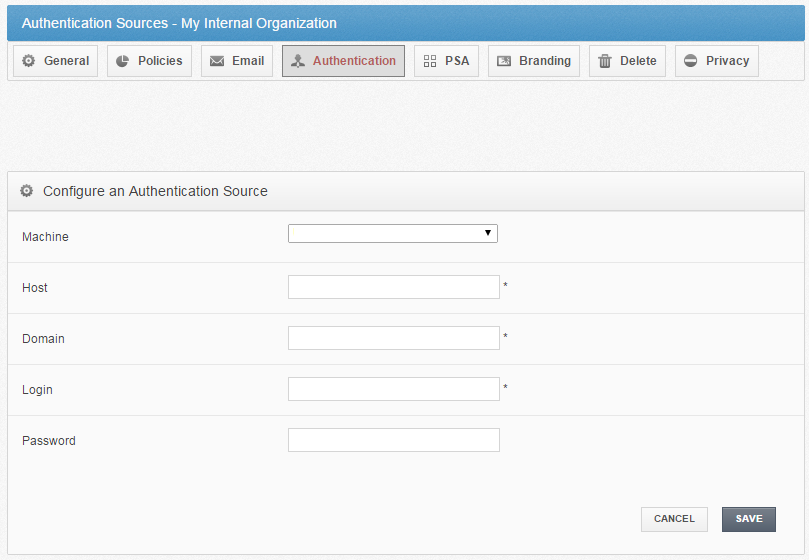
- In the Authentication section, click the Add Source button to add an authentication source.
The page refreshes to display a Configure an Authentication Source section of the page. - In the Configure an Authentication Source section of the page, configure your authentication source.
- In the Machine drop-down menu, select the name of the machine that houses your authentication source.
- In the Host field, enter the full computer name that you recorded above. This information can be found in your computer’s properties.
- In the Domain field, enter the Fully Qualified Domain Name (FQDN) (for example, x360Sync.com).
- In the Login field, enter a username that has administrative access to the authentication source.
- In the Password field, enter the corresponding password for the administrative user.
- Click the Save button when you are finished.
Step 2: Move the Authentication Source User Account to the New Organization
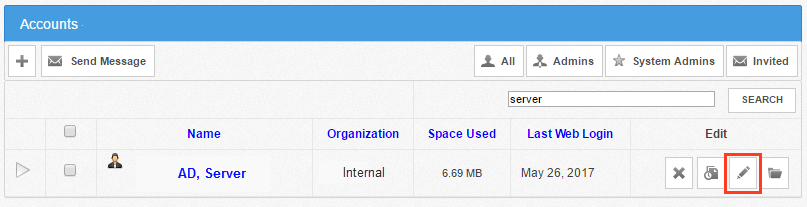
- In the same organization, click the Accounts tab. The Accounts page displays, showing a list of all user accounts.
- Find the user account to which the authentication source machine is registered (in our case, AD, Server) and click the Edit button.
- In the Account Settings page, use the Organization drop-down menu to move the user account to the new organization that needs to be integrated with the authentication source.
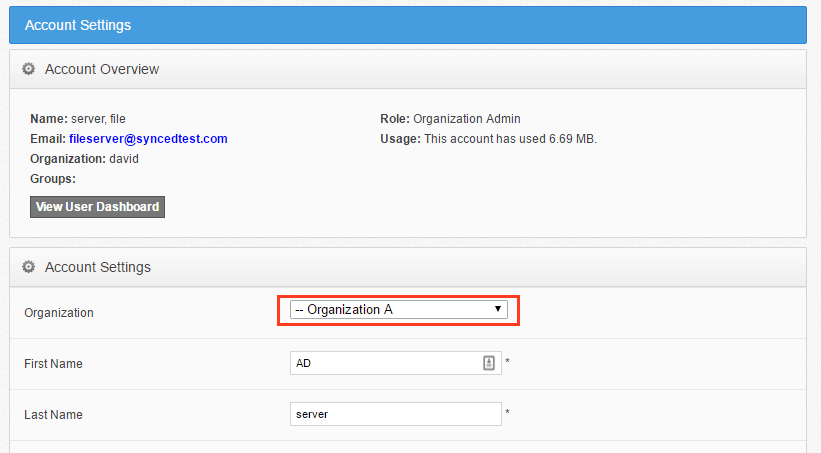
- Click the Save button when you are finished making your selection.
Step 3: Recreate the Authentication Source in this New Organization
Navigate to the new organization and repeat steps outlined in the Step 1 section listed above. This process can be repeated for all organizations that need to utilize this authentication source.
SUPPORT | 720-204-4500 | 800-352-0248
- Contact Axcient Support at https://partner.axcient.com/login or call 800-352-0248
- Free certification courses are available in the Axcient x360Portal under Training
- Subscribe to the Axcient Status page for updates and scheduled maintenance
1857