


Overview
Now you can browse and restore data in SharePoint for a specified point in time.
Our x360Cloud SharePoint folder browser lets you explore a folder tree of a particular SharePoint site (and all of the backed up data.) You can also
- see the SharePoint folder contents
- perform searches within the SharePoint folder and
- restore selected folders (sub-folders or individual files)
Take a look at the possibilities:
1. Search for your SharePoint folders using the x360Cloud browser tools
1.1 Log into your reseller x360Cloud Dashboard.
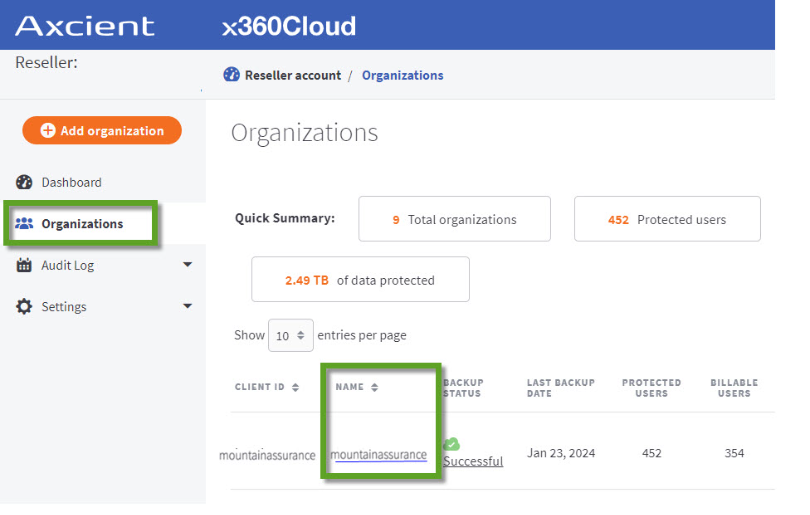
1.2 Select the Organizations tab.
1.3. When the Organizations page displays, click the Name of the desired organization:
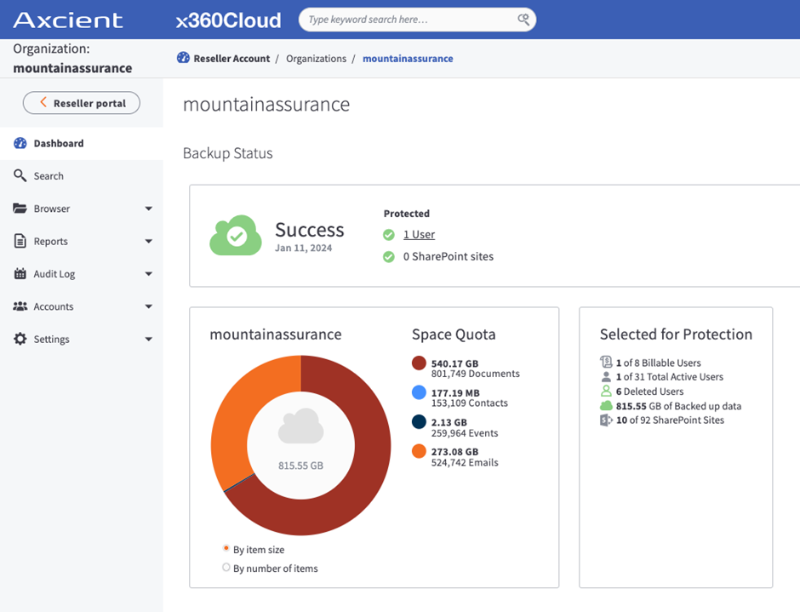
 1.4. When the organization's Dashboard page displays, you will have access to the account details and reports.
NOTE: If you are an organization-level admin user, the organization Dashboard page is your landing page.
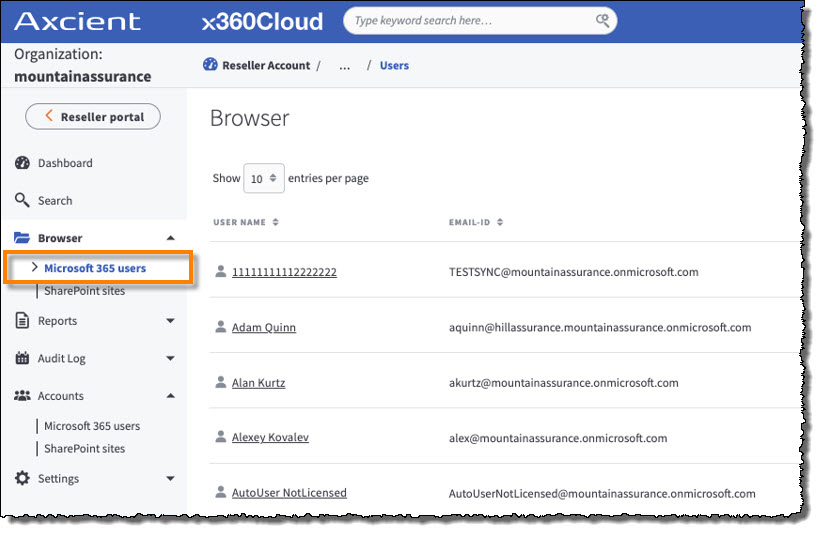
2. Navigate to the Browser menu and select the data you wish to view
2.1. The Microsoft 365 users page displays a list of end user accounts synchronized to x360Cloud:
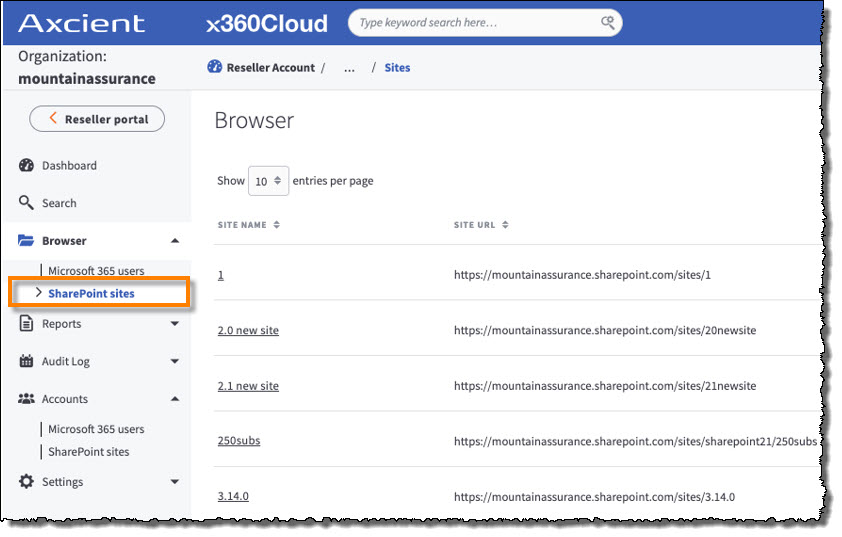
2.2. The SharePoint sites page displays a list of SharePoint sites synchronized to x360Cloud:
3. Review information on protected data (including your last backup)
3.1 You can see the Data Protected column (1, below), which indicates the total backed up data for all the protected services (email, OneDrive, calendar, and so on) for a SharePoint Site.
3.2 The Last Backup column (2, below) indicates the date and time of the latest backup, based on the current Backup Report.
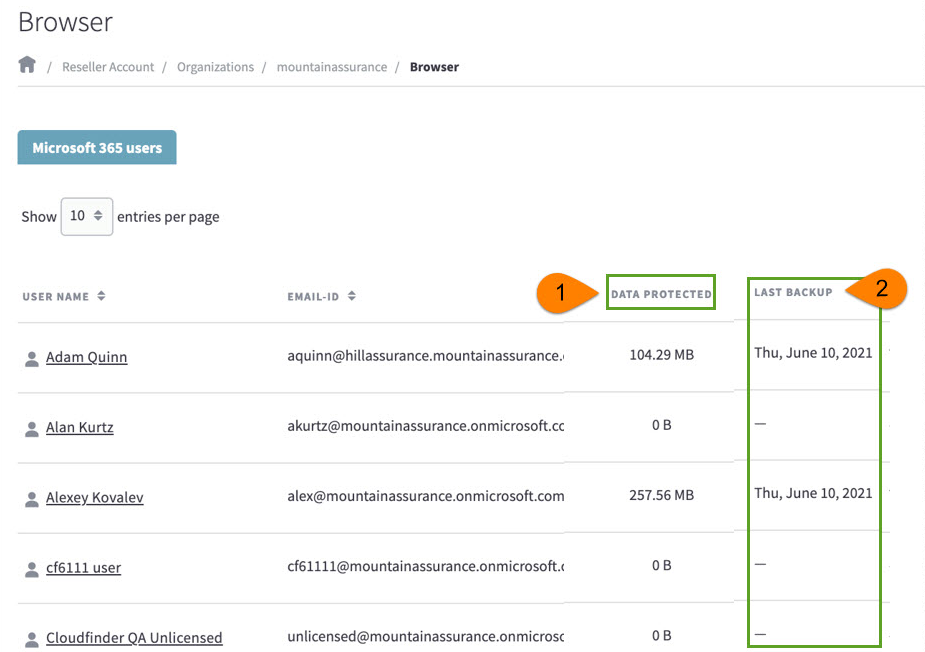
3.3 Click the User Name which you wish to browse or restore.
4. Explore My Files
4.1 A folder tree named My Files is displayed for the selected account:
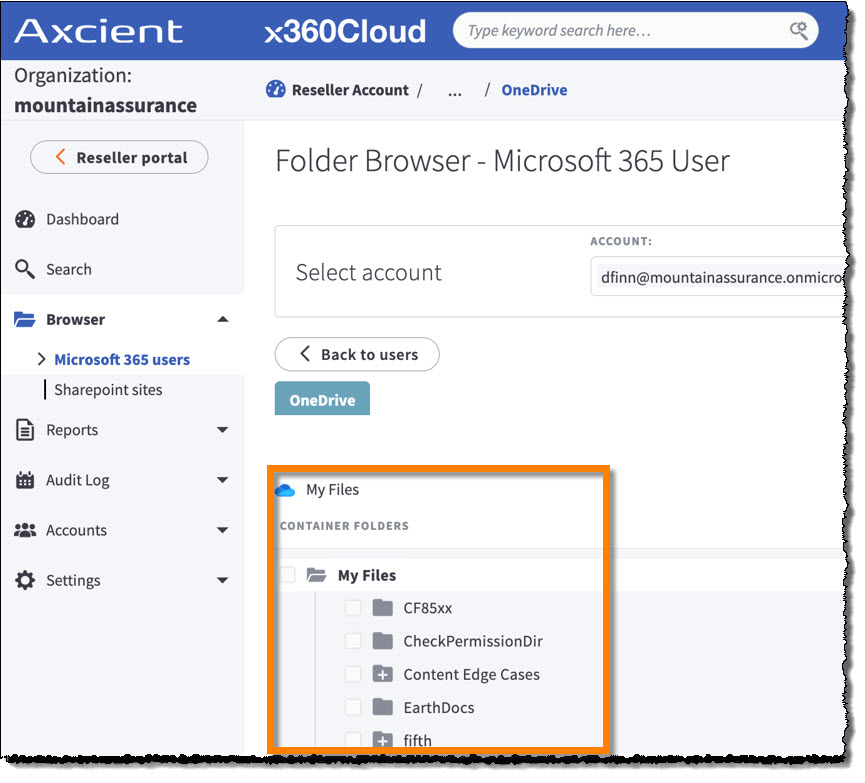
- Expand and collapse folders in the My Files tree by clicking individual folder icons.
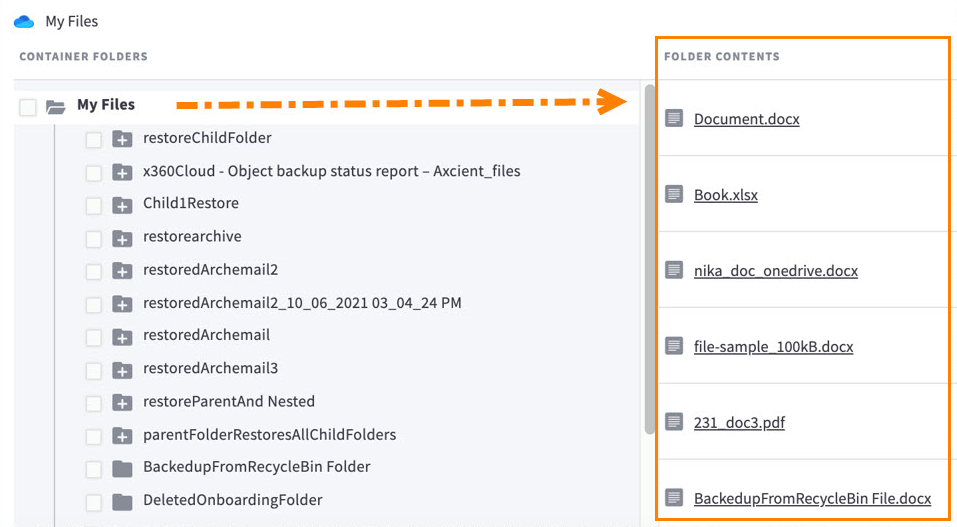
- Click a folder title to designate it as a context folder, allowing you to see a list of the files within it.
- As each different context folder is selected in the folder tree, its files are loaded into the Folder Contents section to the right of the tree.
Ready to learn more?
Continue reading below to find out how you can explore the data captured by x360Cloud at a specified time and how you can perform file searches.
Explore a SharePoint site tree
For SharePoint sites, the folder tree starts from the Site root node (named after the SharePoint site. “NikaSite" is the SharePoint site used in the example below).
Under the Site root node, you will see where the SharePoint Documents are listed.
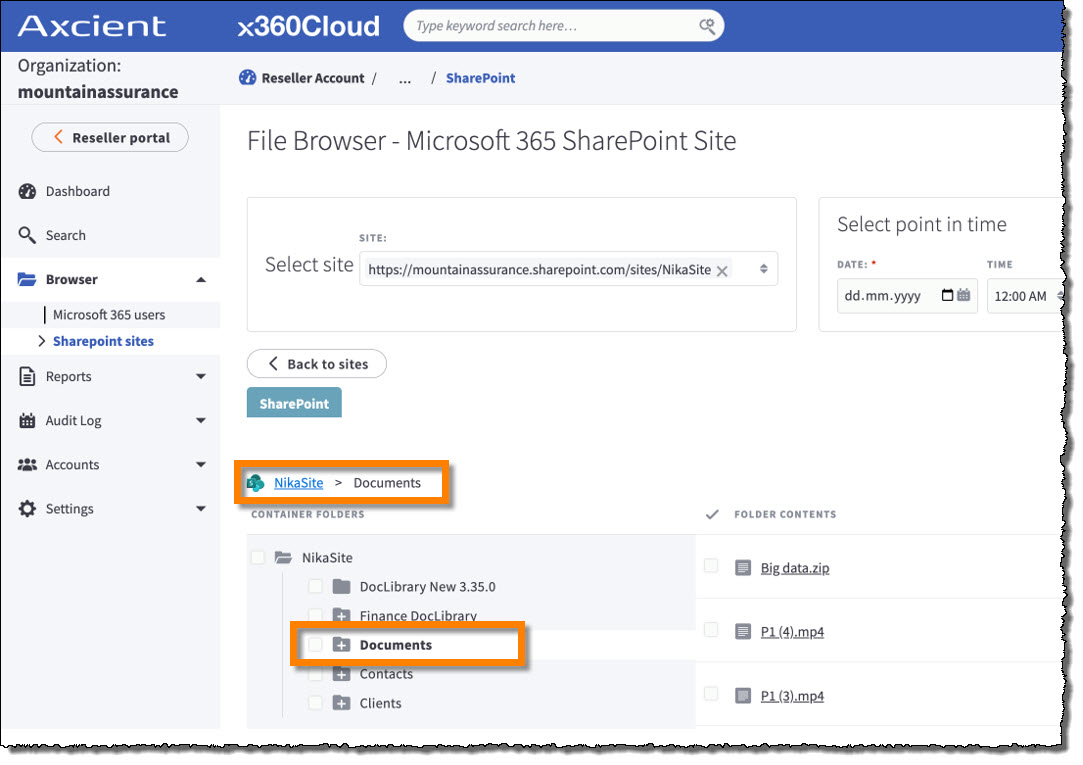 Each document library contains a tree of folders and sub-folders located within it.
Explore data as it was at a specified point in time
To apply a point-in-time setting, you must specify the date in the DATE field (and optionally, the time in the TIME field), and then click the Update button.
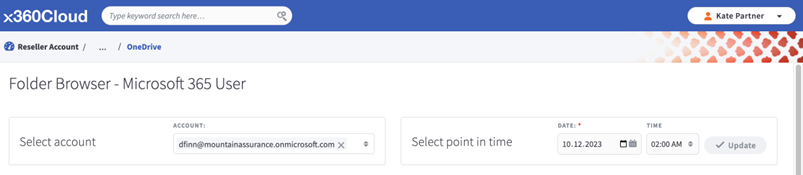
x360Cloud will show the latest file folder structure as it was captured at or before the specified point in time.
For example:
- if a folder (or file) was renamed after the specified point in time, it will be shown in the browser with the old name
- if a folder (or file) was moved after the specified point in time, it will be shown in the browser with the old path
- if a folder (or file) was added after the specified point in time, it will not be shown in the browser
NOTE: if a folder (or file) was deleted before the specified point in time, it will still be shown in the browser at its original path, so that it can be easily found and recovered in the event of a disaster.
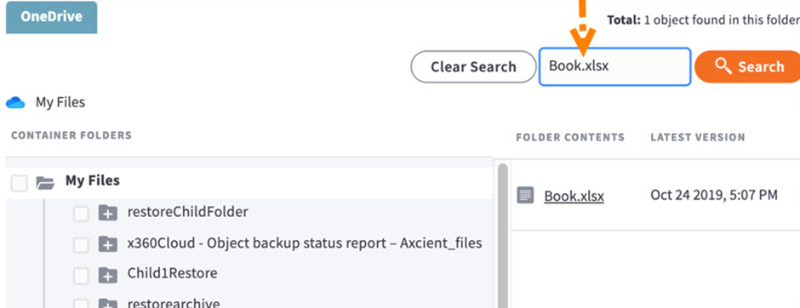
Search for files in a specified folder
Need to search for a file within a particular folder?
Enter your terms into the search box and press the Search button.
(The search field supports wildcards, too)
Searches are performed using the following file attributes:
- File name: The extension must be part of a keyword
- File metadata: The document author
- File content. The following file formats are supported:
| File formats | Extension example |
| Microsoft Office document |
.doc, .docx, .xls, .xlsx, .ppt, .pptx |
| Mail formats |
.eml, .pst, .msg |
| Electronic Publication |
.epub |
| Hypertext Markup Language |
XHTML, HTML, .html, .xhtml, .xht |
| OpenDocument |
.odt |
| Portable Document |
|
| Rich Text |
.rtf |
| Database |
.sql |
| Plain Text |
.txt |
| Compression and packaging |
.7z, .zip, ARJ, Dump, etc. (RAR is not currently supported) |
| XML and derived formats |
.xml |
| Microsoft Office document |
.doc, .docx, .xls, .xlsx, .ppt, .pptx |
How to restore folders
You can combine multiple options to select different combinations of folders to restore.
- First, select the desired folders and subfolders.
After you successfully locate the desired folders to restore, you can also select specific subfolders to be restored, using the checkboxes in the folder tree.
You can select various combinations of subfolders within a folder:
- A folder is fully selected when it (and all of its subfolders) are checked.

- A folder is partially selected when the folder itself is not checked, but some or all of its subfolders are checked.

- A folder is not selected when neither the folder nor any of its subfolders are checked.

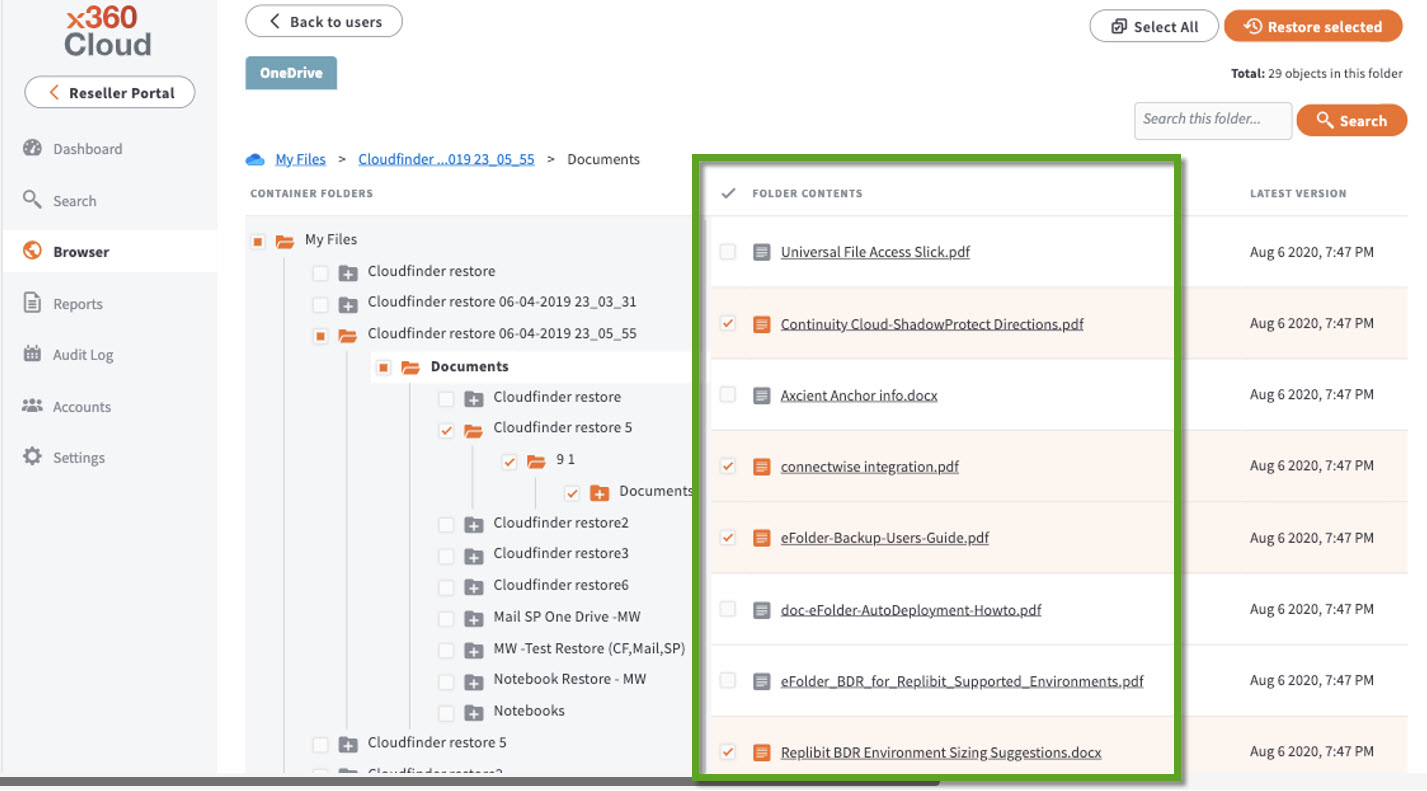
How to restore individual files
You can select and restore individual files by clicking each desired individual checkbox in the Folder Contents section:
How to perform bulk file selection
For bulk file selection, you have two methods available:
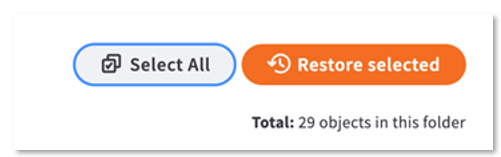
METHOD #1: Click the Select All button (in the upper right corner) to select all files in this folder (This will include all files from every page of the list)
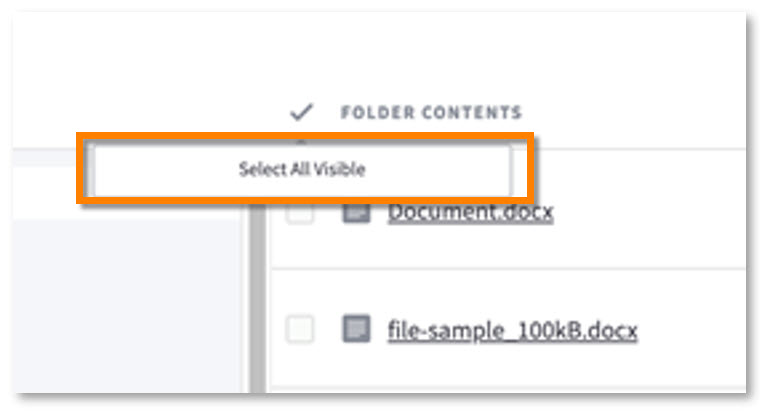
METHOD #2: Click the Select All Visible button, which selects all files on the page:
You can combine multiple options to select different combinations of files and folders to restore.
How to perform the restoration process
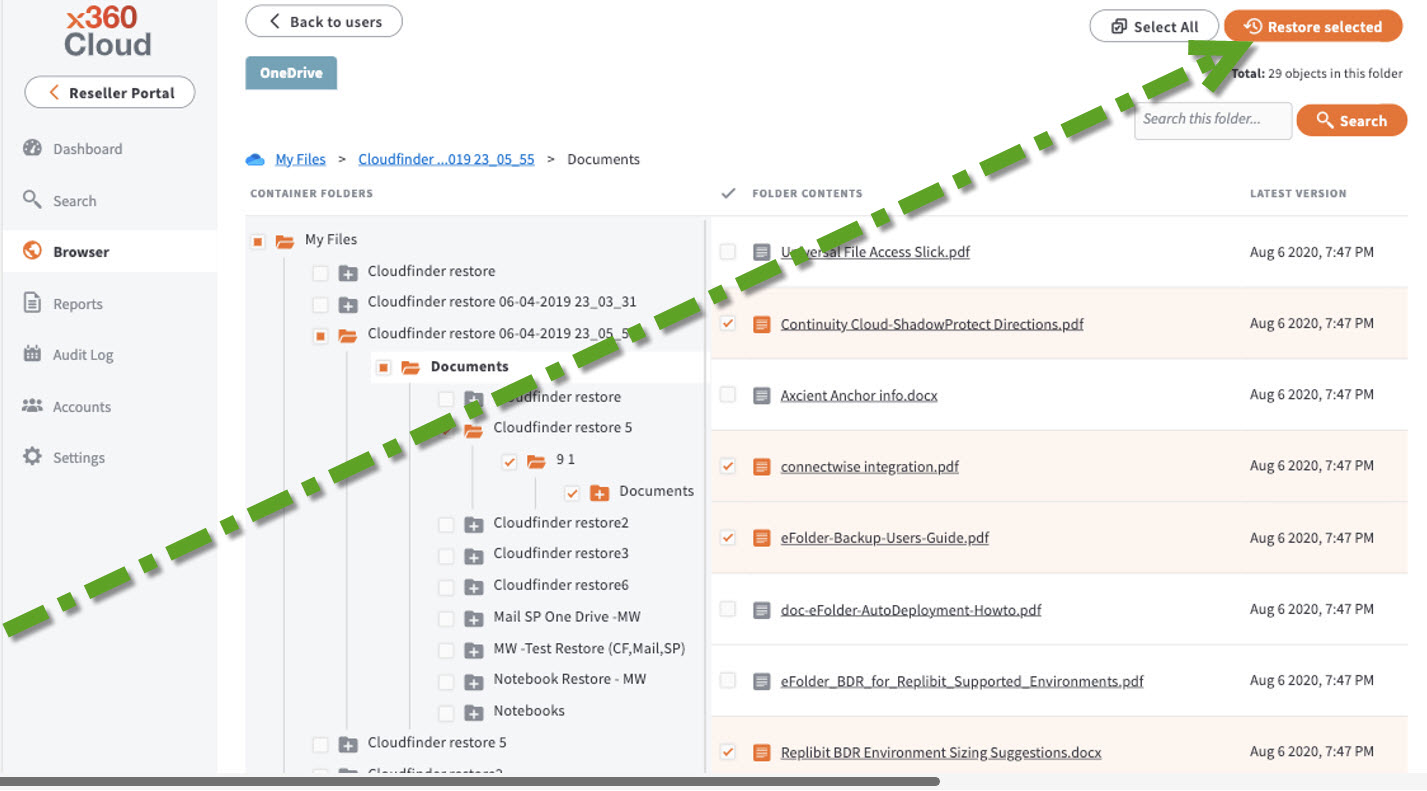
1. First, select all of the folders, subfolders and files you wish to restore.
2. Then, click the Restore selected button (in the top right corner of the screen) to begin the process:
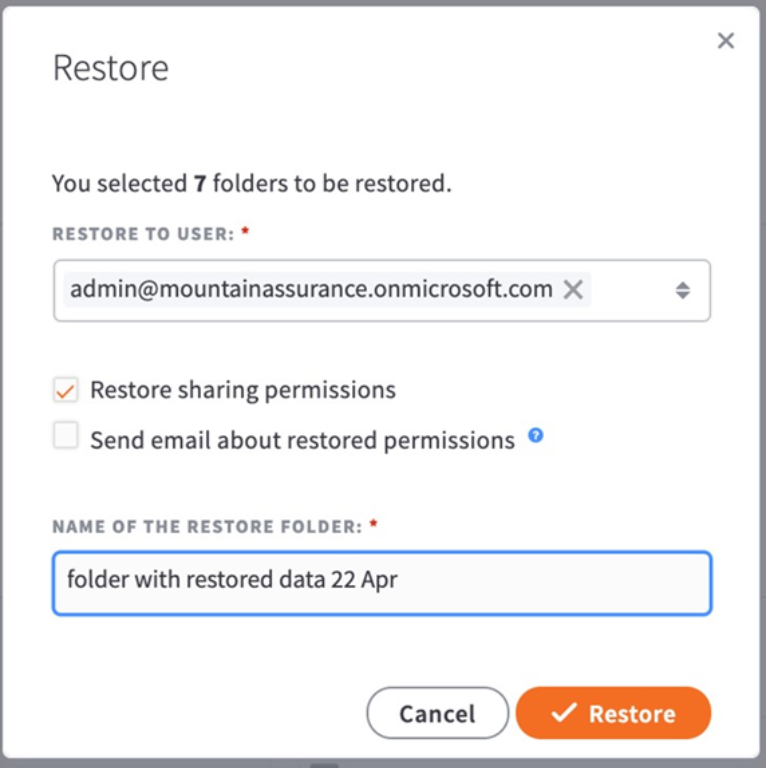
- Click Restore to User to select the user account where this item will be restored.
- Optionally, you can use the check boxes to set other restore permissions.
- Click Restore sharing permissions to recover folders and files permission settings, including access for the previous owner of the backed up user account.
- Click Send email about restored permissions to alert users whose sharing permissions are restored along with data, including the previous owner of the backed up user account.
- Optionally, you can use the check boxes to set other restore permissions.
- In the Name of the Restore Folder field, enter the name of the folder where this item will be recovered.
- Then, click the orange Restore button to continue.
4. To complete the restoration, confirm the following selections:
NOTE: SharePoint data can be restored to the root SharePoint site only.
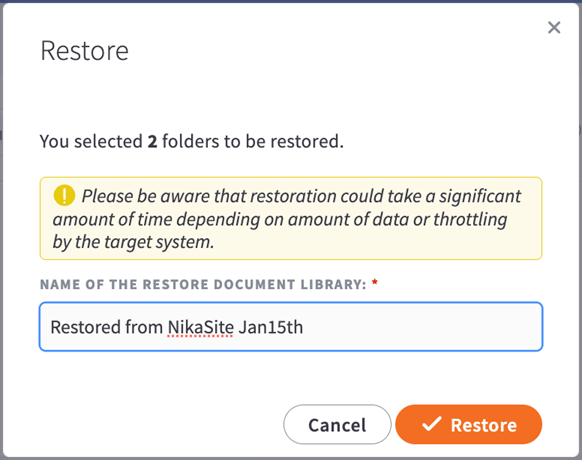
In the Name of the Restore Document Library field, enter the name of the document library you wish to create in the SharePoint root site.
NOTE: SharePoint data can be restored to the root SharePoint site only.
5. Review your choices and when you are satisfied with your selections, click the Restore button to complete the restore process.
SUPPORT | 720-204-4500 | 800-352-0248
- Contact Axcient Support at https://partner.axcient.com/login or call 800-352-0248
- Have you tried our Support chat for quick questions?
- Free certification courses are available in the Axcient x360Portal under Training
- Subscribe to Axcient Status page for updates and scheduled maintenance
818 | 984 | 1002 | 1121 | 1701