
Steps to convert a Direct-to-Cloud endpoint to appliance mode
[Watch a step by step video here:] (Seven minutes)
STEP 1. Deploy an appliance provisioned for the customer
| Need detailed instructions for installing and configuring an appliance? Refer to Appliance setup and first-time login for step-by-step help. Note: As you are using the instructions provided at Appliance setup and first-time login, you can disregard the final step called “Ready to deploy x360Recover Agents”, since your agent already exists on the protected system (and will be edited in step 3 below). |

STEP 2. Perform an incremental vault-to-appliance recovery
See Incremental Vault Recovery for detailed instructions
Note: You may continue to take backups of the protected system during this phase. Only proceed to the next step after the recovery of the protected system data from the vault to the appliance is completed.

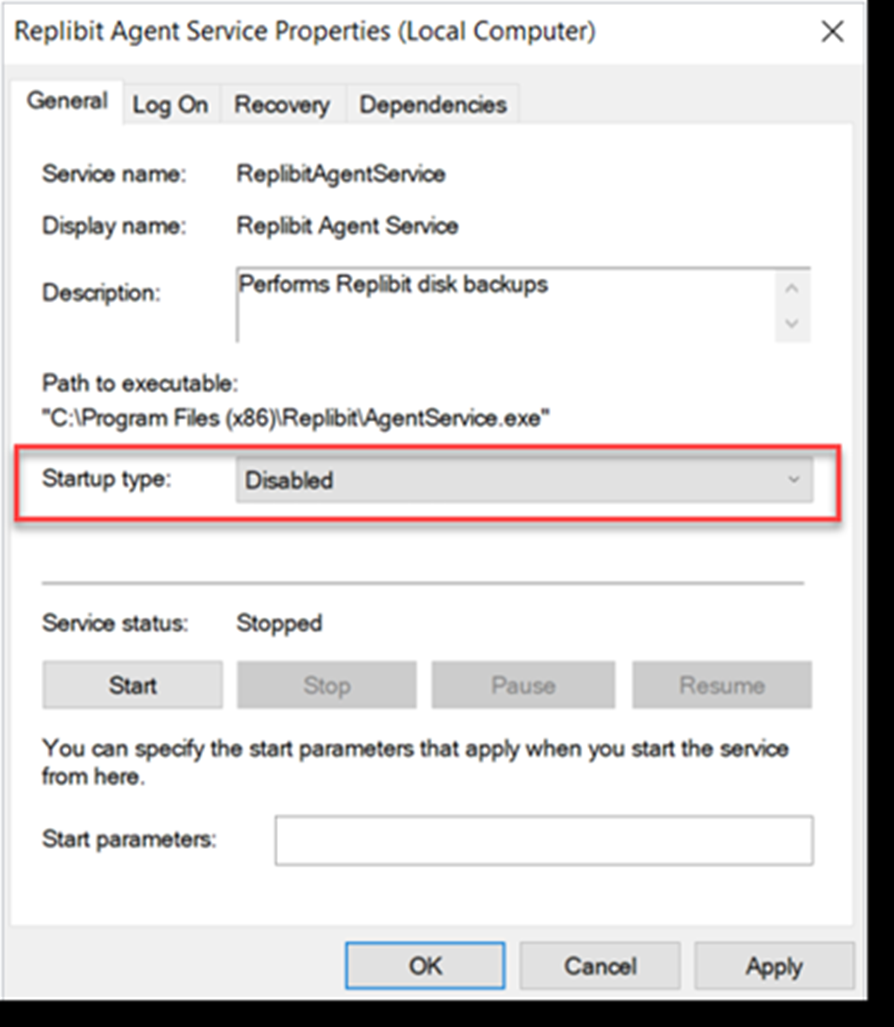
STEP 3. Stop the agent service and update the agent configuration
3. Stop the agent service and reconfigure the agent settings.
3.1. After completing the vault recovery, open the vault.
Verify that the protected system no longer has a backup schedule option on the Protected Systems page (indicating it is no longer a Direct-to-Cloud endpoint)
3.2. On the protected system, stop the Agent Service in Windows Services Manager and disable it:
Note:
- For Agent version 2.x (or older) the agent service is ‘Replibit Agent Service’.
-
For Agent version 3.x (or higher) the agent service is ‘xCloud Agent Service’
Note:
- For Agent version 2.x the configuration file is ‘aristos.cfg’
For Agent version 3.x the configuration file is config.toml
3.3. Open notepad as administrator.
Open the agent configuration file:
- For agent 2.x: C:\Program Files (x86)\Replibit\aristos.cfg
- For agent 3.x C:\Program Files\xCloud\configs\config.toml)
3.4. Save a copy of the file (i.e. as aristos.cfg.Old or config.toml.old)
3.5. In the original configuration file, edit the field SERVER= by removing the vault URL and entering the IP address of the appliance.
3.6. Delete any settings related to local cache in the configuration file. (Local cache does not work with appliance-based backups.)
Then, delete the Permid.cfg file.
3.7 Remove the Direct-to-Cloud authentication token:
- For agent 2.x, delete the Permid.cfg file in C:\Program Files (x86)\Replibit\,
- For agent 3.x edit the secure.toml configuration file in C:\Program Files\xCloud\configs\ and remove the line containing ‘perm_id=xxx’
|
IMPORTANT: Do NOT delete secure.toml for 3.x agent installations. |
3.8. Save and close the configuration file(s).
3.9 Enable/Start the agent services in Windows Task Manager.

STEP 4. Confirm that backup and replication are running
4.1. After converting a Direct-to-Cloud endpoint to appliance mode, the appliance will automatically select to run a Full Backup as the next backup job.
Note: This "Full Backup" is actually an incremental backup plus fresh metadata. (It is not the same size as a full base snapshot.)
Subsequent backups will be incremental, as usual.
4.2. Verify that backups are completed successfully.
4.3. Verify that new backups are replicated to the vault.
Related article:
If your appliance has failed entirely, or if the appliance storage pool has failed, you can recover protected systems from the vault to a new appliance. Full details are available at How to recover a protected system from the vault to a new appliance.
SUPPORT | 720-204-4500 | 800-352-0248
- Please contact your Partner Success Manager or Support if you have specific technical questions.
- Subscribe to the Axcient Status page for a list of status updates and scheduled maintenance.
576 | 631 | 1087 | 1136 | 1307 | 1684 | 2056