Overview
You can create and manage all of your files and folders in the Browse Files page of the web portal. In this page, you can utilize advanced drag and drop functionality, create files folders, upload files, and manage revisions. You can also preview dozens of file types directly in your web browser and edit files simultaneously with coauthors using the fully integrated Collaborative Web Editor.
Find content
- In the web portal, click the My Files tab. This gives you access to your files, folders, and Team Shares.
- To quickly organize your content, drag and drop files and folders within the page. You cannot drag and drop a personal file or folder into a Team Share. You can, however, drag and drop personal files and folders, or drag and drop files and folders while inside a Team Share.

3.You can also select multiple items at one time by holding down the Shift key on your keyboard. You can then perform mass actions, including download, lock, move, deleted, and more.
Preview content
1. To preview a file in your web browser, right-click the file and select View. Or, simply click the file to view its contents. The selected file will open, allowing you to utilize advanced search tools, select and copy text, print, download, and more.
2. Click the Close button when you are finished previewing the file.
Edit content
1. Right-click a supported file type, point to Open in and select your preferred editor.
Depending on administrative settings, you might have access to the Web Editor or a Microsoft app.

For example, if you select Web Editor, the file opens in the fully integrated, real-time Collaborative Web Editor.

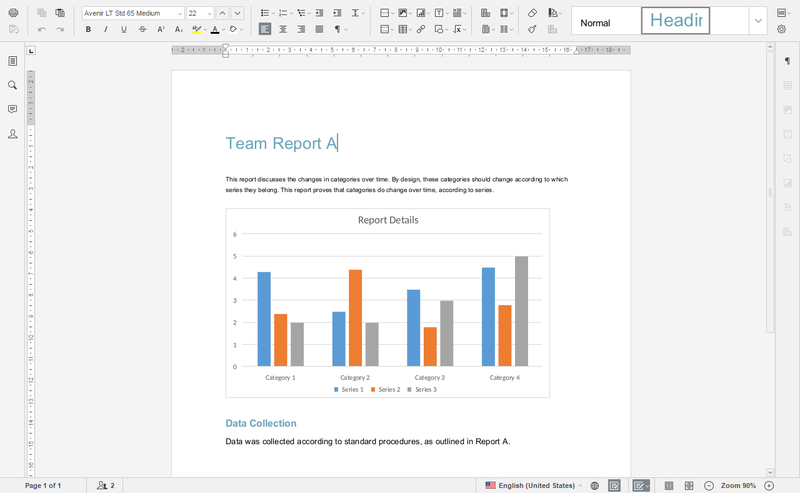
2. In the Collaborative Web Editor, you can access a wide-range of formatting tools to help you update fonts, paragraph formats, charts, tables, images, style types, and more. Additionally, you can edit simultaneously with coauthors, send and receive chats, and view and manage comments.
Create and manage content
- In the Files tab of the web portal, you can use the toolbar buttons to manage content in the selected folder.
- Click the Create drop-down button to create a new file or folder inside the web portal.
- Click the Upload Files button to add files to the web portal.
- Click the Rollback button to restore all files within the entire folder to an earlier revision before a selected date. The Revision Rollback feature is particularly useful in situations where a file might have been corrupted by ransomware; it utilizes a file’s revision history, and restores all currently-existing content in the folder to a healthy revision at a specified point-in-time. In these cases, you can use the Activity Log to determine when the infected revisions were uploaded, and then roll back files prior to the point of infection.
- Click the Show Deleted button to show files that have been deleted.
- Click the Restore Deleted button to return any deleted files to their original location.
- Click the Erase all Revisions button to erase previous revisions.

- Use the foldermenu to manage individual folders:
- Right-click a folder. A menu displays.
- In the menu, you can:
- Click the Share link to create a share link to the folder and its contents.
- Click the Download ZIP link to download the entire folder as a ZIP file to your local machine.
- Click the Erase Revisions link to remove previous revision of the folder from the system.
- Click the Rename link to rename the title of the folder.
- Click the Move link to change the path of the folder.
- Click the Delete link to delete the folder from the system.
NOTE
When you delete an item, it is still stored in the system for a pre-determined number of days. Within this timeframe, you can restore a deleted file. Please contact your administrator for more information.
- Alternatively, you can use the filemenu to manage individual files; or, press and hold down the Shift key to select multiple files at one time.
- Right-click a file. A menu displays.
- In the menu, you can:
- Click the Open in link to launch the file in the native browser, the Collaborative Web Editor, Microsoft 365 (if applicable), or the Web Preview tool.
- Click the Share link to create a share link to the file.
- Click the Download link to download the file to your local machine.
- Click the Revisions link to view a list of revisions to the file, and optionally restore a previous revision.
- Click the Erase Revisions link to remove previous revision of the file from the system.
- Click the Activity link to review activity or events for the selected file.
- Click the Rename link to rename the selected file.
- Click the Move link to change the path of the selected file.
- Click the Delete link to delete the file from the system.
NOTE
When you delete an item, it is still stored in the system for a predetermined number of days. Within this timeframe, you can restore a deleted file. Please contact your administrator for more information.