
How to integrate x360Recover RMC with ConnectWise |
How to integrate the [legacy] BRC platform with ConnectWise
You can choose to integrate the [legacy] BRC platform with the ConnectWise PSA tool.
When you do this, alerts that originate in BRC will be pushed to ConnectWise, allowing you to manage and monitor all events from one location.
Note: To complete [legacy] BRC integration with the ConnectWise PSA tool, you will need information related to the ConnectWise account being used. Before you start the BRC integration, you will need to obtain:
- API key
- ConnectWise account login details
- Company account details for the target client site
- ConnectWise service board data (including service type and subtype)
- Service priority setting
Tips on how to obtain the required information are included below.
Need more help? For information on inheriting these settings in the UMC, please reference Integrate BRC with ConnectWise: Settings .
Security Permission Requirements
ConnectWise REST API user accounts require certain security privileges in order to establish connection with ConnectWise and publish/ manage PSA tickets.
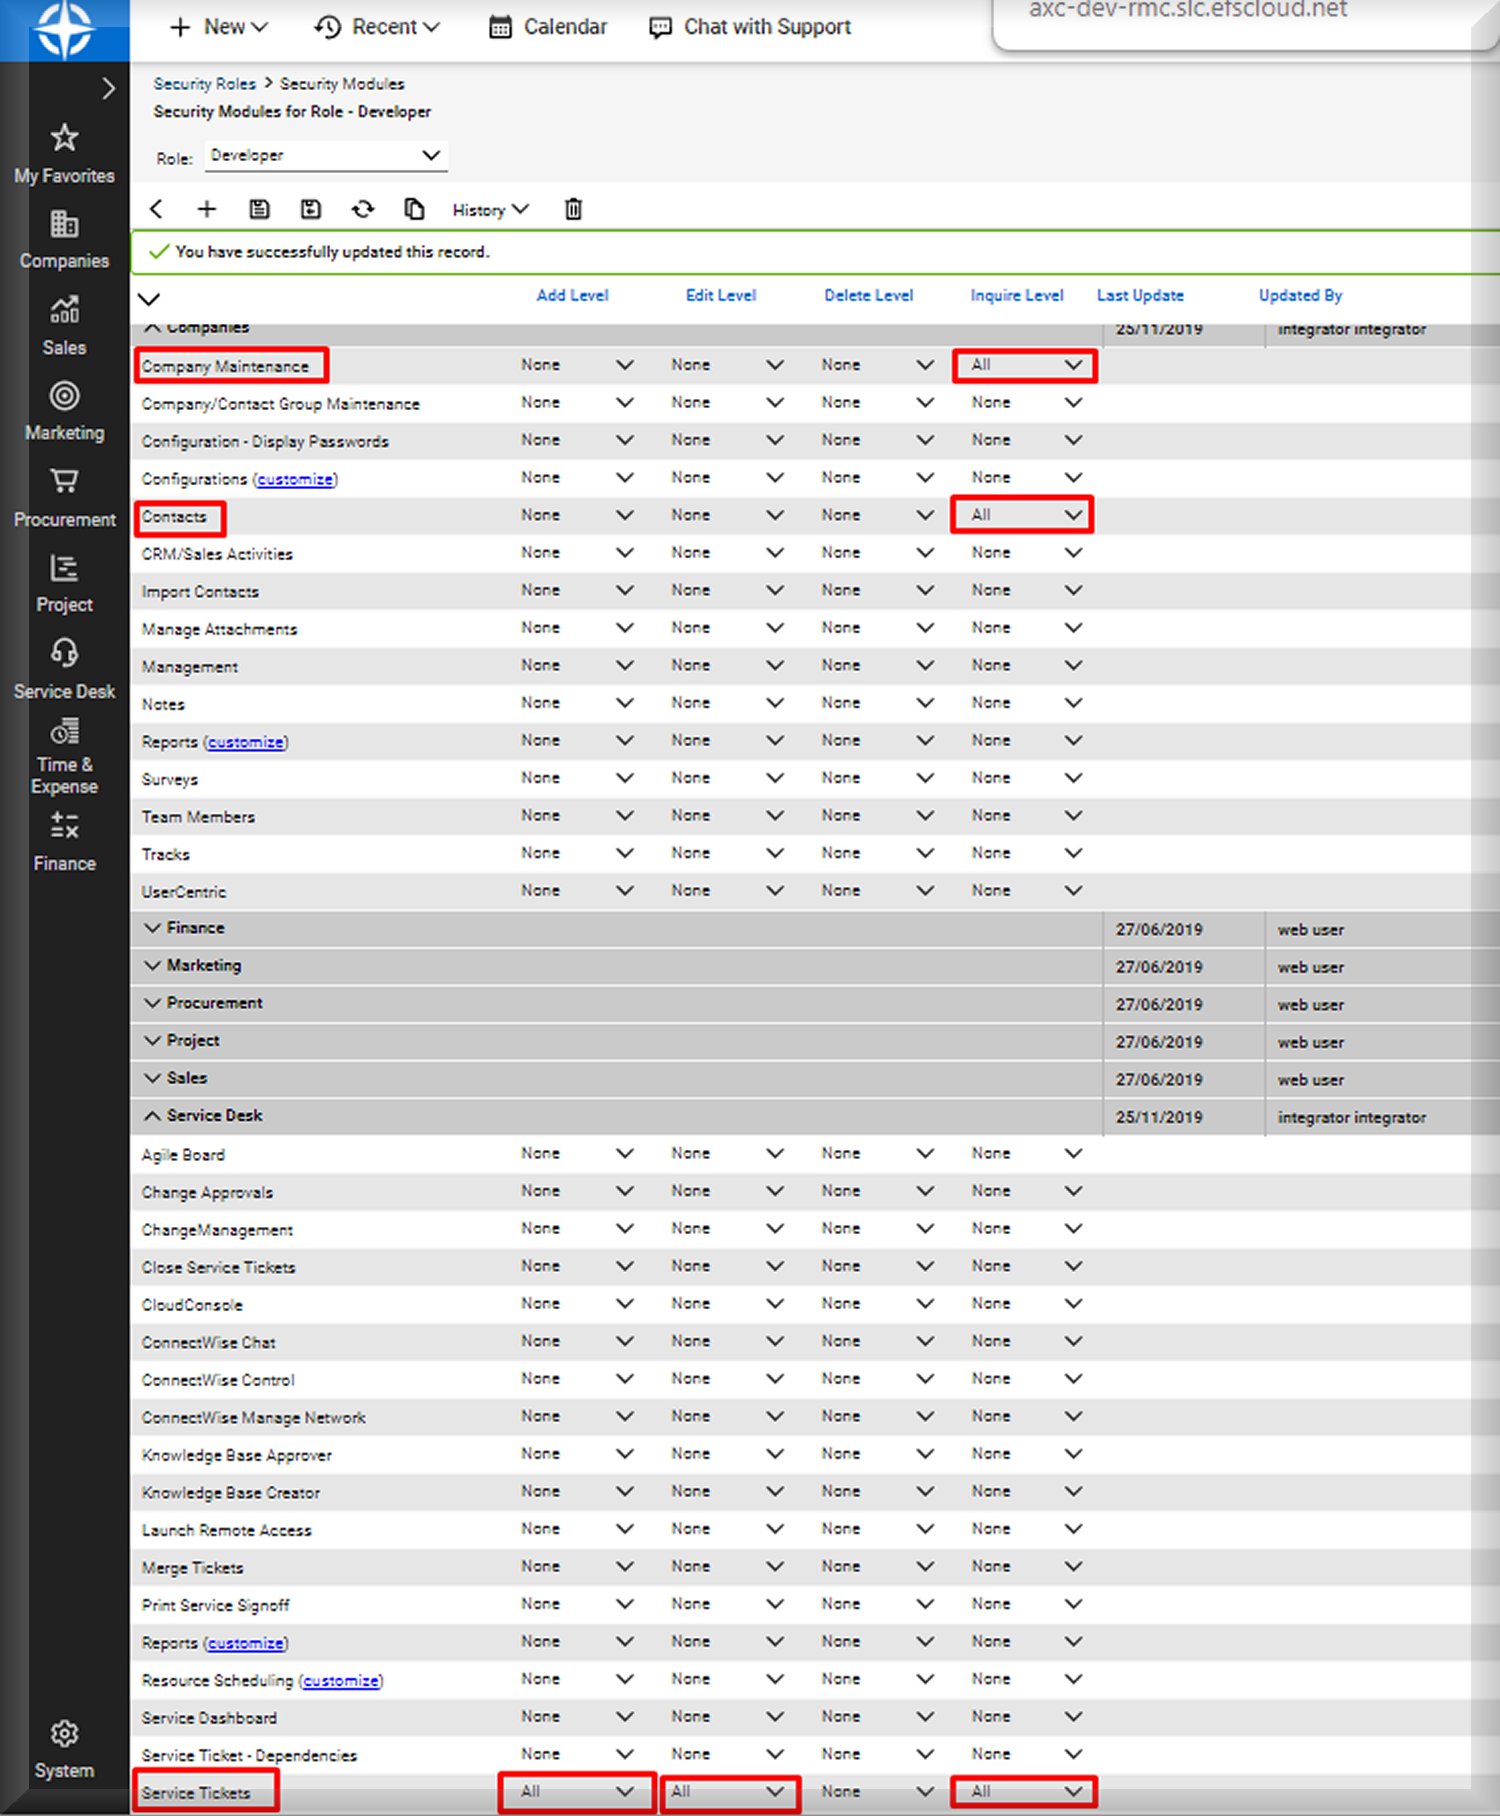
1. API user accounts should have Inquire permissions for:
- Company Maintenance
- Contacts
- Service Tickets
2. API user accounts should also have Add and Edit permissions to Service Tickets, .
Please navigate to Security Roles/ Security Modules on the ConnectWise webpage and update the security permissions highlighted in the below screenshot:
Instructions
To integrate BRC with ConnectWise:
- In the Site Details page, click the Settings link.
- In the Site Settings page, click the Edit button in the PSA Tool section.
|
|
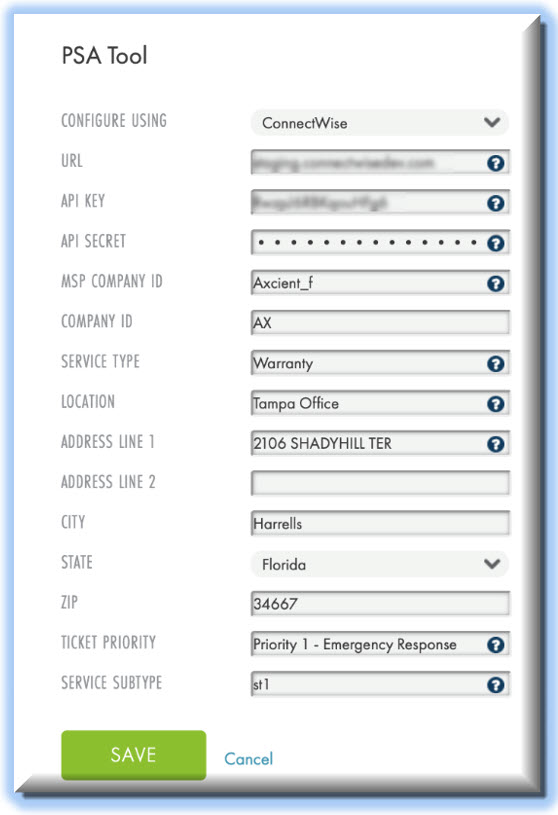 |
*The value entered in the Service Type field must match the value used in the corresponding Service Type field in ConnectWise as part of client configuration settings.
** The value entered in the Service Subtype field must match the value used in the corresponding Service Subtype field in ConnectWise as part of client configuration settings.
3. Click the Save button when you are finished.
Collecting Additional Information
Obtain the API Key
You can obtain API information within the ConnectWise service. For the purposes of integrating ConnectWise with BRC, you will need to create a new API key.
- Log in to ConnectWise and open the System menu.
- In the System menu, click the Members link.
- In the Members page, click the API Members tab and then click the plus icon to create a new API Member.
- In the Member ID field, enter Axcient.
- In the Role ID field, make sure the role is configured with Add, Update, and Close tickets.
- Click the Save button but do not close the window. After you click the Save button, you will be given access to the API Keys tab.
- Click the API Keys tab and then click the plus icon to create a new API key.
- In the Description field, type BRC.
- Click the Save button but do not close the window.
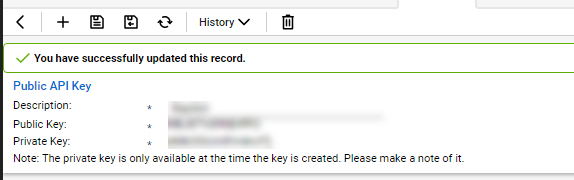
- Record the public key and private key before you close the window. You will not be able to view the private key again after this window is closed.
The image below details the location of the public key and private key fields (API Secret).
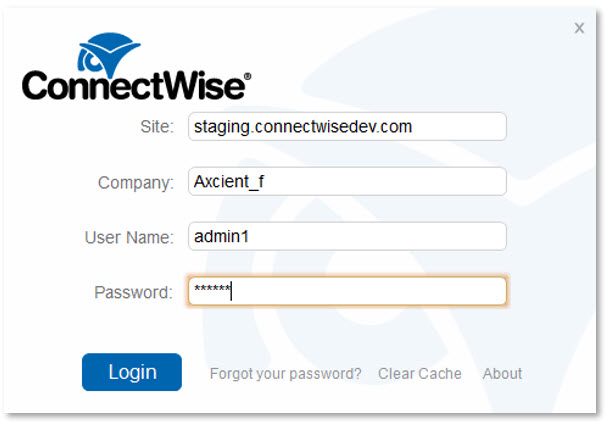
Obtain ConnectWise Login Information
The ConnectWise login information is created when first setting up the ConnectWise service. For the purposes of integrating ConnectWise with BRC, you will need to enter the login information used to connect to ConnectWise into the appropriate fields.
Obtain Client Information
To obtain the client information required to integrate with ConnectWise, you will first need to create a new company account for the target client site.
To obtain the required client company information:
- Log in to ConnectWise.
- On the left-hand navigation menu, expand the Companies tab and select the Companies option.
- In the Company Search page, enter the name of the target company.
- When found, select the target company.
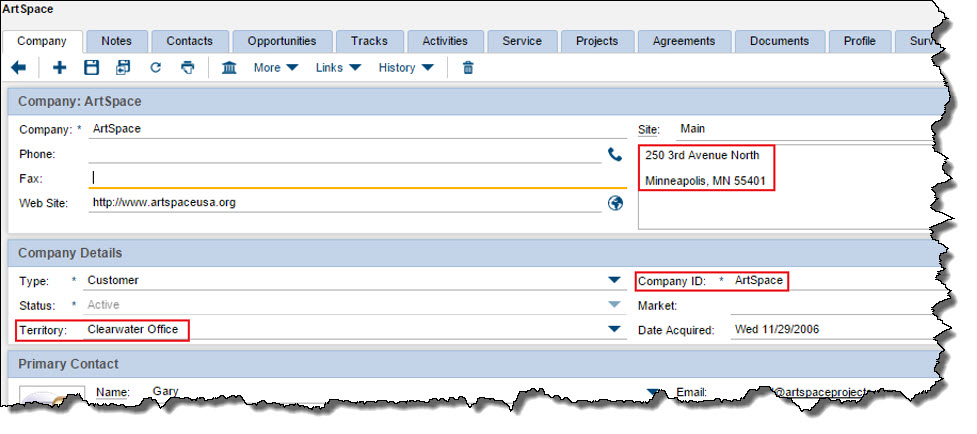
- Record the following company information:
- Company address, which corresponds to the Address Line 1 and 2, City, State and Zip fields in the Axcient Web App.
- Territory field, which corresponds to the Location field in the Axcient Web App.
- Company ID field, which corresponds to the ID Number in the Axcient Web App.
Obtain Service Type and Subtype
The Service Type and subtype are determined by the ConnectWise login account. This ConnectWise account is associated with a specific Service Board, which must be configured as needed by the administrating user. (For more information regarding Service Boards, please refer to ConnectWise support.)
- In the ConnectWise left-hand navigation menu, select System and then select Setup Tables.
- In the Table column, enter the Service Board in the search field and press the Enter key.
- On the Service Board List page, click on the appropriate Service Board.
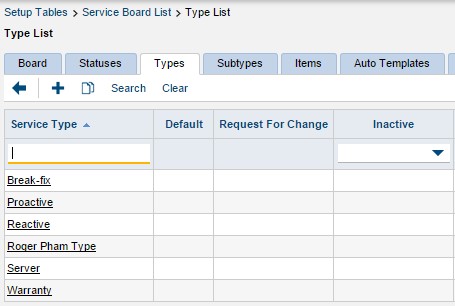
- To find the Service type, click the Types tab and enter one of the listed values in the Service Type field of the ConnectWise configuration page.
- To find the Service subtype, click the Subtypes tab and enter one of the listed values in the Service Subtype field in the ConnectWise configuration page.
Obtain Priority
The service priority is determined by the ConnectWise login user. This ConnectWise account is associated with a specific Service Board, which must be configured as needed by the administrating user. (For more information regarding Service Boards, please reference ConnectWise support.)
To obtain priority values:
- On the ConnectWise left-hand navigation menu, select System and then select Setup Tables.
- In the Table column, enter SLA in the search field and press the Enter key. Click the SLA option when it displays.
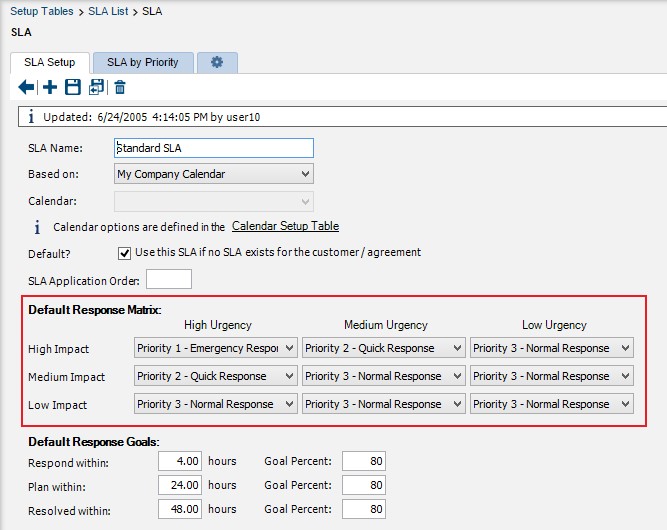
- On the SLA List page, select the appropriate SLA option.
- Enter one of the listed values in the Priority field in the ConnectWise configuration page.
Additional Information
For information on inheriting these settings in the UMC, please reference the Integrating BRC with ConnectWise and Inheriting Settings in the UMC Knowledgebase article.
Source: https://portal.axcient.com/6619/integrating-brc-with-connectwise/