
1. Prepare Axcient Virtual Office for SonicOS 6.5
| See Configure IPsec VPN site-to-site VPN Settings for details on these preparatory steps. |
NOTE: Release 6.5 includes significant user interface differences from SonicOS 7.x and newer.
Before you work with the SonicOS 6.5 firewall, first enable port forwarding and IPsec VPN within your Virtual Office
Note: You may also perform these steps within a Runbook (to simplify testing and live cloud failover events.)
- First, open your Virtual Office.
- Next, enable port forwarding.
- Finally, configure IPsec VPN within your Virtual Office.
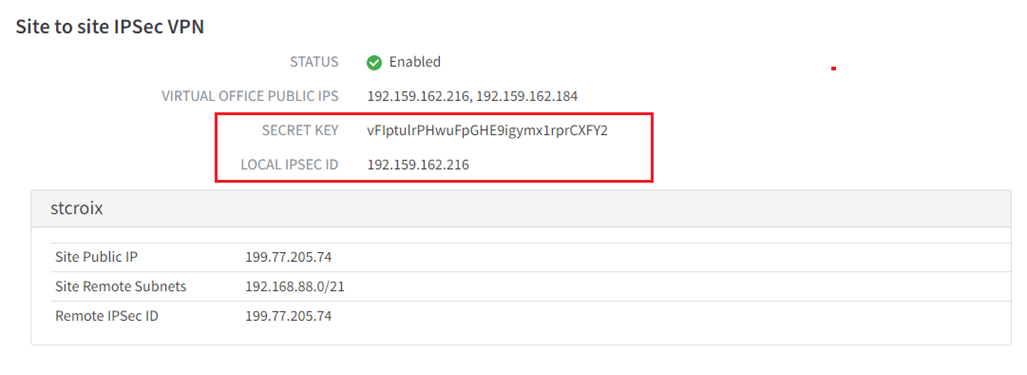
Important: Once you have configured IPsec VPN, please make a note of (a) the randomly generated pre-shared SECRET KEY (password) which was generated for you, as well as (b) the LOCAL IPSEC ID address you configured to use for IPsec VPN.
You will need this information later in this process:
2. Configure your SonicWall firewall for IPsec VPN - SonicOS 6.5
NOTE: This release includes significant user interface differences from SonicOS 7.x and newer.
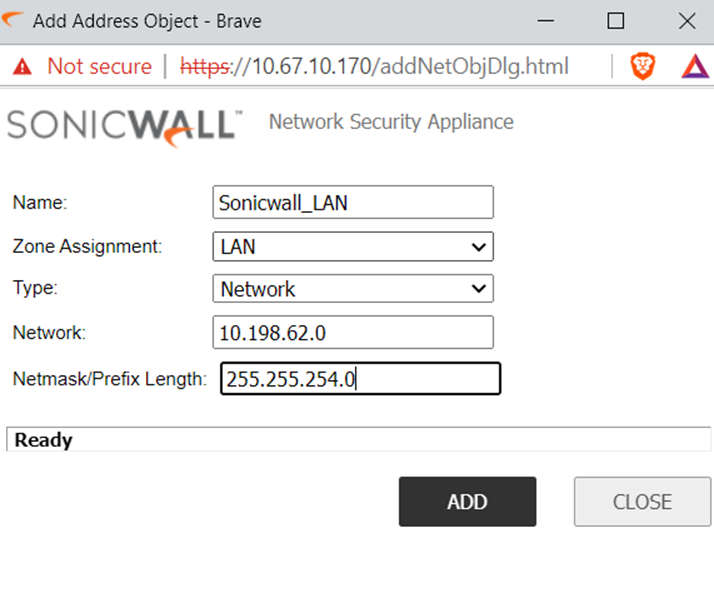
2.0. Create an address object for the Local LAN network
2.1. Navigate to Manage | Object | Address objects and click Add.
2.2. Enter a friendly Name for the object (For example: Sonicwall_LAN)
2.3. Set the Zone Assignment to LAN.
2.4. Set the Type to Network.
2.5. For Network, enter the local LAN network address (For example: 10.198.62.0)
2.6. For Netmask/Prefix Length, enter the Netmask value (For example: 255.255.254.0)
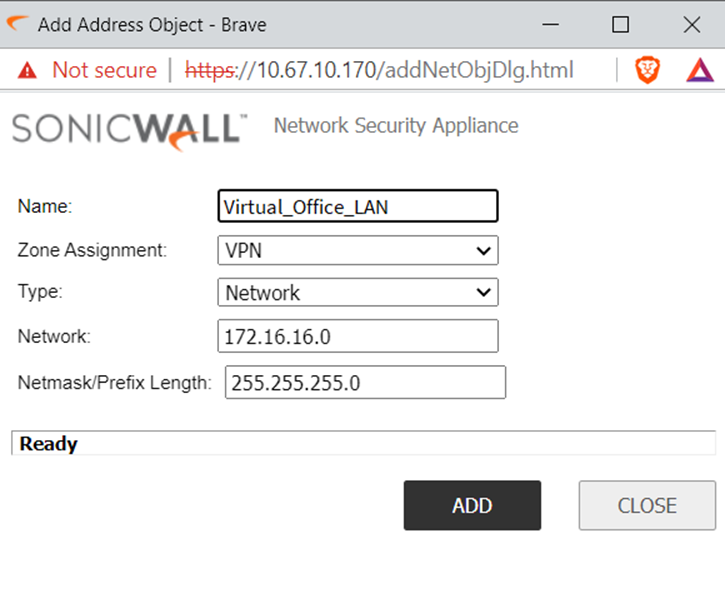
3.0. Create an object for the Remote LAN Network
3.1. Navigate to Manage | Object | Address objects and click Add.
3.2. Enter a friendly Name for the object, i.e. Virtual_Office_LAN
3.3. Set the Zone Assignment to VPN.
3.4. Set the Type to Network.
3.5. For Network, enter the local LAN network address, i.e. 172.16.16.0.
3.6. For Netmask/Prefix Length, enter the Netmask value, i.e. 255.255.255.0
4.0. Enable VPN
4.1. Go to Manage | VPN |Base Settings.
4.2. Select Enable VPN.
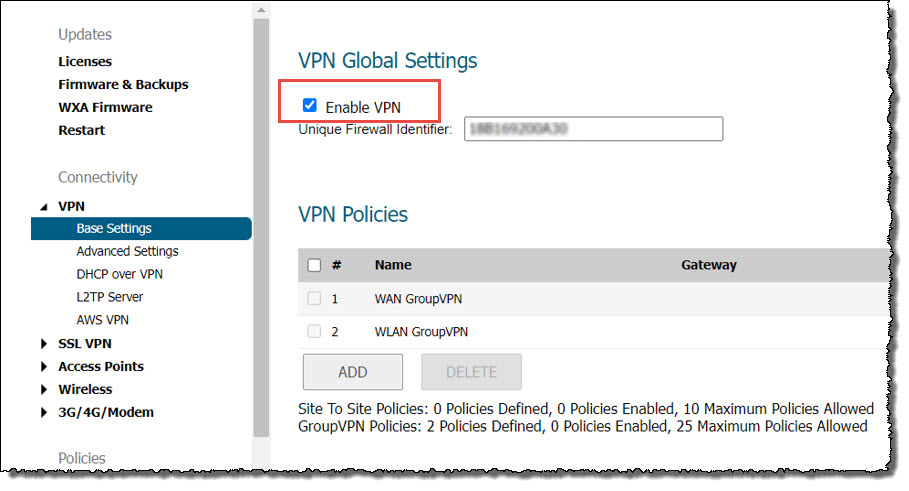
4.3. Navigate to System Setup | Appliance | Base Settings | Firewall Name and enter a value in Unique Firewall Identifier.
Note: As the name suggests, this identifier should be unique among all the SonicWall firewall under your control.
5.0. Configure VPN policy
5.1. Click Manage in the top menu.
5.2. Navigate to VPN | Base Settings and click Add. The VPN Policy window is displayed.
5.3. Select the General menu.
-
Security Policy
- Set Policy Type to Site to Site
- Set Authentication Method to IKE using Preshared Key
- Enter a friendly Name for the connection, i.e. Axcient_Virtual_Office
- Set IPsec Primary Gateway Name or Address to the Virtual Office Public IP address (LOCAL IPSEC ID).
- Set IPsec Secondary Gateway Name or Address to 0.0.0.0.
-
IKE Authentication
- Set Shared Secret and Confirm Shared Secret to the Secret Key provided in Axcient Virtual Office.
- Set Local IKE ID and Peer IKE ID to IPv4 Address.

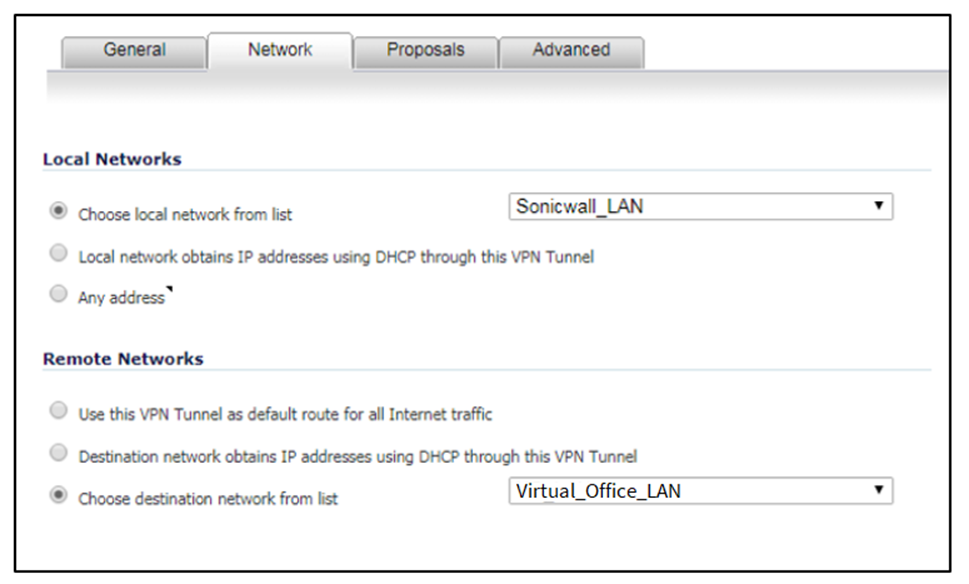
5.4. Click the Network menu.
- Under Local Network select Choose local network from list and set it to Sonicwall_LAN.
- Under Remote Networks select Choose local network from list and set it to Virtual_Office_LAN.
5.5. Select the Proposals Menu.
-
IKE (Phase 1) Proposal
- Set Exchange to IKEv2 Mode
- Set DH Group to Group 14
- Set Encryption to AES-256
- Set Authentication to SHA386
- Set Life Time (seconds) to 3600
-
IKE (Phase 2) Proposal
- Set Protocol to ESP
- Set Encryption to AES-256
- Set Authentication to one of SHA256, SHA384, or SHA512
- Enable Perfect Forward Secrecy is not used, leave Disabled
- Set Life Time (seconds) to 3600.

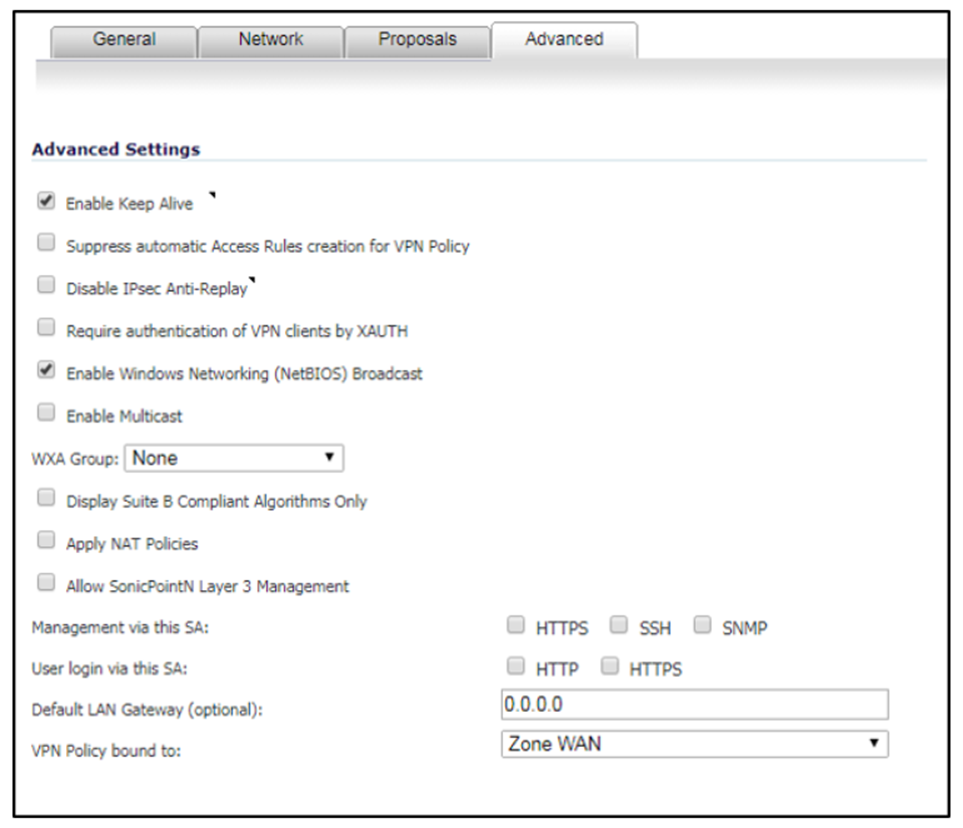
5.6. Select the Advanced menu.
- Select Enable Keep Alive
- Select Enable Windows Networking (NetBIOS) Broadcast
- Set VPN Bound to value to Zone WAN
Click OK to save the configuration.
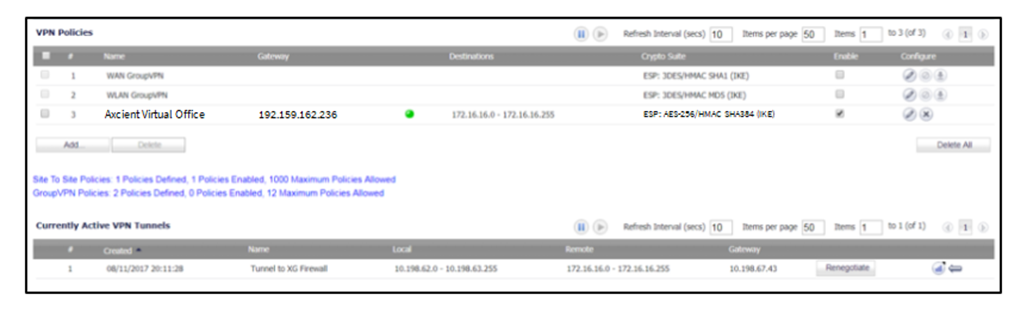
3. Activate the connection
Navigate to VPN | Settings | VPN Policies.
Select the Axcient Virtual Office connection and click Add.
It should appear under the Currently Active VPN Tunnels list.
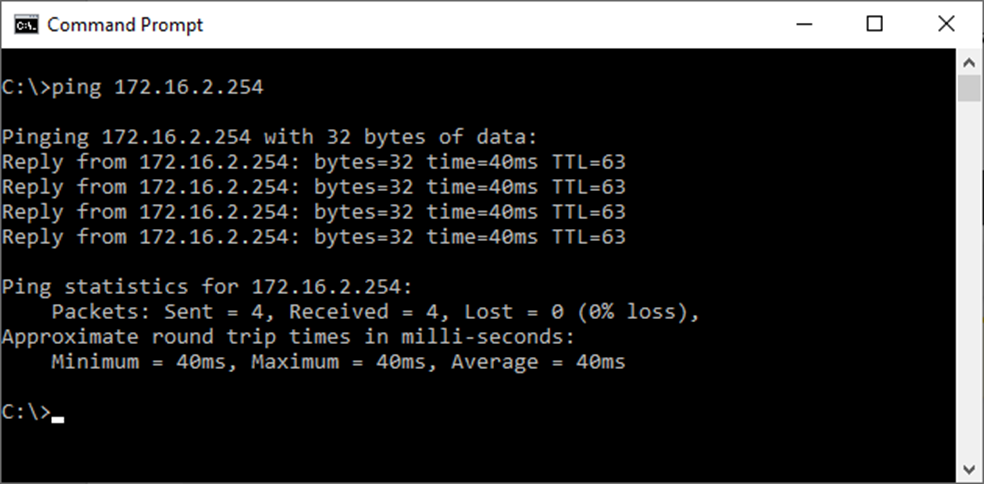
C. Verify your connection
To test your connection, open a Windows CMD shell and ‘ping’ the Virtual Office gateway address.
SUPPORT | 720-204-4500 | 800-352-0248
- Contact Axcient Support at https://partner.axcient.com/login or call 800-352-0248
- Free certification courses are available in the Axcient x360Portal under Training
- Subscribe to the Axcient Status page for status updates and scheduled maintenance
1432