
1. Prepare Axcient Virtual Office for pfSense
| See Configure IPsec VPN site-to-site VPN Settings for details on these preparatory steps. |
Before you work with the pfSense firewall, you must first enable port forwarding and IPsec VPN within your Virtual Office.
Note: You may also perform these steps within a Runbook (to simplify testing and live cloud failover events.)
- First, open your Virtual Office.
- Next, enable port forwarding.
- Finally, configure IPsec VPN within your Virtual Office.
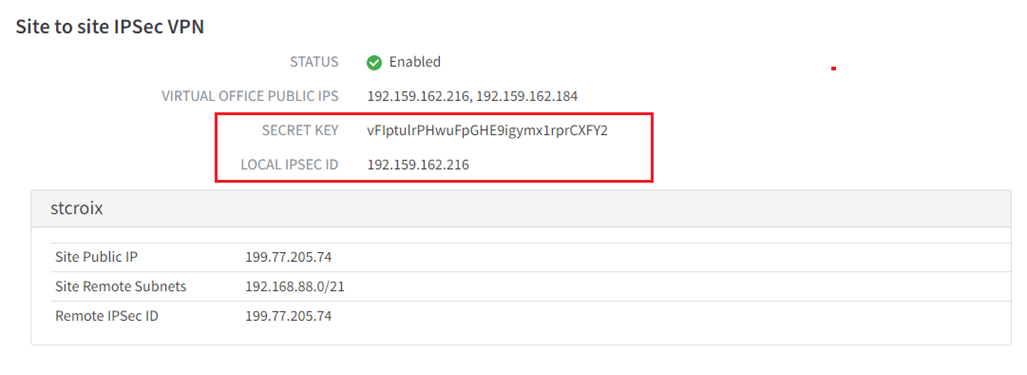
Important: Once you have configured IPsec VPN, please make a note of (a) the randomly generated pre-shared SECRET KEY (password) which was generated for you, as well as (b) the LOCAL IPSEC ID address you configured to use for IPsec VPN.
You will need this information later in this process:
2. Configure Your pfSense firewall for IPsec VPN
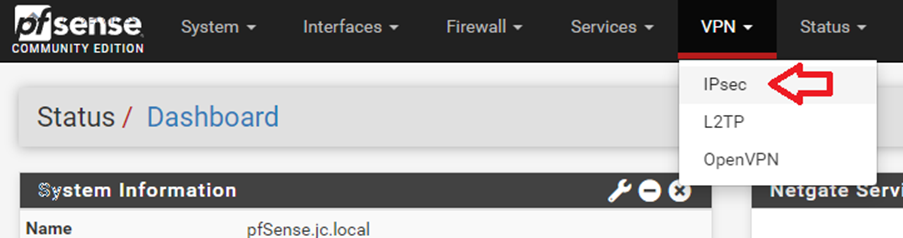
2.1. Login to your pfSense firewall and select IPsec from the VPN menu
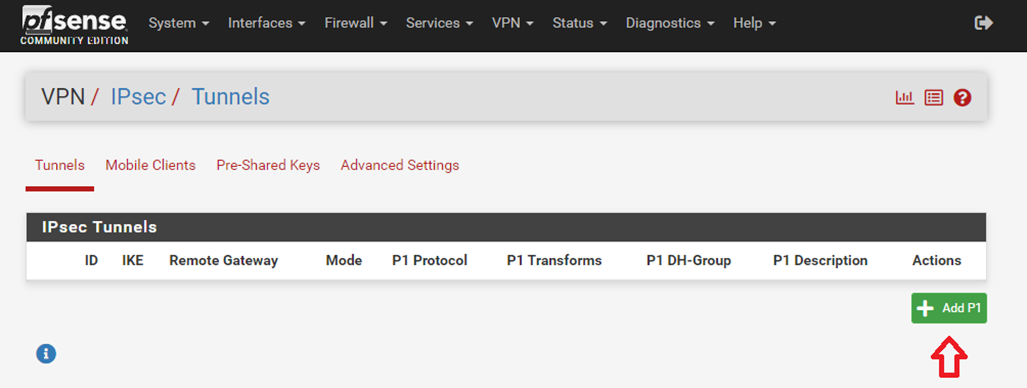
2.2. Click Add P1 to begin creation of a new IPsec tunnel definition:
2.3. Accept the defaults for all fields except for the following:
- For Description, enter a friendly description or name for this VPN tunnel. i.e. ‘Axcient Virtual Office’
- For Remote Gateway, enter the Public IP address of your Virtual Office. This is the address you saved from your notes for LOCAL IPSEC ID, noted above
- Pre-Shared Key: Enter the randomly generated pre-shared key from Virtual Office. This is from your notes for the SECRET KEY, noted above
-
Encryption Algorithms:
- Algorithm: AES
- Key length: 256
- Hash: SHA384
- DH Group: 14 (2048 bit)
- Lifetime: 3600
- Child SA Close Action: Restart/Reconnect
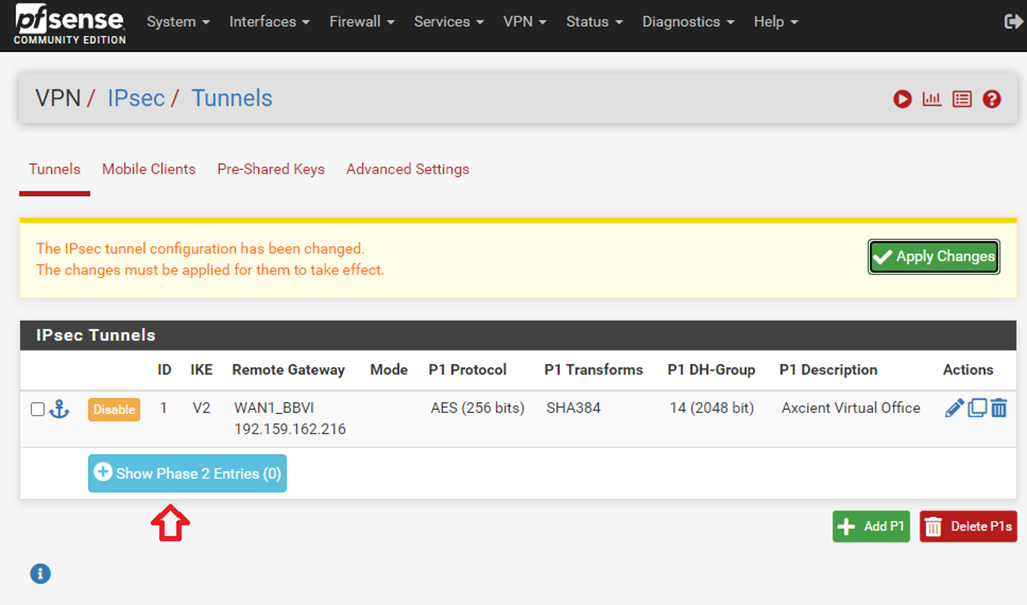
2.4. Click Save to save Phase 1 settings
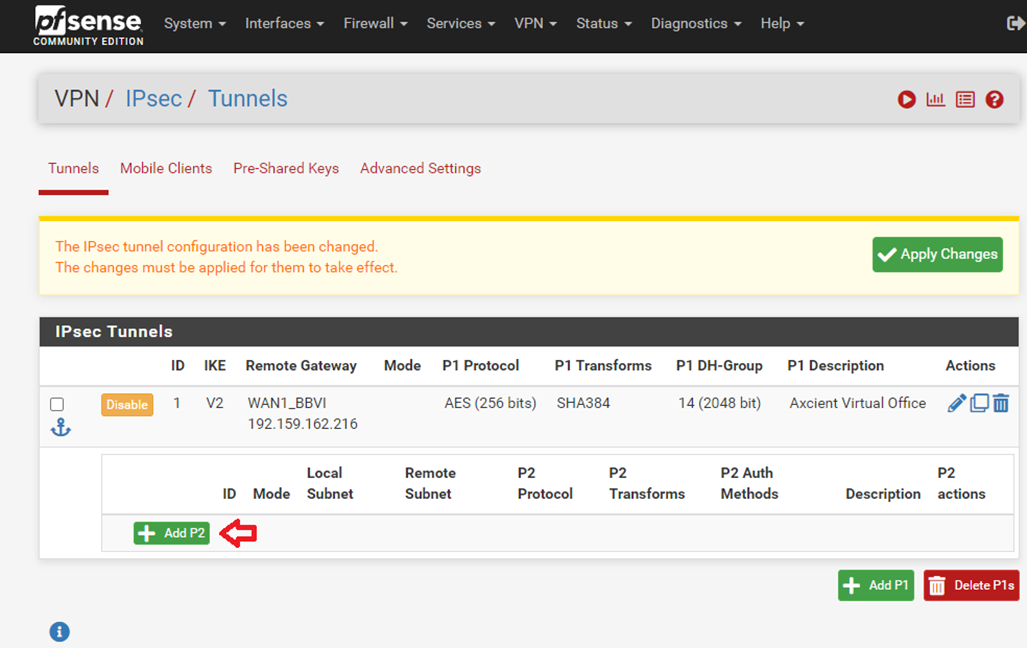
2.5. Click Show Phase 2 Entries
2.6. Then click Add P2
2.7. Accept the defaults for all fields except for the following:
- The Description field is optional and may be left blank
- Leave Local Subnet as the default value (LAN subnet) unless you need to accept traffic for additional local or remote site networks to be routed via this tunnel
- For Remote Network, enter the LAN subnet of the Virtual Office.
- For example, if you configured your gateway address in Virtual Office as 172.16.0.254 with a subnet mask of 255.255.255.0, you would set the Remote Network to 172.16.0.0/24.
Note: pfSense only accepts a single network (each) for local and remote network payloads. With planning, you can work around this by specifying a larger network that encompasses all required networks.
For example, if your Local LAN network is 192.168.0.0/24 but you also would like to include traffic from 192.168.1.0/24 you could specify 192.168.0.0/23 for the Local Subnet, which encompasses both networks.
Encryption Algorithms
- Check AES and select 256 bits
- Uncheck AES1280gcm
- Hash Algorithms: Accept the default SHA256 or you may alternatively select SHA384 or SHA512. Select only one, as the first (lowest) found to match will be used
- Keep Alive: Check to enable periodic keep alive
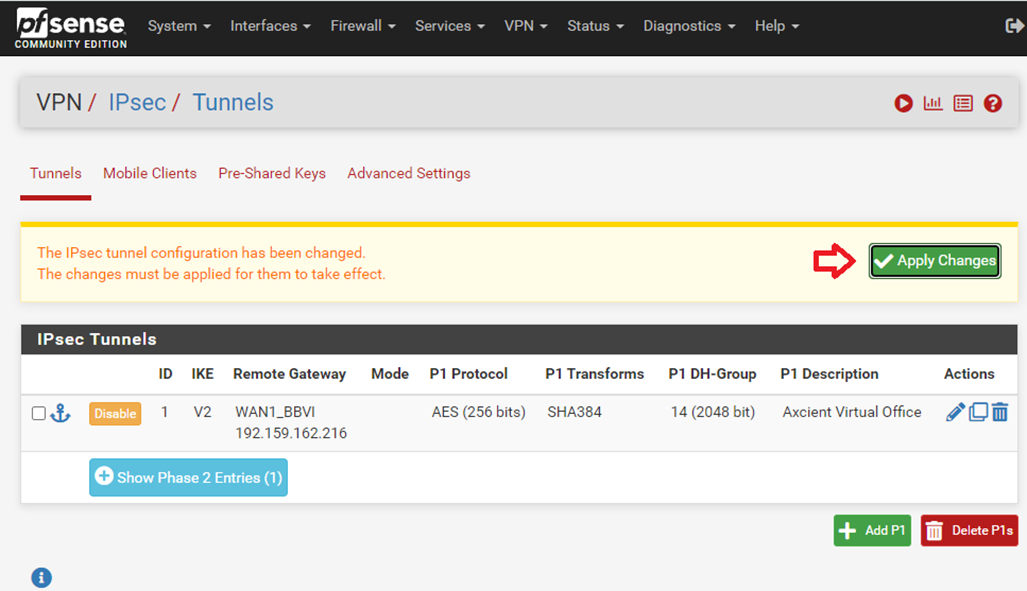
2.8. Click Save to save Phase 2 settings
Now that settings are configured, click Apply Changes to activate them.
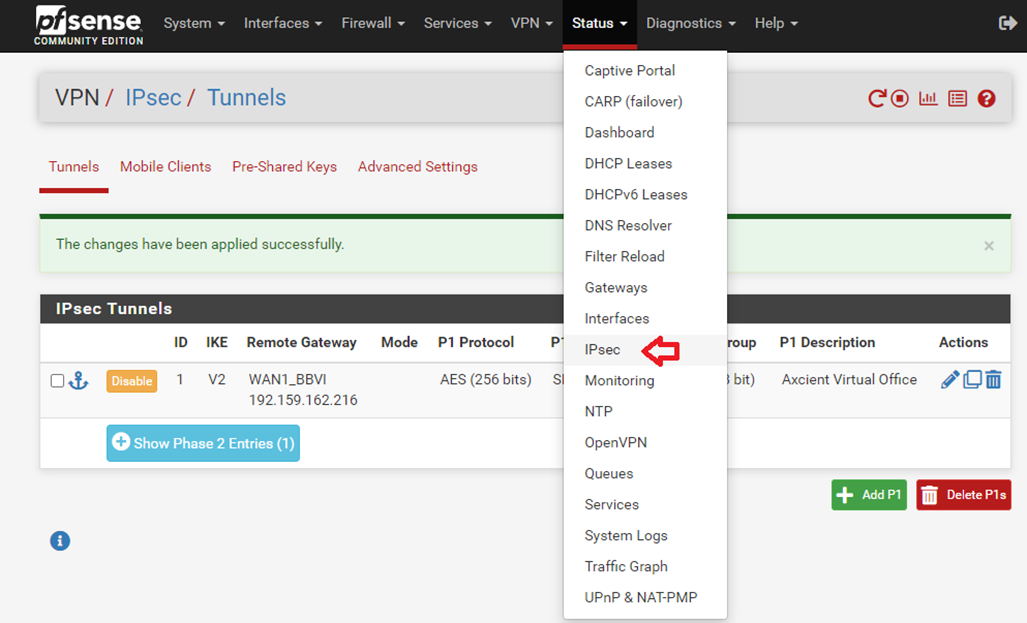
3. Test your connection
3.1. From the top menu select Status and click IPsec
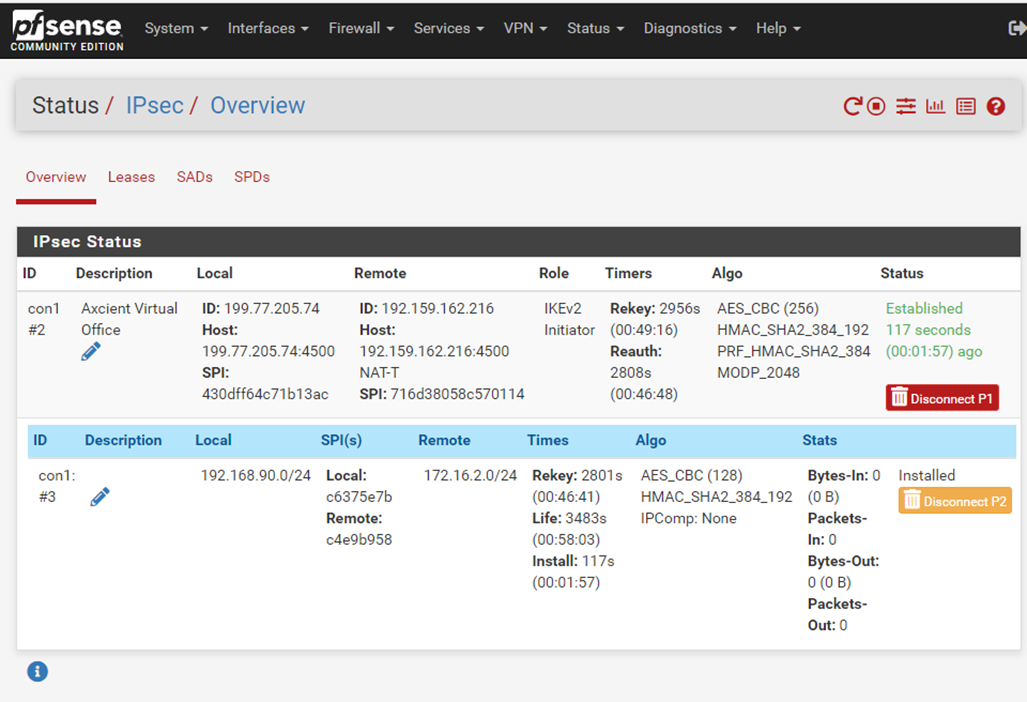
3.2. The tunnel is most likely disconnected at this point, so click Connect P1 and P2s
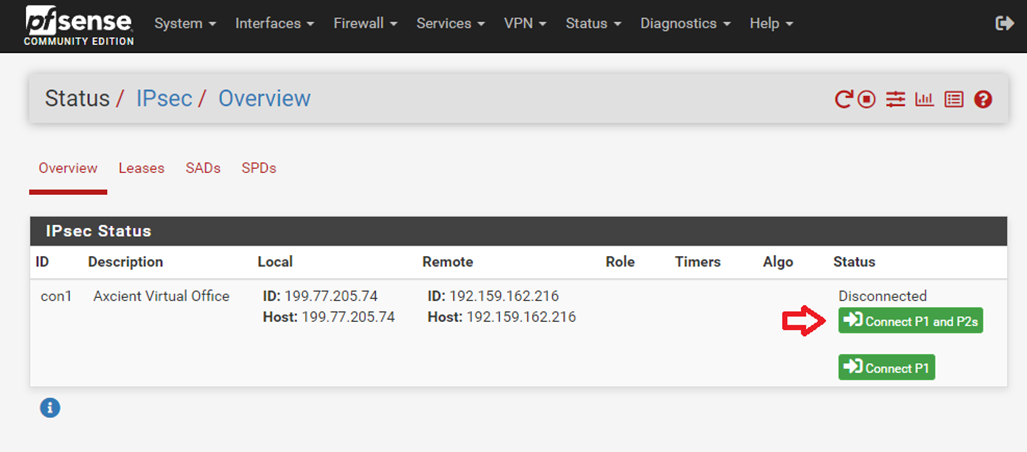
Phase 1 should now be connected.
3.3. Click on Show child SA entries to verify Phase 2 connection.
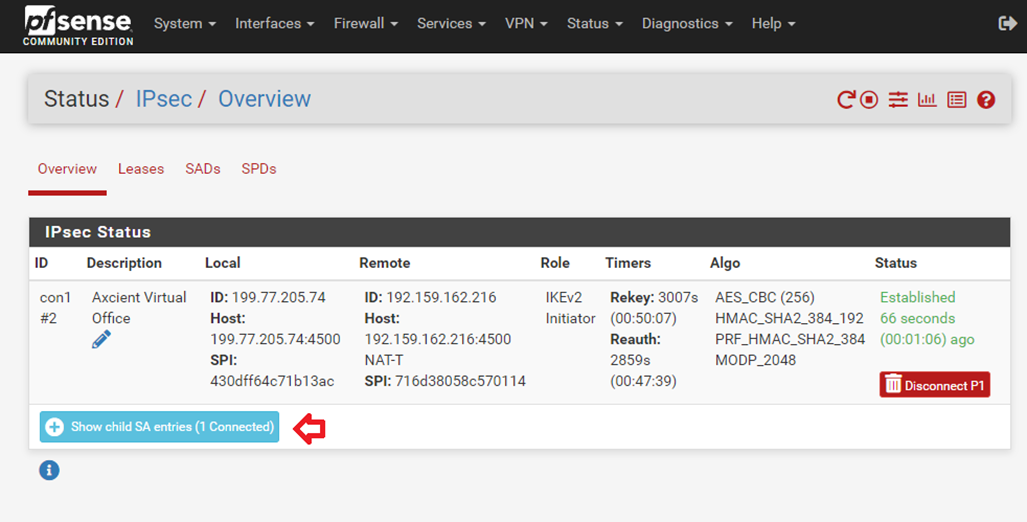
Review the information:
4. Allow traffic from network
The last remaining step is to configure the firewall rules to allow traffic from the remote network.
By default, firewall rules block all traffic not specifically defined.
4.1. From the top menu, select Firewall and click Rules
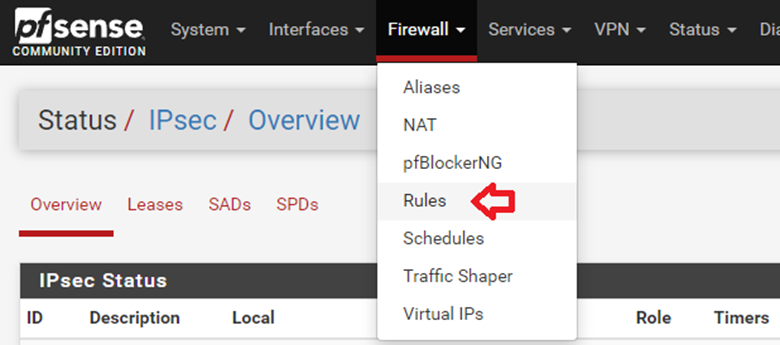
4.2. Select IPsec, then click Add to add a new rule.
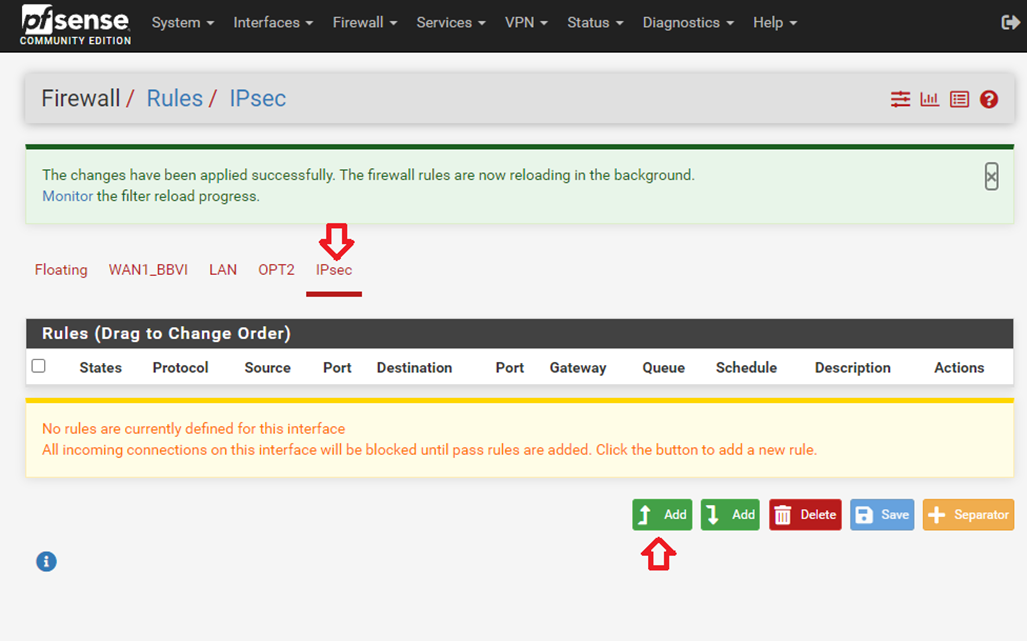
4.3. Accept the defaults for all fields except for the following:
- Set Protocol to Any if you want Ping to work over the VPN; Otherwise, select TCP/UDP
- For Source, select Network from the dropdown and specify the Virtual Office subnet as configured for Remote Network above
- For Destination, select Lan net or the network you configured as Local Network above.
4.4. Click Save to complete this firewall rule.
4.5. Click Apply Changes to activate settings.
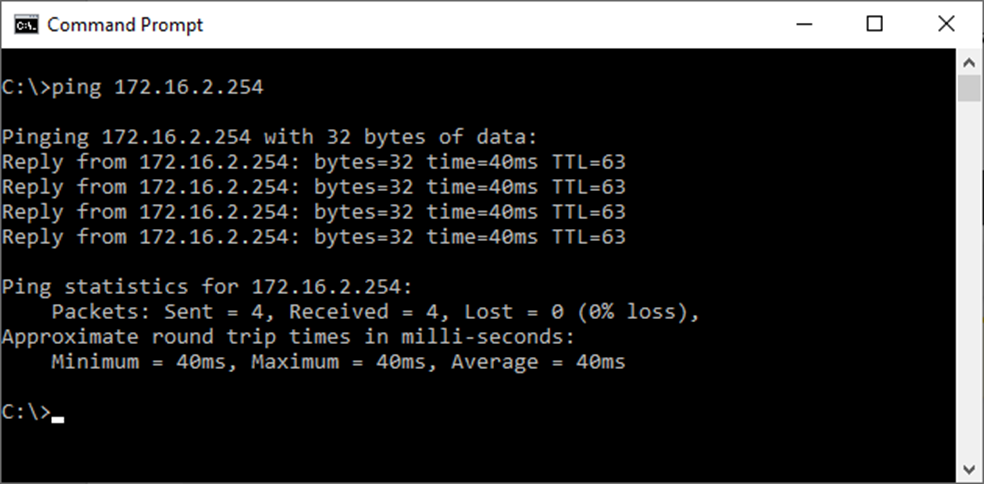
5. Verify your connection
To test your connection, open a Windows CMD shell and ‘ping’ the Virtual Office gateway address.
SUPPORT | 720-204-4500 | 800-352-0248
- Contact Axcient Support at https://partner.axcient.com/login or call 800-352-0248
- Free certification courses are available in the Axcient x360Portal under Training
- Subscribe to the Axcient Status page for status updates and scheduled maintenance
1429