
Make the AMP work for your business
Using the AMP, you can view and customize a variety of useful marketing assets - for free.
The following instructions will show you how to view and customize your assets.
Please let us know if we can assist you or if you have questions about using the AMP
View your assets
To get started, first log into the AMP via the x360Portal.
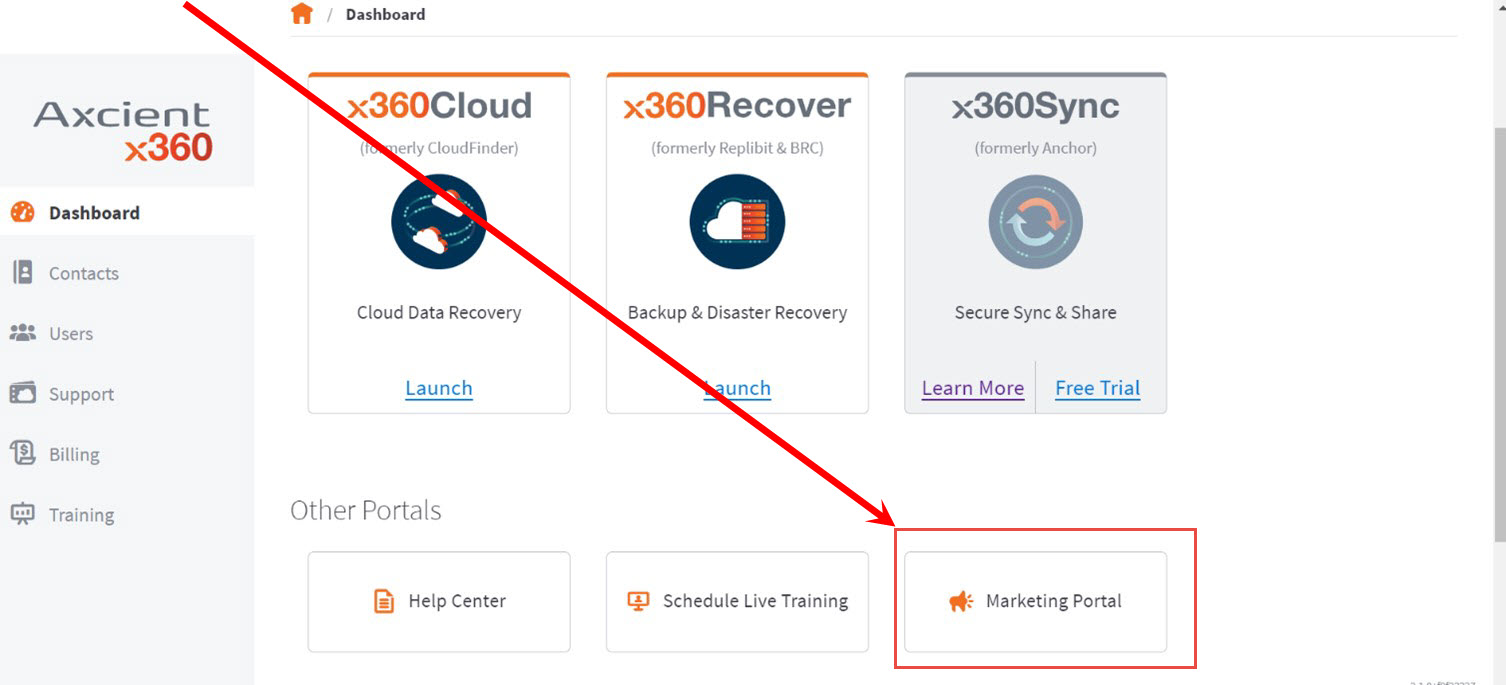
1. Once you are logged into the AMP, hover over the Assets tab in the top naviagtion and then click View Assets.

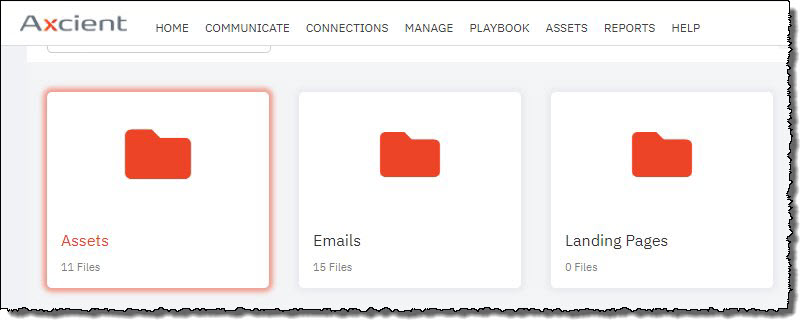
2. Select the folder named Assets.
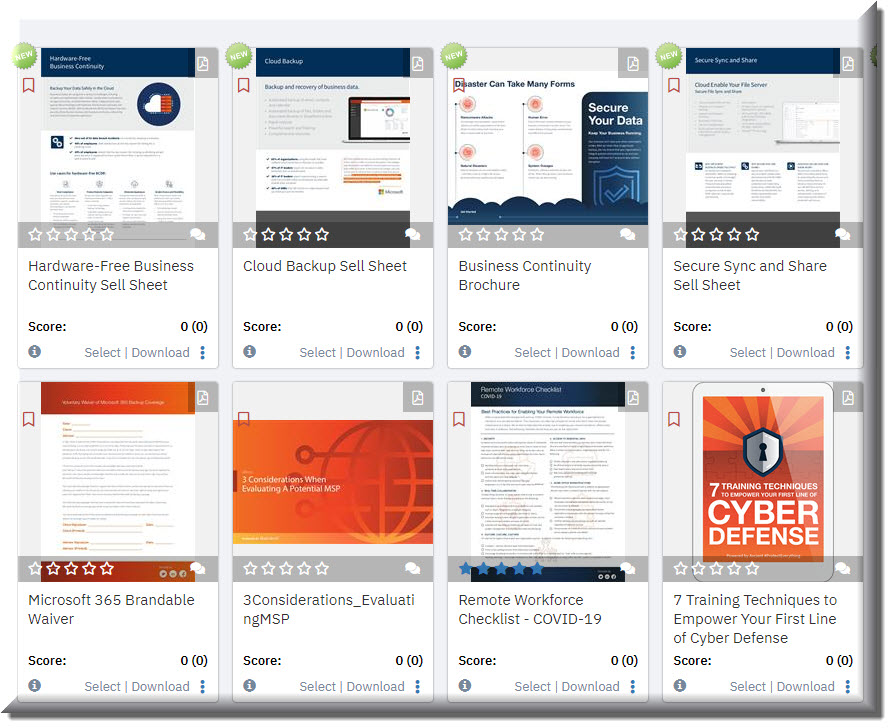
3. Available assets will appear on your display:
Customize your assets
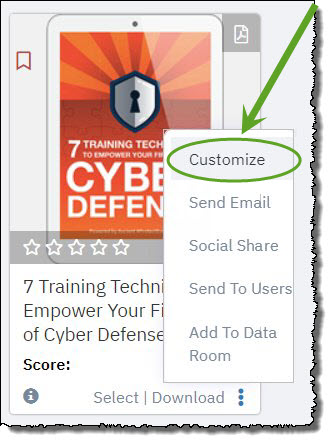
1. Locate the asset you wish to use.
2. Click the three dots on the bottom right-hand corner of the desired asset to select it.
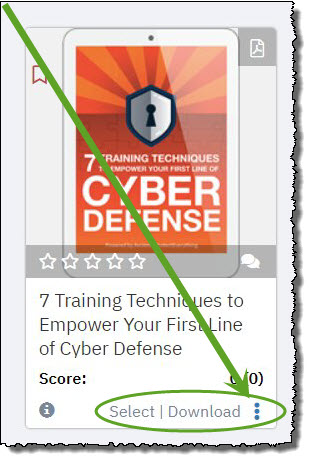
3. A menu of actions will appear.
Click Customize.
4. The Customize Print Media screen will appear.
a. The INFO screen is where you can rename this asset and add a description, if you like.
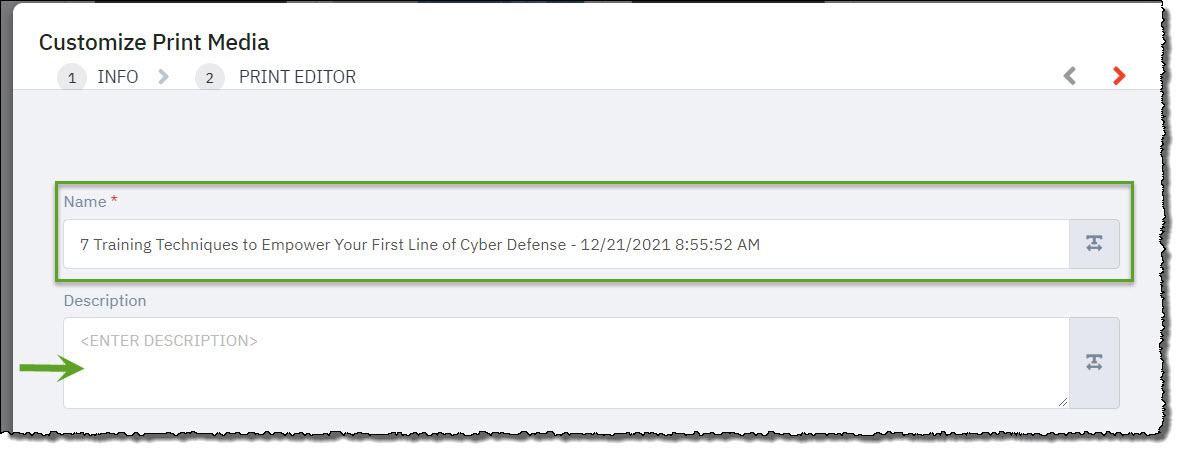
b. Make any desired changes to the asset name and description.
c. Then click the arrow > to continue to the PRINT EDITOR screen, where you can make edits to your asset.
Edit your assets
On the PRINT EDITOR screen, your logo should automatically appear on the asset.
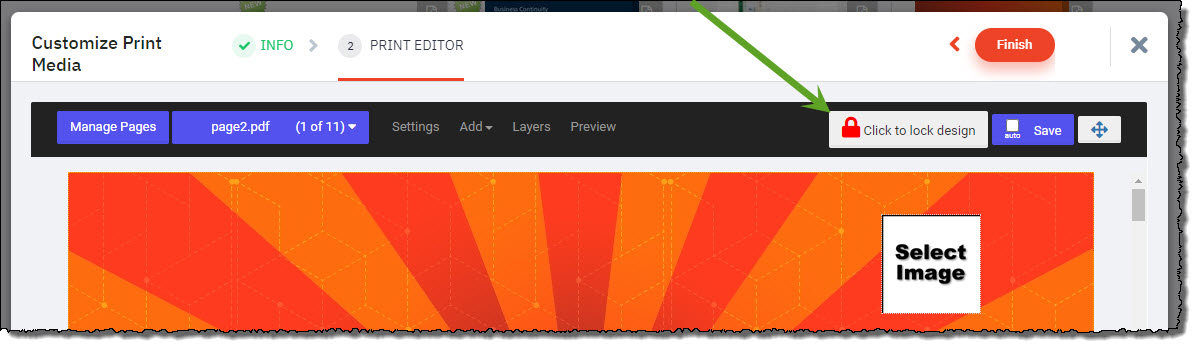
To edit, click the button labeled Click to unlock design
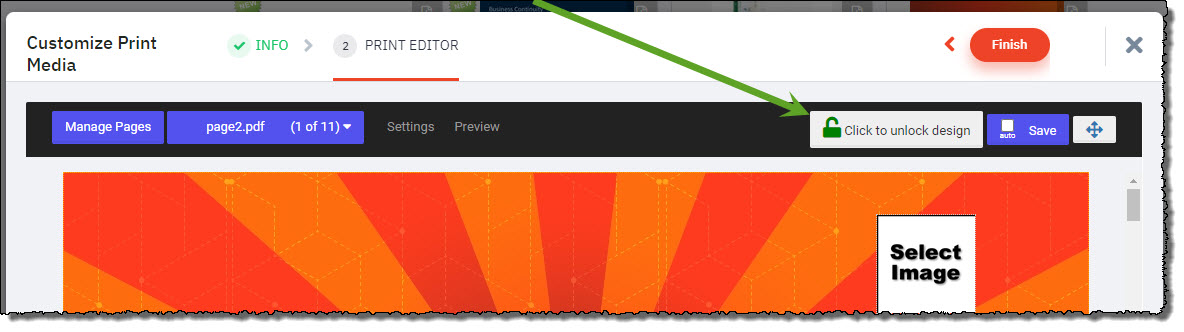
You can edit the size of your logo.
You can also replace your existing logo with the alternative light or dark version you loaded previously:
- Click Add
- Click Image
![]()
Once you have selected Image, you can choose Pick from Gallery and upload a new image
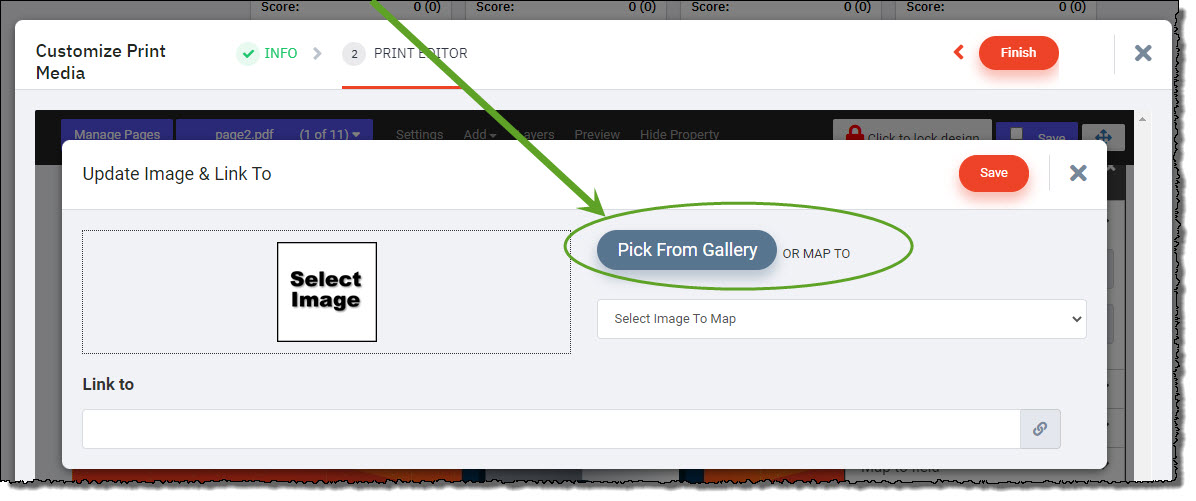
Alternatively, you can choose a different version you have already uploaded to your profile.
When you have completed your edits, save the changes by clicking the button labeled Click to lock design and then click Finish.
Edit your contact information
1. To edit your contact information and signature, double click the text box that includes your company information. You can edit the text size, font, color, and other information you would like to include
2. Click Accept after you have completed your editing.
3. Once you are done editing the print document, click on the button labeled Click to lock design.
4. Click Save
5. Click Finish to complete this editing session.
Send an email using this asset
After you click the Finish button at the end of your editing session, a preview window will display several choices.
If you click Send...
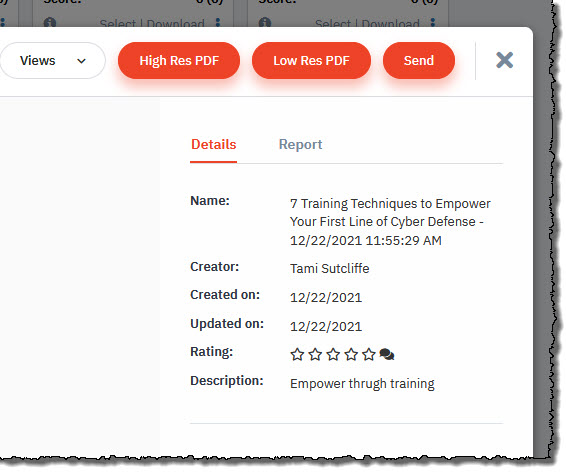
...a window with the configuration choices for this email will open.

1. To schedule this email: Choose when you wish this email to be sent by using the dropdown menu by the blue Schedule button. This will let you (a) customize a specific send date and time or (b) send immediately.
2. To add contacts: Click the empty To: field and type in the desired email address.
3. To choose pre-existing contacts: To determine which of your pre-populated contacts will receive this email, click the magnifying glass at the far right of the To: field. This will allow you to select any pre-uploaded contacts or lists. Select the desired contacts and click Select.
4. To add a subject: Type in the desired email subject on the the subject line
When all the desired fields are completed, click Send.
More about using the Axcient Marketing Portal (AMP)
SUPPORT | 720-204-4500 | 800-352-0248
- Contact Axcient Support at https://partner.axcient.com/login or call 800-352-0248
- Free certification courses are available in the Axcient x360Portal under Training
- Subscribe to the Axcient Status page for a list of status updates and scheduled maintenance
999