
Overview of bare metal restore (BMR) for Linux-protected systems (Appliance only)
In addition to basic file and folder recovery, x360Recover now supports bare metal restore (BMR) for recovering a complete image of a protected Linux system. (Appliance only)
Note: As of Q2 2023, x360Recover BMR for Linux-protected systems supports only the appliance (iSCSI) recovery mode.
Support for other bare metal restore options (such as for Direct-to-Cloud with local cache) will be implemented in later releases.
Recommendations and supported configurations
Remove partitions
IMPORTANT PREREQUISITE: Before beginning a bare metal restore, we recommend that you first inspect the destination disk and remove any existing partitions. This will ensure that you have a successful recovery.
STEP 1. After booting the x360Recover BMR ISO, run GParted from the desktop.
STEP 2. Select each disk you intend to overwrite with the recovery from the top right dropdown menu.
NOTE: You must remove any locked partitions (such as LVM groups or swap partitions) because the system will block these locked partitions from being overwritten:
- To delete locked LVM partitions, first select the partition and click Partition -> Deactivate
- To delete locked swap partitions, first select the partition and click Partition -> SwapOff
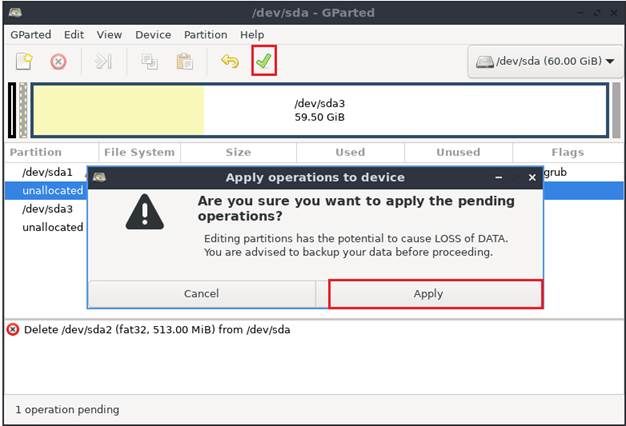
STEP 3. To remove the chosen partitions, select each partition, one at a time, and click the red-circle-x icon on the toolbar.
Then, after all desired partitions are removed, click the green check icon to save these changes.
STEP 4. Once the selected destination disk(s) have been cleared, open the Recovery Wizard, and proceed with the bare metal restore operation
DeleteLegacy BIOS or EFI
Your original protected system is configured to boot using either (a) legacy BIOS mode or (b) modern EFI mode.
Typically, you maintain the original boot mode when recovering your Linux system via bare metal restore.
When booting the x360Recover bare metal restore ISO, make sure the physical or virtual system is configured to boot in the correct mode, either legacy BIOS or modern EFI mode.
Note: To change boot mode, please see Change the BIOS Boot Mode from legacy to EFI under the Advanced Topics section below.
DeleteDisks: basic or LVM
IMPORTANT PREREQUISITE: Before beginning a bare metal restore, we recommend that you first inspect the destination disk and remove any existing partitions. This will ensure that you have a successful recovery. For instructions, review the BMR Guide.
When installing the Linux operating system, you have a choice during disk partitioning.
- Most distributions default to Basic Disk mode, using classic primary and/or extended partition types.
- Most distributions also allow the selection of modern LVM (Logical Volume Manager) disk mode, offering more complex disk partitioning options. LVM options include multiple partitions, spanned partitions, mirrored partitions, and software RAID partitions. Whole-disk encryption requires LVM disks, for example.
Supported configurations:
- Basic Disk mode configurations
- Simple, single-disk LVM mode configurations, with or without encryption
Other configurations (such as ZFS boot disks) are not supported for backup or recovery.
Notes on LVM disks:
- LVM disks will be converted to basic disks during the recovery process.
- LVM volume information is not reconstructed. Instead, the disk volumes are constructed as basic disks and partitions.
- Whole disk encryption of LVM disks will be removed during recovery.
- After recovery of LVM disks with encryption enabled, several boot messages will be present, displaying attempts to find and mount the LVM volume groups and crypto disks. These messages will time out after a few attempts (because the volume groups and encrypted disk volumes are no longer present after recovery) and boot will continue. These message may be ignored.
Where to download the BMR tools
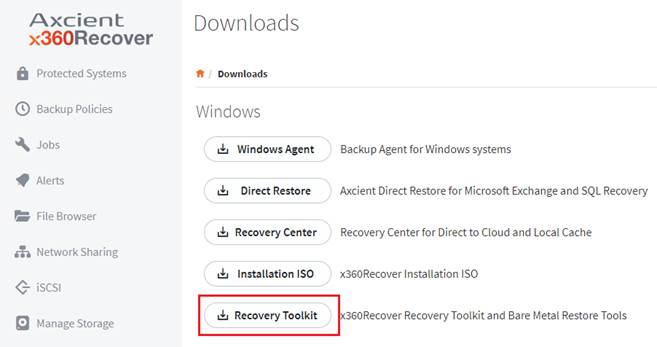
You can download the x360Recover bare metal restore ISO image:
- from the Axcient Downloads page or
- from the Downloads menu on any appliance:
If you need help creating a bootable USB drive from this ISO image, please review
Create a Bootable USB Flash Drive
How to perform a bare metal restore for Linux-protected systems (appliance only)
Performing the basic bare metal restore on system data for Linux is similar to performing BMR for Windows:
1. Boot from the bare metal restore ISO
2. Run the bare metal restore wizard
3. Perform recovery from the appliance
IMPORTANT PREREQUISITE: Before beginning a bare metal restore, we recommend that you first inspect the destination disk and remove any existing partitions. This will ensure that you have a successful recovery. For instructions, review the BMR Guide.
|
For detail descriptions on performing the initial data BMR:
|
How to perform boot repair (if needed)
Occasionally, you'll find that the recovered system is directly bootable after completing the bare metal restore process.
But, more often, you'll need to perform some simple boot fixes to create a bootable system.
Click the down arrow for tips on some simple boot fixes:
Tips for boot repairs
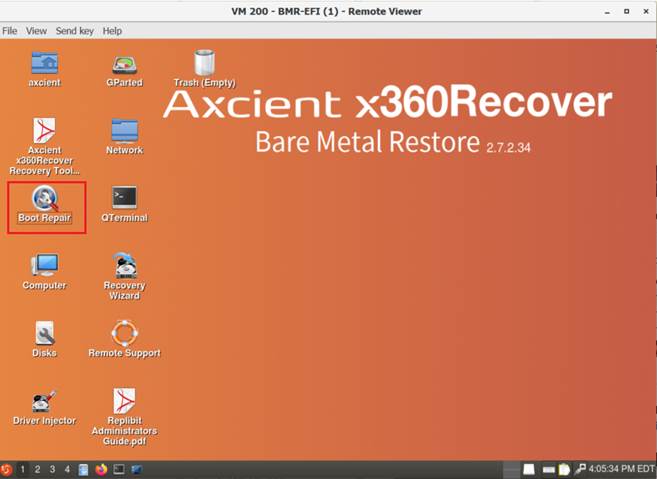
Once the bare metal restore wizard is finished, click Finish and close the wizard.
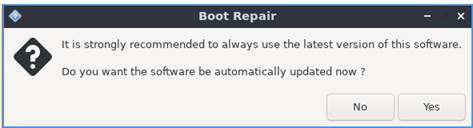
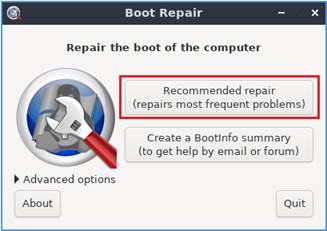
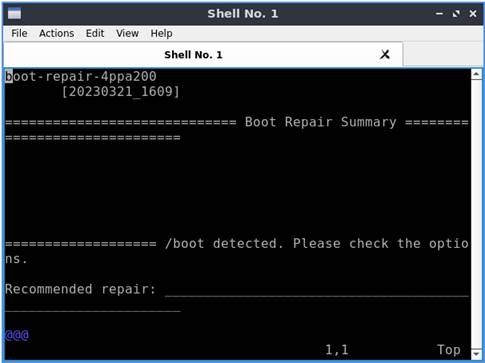
Next, launch the Boot Repair wizard from the desktop icon:
- When prompted to update the software, click No.
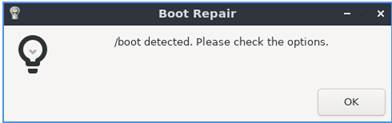
If /boot detected message appears, click OK to continue.
2. Select the Recommended Repair option to continue.
Several progress messages will appear during the operation.
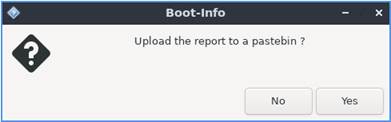
3. When prompted to Upload the report to a pastebin?, click No.
4. Click OK to close the completion message.
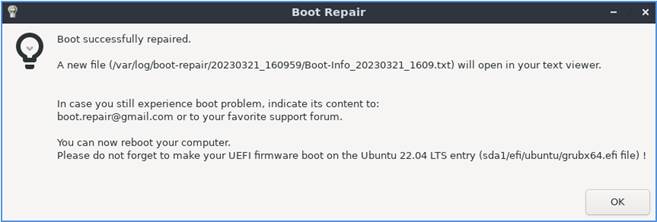
5. A shell window opens with the log file containing the repair operations that were performed. Close this window once you are done examining the results.
6. Reboot the protected system to verify the system is fully recovered.
7. Click the menu button in the bottom left corner of the screen.
8. Navigate to Leave and click Reboot.
9. Click Yes when prompted if you really want to restart.
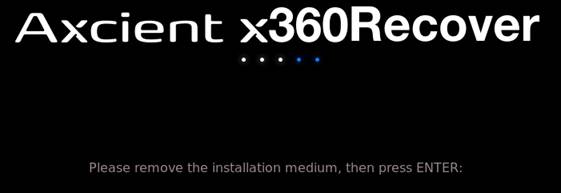
10. When prompted, remove your USB media from the system and press Enter to continue.
Advanced topics
The following sections contain information to help you respond to some known issues, as well as to answer some frequently asked questions you may encounter.
If you need additional technical help, please submit a Support ticket and we will be happy to help you resolve any further issues or questions.
Known issue: Ubuntu legacy BIOS mode with LVM Volumes
There is a minor bug in the recovery process which affects Ubuntu Linux systems running in legacy BIOS mode with LVM partitions (with or without encryption).
This bug requires a manual “work around” procedure.
When recovering an Ubuntu Linux system that (a) uses legacy BIOS and (b) has LVM disk partitioning, please perform the following steps to complete the BareMetal Recovery process:
STEP 1. Start the Recovery wizard as usual and select Appliance mode
STEP 2. Log into the appliance
STEP 3. Select the protected system and recovery point
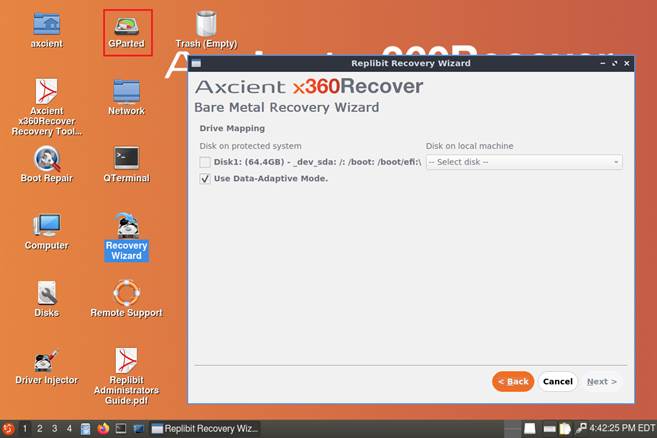
STEP 4. IMPORTANT: When you get to the Drive Mapping page, STOP.
Do not close the recovery wizard yet, and do not proceed past the Drive Mapping page.
Instead, move the window to the side if necessary to expose the icons on the desktop and proceed with the following steps:
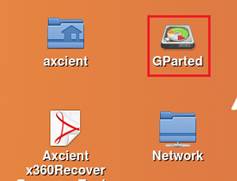
STEP 4.1. You will be using GParted to copy disk volumes. To do this, launch GParted from the desktop icon:
STEP 4.2. From the top right dropdown selector within GParted, choose the desired source disk. This is the disk you plan to use for performing the data copy.
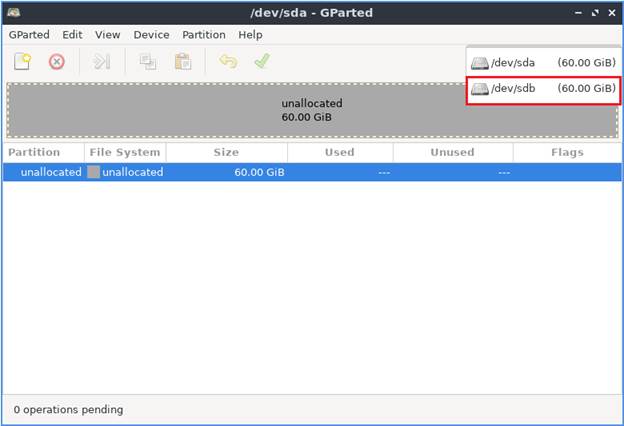
- If your Linux system has only a single disk, this desired source disk will be /dev/sdb.
- If your Linux system has multiple disks, you may need to compare disk sizes and partition content to identify the correct device.
- The recovery wizard lists the partitions on each disk in the Disk on protected system column.
- The dropdown selector lists the Local disks on the recovery environment under the disk on the local machine column.
- All of the Local disk devices are considered Target drives, not Source drives.
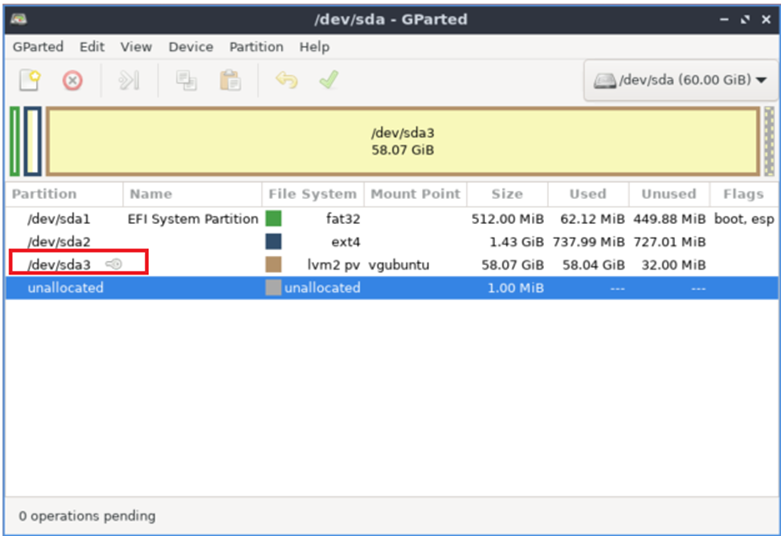
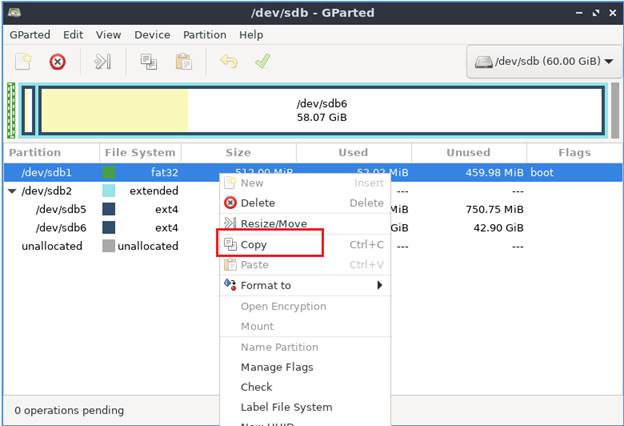
STEP 4.3. Once you have selected the desired source disk, GParted will display the partitions available on that disk:

The issue to be resolved is an inconsistency in the partition table involving the two logical partitions inside the extended partition.
After completing the Recovery Wizard data copy process, the main data partition (/dev/sdb6) is unreadable, so we will copy it manually using GParted instead.
STEP 4.4. Right-click on the first partition (/dev/sdb1 in this case) and click Copy.
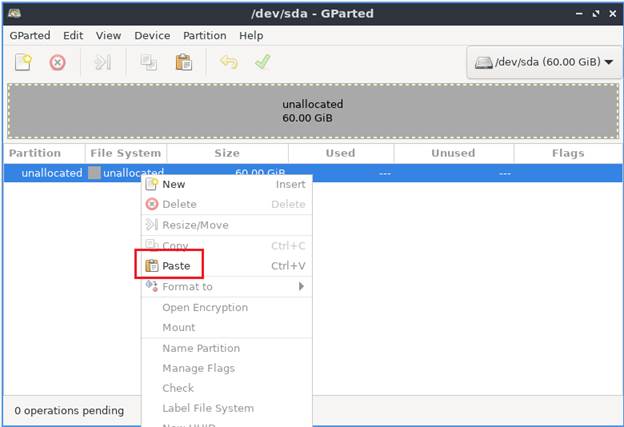
STEP 4.5. Switch back to the first disk in the system (/dev/sda)
Right-click on the Unallocated partition space and click Paste.
STEP 4.6. Accept the default size and position settings and click Paste.
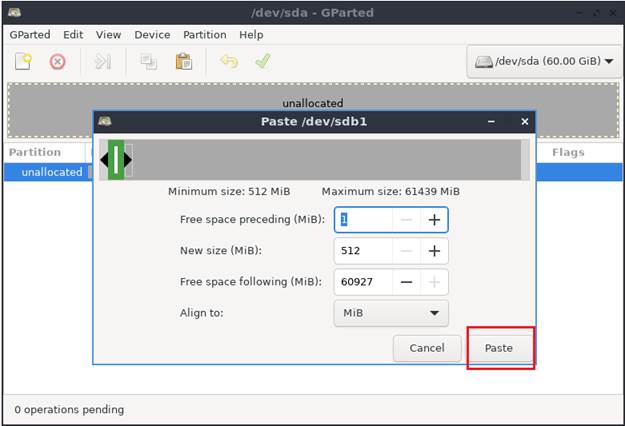
If any more primary partitions exist on the disk before the extended partition, switch back to the source disk and repeat the copy/paste steps above for each such partition.
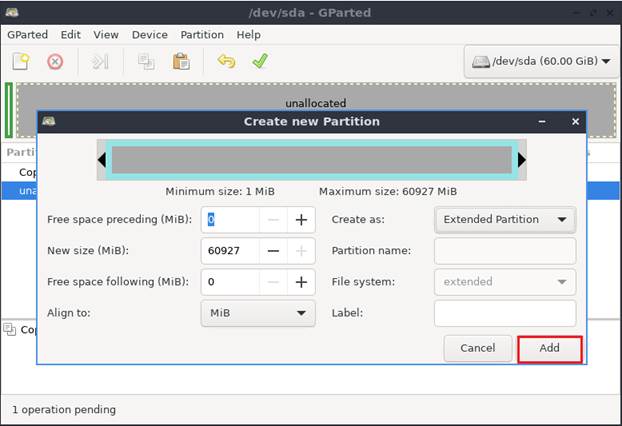
STEP 4.7. Next, you will manually create the extended partition.
Right click the unallocated partition on the target disk and click New.
STEP 4.8. Change the Create-As value to Extended Partition
Accept the default size and position values.
Click Add to continue.
STEP 4.9. Next, swap between the source and target disks, repeating the copy/paste operations above for each logical partition inside of the extended partition.
In the example above, you would copy and paste /dev/sda5 and /dev/sda6 to the target disk, then accept the default values for size and position for each partition and click Paste.
STEP 4.10. After all partitions have been selected to be copied, click the green check button to begin the copy process:
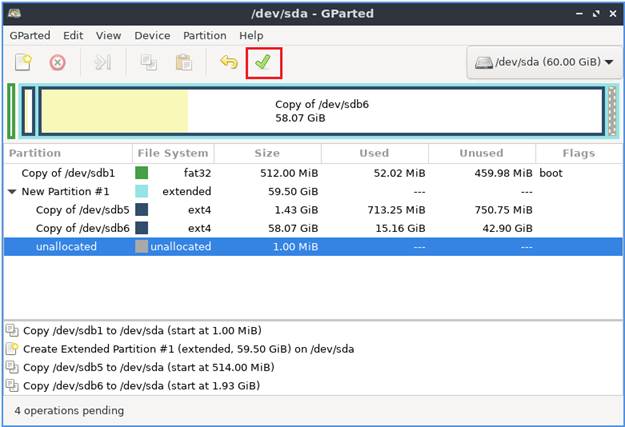
STEP 4.11. Click Apply when prompted to overwrite the disk.
Progress will be displayed as each partition is copied.
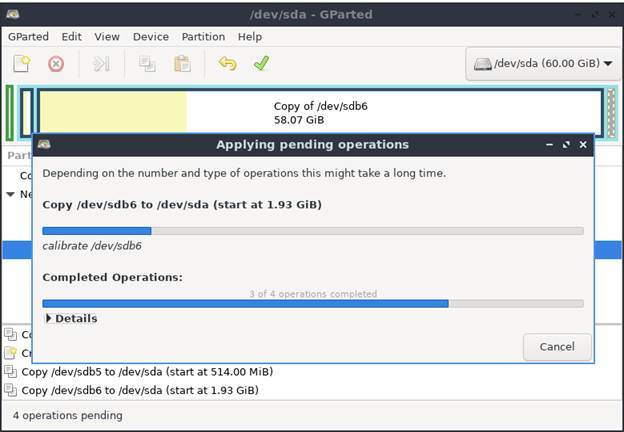
STEP 5. Once the copy process is complete, expand the Details pane and verify that all operations have completed without errors, then click Close.

STEP 6.0. Close and exit GParted.
Click Cancel to close the recovery wizard and release the mounted disks and exported recovery snapshots.
STEP 7.0. Proceed with running any needed boot repairs as described above to complete the recovery.
DeleteKnown issue: Ubuntu legacy BIOS mode with basic disks
Ubuntu creates an EFI boot partition for both legacy BIOS mode and for EFI mode during the installation process.
This ‘extra’ partition is confusing to the boot repair wizard and will prevent the boot repair operation from running successfully for this type of system.

To resolve this issue, you will delete the EFI boot partition.
STEP 1. Launch GParted from the desktop icon.
STEP 2. Right click the EFI System Partition and click Delete.
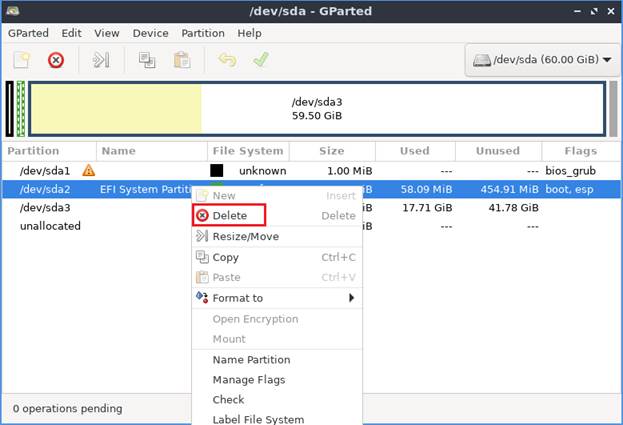
STEP 3. Click the green check button to apply changes.
Click Apply when prompted to confirm changes.
STEP 4. Once the EFI partition is removed, proceed with running the boot repair steps detailed above.
DeleteFAQs: Change the BIOS boot mode from legacy to EFI
What can you do if your original system used legacy BIOS but your new hardware now only supports EFI?
It is possible to convert an existing legacy BIOS system to EFI mode, by creating an EFI partition on the disk using GParted.
| Note: Ubuntu installations already have an existing EFI partition - even on systems configured for legacy BIOS mode. For Ubuntu, skip this step. |
STEP 1: Create EFI system partition
1.1. Boot from the bare metal restore ISO and perform the BareMetal Restore recovery as detailed above.
1.2. Once the system data has been restored, launch GParted from the desktop icon.
To create a new EFI system partition, you must make space on the disk.
To do this, you'll shrink and move an existing partition to create free space at the beginning of the disk.
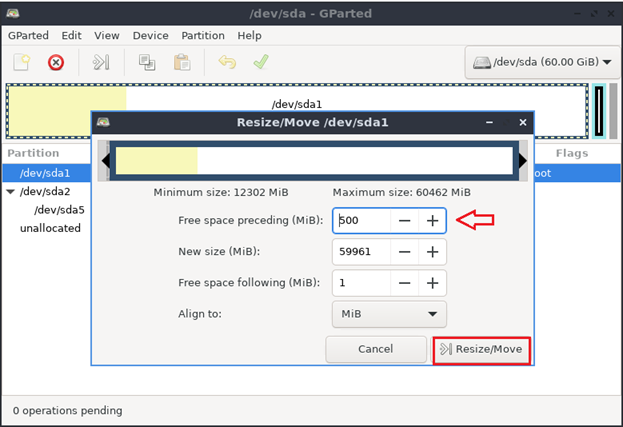
1.3. Right-click the partition to be shrunk and click Resize/Move.

1.4. Use the +/- buttons to increase the size of ‘Free space preceding’ the partition to 500MB.
1.5. Click Resize/Move to save changes.
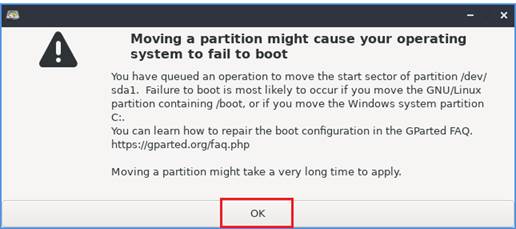
1.6. Click OK to accept the warning message.
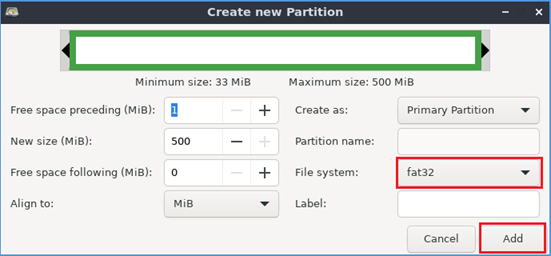
1.7. Right-click the Unallocated space at the beginning of the drive and click New.
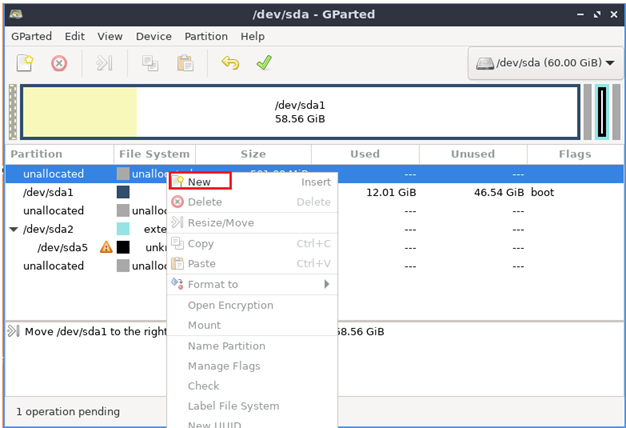
1.8. Set Filesystem to Fat32 and click Add.
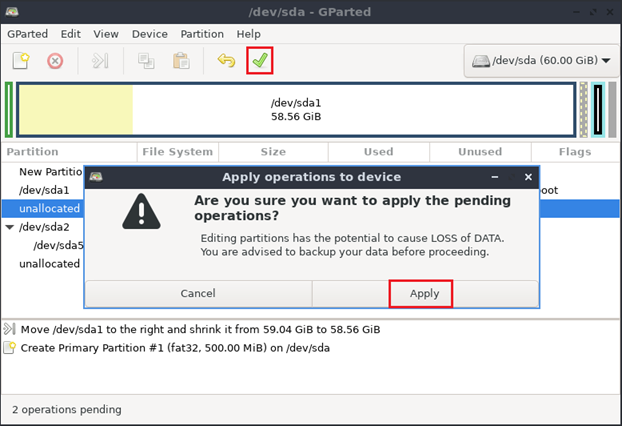
1.9. Click the green check button to apply changes.
1.10. Click Apply to confirm changes to the disk.
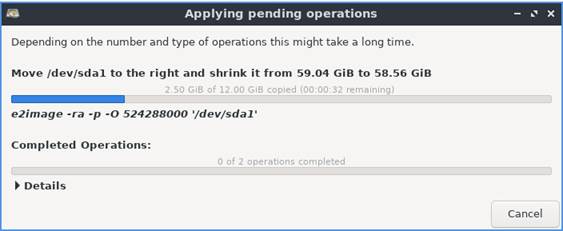
Progress will be displayed.
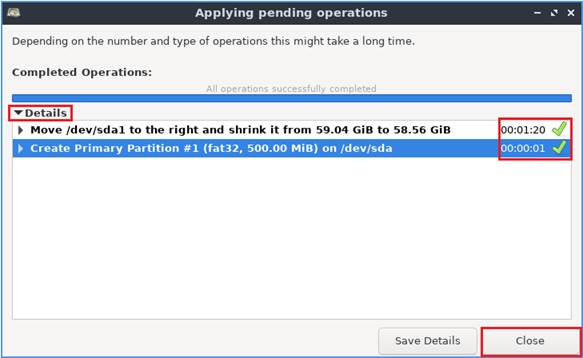
1.11. When completed, expand Details and verify that all operations have completed successfully.
1.12. Then, click Close.
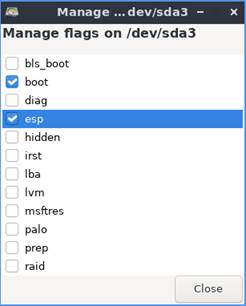
1.13. Right-click the Fat32 partition and click Manage Flags.
1.14. Select boot and esp and click Close.
1.15. Exit GParted and continue to perform the Boot Repair process as detailed below. This will complete rebuilding the boot records for EFI mode.
STEP 2: Boot Repair
2.1. Launch Boot Repair from the desktop icon and proceed through the wizard as detailed above.
Swap Grub packages
To change between legacy BIOS and EFI boot mode, (a) the BIOS mode Grub packages on the environment need to be uninstalled and (b) the EFI mode Grub packages need to be installed in its place.
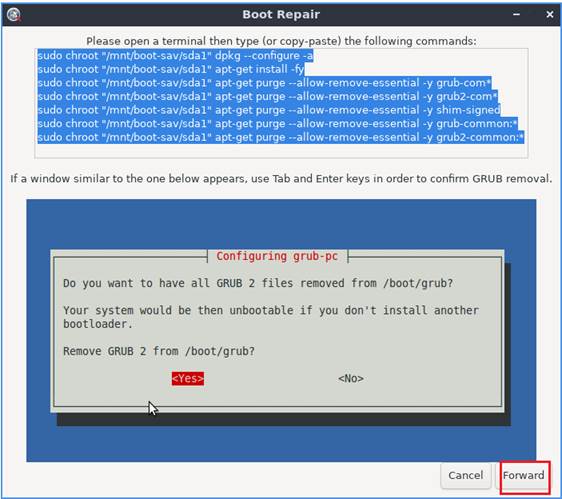
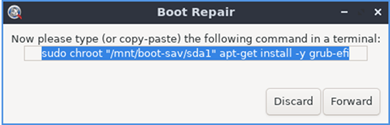
2.2. You will be prompted to copy and paste some commands into a terminal window to perform these actions manually.
When prompted, open a terminal window and copy/paste the commands to remove the existing grub packages.

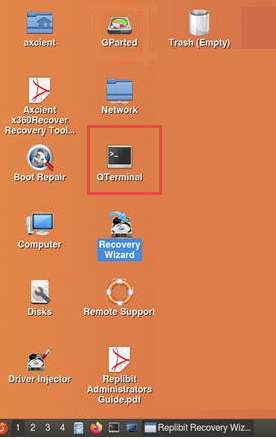
2.3. Launch QTerminal from the desktop icon.
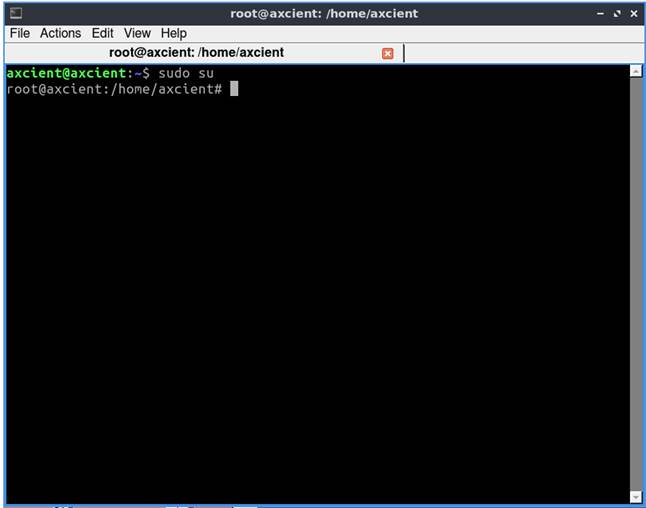
2.4. Elevate privileges to ‘root’ by running ‘sudo su’.
2.5. Right click the blue highlighted commands in the Boot Repair window and click Copy.
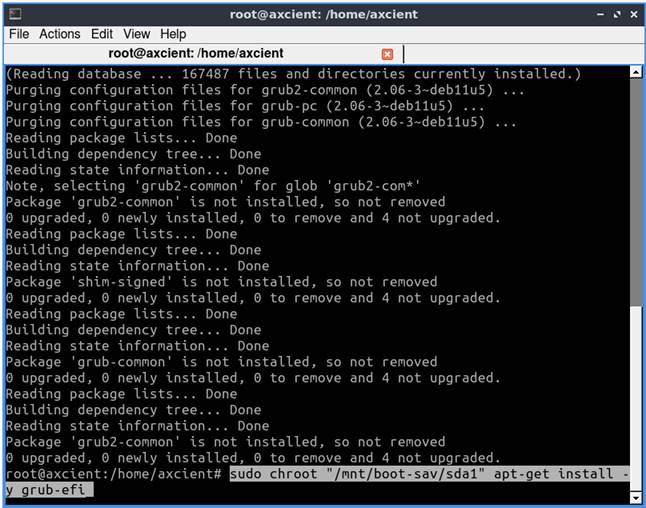
2.6. Right click in the terminal window and click Paste Clipboard.
2.7. Press Enter to execute the commands.
2.8. When prompted to paste this text, click Yes.

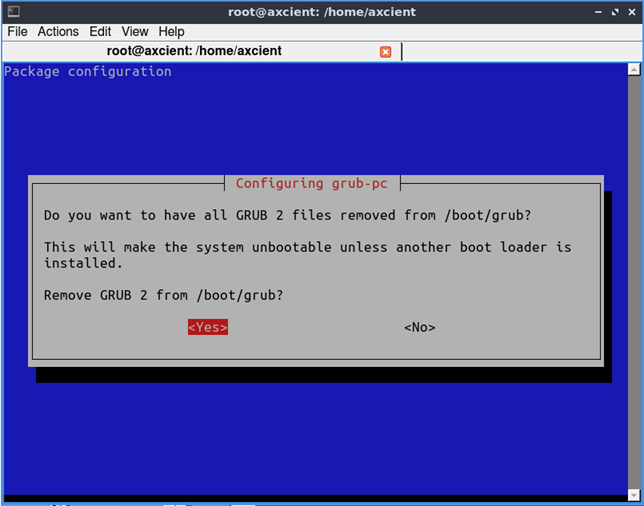
2.9. When prompted, use the arrow keys to highlight Yes and then press Enter to continue with removal of Grub files from the system.
2.10. Once the operation is complete, return to the Boot Repair window and click Forward to move to the next screen.
2.11. Drag the mouse across the command in the window to highlight it, then right click and click Copy.
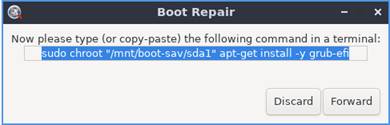
2.12. Return to the terminal window, right click and click Paste Clipboard, then press Enter to execute the commands.
2.13. Once the installation of Grub for EFI is completed, close the terminal window and return to Boot Repair.
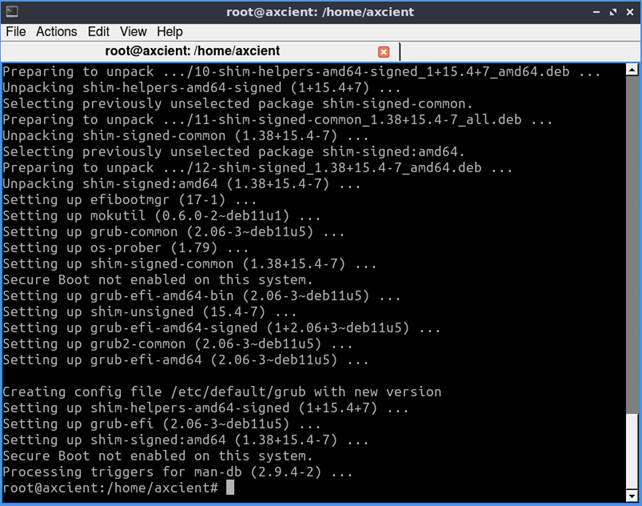
2.14. Click Forward to proceed to the next page.
Complete the rest of the Boot Repair wizard process normally.
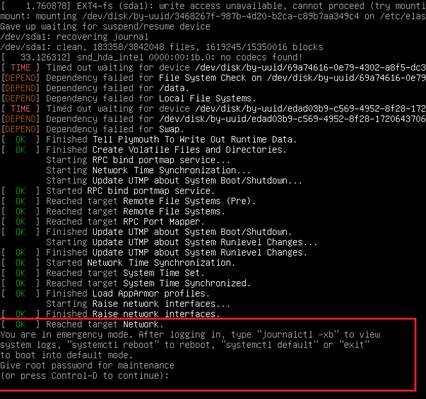
DeleteFAQ: Why is my system booting to maintenance mode?
Linux is more fragile than Windows when it comes to having multiple disks and volumes present in your image.
If your system has multiple disks and volumes that are typically mounted as part of the operating system, all of those disks and volumes must be present and mountable when booting the system.
- If all disks and volumes are not present and mountable when booting the system, Linux will halt the boot process and begin maintenance mode for troubleshooting.
To temporarily resolve this issue (and to allow booting into the operating system), remove any missing volumes from /etc/fstab
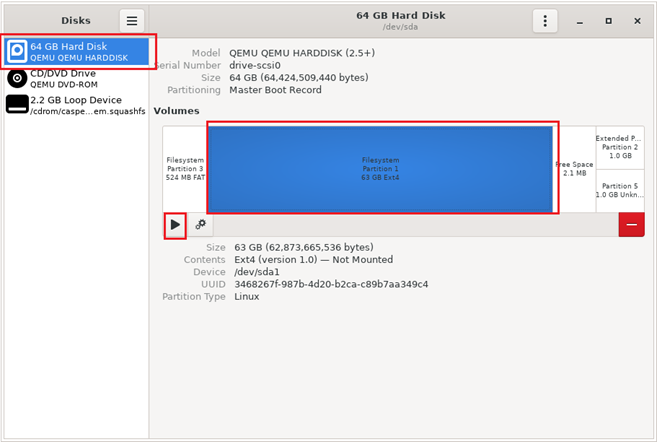
To provide a more-easily edited GUI environment, you can boot the system from the bare metal restore ISO.
- Launch disks from the desktop icon to open the DiskManager utility.
- Select the first disk in the system.
- Select the disk partition containing the Linux Operating System.
- Click the Play icon to mount the partition inside the BMR live CD environment.
The volume will be mounted at
/media/axcient/<uuid>
where <uuid> is the UUID of the volume being mounted.
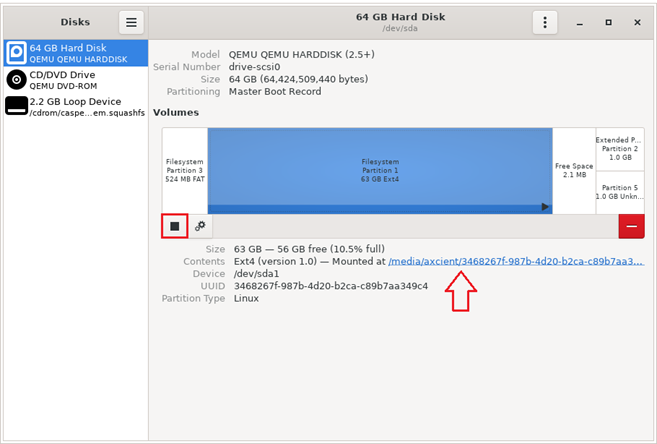
- To later dismount the volume, click the Stop button.
Editing with Nano
Nano is a user-friendly text editor in Linux.
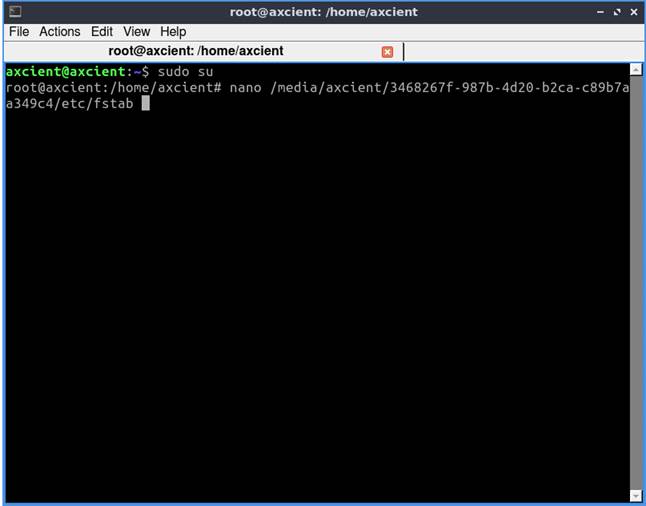
1. To edit the file with Nano, launch QTerminal from the desktop icon.
2. Elevate to root user privileges by running ‘sudo su’.

3. Edit the file by running:
nano /media/axcient/<uuid>/etc/fstab
Note: You will replace <uuid> with the actual UUID value of the volume mounted. Hint: You may use <TAB> to complete partial name matches within the shell.
4. You can comment out the mount entries for any volumes that are missing from the system by placing a ‘#’ character in front of the line.
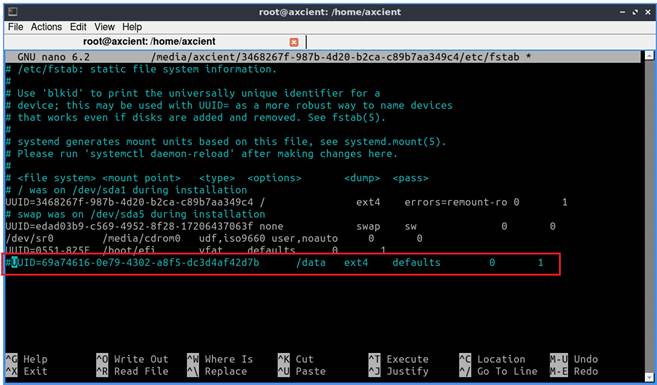
5. Press <CTRL>-o then <Enter> to save changes
6. Press <CTRL>-x to exit Nano.
7. Close the terminal window and return to Disk Manager.
8. Dismount the disk volume by pressing the Stop button.
9. Reboot the system.
10. When prompted, disconnect the Bare Metal Recovery ISO to boot into the Linux system.
Delete
SUPPORT | 720-204-4500 | 800-352-0248
- Contact Axcient Support at https://partner.axcient.com/login or call 800-352-0248
- Free certification courses are available in the Axcient x360Portal under Training
- Subscribe to the Axcient Status page for a list of status updates and scheduled maintenance
1441