
If you use an iPhone or an iPad, you can download the iOS app "Synced Tool" in the App Store. This app allows you to:
- Open and view files and folders,
- Edit files,
- Lock files and folders,
- Share files and folders,
- Manage share links,
- Upload content from your device, such as photos,
- Automatically back up your camera roll to a synced folder, called Camera Uploads,
- Rename, delete, and move items, and
- Favorite items for offline viewing.
Log in
To log into the iOS app:
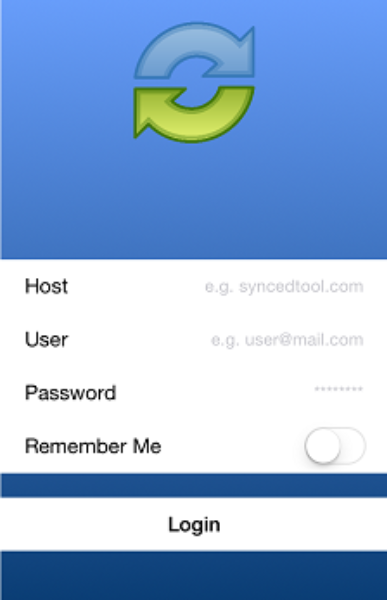
1. In your iOS device, press the app icon to launch the app. The Login screen displays, prompting you to enter your credentials, including:
- In the Host field, enter the host of the system (for example, syncedtool.com).
- In the User field, enter your username (for example, user@mail.com).
- In the Password field, enter your password.
- Press the Login button when you are finished.
If Two-Step Authentication has been enabled for your organization or for your user account, you will be prompted to enter an authentication code at the time of initial registration. Enter the authentication code and press the OK button.

If Two-Step Authentication has been enabled for your entire organization, you will also be asked to configure a passcode after the initial registration process. At subsequent sessions, you will be prompted to enter this passcode when you access your mobile app. If Two-Step Authentication has been turned on only for your user account (either by you or by your administrator) you will not be required to configure a passcode.
You will be directed to the Settings screen. Select Use Passcode.
You will be prompted to enter a Passcode.
When accessing the mobile app in the future, you will be prompted to first enter this passcode.
Navigation
When you have access to your account, you can use the app to open and view files, manage files, and upload content. For example:
- Press the Files button to view and manage your files and folders; you can rename or move an item or mark it as a favorite.
- Press the Share Links button to view a list of items shared by you.
- Press the Backups button to view a list of your backups.
- Press the Favorites button to view a list of items that you have marked as favorites.
- Press the Upload button to upload content—such as images—from your phone to the server.
- Press the Settings button to view your account information, such as the app revision, your user name, space usage, passcode lock settings, and local storage settings. You can also turn on the option to only upload content over a wifi connection.
Operations
Synced Tool for iOS provides a variety of actions a user can perform on a file or folder:
| Operation | Action |
| Open with Options | Long tap on a file. |
| Share, Favorite, Rename | Swipe to the right on a file of folder. |
| Delete | Swipe to the left on a file of folder. |
| Lock | Click Edit and select item(s). |
View and edit files
You can access and view files using the iOS app, allowing you to preview and edit content without fully downloading it to your mobile device. You can also use the Collaborative Web Editor to edit and collaborate with coauthors in real time. In this way, you can review and update content without utilizing mobile resources.
1. Press the Files button. The Files screen displays.
2. In the Files screen, find the file that you want to view.
3. Press the title of the file. The file opens, allowing you to review content without utilizing mobile resources.
4. Click the Edit button to open the file in edit mode.
The Collaborative Web Editor opens in edit mode, allowing you to edit the file and collaborate with coauthors in real time.
Lock files and folders
Optionally, you can lock a file or folder within a Team Share. To lock a file or folder:
1. Press the Files button. The Files screen displays.
2. In the Files screen, press the Edit link at the top right-hand corner of the screen.
3. Select the appropriate file or folder, and then press the Lock button at the bottom of the screen. The item is now locked, preventing other users from accessing your content.

Share files and folders
You can also share files and folders directly within your app. To share a file or folder, or to send a secure share:
1. Press the Files button. The Files screen displays.
2. In the Files screen, find the file or folder that you want to share and slide it to the right.
3. Press the Share button.
4. To send a share link, press the E-mail link option. Alternatively, to send a secure share, press the E-mail secure link option. If your administrator has configured settings to only allow secure shares, you will only have the option to send a secure link.
You will be prompted to select a recipient and compose an email message.
5. To manage share links you created, press the Share Links button.
6. Select an item in the list to view share link information and statistics. Secure share links are indicated by a lock icon.
Back up the camera roll
You can also automatically back up your mobile phone's camera roll to a synced folder using the Auto Backup feature. When this feature is turned on, your mobile app will automatically back up photos, videos, or both, to a synced folder called Camera Uploads. With this feature, you always have a backup of your mobile photos and videos.
1. Press the More button and select the Settings link.
The Settings screen displays.
2. In the Settings screen, press the Camera Upload option. The Camera Uploadmenu displays.
- Select the Enable Camera Upload option to back up photos on your device.
- Select the Upload Videos option to back up videos on your device.
- Select the Background Upload option to initiate backups without accessing the app.
NOTE: When uploading content over your mobile network, charges from your service provider may apply.
3. Back in the Settings screen, you can optionally turn on the Only Upload over wifi option to upload content only when you are connected to a wifi connection. This setting will help you avoid charges from your service provider.
Set a file or folder as a favorite for offline viewing
Finally, you can mark files and folders as a favorite so that they are downloaded to your device. Your mobile app will be aware of files that are not favorites, but only favorite files and folders will be fully downloaded. You can decide to favorite and unfavorite files and folders based on space limitations and access needs.
1. In the Files screen, slide the appropriate file or folder to the right to reveal a set of options for that file or folder.
2. Press the Favorite button (star icon) to mark the file as a favorite. If you favorite an entire folder, all if its files will become favorites as well.
3. To a view a full list of favorite files and folders, press the Favorites button.
SUPPORT | 720-204-4500 | 800-352-0248
- Contact Axcient Support at https://partner.axcient.com/login or call 800-352-0248
- Free certification courses are available in the Axcient x360Portal under Training
- Subscribe to the Axcient Status page for a list of status updates and scheduled maintenance
1038