
In addition to collaborating and sharing content with internal users, end users can also share files and folders with outside third parties. These outside users are called guests.
Guest accounts are intended for users who are not members of an organization.
These guest users have limited access to the system, allowing for the sharing of files or folders or for collaboration on specific content.
Guest accounts can:
- Access a shared file or folder through the web portal
- Manage their account information and change their password
Guest accounts cannot:
- Utilize the desktop client, WebDAV, or mobile apps
- Subscribe to Team Shares
When an end user sends a secure share to a person outside of your organization, they are automatically creating a guest account within the system, and giving that guest access to the file or folder that was shared. For more information, please reference the End User Guide.
NOTE
End users can only create guest accounts if you have enabled the Allow Users to Share Files setting, which can be found in the Policies tab. You can also manually create guest accounts using the Guests tab inside the web portal. Optionally, these guest accounts can be turned into standard user accounts, if necessary.
TIP
You can use guest accounts to replace the use of an FTP server as a file-sharing tool.
To manually create guest accounts:
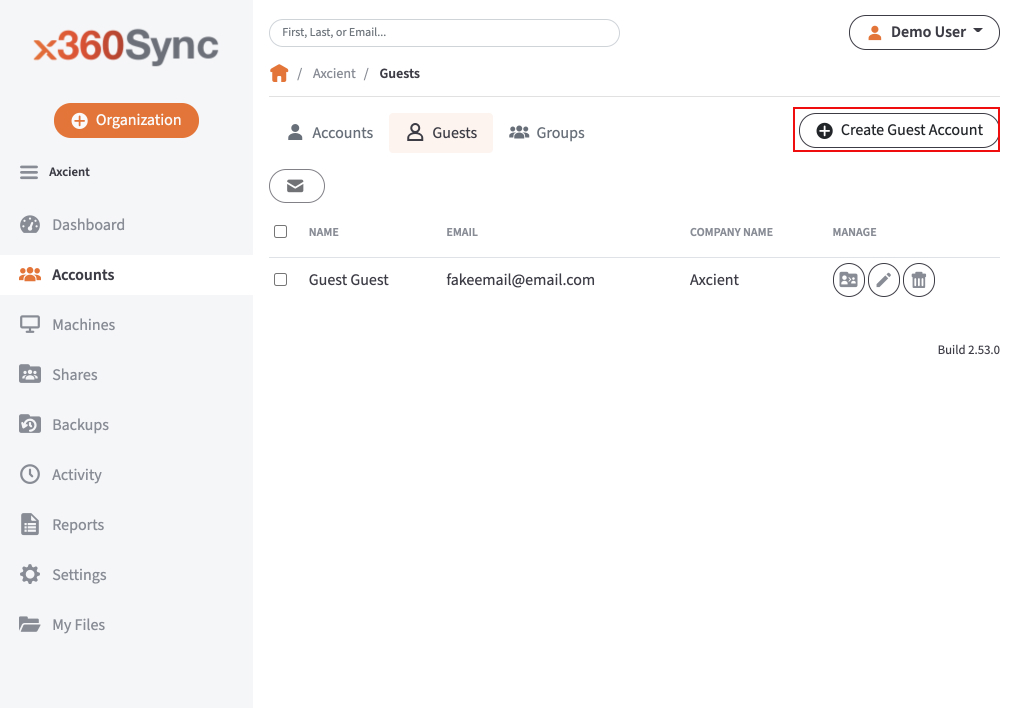
- In the Organization navigation menu, select the organization in which you want to manually create guests. The selected organization displays.
- Click the Accounts tab, and and then click the Guests button. The Guest Accounts page displays, listing all of your existing guests.
- In the Guest Accounts page, click the Create Guest Account button.
 The Guest Settings page displays.
 - In the Guest Settings page, enter information about the guest account, including:
- In the First Name field, enter the user’s first name.
- In the Last Name field, enter the guest user’s last name.
- In the Email field, enter the guest user’s email address.
- In the Password field, enter password credentials; alternatively, click the Auto-Generate checkbox to allow the system to automatically generate a password for the guest user. The user will be prompted to change an automatically generated password when he or she first logs in to the web portal.
- In the Confirm Password field, retype to confirm the password if it was manually typed into the Password field.
- Use the Password Expires field if you would like to generate a time-sensitive password for the new guest user. You can select from 6 hours, 12 hours, or 24 hours. If you do not want to generate a time-sensitive password, leave this drop-down field set to Never.
- In the Language drop-down menu, select the user’s preferred site language, which also affects numbering formats. Leave this field blank to use the default language set for the organization, which you will see displayed when you hover over the blue Question icon.
- In the Default Timezone drop-down menu, select the user's preferred timezone, which affects dates and times displayed across the system. You can also leave this field blank to use the system default, which you will see displayed when you hover over the blue Question icon.
- By default, the Send Welcome Email checkbox is selected, which will send a welcome email to the new guest, containing information about how to access the system. Uncheck this checkbox if you do not wish to send a welcome email. This option is useful when you prefer to fully control messaging at a later time. For example, you might need to complete outstanding administrative tasks prior to inviting guests, like creating Team Shares, rebranding the tool, and so forth. You can then manually send log-in information at a later date.
- Click the Save button when you are finished.

- When the new guest user is created in the system, the guest user will receive a welcome email with instructions on how to access the system.
- Optionally, to send a message to a guest user, select the checkbox next to the appropriate account, and click the Send Message button.
 An Email Guests dialog box displays, allowing you to compose an email message directly from your web browser. Optionally, click the Send reset password link checkbox to provide the selected guest account with a link to reset his or her password.
- Optionally, convert a guest account to a standard user account.
- To convert a guest account to a standard user account, click the Edit button.
 The Guest Account Settings page displays, allowing you to edit the guest account.
 - In the Guest Account Settings page, click the Convert to Standard Account button.
 You will be asked to confirm this change.
- To convert a guest account to a standard user account, click the Edit button.
- In the Guest Accounts page, you can optionally delete a guest account by clicking the Delete button.
