
You have many options for creating user accounts, including bulk-importing users through Active Directory and CSV files. In some instances, however, you might want to manually create individual user accounts.
To manually create user accounts:
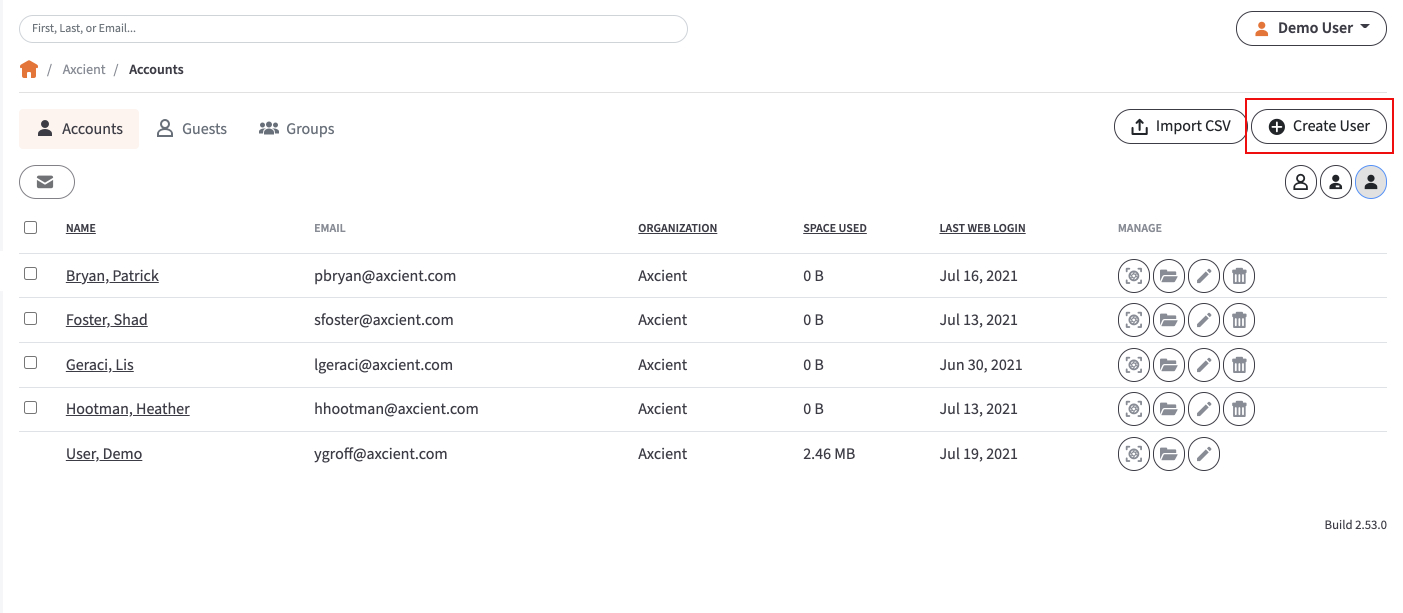
- In the Organization navigation menu, select the organization in which you want to create the new user account. The selected organization displays.
- Click the Accounts tab. The Accounts page displays.
- In the Accounts page, click the Create User button.
 The Account Settings page displays.
 - In the Account Settings page, enter account details for the new account, including:
- In the First Name field, enter the user’s first name.
- In the Last Name field, enter the user’s last name.
- In the Email field, enter the user’s email address. Each user account must have its own unique email address associated with it.
- In the Password field, enter password credentials; alternatively, click the Auto-Generate checkbox to allow the system to automatically generate a password for the user. If the password is auto-generated, the user will be prompted to change it when they first log in to the web portal.
- In the Confirm Password field, retype to confirm the password if it was manually typed into the Password field.
- Use the Password Expires field to set the validity period (since the account creation time) for a temporary password for the new user account. You can select 6 hours, 12 hours, 24 hours (default) or 48 hours. If you do not want to generate a time-sensitive password, have this drop-down field set to Never.
- In the Mobile Phone Number field, enter the mobile phone number of the user.
- In the Language drop-down menu, select the user’s preferred language, which controls the language settings displayed in the web portal and mobile apps, as well as number formatting. Leave this field blank to use the organization’s default language setting.
- In the Timezone drop-down menu, select the user’s preferred timezone, which controls the display of dates and times. Leave this field blank to use the organization’s default timezone setting.
- Click the Shared Quota checkbox if you want the user to be assigned a shared pool of space within the organization.
- In the Individual Space Quota field, enter a specific quota for the user if he or she is not part of the shared quota pool for the organization. Note that organization administrators always use shared quota; if administrator uploads files to another user's share, these files will still use shared quota and can exceed user's individual space quota.
- In the Email User When They Reach field, select a percentage checkbox to indicate if a user should be notified when approaching a certain percentage of his or her quota.
- Select the Send Welcome Email checkbox to send a welcome email to the user. Uncheck this checkbox if you would like to send the welcome email at a later date; for example, when you finish configuring the organization and setting up Team Shares.
- Select the WebDAV Access checkbox to give the user WebDAV access, which is another way for end users to view and edit files. WebDAV is useful when you do not want local copies of large files being stored on external machines. For more information, please reference the End User Guide.
- Select the Organization Admin checkbox to give the user administrative privileges. Users should only be given this level of access if they will be conducting administrative tasks within the system.
- (Private Cloud only) Select the System Admin checkbox to give the user advanced administrative privileges. Users should only be given this level of access if they will be conducting system-related tasks within the system.
- In the Add to Groups search box, type the name of the group(s) to which the user should be added, if any.
- In the Add to Team Shares search box, type the name of the Team Share(s) to which the user should be given access, if any. Alternatively, click the All button to add the user to all Team Shares, or click the None button to clear your selection.
- If you added the user to a Team Share, you can use the Team Share section of the page to define the user's permission role within the selected Team Share. By default, the Collaborator role is assigned, giving the user the ability to do anything except trim (delete revisions to files) and purge (permanently delete files and folders). Click the Collaborator button to change this setting. For more information on permission roles, please visit the How to Create a New Team Share section of this guide.

- Click the Save button when you are finished.