
Overview
There are several different approaches available for hardware migration from BRC to x360Recover.
The following document provides a step-by-step guide for migrating from Axcient BRC to x360Recover in Direct to Cloud mode, side by side with BRC, while the initial base image backup is sent to the Cloud. Local cache may be enabled optionally on each backup agent, with storage on either a locally-attached USB storage device or a shared NAS storage repository, to allow for a 'no-hardware' BDR local recovery and virtualization.
A note on software: When you are ready to migrate from BRC to x360Recover, we offer two ISOs:
Both types of ISO downloads (with EULA) are available here |
No-hardware BDR model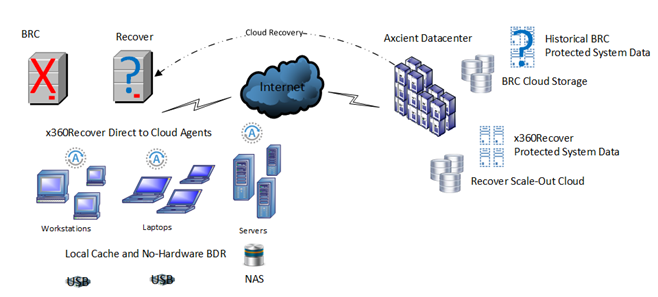
In some situations, you may elect to eliminate the on-premises hardware appliance completely and switch your client over to Direct-to-Cloud mode.
Examples of no-hardware BDR scenarios:
- The existing BRC appliance is outdated and the client doesn't want to purchase new hardware
- The client has downsized, or moved to a remote work model.
In this model, x360Recover is deployed in Direct-to-Cloud mode (side by side with BRC), while the initial base image backup is sent to the cloud.
- Local cache may be optionally enabled, on each backup agent. Storage is then performed on either a locally-attached USB storage device or a shared NAS storage repository, to allow for no-hardware BDR local recovery and virtualization.
- Once x360Recover is synced with the cloud, the BRC appliance may be retired or potentially repurposed (as a NAS local cache server, an x360Recover appliance, or a hypervisor host)
- Direct-to-Cloud protected systems may be optionally recovered from the cloud. This means they may be returned back to an appliance and converted to local appliance mode, now or anytime in the future.
- You may choose to delete the historical BRC cloud data at this point or retain it for long term historical recovery operations. Axcient will host the BRC cloud data at no additional charge for up to 1 year.
This migration model is appropriate for customers with satellite offices, remote workers, or situations where a customer does not wish to replace aging appliance hardware.
Pros and cons of this migration method
| Pros: | Cons: |
|
|
How to perform this migration
Use the following steps to migrate a BRC appliance and client over to x360Recover.
STEP 1. Download and save a Direct-to-Cloud agent install file
- Login to x360Recover (using either the Partner Portal or through Recover Manager.)
- Navigate to your vault and log in.
- Select Vaults in the left menu.
- Locate the desired vault and click Details.
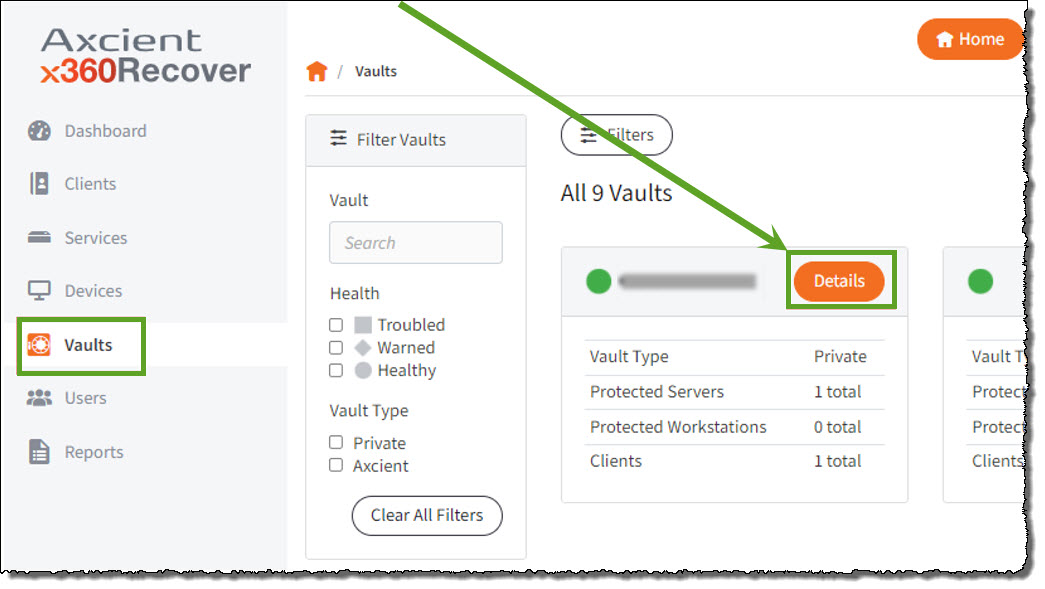
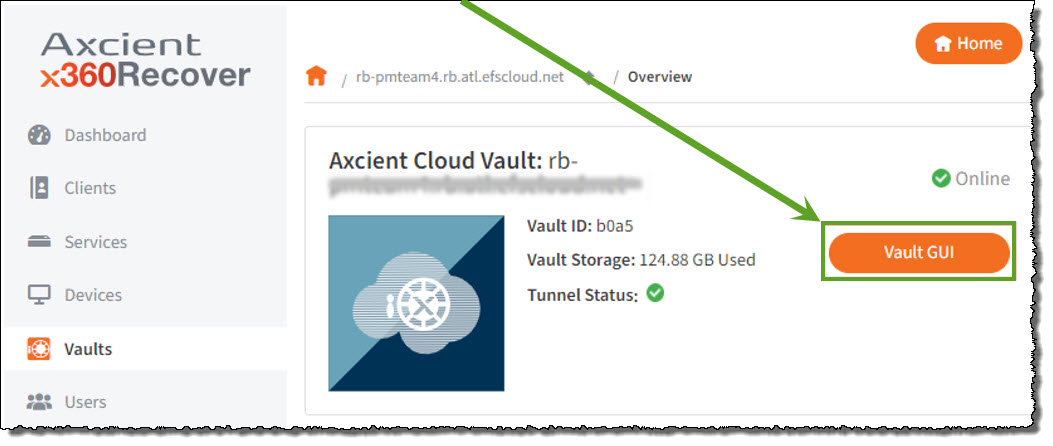
- When the Overview page for the desired vault opens, click the Vault GUI button to connect to the vault and login via SSO:
- Select Clients from the left menu.
- If you have not already created an x360Recover account for this client, click Add Client, then enter a UserName and Company name and click CreateUser.
- Locate the desired client.
- Click the Download link to retrieve the Windows agent.

- IMPORTANT: Do not rename this agent download file. This agent download is specific to this client. This specific download is identified by the special string of characters in the downloaded filename. DO NOT RENAME THE FILE.
- This installation package is valid for 14 days from the time of the original download. After 14 days, this download package will expire and you will need to download another agent installation file.
Finally, save the agent installation file to a convenient location (such as a USB thumb drive or network share.)
STEP 2. Deploy the agent(s)
After downloading the Direct-to-Cloud agent installer, proceed with installing agents onto your protected systems.
Install an x360Recover agent on each system you wish to protect. The agent must be installed on each system you wish to backup with x360Recover.
- Complete details on Direct-to-Cloud agent deployment
- How to deploy a silent Direct-to-Cloud agent using an RMM or other tool.
Configure local cache for no-hardware BDR
x360Recover Direct-to-Cloud offers accelerated local recovery from cloud backups using local cache: a repository containing encrypted block data from one or more protected systems.
Stored on a locally-attached USB device, or network share, local cache greatly accelerates the recovery of protected system data from the cloud.
With local cache configured, the x360Recover Recovery Center utility can perform accelerated local recovery of file and folder data, as well as instant virtual disk exports that may be used for virtualization.
STEP 3. Verify the agent registration and the initial backup
- Return to your vault.
- Navigate to the Protected Systems page on the left menu.
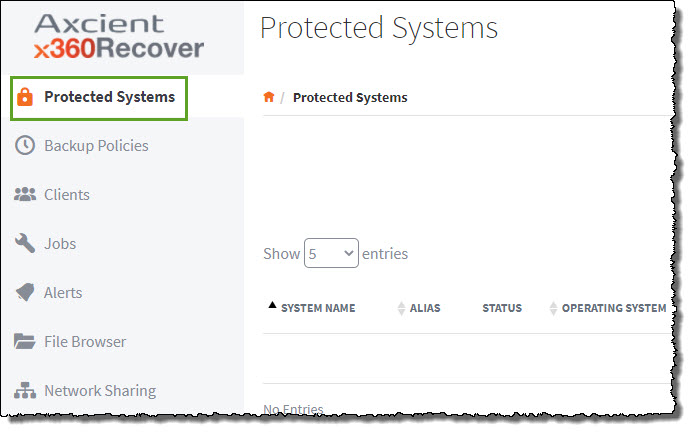
Verify that your protected systems have registered and appear in the list of systems.
- Note: Direct-to-Cloud endpoints will have a Schedule selection.
- Endpoints replicated from appliances (if any) will not have a Schedule selection.

Once an agent has been registered, it should begin performing the initial full backup, depending on your configured backup policy (schedule).
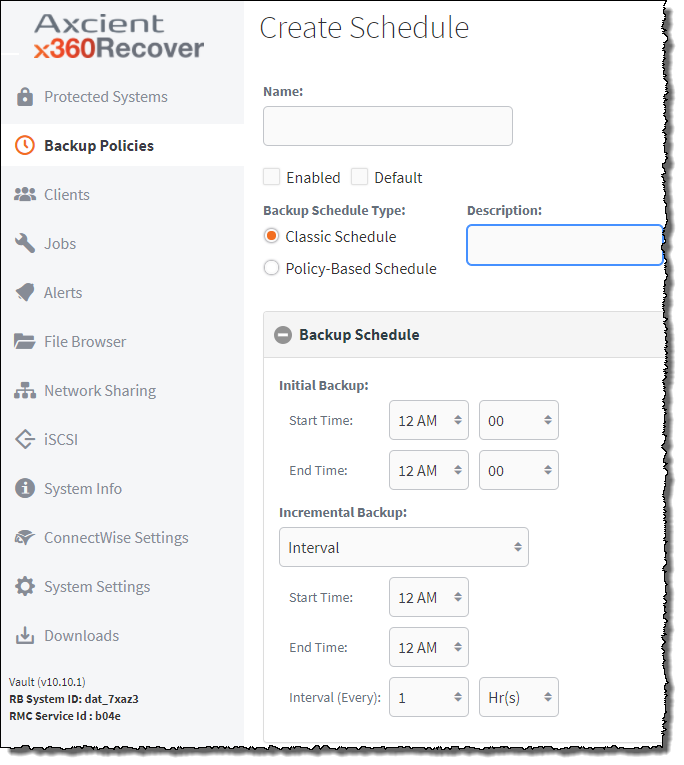
How to configure backup policies (schedules)
Backup policies (schedules) let you manage and customize backup scheduling for each of your clients. Backup policies allow you to configure agent bandwidth settings, based on each individual customer's business hours.
To set a backup policy from the vault, select Backup Policies from the left menu and then edit the default policy, adjusting backup schedules as desired.
STEP 4. Monitor the progress of the initial full backup
You can monitor the progress of the initial full backup from the Jobs page.
- Log in to the vault.
- Select Jobs from the left menu pane.
- Select Backup from the top menu.
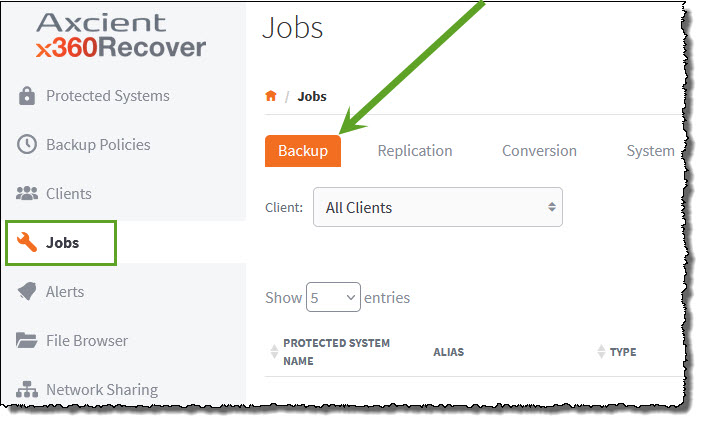
- The most recent jobs are displayed on the top of the list by default.
- Search any field by typing in the search field.
- Valid searchable job statuschoices include
- Completed
- Running
- Paused
- Missed
- Failed
- Search for multiple states by separating items with a ‘pipe’ character. For example:
- Missed | Failed
- Running | Paused
Note: Please wait for the initial full backup to complete successfully for all protected systems before continuing with the next step (BRC appliance decommissioning.)
Decommission the BRC appliance
The following steps will deprovision this BRC appliance.
STEP 1. Perform a clean shutdown of BRC services
- Disable all backup jobs scheduled for all devices.
- Verify that any running jobs have completed.
- Confirm that all off-site replication jobs have complete successfully.
- Once all job activity is complete and the appliance is in a stable state, you can shut down and power off the BRC appliance.
|
Important note: DO NOT factory reset the BRC appliance before wiping and reloading with x360Recover. Performing a factory reset of the appliance will destroy the SID for the unit and delete your cloud data. |
STEP 2. Verify cloud data
Verify the state of your protected system data in the Axcient Cloud and ensure that all data is recoverable.
- Verify that all of the cloud protected systems are parked.
(Disabling backup jobs on the appliance should park the endpoints) - Perform a file and folder recovery.
- Browse and validate that all volumes are accessible
- Perform a Virtual Office test run
- Ensure that all protected systems will boot in the cloud to test data integrity
Once you are satisfied that the cloud copy of your data is in good health, you may decommission and wipe the retired BRC appliance.
Note: Although your cloud storage will effectively be doubled (since protected system data is now held under both the BRC cloud and the x360Recover Scale-Out Cloud), we have anticipated this as part of the migration process. Axcient will maintain your historical BRC protected system data in the Axcient Cloud at no additional charge to you for up to one year.
Other considerations: Potential uses for the retired BRC appliance
- Redeploy the retired BRC appliance as a shared NAS device and use the storage for a local cache repository.
- Alternatively, redeploy the retired BRC appliance as a standby hypervisor. This could be useful when virtualizing Direct-to-Cloud systems which have been recovered using Recovery Center's virtual disk export feature.
A note on software
When you are ready to migrate from BRC to x360Recover,we offer two ISOs:
- For BRC hardware < two years old, please use the Hardware Enablement version of the ISO (v10.8.0 or newer)
- For BRC hardware > two years old, please use the standard ISO (v10.8.0 or newer)
Both types of ISO downloads (with EULA) are available here
SUPPORT | 720-204-4500 | 800-352-0248
- Contact Axcient Support at https://partner.axcient.com/login or call 800-352-0248
- Free certification courses are available in the Axcient x360Portal under Training
- Subscribe to the Axcient Status page for a list of status updates and scheduled maintenance
911