
What is a backup policy?
Traditional backup schedules forced you into an all-or-nothing time window, during which all backups would occur - whether this was convenient for your customer's business - or not.
x360Recover's backup scheduling engine is built around each customer's business hours. This gives you more flexibility to craft backup times to complement the specific seven-day business schedule of each customer.
How will you use an x360Recover backup policy?
- First, you'll create backup policies (schedules) and apply these for each customer. Backup policies should be in place before the agent performs a backup and sends that backup to the local appliance.
- Then, you'll install the x360Recover agent software on a protected system.
Backup policy types
When you create a backup policy, you define two types of backups: ·
- The initial backup (full backup) which copies all sectors of the image.
- The incremental backups (snapshots) which only copy anything that has changed, saving time and disk space.
Note: You can't schedule an incremental backup unless you have completed the initial (full) backup. Because x360Recover is chain-free, snapshots are not dependent on previous snapshots.
DeleteWhere do I find the backup policy settings?
Where do I find the backup policy settings?
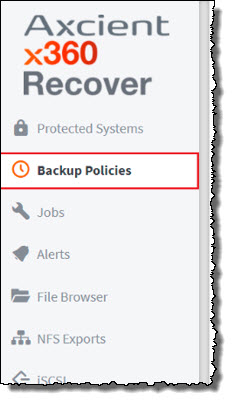
The Backup Policies tab in the left menu pane is where you set up these policies.
When creating a policy-based backup schedule, you first designate which days of the week and hours of the day are considered business hours.
Then, you define the backup parameters. For each time frame, you'll select an incremental backup frequency and decide whether full backups will run during this window.
Finally, you may optionally choose to configure agent throttling settings (such as maximum disk I/O and network bandwidth the agent will be allowed to use during each time frame.)
DeleteChecklist: Before you create a backup policy
What you'll need to know before you create a backup policy
- All backup policies are created and maintained within the vault.
- Within the vault, you'll use the Backup Policies page to create and define both (a) the initial backup policies and (b) the ongoing incremental snapshot policies.
- You can create policies and assign them to different machines according to a client's special requirements or technical limitations.
- When creating a backup policy, you first designate which days of the week and which hours of the day are considered business hours for that customer.
- Once you have specified business hours, you define the backup schedule parameters.
- Finally, you may optionally choose to configure agent throttling settings (maximum disk I/O and network bandwidth the agent will be allowed to use during each time frame.)
- You can adjust initial backup policies to run during certain hours of the day and pause at other hours of the day (to limit user impact during office hours.)
Steps to create a backup policy
How to create a policy-based schedule
1. Log in to the appliance or vault
2. Navigate to the Backup Policies page.
3. Click Add Policy to create a new backup schedule. Optionally, click Edit to edit an existing schedule.
Note: Existing classic backup schedules may be edited and converted to new, advanced policy-based schedules.
4, Enter a name for the new schedule and select Policy-Based Schedule to choose the new advanced schedule type.
5. Check the Enabled check box to enable the policy. Optionally, you may set this schedule to be the system default and enter a description for the schedule.
6. Expand the Business Hours dropdown menu and select the desired days of the week and the hours of each day. These choices are now considered the designated business hours. Note that any remaining times outside this time window will be considered non-business hours.
7. Expand the Backup Schedule dropdown menu and set the desired backup parameters for both business and non-business hour timeframes:
- The Interval parameter (frequency of incremental backups) may be set to None.
- The Allow Full Backups parameter may be enabled or disabled for either timeframe
Note: You cannot (a) set BOTH timeframes to None and/or (b) disable all full backups. This is because the incremental and full backups MUST be allowed to run sometime during the week.
DeleteAgent throttling
Specify agent throttling
Throttling allows you to control the maximum disk I/O and network bandwidth consumed by the agent during a backup within each time frame.
- To set up the agent throttling settings, expand the Throttling dropdown menu and click the Enable Agent Throttling Controls checkbox.
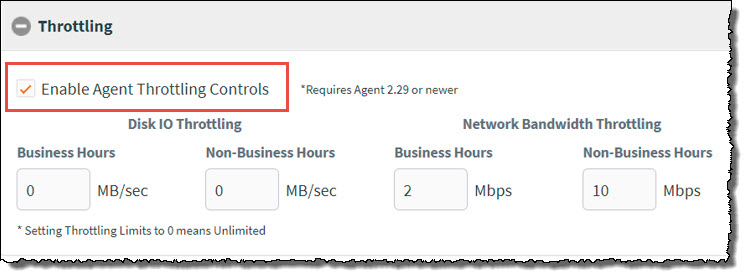
Note that the throttling control requires agent 2.29 or newer to be effective.
- Disk I/O is expressed in MB/sec (Megabytes per second). This is the maximum rate at which data will be read from each disk volume in the protected system. Note that the limit is applied to each volume separately: This is not a limit on total disk I/O overall, but each volume separately.
Setting a disk I/O limit can be useful if your protected system is a virtual machine or has otherwise slow storage drives which impact users during backup operations.
- Network bandwidth is expressed in Mb/sec (Megabits per second). This is the total maximum network transmit speed allowed to the agent when transferring data to the server. Unlike Disk I/O throttling, network bandwidth throttling is applied as an overall total, regardless of how many disk volumes are in the system.
Network bandwidth throttling is effective in reducing user impact on internet access performance due to Direct-to-Cloud (D2C) Cloud backup operations.
You can specify different limits to be applied during each timeframe, based on whether this falls within business or non-business hours.
Setting a throttling value of 0 (zero) sets the limit to unlimited.
Once all settings have been configured, click Save to complete the changes to the backup schedule.
DeleteUpdate existing schedules
Update existing schedules
Traditional Classic schedules, including manual schedules, are still supported.
|
Note: Existing classic backup schedules are not affected by the change to the new engine. It is still possible to create and manage your existing classic schedules.
|
1. Log in to the appliance or vault
- To apply a new Business Hours backup schedule to existing protected systems:
Navigate to the Protected Systems page and select the desired schedule from the Schedule column:
To create or edit a traditional Classic schedule for your protected systems, select Classic Schedule in the Edit Schedule page of the Backup Policies tab:
As an alternative to creating and applying a new schedule to each protected system, you can simply convert the currently applied classic schedule to a policy-based schedule, by editing the Backup Schedule Type.
To create a backup policy:
1. Log in to the vault web interface.
2. In the left-hand navigation menu, click the Backup Policies tab.
3. In the Schedules page, click the Add Policy button.
4. In the Create Schedule page, enter information about the new backup policy:
- In the Name field, enter a descriptive name for the backup policy. For example, you might create a backup policy titled Critical for servers requiring 15-minute incremental backups; and Non-Critical for servers that only require incremental backups every hour.
- Ensure the Enabled checkbox is selected to activate this new backup policy. If the backup policy is not enabled but later assigned to a protected system, backups for the protected system will be disabled.
- Optionally, click the Default checkbox to assign this backup policy as the default backup policy for all protected systems.
- Choose a backup schedule type: either Classic or Policy-based.
- If a description of this backup schedule type is needed, enter that information here.
- Open the Backup Schedule dropdown menu.
- In the Initial Backup section, define a Start Time and End Time for the first, full initial backup. This timeframe allows you to limit the impact of the initial backup on the user experience.
- In the Incremental Backup section, you can optionally use the drop-down menu to change the incremental backup type from Interval to Manual. The Manual setting allows you to create snapshots at specific times instead of intervals.
- If you selected Interval in the drop-down menu, define a Start Time, End Time, and Interval for all future incremental backups.
- Click the Save button when you are finished. The backup policy is now created and will be listed in the Schedules page. You can manage and edit backup policies in the Schedules page.
5. After the backup policy is created, you can assign the backup policy to a protected system.
a. In the left-hand navigation menu, click the Protected Systems tab.
b. Find the desired protected system and use the Schedule drop-down menu to select the appropriate Schedule. The schedule is now assigned to the protected system.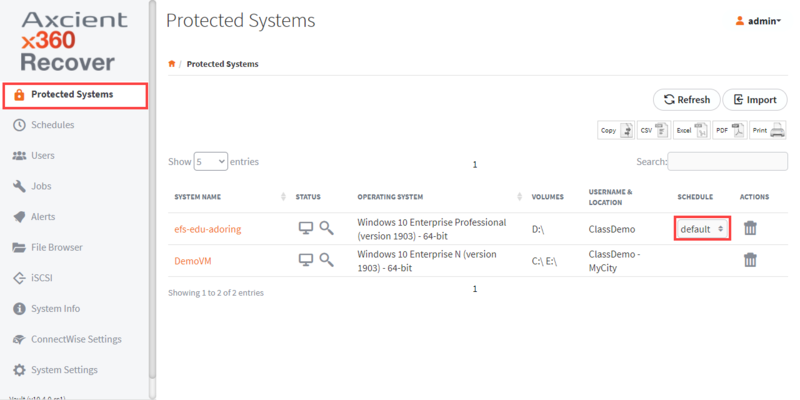
SUPPORT | 720-204-4500 | 800-352-0248
- Contact Axcient Support at https://partner.axcient.com/login or call 800-352-0248
- Free certification courses are available in the Axcient x360Portal under Training
- Subscribe to the Axcient Status page for a list of status updates and scheduled maintenance
846 | 956