
What is incremental vault recovery?
Incremental vault recovery allows you to retain the protected system cloud backup history by recovering incremental cloud data back to an appliance, in multiple passes. This can be useful in the following scenarios.
- An appliance needs to be repaired or replaced.
- When you are switching a protected system from Direct-to-Cloud mode to appliance mode.
- An appliance is down for repair and at the same time you have a protected system that needs a bare metal restore. By utilizing Virtual Office and Direct-to-Cloud you can maintain an uninterrupted set of backups during the interim. For this scenario, start a Virtual Office and convert the protected system from appliance mode to Direct-to-Cloud mode then continue with the incremental vault recovery.
A. How it works
1. Incremental vault recovery allows you to perform the recovery of a protected system snapshot from a vault, back to a BDR appliance, in multiple passes.
2. The first pass will copy the base snapshot of your choice to the BDR appliance. We advise you to select the most recent (last known) clean snapshot.
3. If you have failed over to Virtual Office, backups will continue to run and new recovery points will continue to be created on the vault during this process.
4. Once the initial recovery pass is completed, you can perform additional passes to collect newly created ‘incremental’ snapshots on the vault and copy them to the BDR appliance.
DeleteB. Incremental Vault recovery steps
1. To begin the recovery process, click Recover from the Protected Systems page of the BDR.
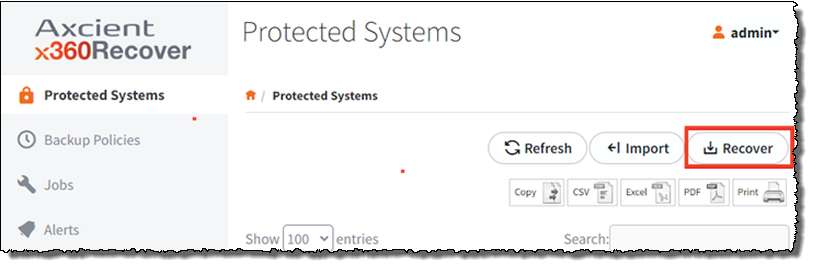
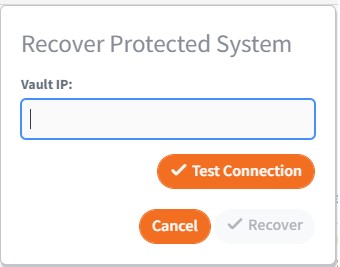
2. This will open the Recover Protected System configuration dialog.
3. Enter the FQDN of your vault and click Test Connection.
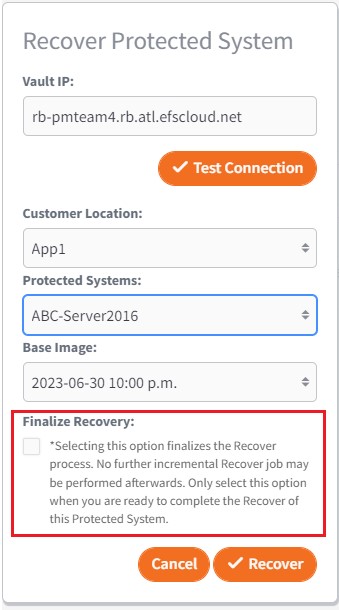
4. When the connection test is successful, select the Customer Location and Protected Systems you wish to recover.
Note: Only customer locations and protected systems that belong to the same client as THIS BDR will be visible.
5. Select the desired snapshot to recover from the cloud vault. This should be the most recent and last known clean backup.
IMPORTANT: It is imperative that you read and understand the following three (3) points before moving forward.
- Do NOT check the Finalize Recovery box if you want incremental backups, from the protected system running in Virtual Office, to continue to the cloud vault during the recovery of the base snapshot to the BDR. Once the base snapshot has completed the recovery, you can run additional recovery passes and bring the base snapshot to the current state of the protected system.
- If you select the Finalize Recovery box at this time, this will be the one and only recovery pass. Further backups will be blocked, and additional recovery passes will not be possible afterwards.
- Should you decide at this time that no other backups are wanted and only one snapshot will be recovered, you can check the box and only run this one recovery pass. Choosing The Finalize Recovery box and clicking the Recover Button to begin the Final Recovery Pass ends the ‘incremental’ recovery process and will block further Direct-to-Cloud backups. For this choice skip down to Section C below. Otherwise continue to step 6.
6. Click the Recover button to begin the first pass.
IMPORTANT NOTE: Only one protected system at a time can be recovered during the process.
You cannot start a second recovery for any other protected system.
7. You may monitor progress on the Jobs -> System page for details:
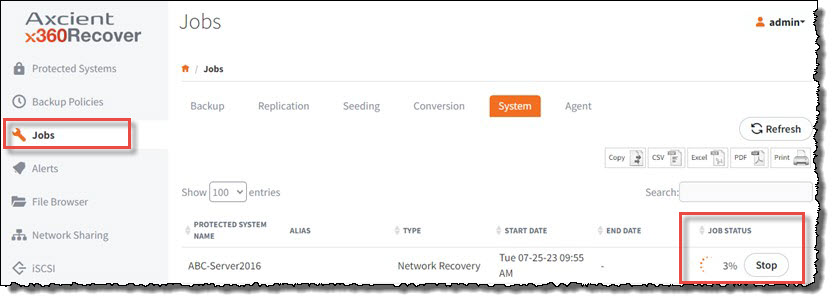
8. Once the initial recover pass is completed, the protected system will be listed on the Protected Systems page.
Note: Icons in the STATUS column will indicate that backups are currently disabled on the BDR, and an incremental recovery process is in progress. Backups from Virtual Office to the vault will continue.

9. To perform additional incremental recovery passes for this protected system, navigate to the Protected Systems page and click on the system name.
This will open the Protected System Details page.
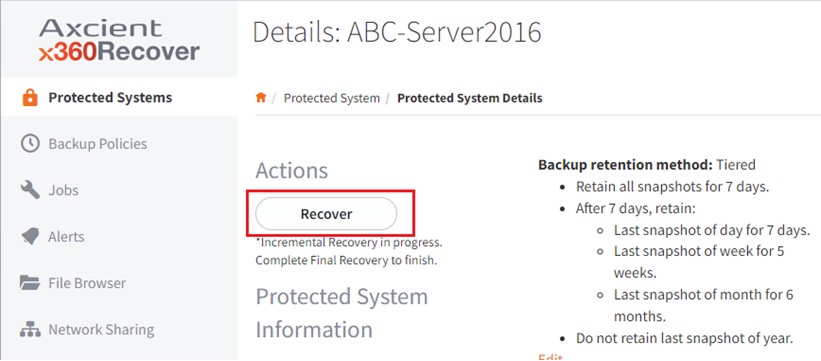
Now, click Recover.
Note that Recover is the only option available under the Actions section until the final recover pass is completed.
10. As shown below, all snapshot actions are also grayed out and unavailable until the final recover pass is completed:
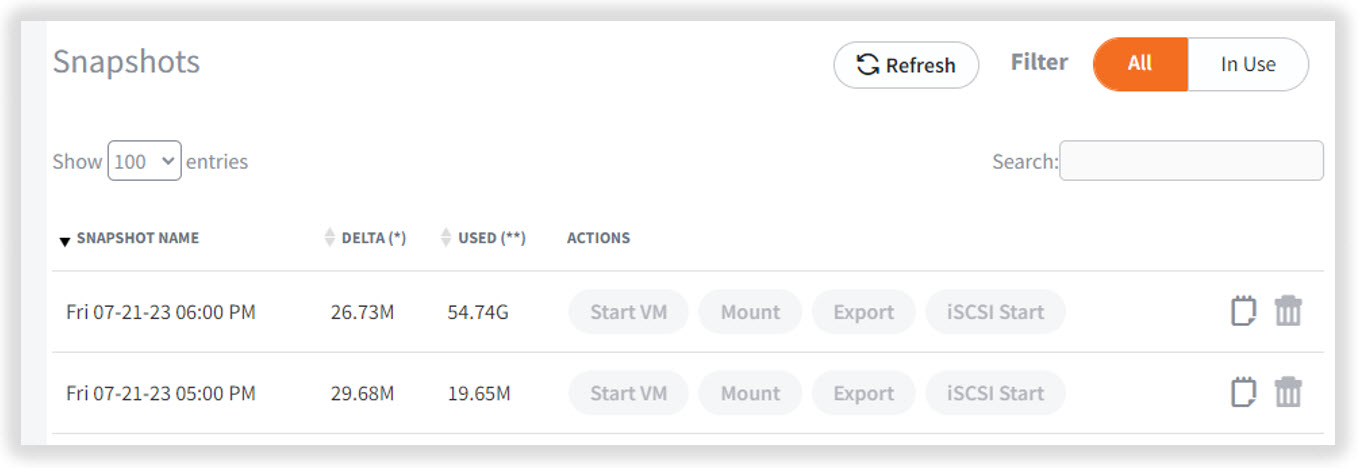
- While you are continuing incremental recovery actions, the customer location and protected system selections are locked.
11. Continue with Incremental passes until you are ready to perform the ‘Finalize Recovery’ pass.
 C. Perform the Finalize Recovery pass
1. When you are ready to perform the Finalize Recovery pass:
a. Go to the cloud vault GUI >Jobs and make sure that there are no backup jobs running for the protected system.
b. Ensure that the protected system in Virtual Office is not in production use.
- Make sure that the client knows that you are ready for the final pass, and they will no longer have RDP access to the protected system.
- Edit the Virtual Office VM settings and remove the client’s RDP access. This will ensure that the client does not make any further changes to the protected system.
c. In the vault Protected System Details page, in the upper left under Actions, click the Schedule Now button. This will run a final backup. Once the backup is complete, use that last snapshot for the Finalize Recovery pass.
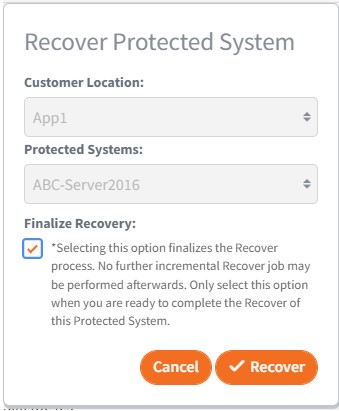
2. Return to the BDR and click the Recover button in the Protected System Details page.
Next, check the box for Finalize Recovery (to perform the final pass) then click Recover.
3. Once the Finalized Recovery pass has completed, all actions become available for the protected system on the BDR:
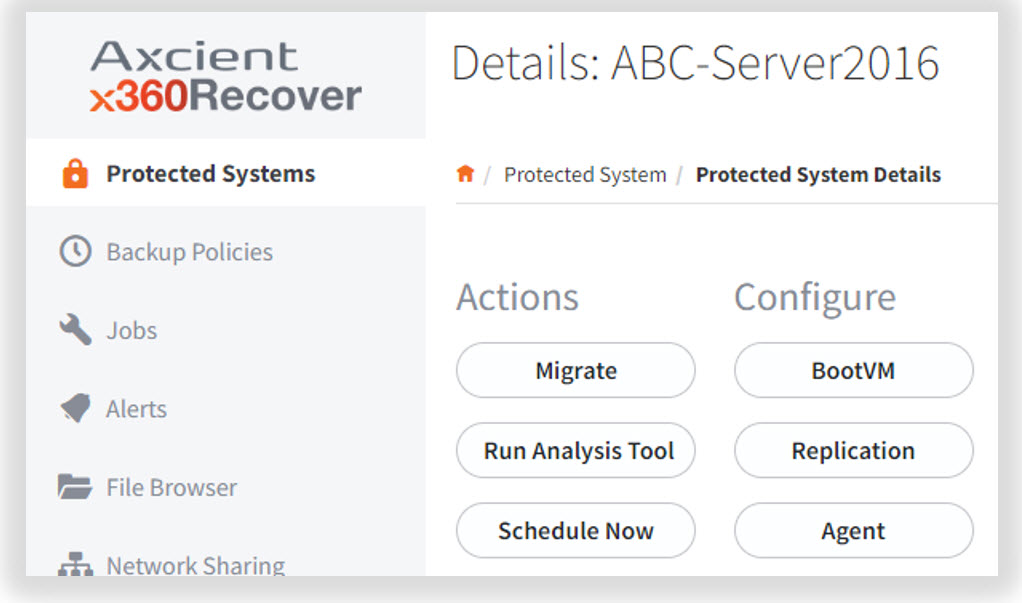
4. Enable replication to the vault by clicking Replication and configuring the desired settings:
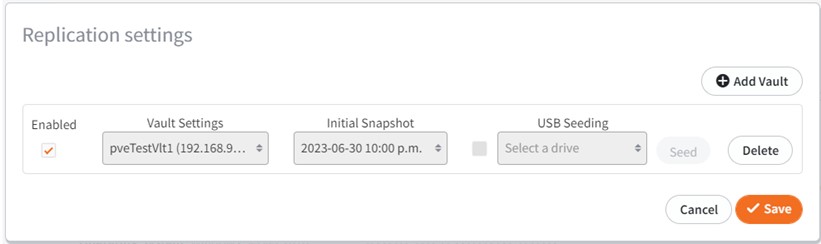
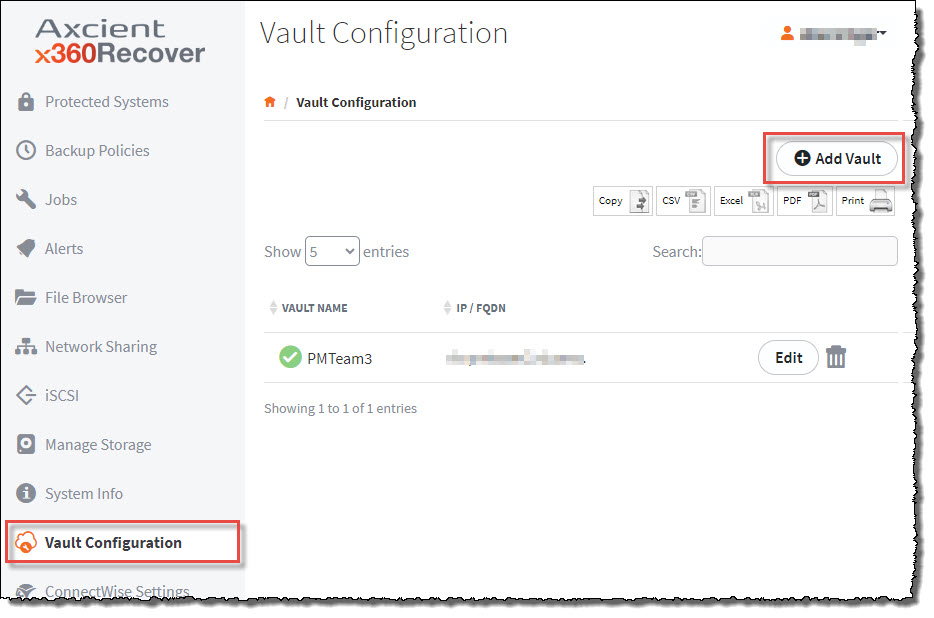
Note: If this is a newly-deployed appliance, you must first configure the vault settings before you enable replication.
Do this by selecting Vault Configuration from the left menu of the appliance and configuring the settings for the vault (before you configure the replication for the protected system.) For detailed instructions, see How to add vaults and manage settings.
5. You must now reconfigure the agent for appliance mode.
5.1. On the protected system, locate the aristos.cfg file in the agent installation directory. Typically, this file is found at
c:\program files (x86)\replibit
5.2. Stop the following services:
- Replibit agent service
- Replibit agent update service
- Replibit management service
5.3. Edit the aristos.cfg file in the agent installation directory by changing the ‘SERVER=<value>’ to SERVER=<IP address of appliance>
5.4. When you have completed that change, save the file.
5.5. If the system was configured in Direct-to-Cloud mode, delete the file Permid.cfg
Deleting this file will convert the agent back to appliance mode.
Additional help:
For help converting an appliance-based protected system to Direct-to-Cloud mode, review Convert an existing appliance agent to Direct-to-Cloud
For help converting a Direct-to-Cloud protected system to appliance mode, review Convert a Direct-to-Cloud endpoint to appliance mode
SUPPORT | 720-204-4500 | 800-352-0248
- Contact Axcient Support at https://partner.axcient.com/login or call 800-352-0248
- Free certification courses are available in the Axcient x360Portal under Training
- Subscribe to the Axcient Status page for updates and scheduled maintenance
1564