
The following instructions will walk you through the steps needed to:
|
1. Start the ShadowProtect Recovery Environment (RE):
2. Partition and configure the new drive: 3. Configure the Network Manager: 4. Begin Restoration:
5. Run the Boot Configuration Utility |
Restore from a network location
1. Use the Network Support feature within the ShadowProtect Recovery Environment (RE).
To use this feature:
Start the RE by
- Booting from a CD or
- Booting from the ISO
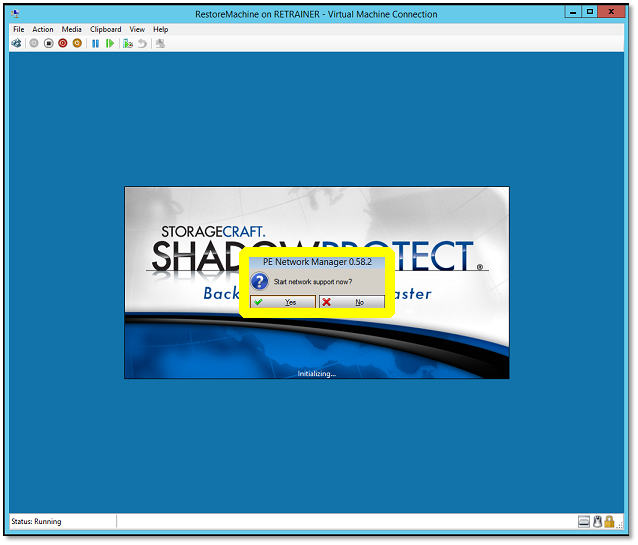
2. When the Start network support now? prompt appears, select Yes:
Configure the correct time zone
NOTE: Selecting the correct time zone is particularly important when recovering a domain controller.
- Using the Wizards tab, locate the Tools menu and click Select Time Zone.
- Make your selection from the drop-down menu.
- Click OK when you are finished.
Initialize the disk for a virtual machine (VM)
The ShadowProtect RE should find the RAW drive and ask for initialization.
- Select the correct format (either MBR or GPT) from the dropdown menu.
- Click Initialize… to continue

NOTE: If the disk is not initialized and you want to add a new MBR partition, reboot the Recovery Environment to continue the restore. Windows cannot accurately read and refresh the new MBR partition information for this newly initialized drive until after the reboot.
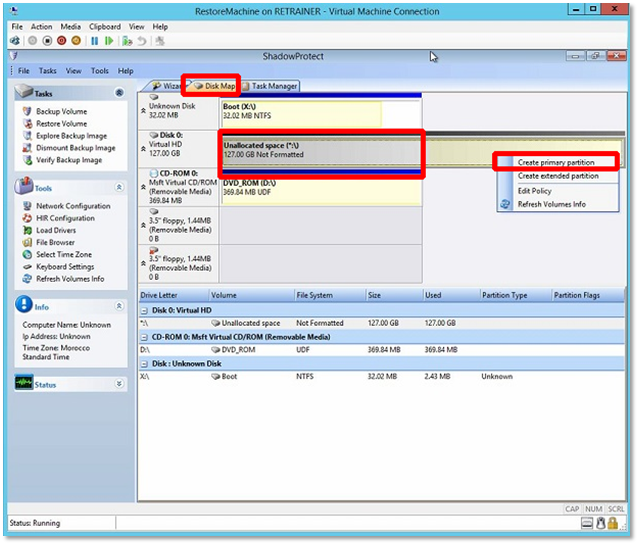
Create a primary partition on the new drive
Using the Disk Map tab, right click to highlight the desired selection.
Select Create primary partition from the drop-down menu.
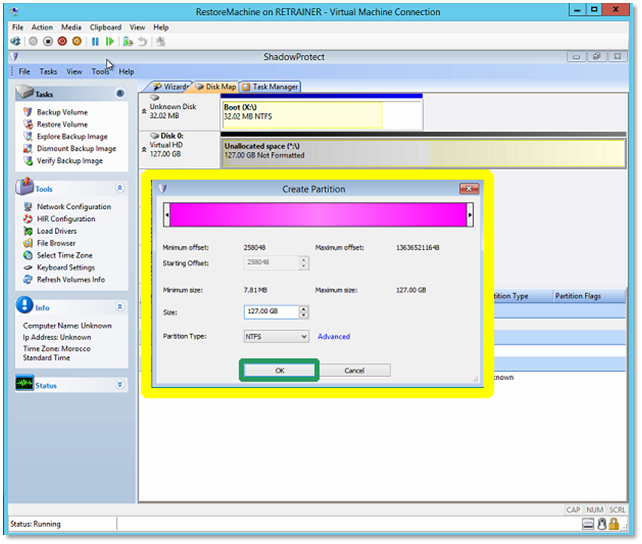
Configure space for the new partition
When the Create Partition screen appears, review the settings and click OK to continue.
NOTE: The default setting for a new primary partition uses all available space on the new drive.
Modify this default setting as needed.
Configure the Network Manager
If your backups are on a network location, configure the Network Manager.
- Using the Wizards tab, locate the Tools menu and click Network Configuration.
- Select Network Drive from the navigation menu.
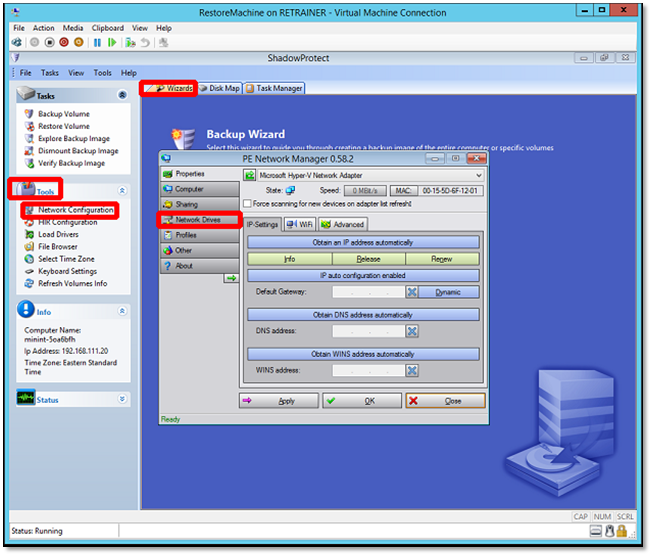
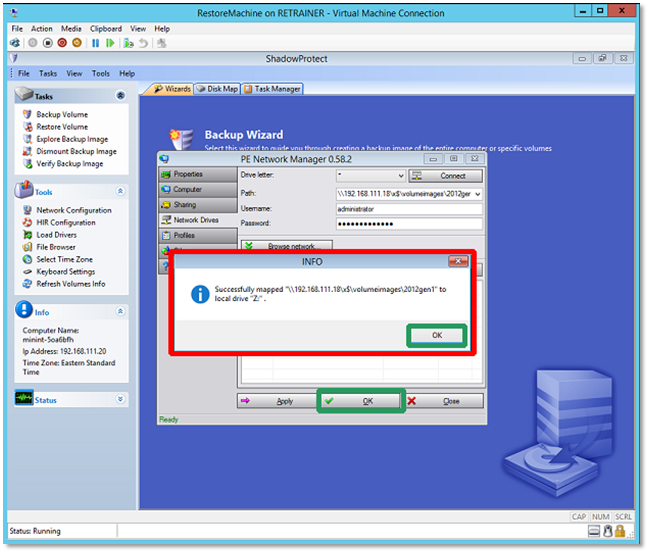
When the Network Drive window appears, input the following:
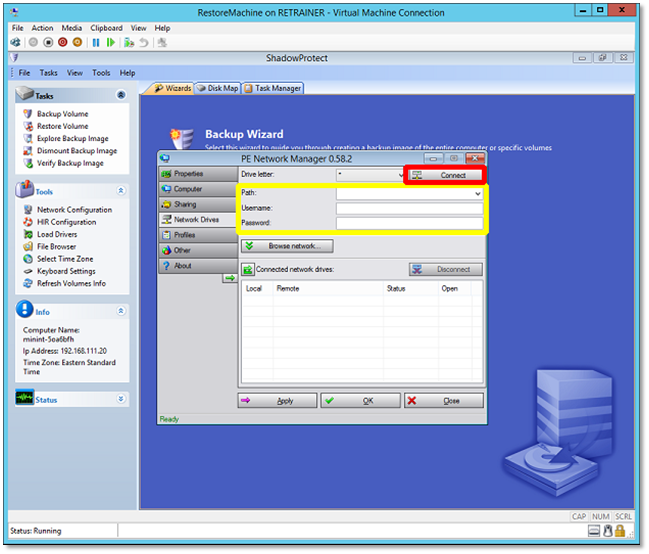
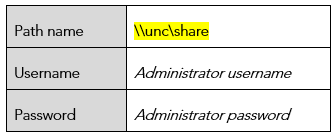
Click Connect to continue.
- An INFO window appears.
- If the details displayed are correct, click OK to continue.
Finally, click OK to return to the main ShadowProtect Wizard menu.
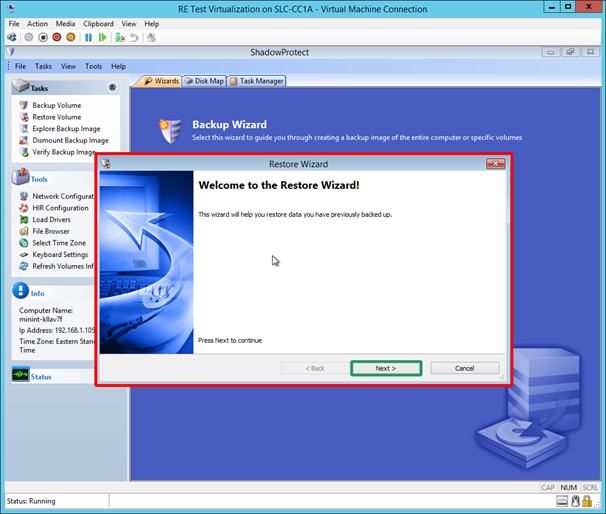
Run the Restore Wizard
Return to the main Wizard menu and click on the Restore Wizard:
 When the Welcome screen appears, click Next to continue.
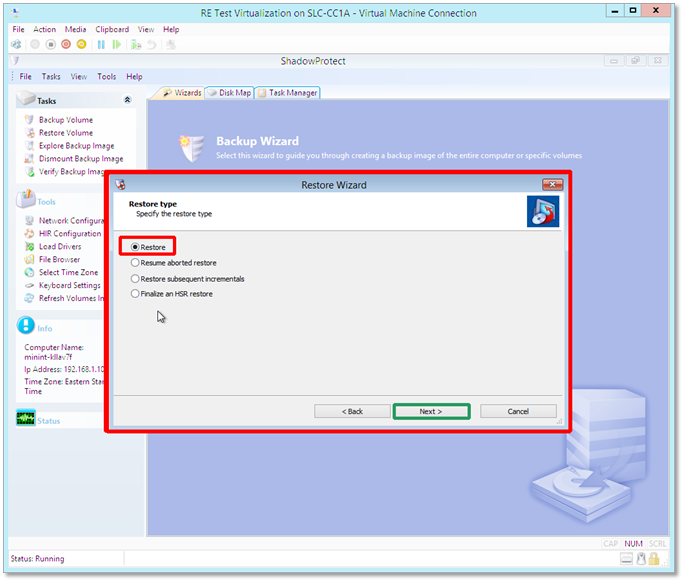
When the Restore type window appears, select Restore and click Next to continue.
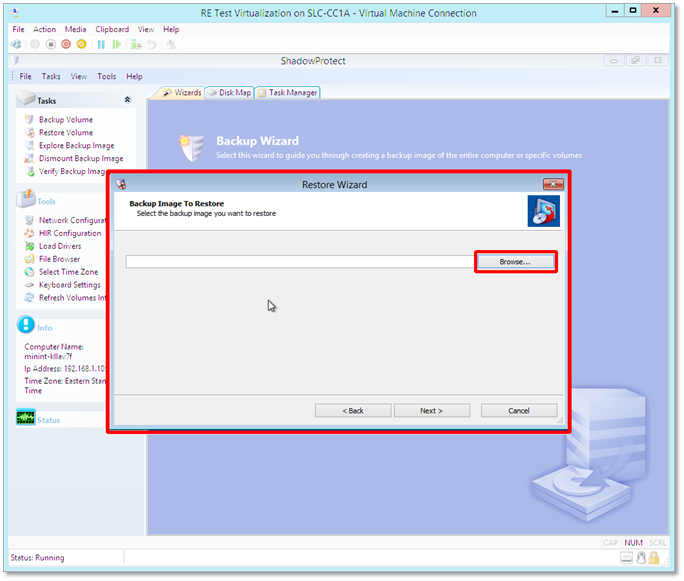
Locate the desired backup(s) and log in
Click the Browse button to locate the desired backups:
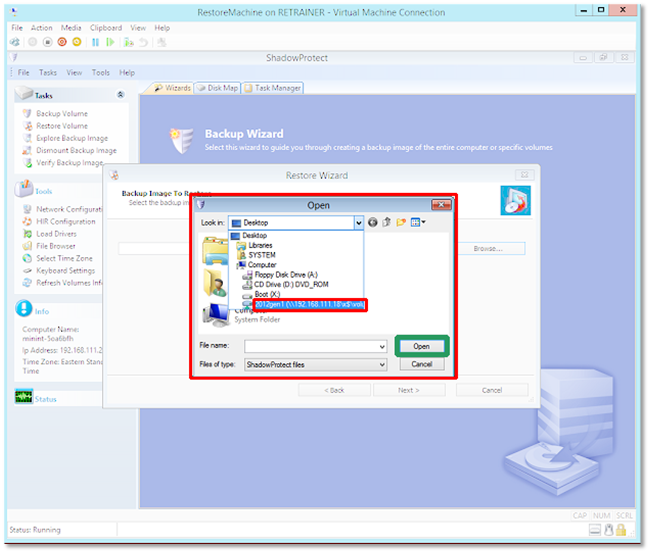
Select the path you previously created in the Configure Network step and click Open.
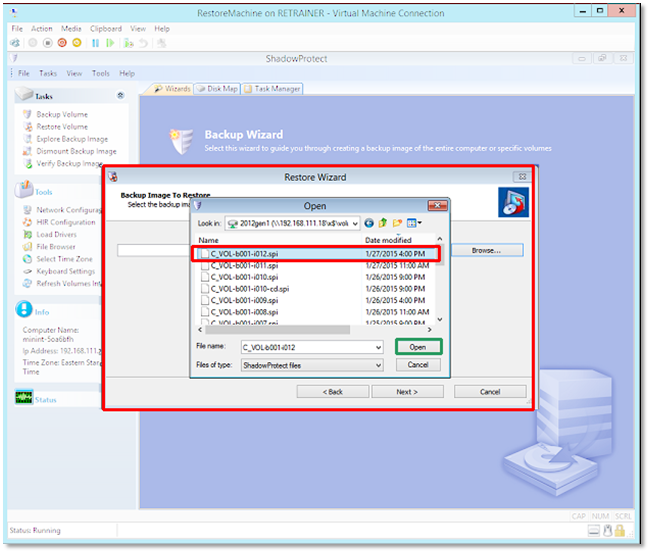
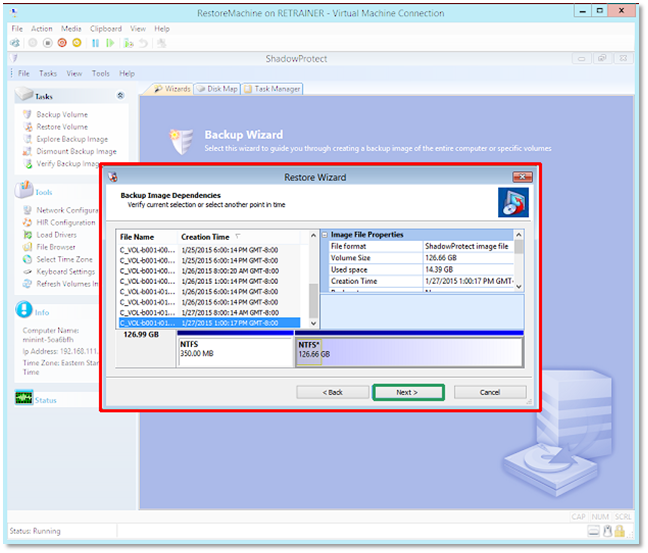
Select the image to be restored and click Open to continue:
A confirmation screen displays the backup partition. If this is correct, click Next to continue.

An additional confirmation screen appears. Review image properties and then click Next.
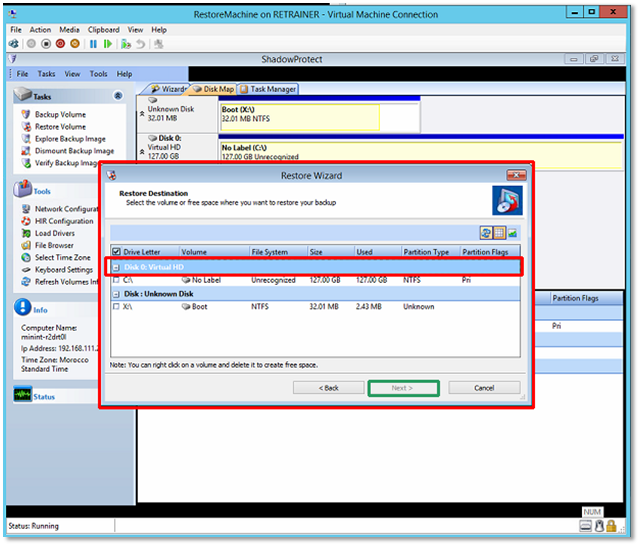
Select the partition created previously and click Next to continue.
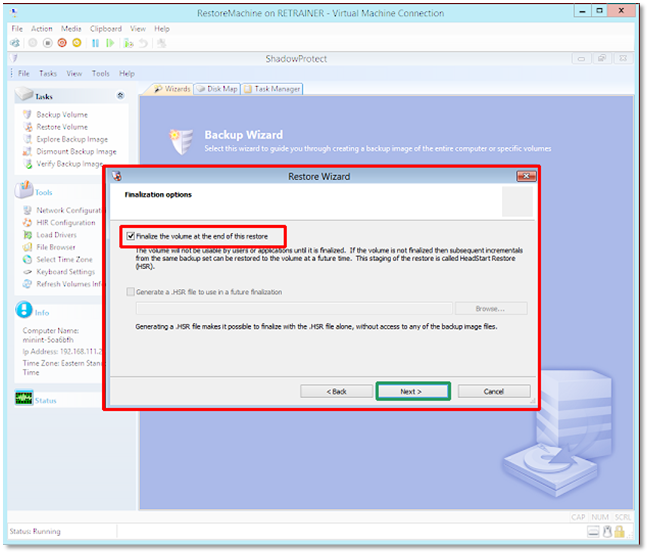
Finalize the volume
If this restore should be finalized, click the Finalize the volume at the end of the restore box.
Click Next to continue.
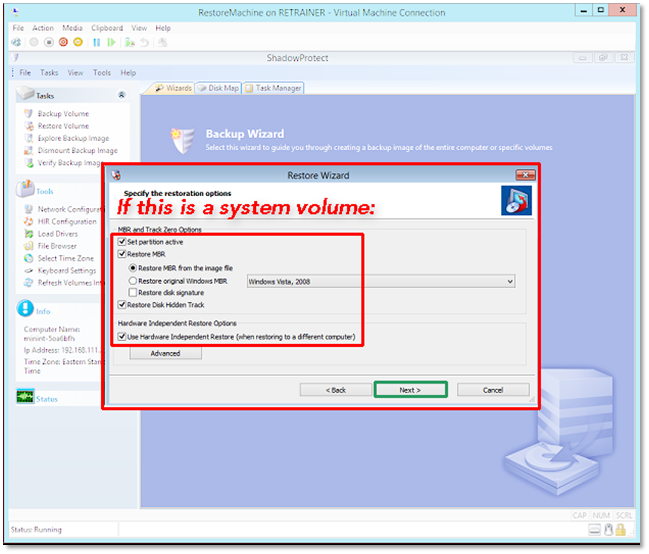
Specify restoration options
If this is a system volume:
- Check the Set partition active box (if not already checked.)
- Check the Restore MBR box
- Select the Restore MBT from the image file radio button
- Check the Restore Disk Hidden Track box
- Check the Use Hardware Independent Restore (when restoring to a different computer) box
- Click Next to continue.
Note: If this is a data volume:
- Uncheck the Set partition active box
- Uncheck the Use Hardware Independent Restore (when restoring to a different computer) box
- Click Next to continue
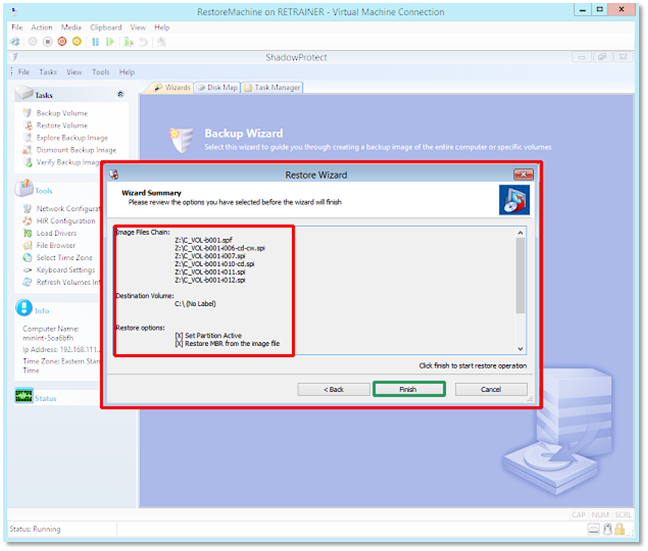
Review the Wizard Summary and click Finish when you are satisfied.
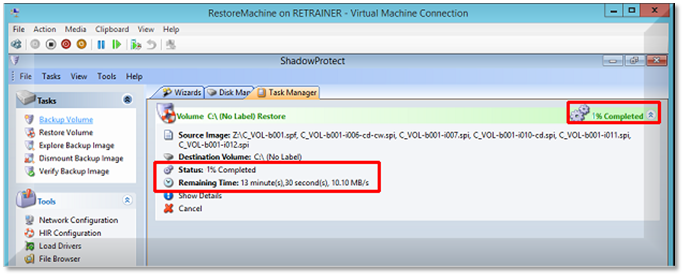
While restoration is underway
While restoration is underway, you will see this status screen, providing details on the percentage complete and the remaining time required:
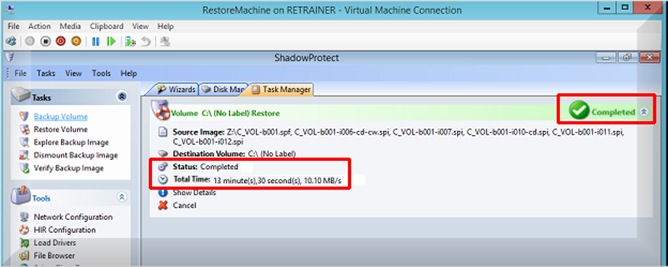
When restoration is complete
When restoration is complete, you will see this confirmation screen:
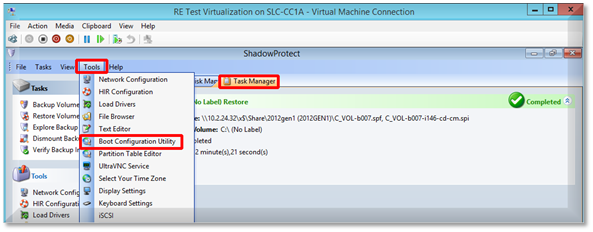
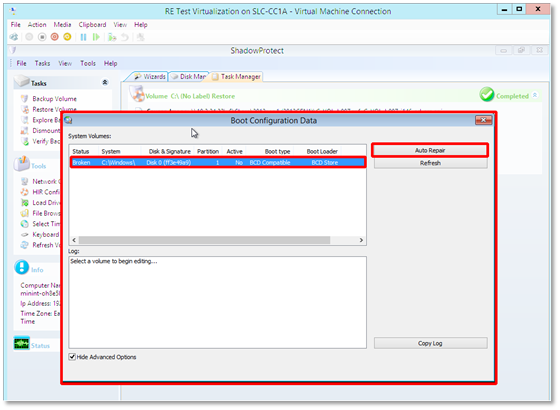
Run the Boot Configuration Utility (BCU)
From the main ShadowProtect Task Manager tab, click on Tools from the top toolbar.
Select Boot Configuration Utility (BCU) to begin.
If any issues are highlighted in the System Volumes or Log windows, click the Auto Repair button:
After any needed repairs are completed, close the BCU.
Note #1: Once your restore is complete, you must close the ShadowProtect Recovery Environment in order to automatically reboot the virtual machine into the restored operating system.
Note #2: After restoring a system volume, some OEM versions of Windows may not reactivate. Windows Activation may intentionally lock some OEM copies of Windows to specific machines. Some OEM licenses may, in fact, not reactivate except on the original machine. In these cases, consult with Microsoft on reactivation options.
Note #3: If this is a DC, SQL or Exchange server, boot into Directory Services Restore Mode to protect and repair the AD database.
If errors occur, reboot the ShadowProtect Recovery Environment (RE) and rerun Boot Configuration Utility (BCU )to fix any issues: