
[This information is from the Quest Rapid Recovery v6.x Cloud Replication Guide: ]
- For each source Core, make sure that the target Core is running a compatible version of Rapid Recovery. In v6, the source and target Cores MUST match in versions.
- Download our recommended version of the Rapid Recovery software from the Axcient Knowledgebase by clicking Dell Rapid Recovery v6 (Formerly AppAssure).
Note: If the source Core is running a version of Rapid Recovery newer than the target Core, please contact Support and we will upgrade your target Core to a newer version.
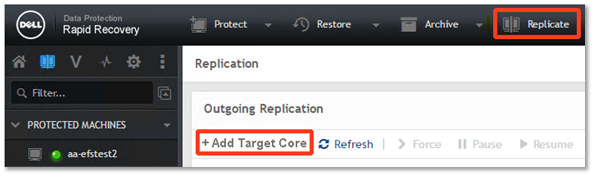
- Next, configure replication on each source Core. To do this, log in to the source Core’s administrative console and click the Replicate tab on the top navigation.
- After the Replication tab has loaded, click on Add Target Core.
Using the Replication Wizard
- The Replication Wizard appears.
When your hosted target Core was provisioned for you, you should have received an assigned Host Name, User Name and Password. You will now enter that information.
Under the Target Core tab, select I have my own Target Core.
- Enter the Host Name assigned to you.
- Enter your assigned User Name.
- Enter your assigned Password.
Click Next to continue.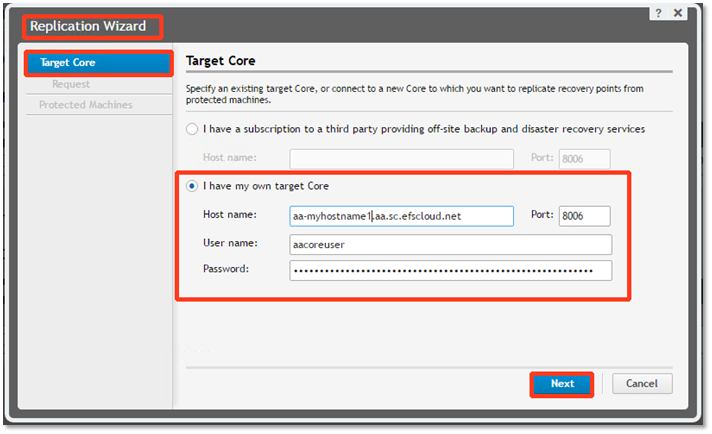
In the example shown, the Host Name is aa-myhostname1.aa.sc.efscloud.net.
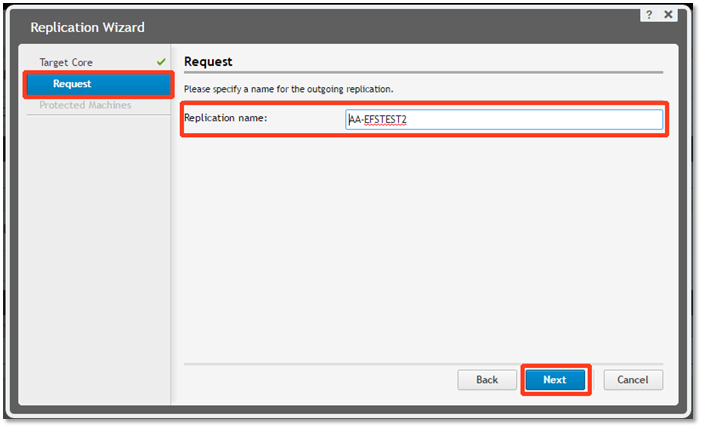
- You can specify a new name for the outgoing replication. (This is useful when the default name is not sufficient for identifying your source Core.)
To do this, under the Request tab, enter the new Replication name for your source Core. Then click Next to continue.
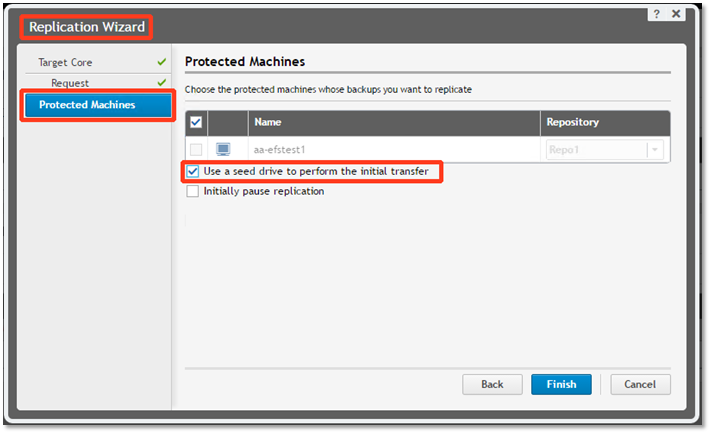
- Under the Protected Machines tab, check the box next to each agent you want to replicate to the target Core.
Then click Finish to complete the Replication Wizard.
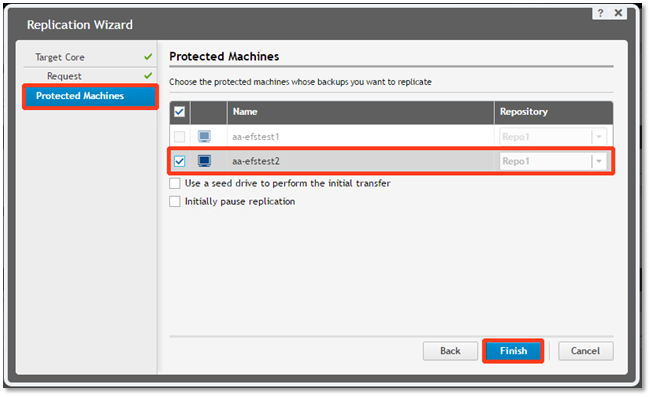
 Important: If you want to ship a local hard disk with the initial set of data, check the Use a seed drive to perform initial transfer checkbox.
Review the information on preloading a seed drive in the Quest Rapid Recovery v6.x Cloud Replication Guide to learn about preparing a seed drive.
Only seed drives provided by Axcient will be accepted. All other drives will be rejected.
Seed (“Preload”) Drives
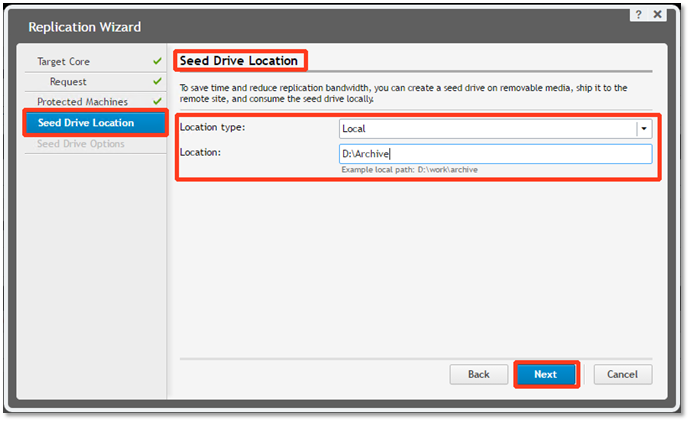
- If you chose to use a seed (preload) drive for the initial data, open the Seed Drive Location dialog box in the Replication Wizard, under the Protected Machines tab.
Note: There is no need to “Initially pause replication”. When a seed process is active, the agent will already be paused and not replicate any data until the process has been completed. Once done, the agent will resume on its own.
- Under the Seed Drive Location tab, select either Local or Network from the drop-down menu.
- Enter the location path.
- Note: If you selected Network as the location type, provide the UNC path and credentials to access the location.
Then click Next to continue.
The Seed Drive Options window will appear.
- You do not need to modify anything on this screen.
- The defaults are correct as shown in the example below:
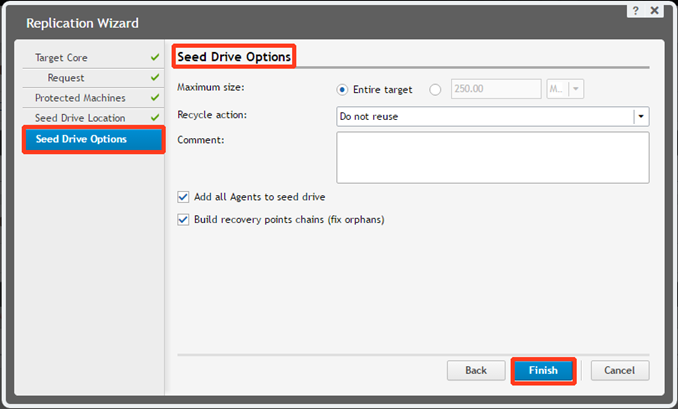
Click Finish to complete the Replication Wizard.
Note: You can monitor the status of the copy (export) operation on the Events tab in the console. Also, please be sure to follow all of the directions listed here when performing a seed operation preload.
Replication Settings
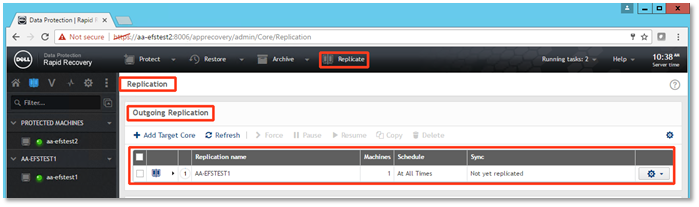
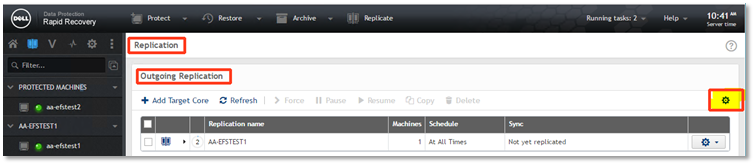
When the replication relationship has been established, the information on the Replication tab should be similar to this:
Note: Replication of the base image (or incrementals, if you are doing a seed) will begin for each agent after their next recovery point is received into the source Core.
Note: Replication will proceed in parallel for many agents at the same time.
The default level of concurrency is normally suitable for most customers. However, you can customize the settings under the Replication tab, by clicking Outgoing Replication, then clicking the sprocket icon on the far right:
Set the Max. parallel streams to a value that can be handled by the network.
Note: Each replication task will now open this number of TCP streams.
- If the number of TCP streams is set too high, it can cause timeouts.
- If the number of TCP streams is set too low, then replication is slower than what it could be.
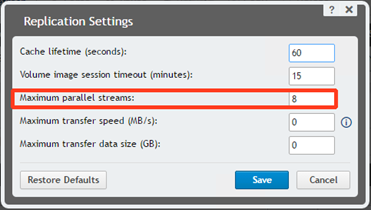
|
Rule of thumb: For every 1.5Mb of upload speed, increase Max Parallel Streams by one. • 1.5 Mbps Upload: 1 Max Parallel Streams • 3.0 Mbps Upload: 2 to 3 Max Parallel Streams |
- Maximum transfer speed is set to 0 by default. This means all available bandwidth will be used to upload data to your target core. If you wish to cap this amount, set Maximum transfer speed to your desired value.
Since this setting is in MB (Megabyte) and not Mb (Megabit – Internet speed), you will need to do some math when converting down. 8 Mbit/s = 1 MB. You can use this link when doing the conversion. https://www.gbmb.org/mbps-to-mbs.
- Maximum transfer size can be left at the default of 0.