
Overview
The deprovisioning of a ShadowProtect Legacy account (not SP Cloud) requires completion of three tasks in this order:
- Delete data
- Uninstall StorageCraft software and Online Backup Manager
- Remove portal account
Task 1: Delete data
- Data is automatically purged 14 days after account deletion. No action needs to be taken for this to happen.
- Data can be purged sooner if preferred, using a manual approach.
Task 2: Uninstall StorageCraft software and Online Backup Manager Software
On the client’s machine, remove the following:
- StorageCraft ShadowProtect (if desired)
- ImageManager
- Online Backup Manager software.
Note: The ShadowProtect software and ImageManager software can be left if the client will be backing up the machines using ShadowProtect.
- If you do leave the software, ensure that you remove any notification settings in both ShadowProtect and ImageManager that you might have configured.
- Also ensure that if the purchase of an MSP license for ShadowProtect is going through your company, that you remove the MSP license.lic file located C:\Program Files\StorageCraft\ShadowProtect folder or Program Files (x86) for a 64bit OS.
- If the Online Backup Manager software is left on the machine, notifications configured through the install (not through the Portal) cannot be controlled from the Portal and could continue to be sent.
Task 3: Remove portal account
To delete a customer account, log in to the Web Portal:
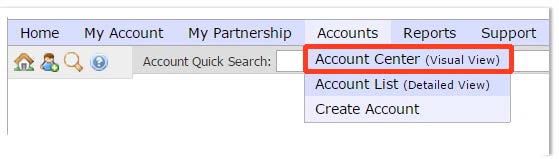
1. Under the Accounts menu, select Account Center (Visual View).
2. Locate the specific customer account you wish to delete and click the checkbox in the left column to select that account.  3. Right click on the account to be deleted to display the submenu tools.
4. Select Impersonate.
5. You will see a yellow bar at the top of the page indicating that you are impersonating that account.
6. Go to My Account | Notifications
7. Remove the check boxes to disable all notifications for this account and click Save.
8. Click Stop Impersonating on the top right to leave this account.

9. Right click on the account to be deleted to display the submenu tools again.
10. Click Delete from within the submenu tools to delete this customer account.
_______________________________________________________________
Supplemental Information
Optional Steps: How to Manually Purge Data
Here are the steps for deleting backup data using the File Manager Utility.
1. Open the Online Backup Manager and select File Manager in the Control Panel page.
2. Select the desired back up location from the drop down menu in the Server field.
You can choose from the destinations that you have defined on the Remote Server, Local Server or Local Disk fields of the My Account page in the Backup Manager.
3. Then click Next to continue.
Note: You can enter the user name and password for any account on the Axcient Web Portal, not just the account for the local computer.
4. Click the Destroy Data button.
5. Enter your Axcient account password.
6. Click OK to continue
7. Select the folders or files you want to delete. Then click Next to continue.
Note: Right click on any file and select Versions to have the option to Open, Save or Destroy any of the versions of the file.
8. Select the options you want on this page:
- The first option (Destroy all data …) will delete all data including the current version.
- The second (default) option (Destroy versions with data older than…) will allow control over the number of versions that will not be deleted.
- The third option (Destroy versions that are at least …) will delete the excess version of the files.
- The fourth option (Consider only deleted files) will only destroy previously “deleted” files in the directories that have been selected.
9. The Backup Manager creates a listing of the files you have selected for deletion for your final verification.
While this list is being created, an option Proceed to the next step without confirmation is available. If you select this option, the delete procedure will automatically start to delete the selected files when the file list has been created.
10. After the file listing has been created, review the files marked for deletion to be sure you want to permanently destroy them. You can modify the selection criteria by selecting the <Back button.
11. Click the Destroy button when you are ready to initiate the deletion process for the files in the list.
12. After the files have been deleted, a window displays the results of the operation.
13. Select Start Over to repeat the process or Exit to finish.