
Overview
ConnectWise is a Professional Services Automation (PSA) platform for companies that sell, service, and support technology. If you use ConnectWise as your PSA platform, you can optionally integrate this platform with x360Sync in the following ways:
- Track alerts that originate in x360Sync
- Systematize your billing process related to number accounts, total storage, or whether File Server Enablement is being utilized
These integration options allow you to manage important customer information in ConnectWise, thereby decreasing the time required to track events and manage billing tasks, and decreasing the margin for human error.
Note: These instructions will help you configure both alert and billing integration settings. You might also decide to only configure alerts, or only configure billing.
Prerequisites
- An x360Sync Administrator Account
- A ConnectWise Account
- Existing customers in ConnectWise
Step 1: Create a new API Key
You can obtain API information within the ConnectWise service. When integrating ConnectWise with x360Sync, you will need to create a new API key.
- Log in to ConnectWise and open the System menu.
- In the System menu, click the Members link.
- In the Members page, click the API Members tab and then click the plus icon to create a new API Member.
- In the Member ID field, enter Axcient.
- In the Role ID field, make sure the role is configured with Add, Update, and Close tickets.
- Click the Save button but do not close the window. After you click the Save button, you will be given access to the API Keys tab.
- Click the API Keys tab and then click the plus icon to create a new API key.
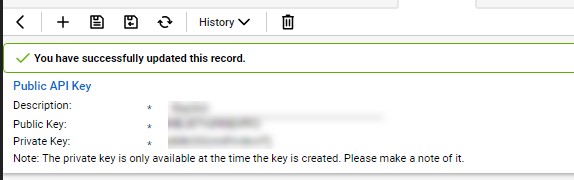
- In the Description field, type Axcient x360Sync.
- Click the Save button but do not close the window.
- Record the public key and private key before you close the window. You will not be able to view the private key again after this window is closed.
Step 2: If Configuring Billing, Set Up ConnectWise Products and Agreements
If you are integrating with ConnectWise billing, you must first select the x360Sync products for which you want to bill. You can define one or more of the following products, based on your specific billing needs.
- Number of accounts
- Total storage
- File Server Enablement
After you select these products, you will then set up specific agreements for each customer.
Agreements help define how the particular customer will be billed.
Set up ConnectWise Products
You must complete the following steps for each product that you want to define.
For example, you might want to define one or all of the following products: accounts, total storage, or File Server Enablement.
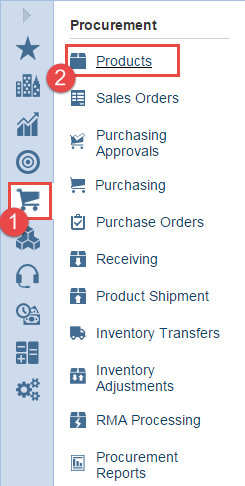
- In ConnectWise, navigate to the Procurement tab, and then select Products.
- Click the New Item button and enter the following information to create a new product:
a) In the Product ID field, give the product a descriptive name. This name must exactly match the product name that you will later configure in x360Sync.
b) In the Description field, enter a short description for the new product. For example, Accounts, $5/user.
c)In the Category/Subcategory drop-down menu, select Manage Services.
d) In the Product Type drop-down menu, select Software.
e) In the Product Class drop-down menu, select Agreement.
f) In the Unit of Measure drop-down menu, select Each.
g) In the Unit Price field, enter the list price for the product.
h) In the Customer Description field, enter a simple description; for example, Accounts, $5/user.
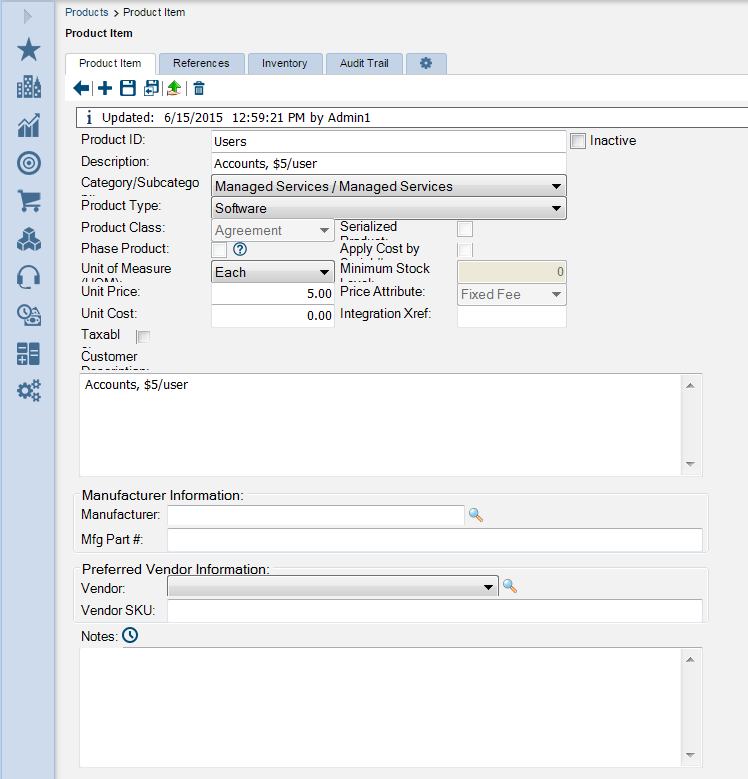
i) Click the Save button when you are finished.
j) Repeat the steps above for each product you want to define.
Set Up ConnectWise Agreements to Bill for x360Sync Services
After you define your products, you can set up agreements for each company that will be billed.
You can also update an existing agreement.
1. In ConnectWise, click the Quick Launch drop-down, and select Agreements.
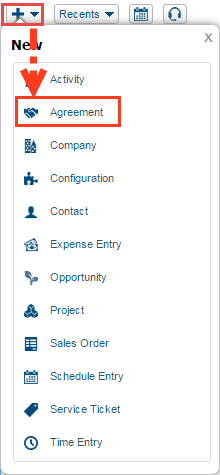
2. Find the agreement to be managed, or create a new agreement. For each new agreement, click the New button.
3. Enter the following information for each agreement:
a.) In the Agreement Type drop-down field, select Managed Services.
b.) n the Agreement Name field, give the agreement a name. This name must exactly match the agreement name that you will later configure in x360Sync.
c.) In the Company drop-down field, select the appropriate company that will be associated with this agreement.
d.) In the Start Date field, enter a date on which the agreement starts.

Step 3: Enter ConnectWise Credentials in x360Sync
Before you can map x360Sync organizations to ConnectWise customers, you must first enter your API information within the top-level organization in x360Sync. You can optionally configure lower-level organizations to inherit these settings.
1. In the Organization navigation menu, select the top-level organization. The organization displays.
2. Click the Settings tab, and then click the PSA tab. The PSA Settings section displays.
3. In the PSA Mode field, select the Configure a New PSA System radio button. The page expands to allow you to select the appropriate PSA system.
4. In the PSA System drop-down menu, select ConnectWise.
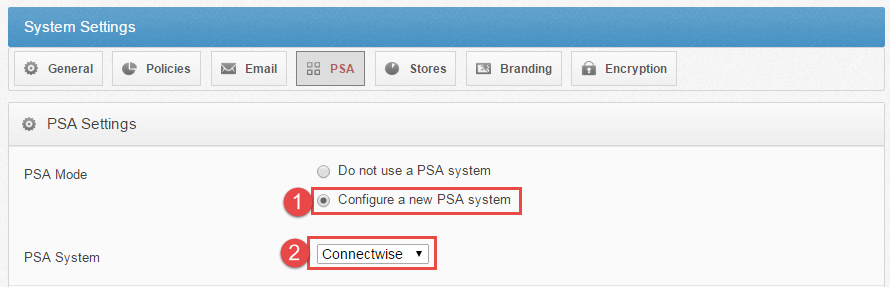
The page expands to show ConnectWise credential fields.
5. Enter the required credentials, including:
a) In the Site URL field, enter the URL of your ConnectWise site.
b) In the Company ID field, enter your Company ID as it appears in ConnectWise.
c) In the Public Key field, enter the public key information you configured when setting up the ConnectWise API key.
d) In the Private Key field, enter the private key information you configured when setting up the ConnectWise API
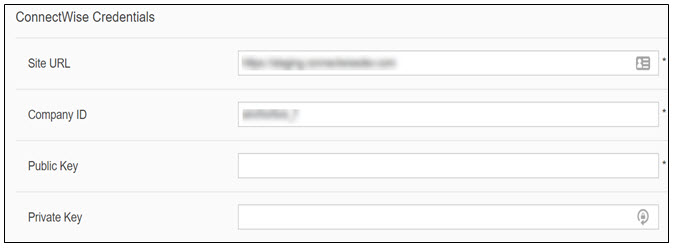
e) Click the Save button when you are finished.
Configure Billing in x360Sync
After credentials are configured correctly, enter information into the ConnectWise Billing Settings section.
You only need to fill out this section if you are configuring billing options.
Please note that this information will only need to be configured once, at the top-level organization, and you can then optionally inherit these settings within lower-level organizations.
- In the Company drop-down field, select the name of the company as it exists in ConnectWise. If you do not see the name of the company, click the Reload Options from PSA button to refresh the connection to ConnectWise.
- Select the Billing Enabled checkbox to indicate that you will be configuring billing.
- In the # of Accounts field, enter the Product ID associated with your account product, exactly how it appears in ConnectWise.
- In the Total Storage field, enter the Product ID associated with your storage product, exactly how it appears in ConnectWise.
- In the File Server Enablement field, enter the Product ID associated with your File Server Enablement product, exactly how it appears in ConnectWise.
- In the Push Date field, select the day of the month that billing information will be pushed to ConnectWise.
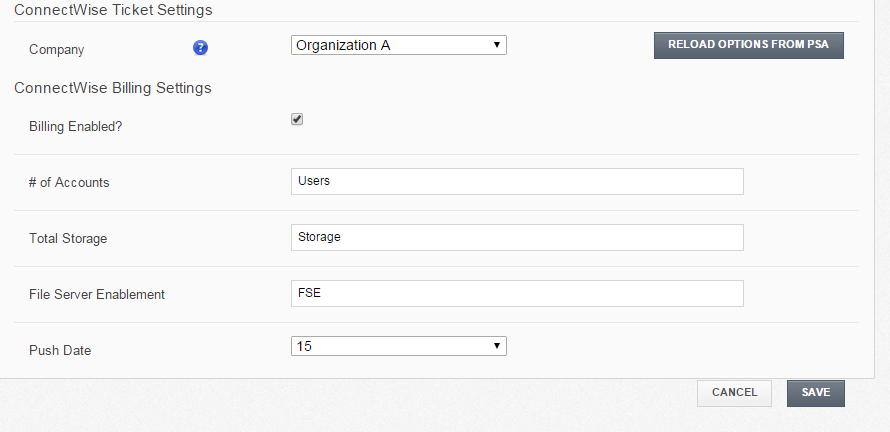
- Click the Save button when you are finished.
Step 4: Map x360Sync Organizations to ConnectWise Customers
After these settings are configured at the top-level organization, you must then map each x360Sync organization to the matching ConnectWise customer.
- Navigate to an organization that will integrate with ConnectWise.
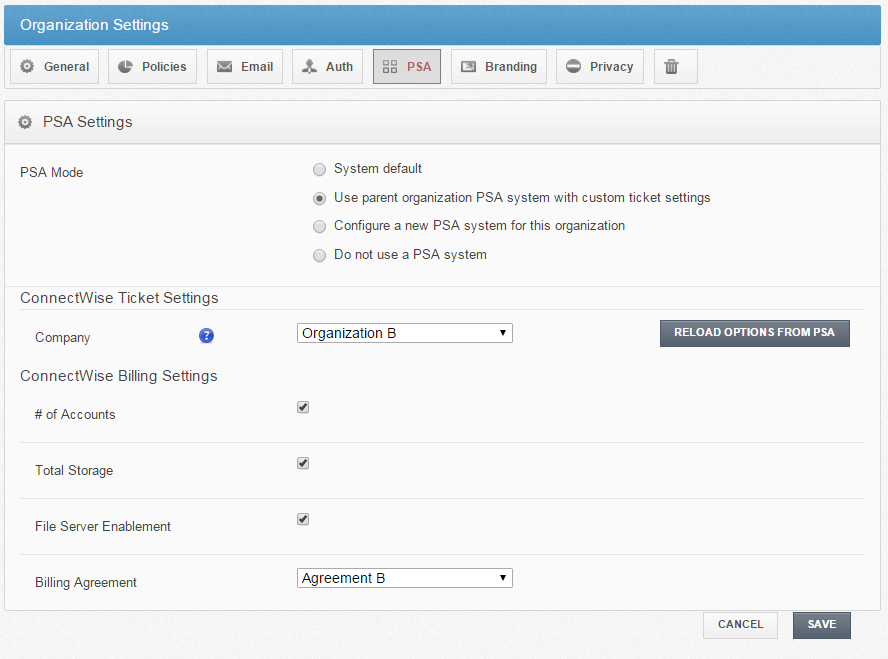
- Click the Settings tab, and then click the PSA tab. The PSA Settings section displays.
- In the Company drop-down menu, select the organization’s associated company name in ConnectWise.
Optionally, configure billing settings:
- In the ConnectWise Billing Settings section, select the checkbox next to the appropriate products configured in ConnectWise. You must select at least one product. If a product is not selected, it will not be billed through ConnectWise.
- In the Choose Agreement drop-down field, select the appropriate agreement configured in ConnectWise. If an agreement is not selected, ConnectWise will not be able to complete the billing process.
- Click the Save button.
After everything is correctly mapped, you will be able to push billing information from x360Sync into ConnectWise.
Step 5: Set Up Alerts in x360Sync
When the organization is linked with a ConnectWise customer, you can set up alerts that will display in the ConnectWise system.
1. While still in the organization, click the Activity tab. The Activity Log page displays.
2. In the Activity Log page, click the Create Alert button.

The Alerts page displays.
3. In the Alerts page, configure alerts, making sure to click the PSA System checkbox.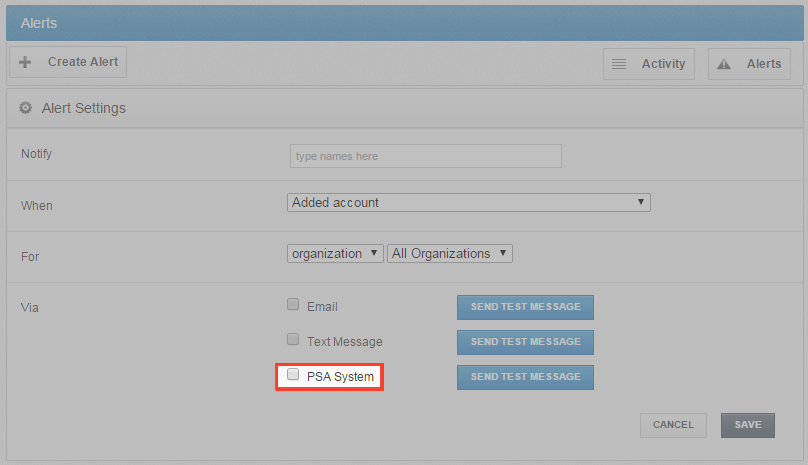
You will now be able to view alerts in ConnectWise for the appropriate customer.
Last updated January 2021.